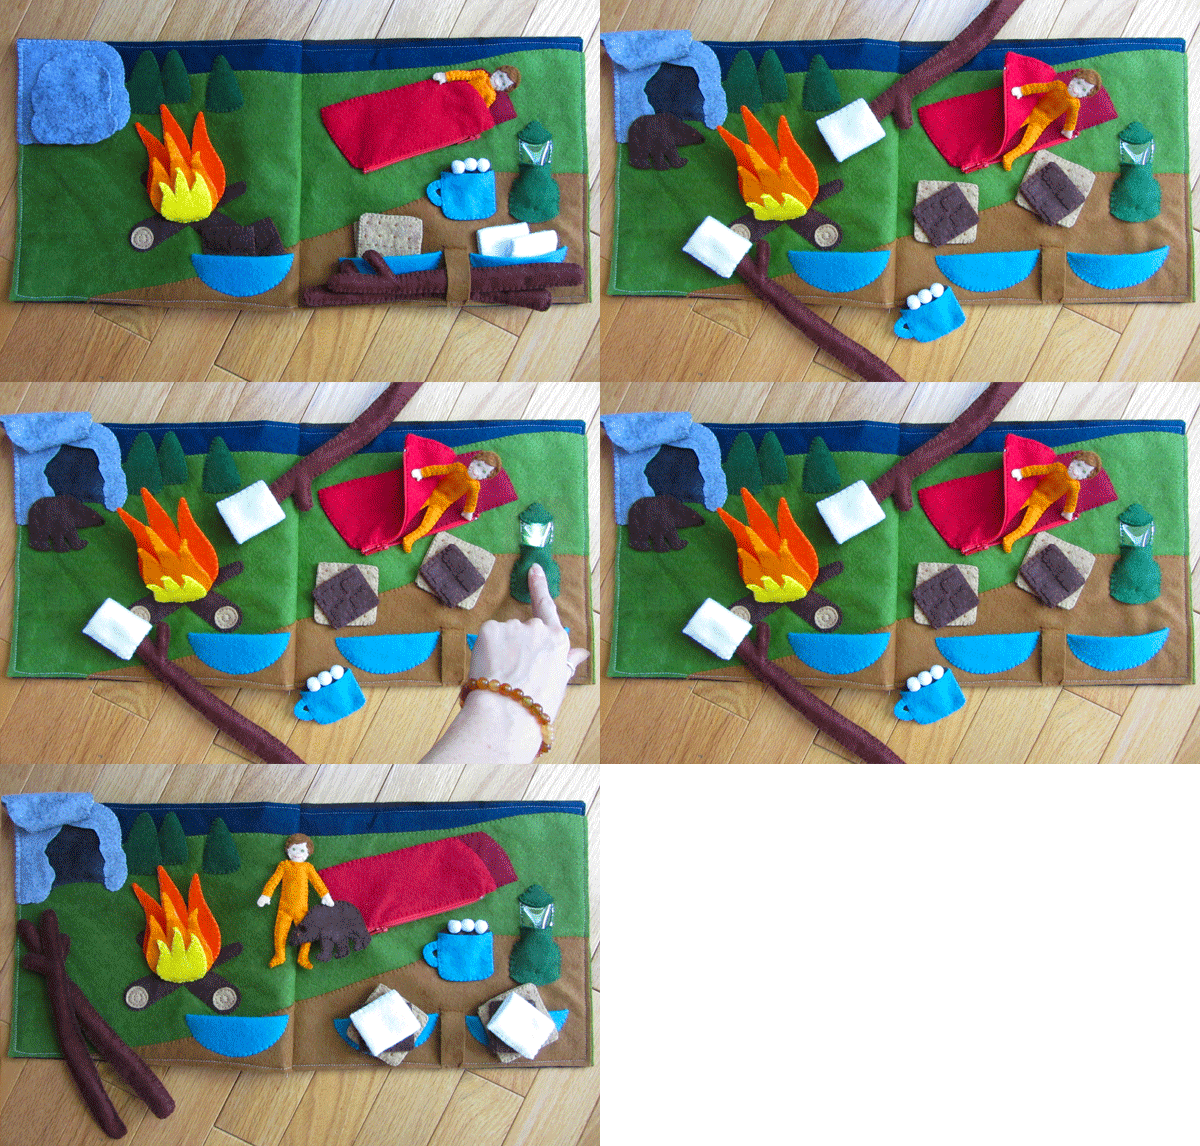
Camping! S’mores! Lanterns!
 This page is sponsored by American Felt and Craft, who provided the felt and crinkle material. When AF&C reached out to me about providing felt for some of my designs, I knew it was meant to be… The next page I had planned to make was a camping one, and the gorgeous earthy colors available in wool blend felt were so perfect for it. And crinkle fabric to make my camp fire crackle? Yes, please! Read more about American Felt and Craft here. Read more about my thoughts on wool blend felt here.)
.
Let’s Go Camping!
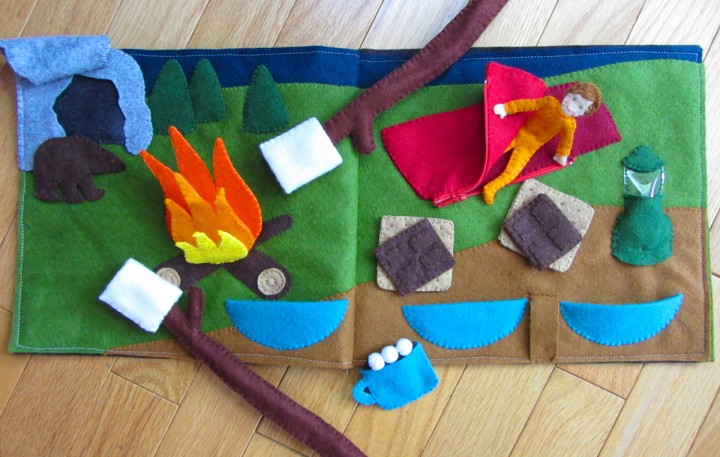
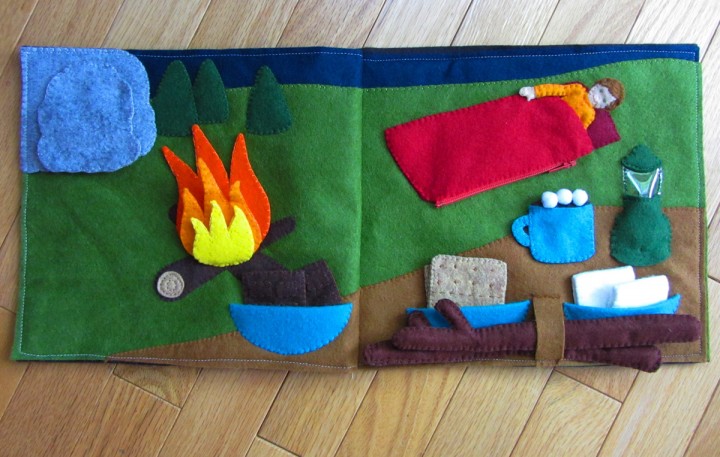
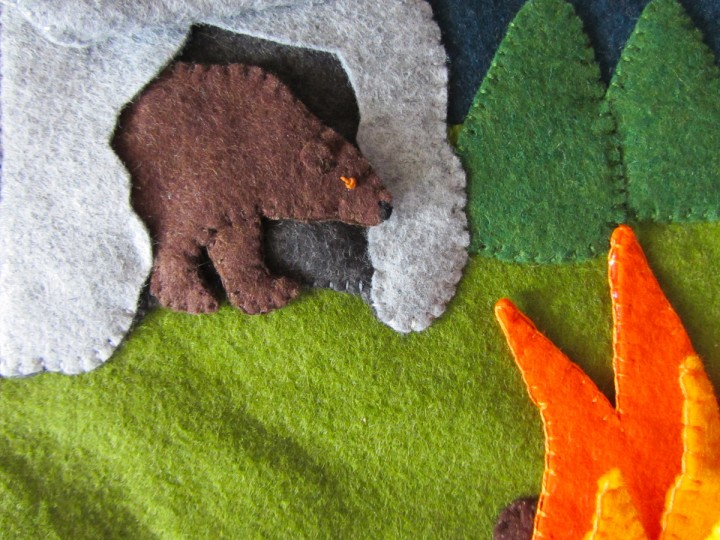
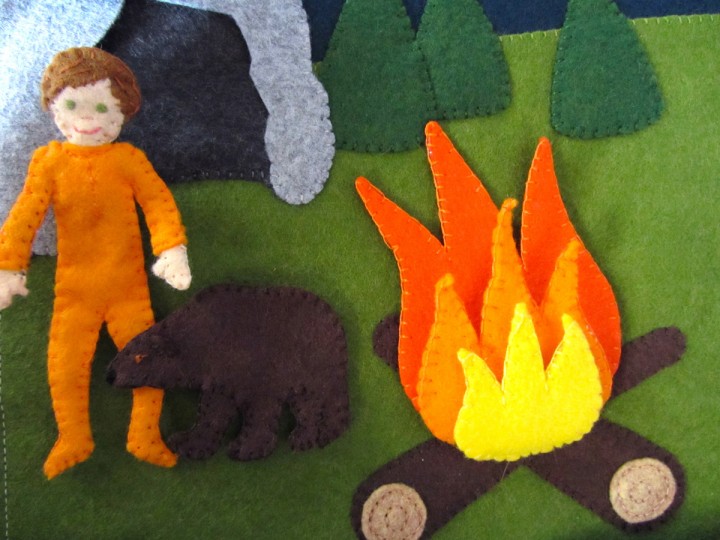
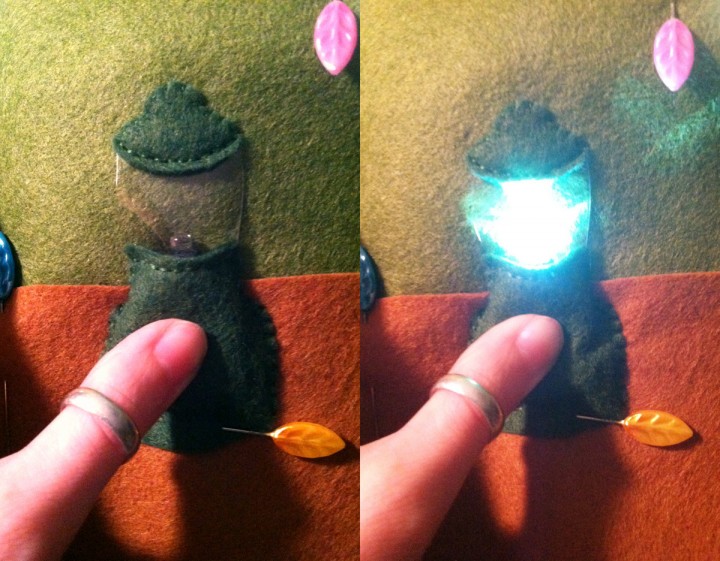
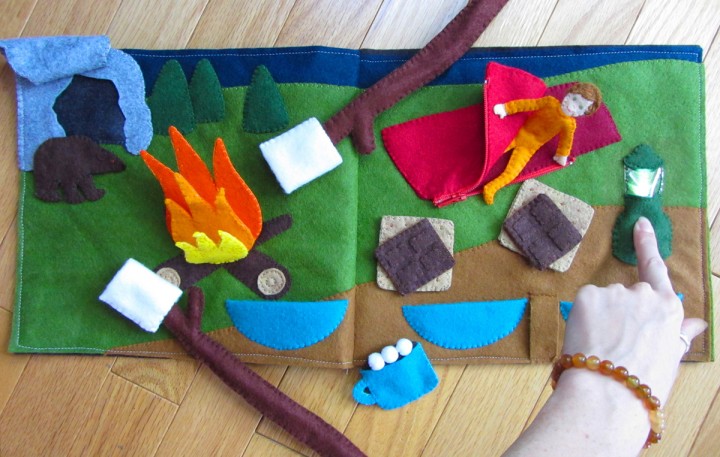
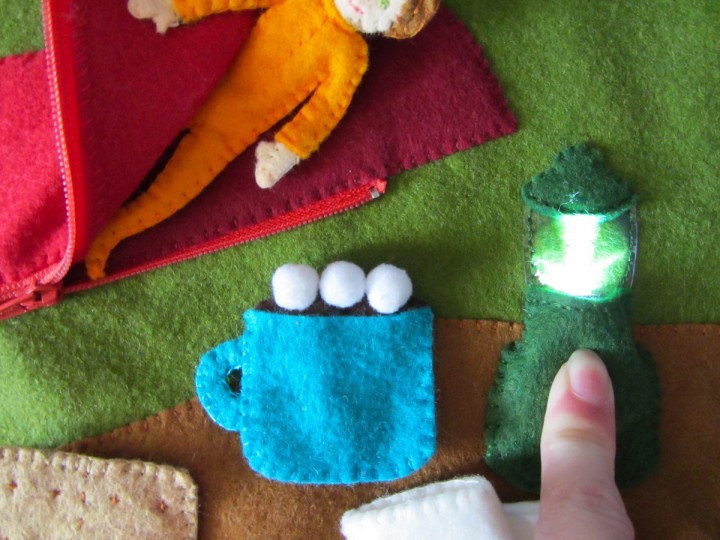
This page is a lot of fun to play with! There is a zipper on the sleeping bag – something Jax needs to practice. Inside is a little bendable mini-Jax to play with! There is a cave hiding a cute baby bear, a lantern that lights up when you press on it, hot cocoa with marshmallows, a crackling camp fire and all the fixings to make s’mores.
What I used:
- The Pattern
- Wool Blend Felt from American Felt and Craft in: Cilantro x 2, Wild Blueberry, Black Pebble, Gray Flannel, Espresso, Peaches and Cream, White, Banana Nut Muffin, Beet, Big Apple, Fresh Cut Grass, Hot Chocolate, Peacock, Doe, Tangerine, Orange Juice and Rubber Duckie.
- Crinkle Material from American Felt and Craft
- Clear Vinyl Scrap
- Two Sew-on Snaps
- Pipe Cleaners
- White Mini Pom Poms
- 4″ Red Zipper from Joann’s
- Mini LED Key Chain Light
The Background: I started with two sheets of cilantro felt and cut them away at the top to make the hills. You need to make sure the two sides line up where they will be sewn together at the center seam. I placed strips of wild blueberry felt behind the cilantro to make the night sky. I sewed the hills to the sky. I then sewed the table pieces to each page, making sure they lined up where the center page seam will be as well. I sewed the three pine trees down before starting on the cave.
The Cave: I sewed the cave interior down in the corner of the page, then sewed down the cave front, leaving the arch of the cave entrance open (see above photo.) I made the cave door by sewing the two door pieces together, then sewed it down into a flap along the top.
The Baby Bear: I first sewed the two sides of each far leg together, then pinned them between the two sides of the main bear body. I sewed a French knot eye with a little stitch in the corner on each side of the bear’s face. I stitched the bear together around the outside, then satin stitched his nose.
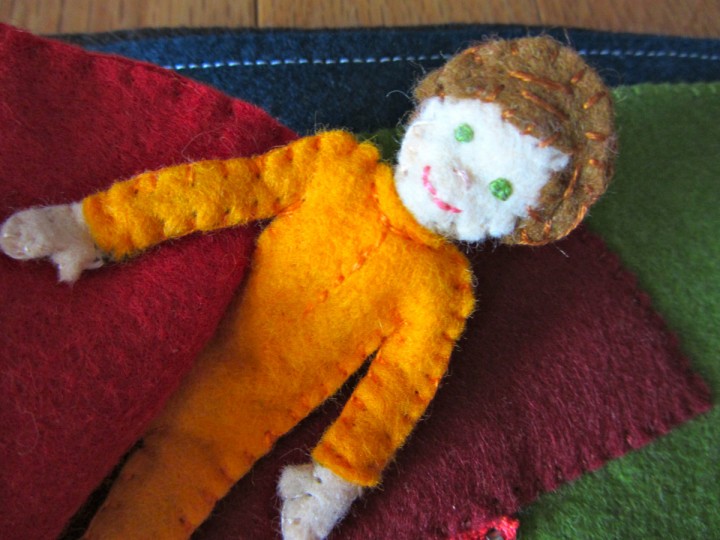
The Sleeping Bag: I pinned down the sleeping bag interior piece on top of one side of the upside-down zipper, folding the extra zipper tape under. I stitched along the edge of the felt, securing that side of the zipper. I then sandwiched the two outer sleeping bag pieces around the other side of the zipper (as shown above) and sewed along the zipper. To finish the sleeping bag, I sewed the two outer pieces together where the above photo is marked yellow, then sewed the outer pieces to the interior pieces (and the actual page) where the photo is marked green.
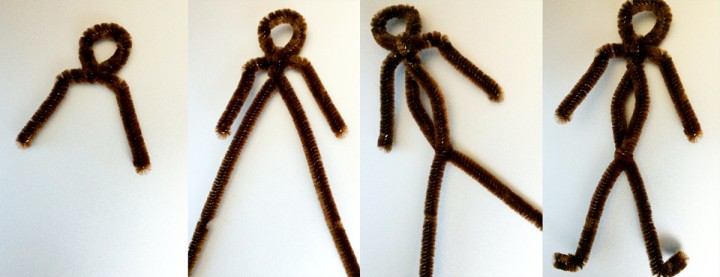
The Child: I made my child a mini Jax. I’ve included a drawing of girl hair in my pattern. I started by making an armature out of pipe cleaners. See the below photos for how I did mine. I laid the pipe cleaners on top of the pattern as I made it to be sure it would fit. (when working with the pipe cleaners, always fold over the ends so there aren’t any sharp pokies to hurt your little one!)
I started sewing the felt with his head. I embroidered his face (French knot eyes, a small stitch for the nose and a back stitch smile) then sewed the front and back head pieces on to the armature. I then sewed the front and back hair pieces on and added some stitches to show the hair. I sewed the hands on, then sewed the pajamas on. I added back stitching to the neck and chest.
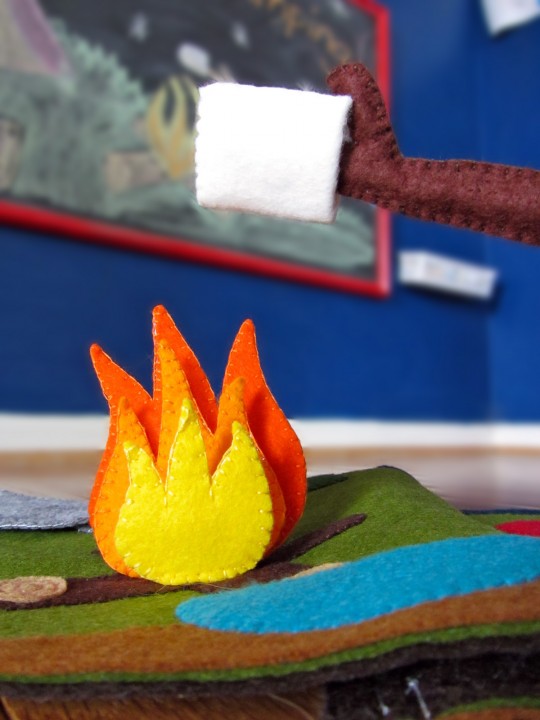
The Camp Fire: For each of the three camp fire flames, I pinned the pattern piece on to two pieces of felt layered around a bit of the crinkle fabric, then cut through all 3 layers. Then I sewed around the outside of each. I sewed the two logs down to the page in an X, and sewed on the log ends with back stitched circles. I layered the flames together and sewed them to the logs along the bottom. The crinkle material gives the flames enough stability that the camp fire can stick up when the page is laid flat.
The Lantern: The body of the lantern is drawn to wrap around the LED light I bought. You’ll have to modify it if you use a different light. The light is a keychain, so I pulled off both metal rings that came on it. I started by sewing the bottom of the lantern glass to the lantern body. Then I laid the light in place on the page and sewed the lantern body down over it on the left and right sides (so that the bulb of the LED sticks up into the window.) Leave the bottom open, but sew a snap on to hold the light in. This way, you can get it out to change the battery. I sewed the top of the lantern on, then finished it by back stitching the sides of the glass.
The S’mores:
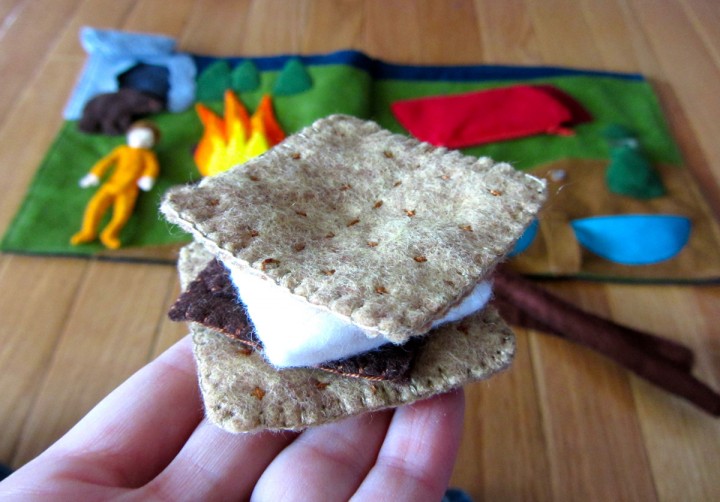
Marshmallows: I folded my square of felt into quarters, then stitched it into a tube as shown in the photo above. I sewed the inner tube, sewed the outer tube, then around the bottom edge to sew the two tubes together. You could cut your felt in half first then sew one tube inside the other.
Graham Crackers: The crackers are stitched on both sides with a dashed line down the center, then little + stitches to make the “holes”. I then stitched the two sides together. I made two, but you could make 4 if you prefer.
Chocolate: The tops of the chocolate had 4 rectangles sewn on before I stitched the front and back together.
The Bowls: I simply sewed the folded bowl shapes and sewed them to the page along the curves.
The Sticks: The sticks each have a pipe cleaner insider them. I folded the extra length back at the top, then out to make the branch. I folded the extra bit of branch back to the main stick and twisted it the secure it. I then sewed the felt over the pipe cleaners. I added a loop of felt to the table to hold the sticks.
The Hot Cocoa: I started by sewing three mini pom poms to the hot cocoa. Make sure they are on there good and secure! That’s the first thing Jax tried to pull off! I sewed the top of the hot cocoa to the mug back. I stitched the handle together, then layered it between the front and back of the mug as I sewed them together. I added a snap to hold the mug on the table.
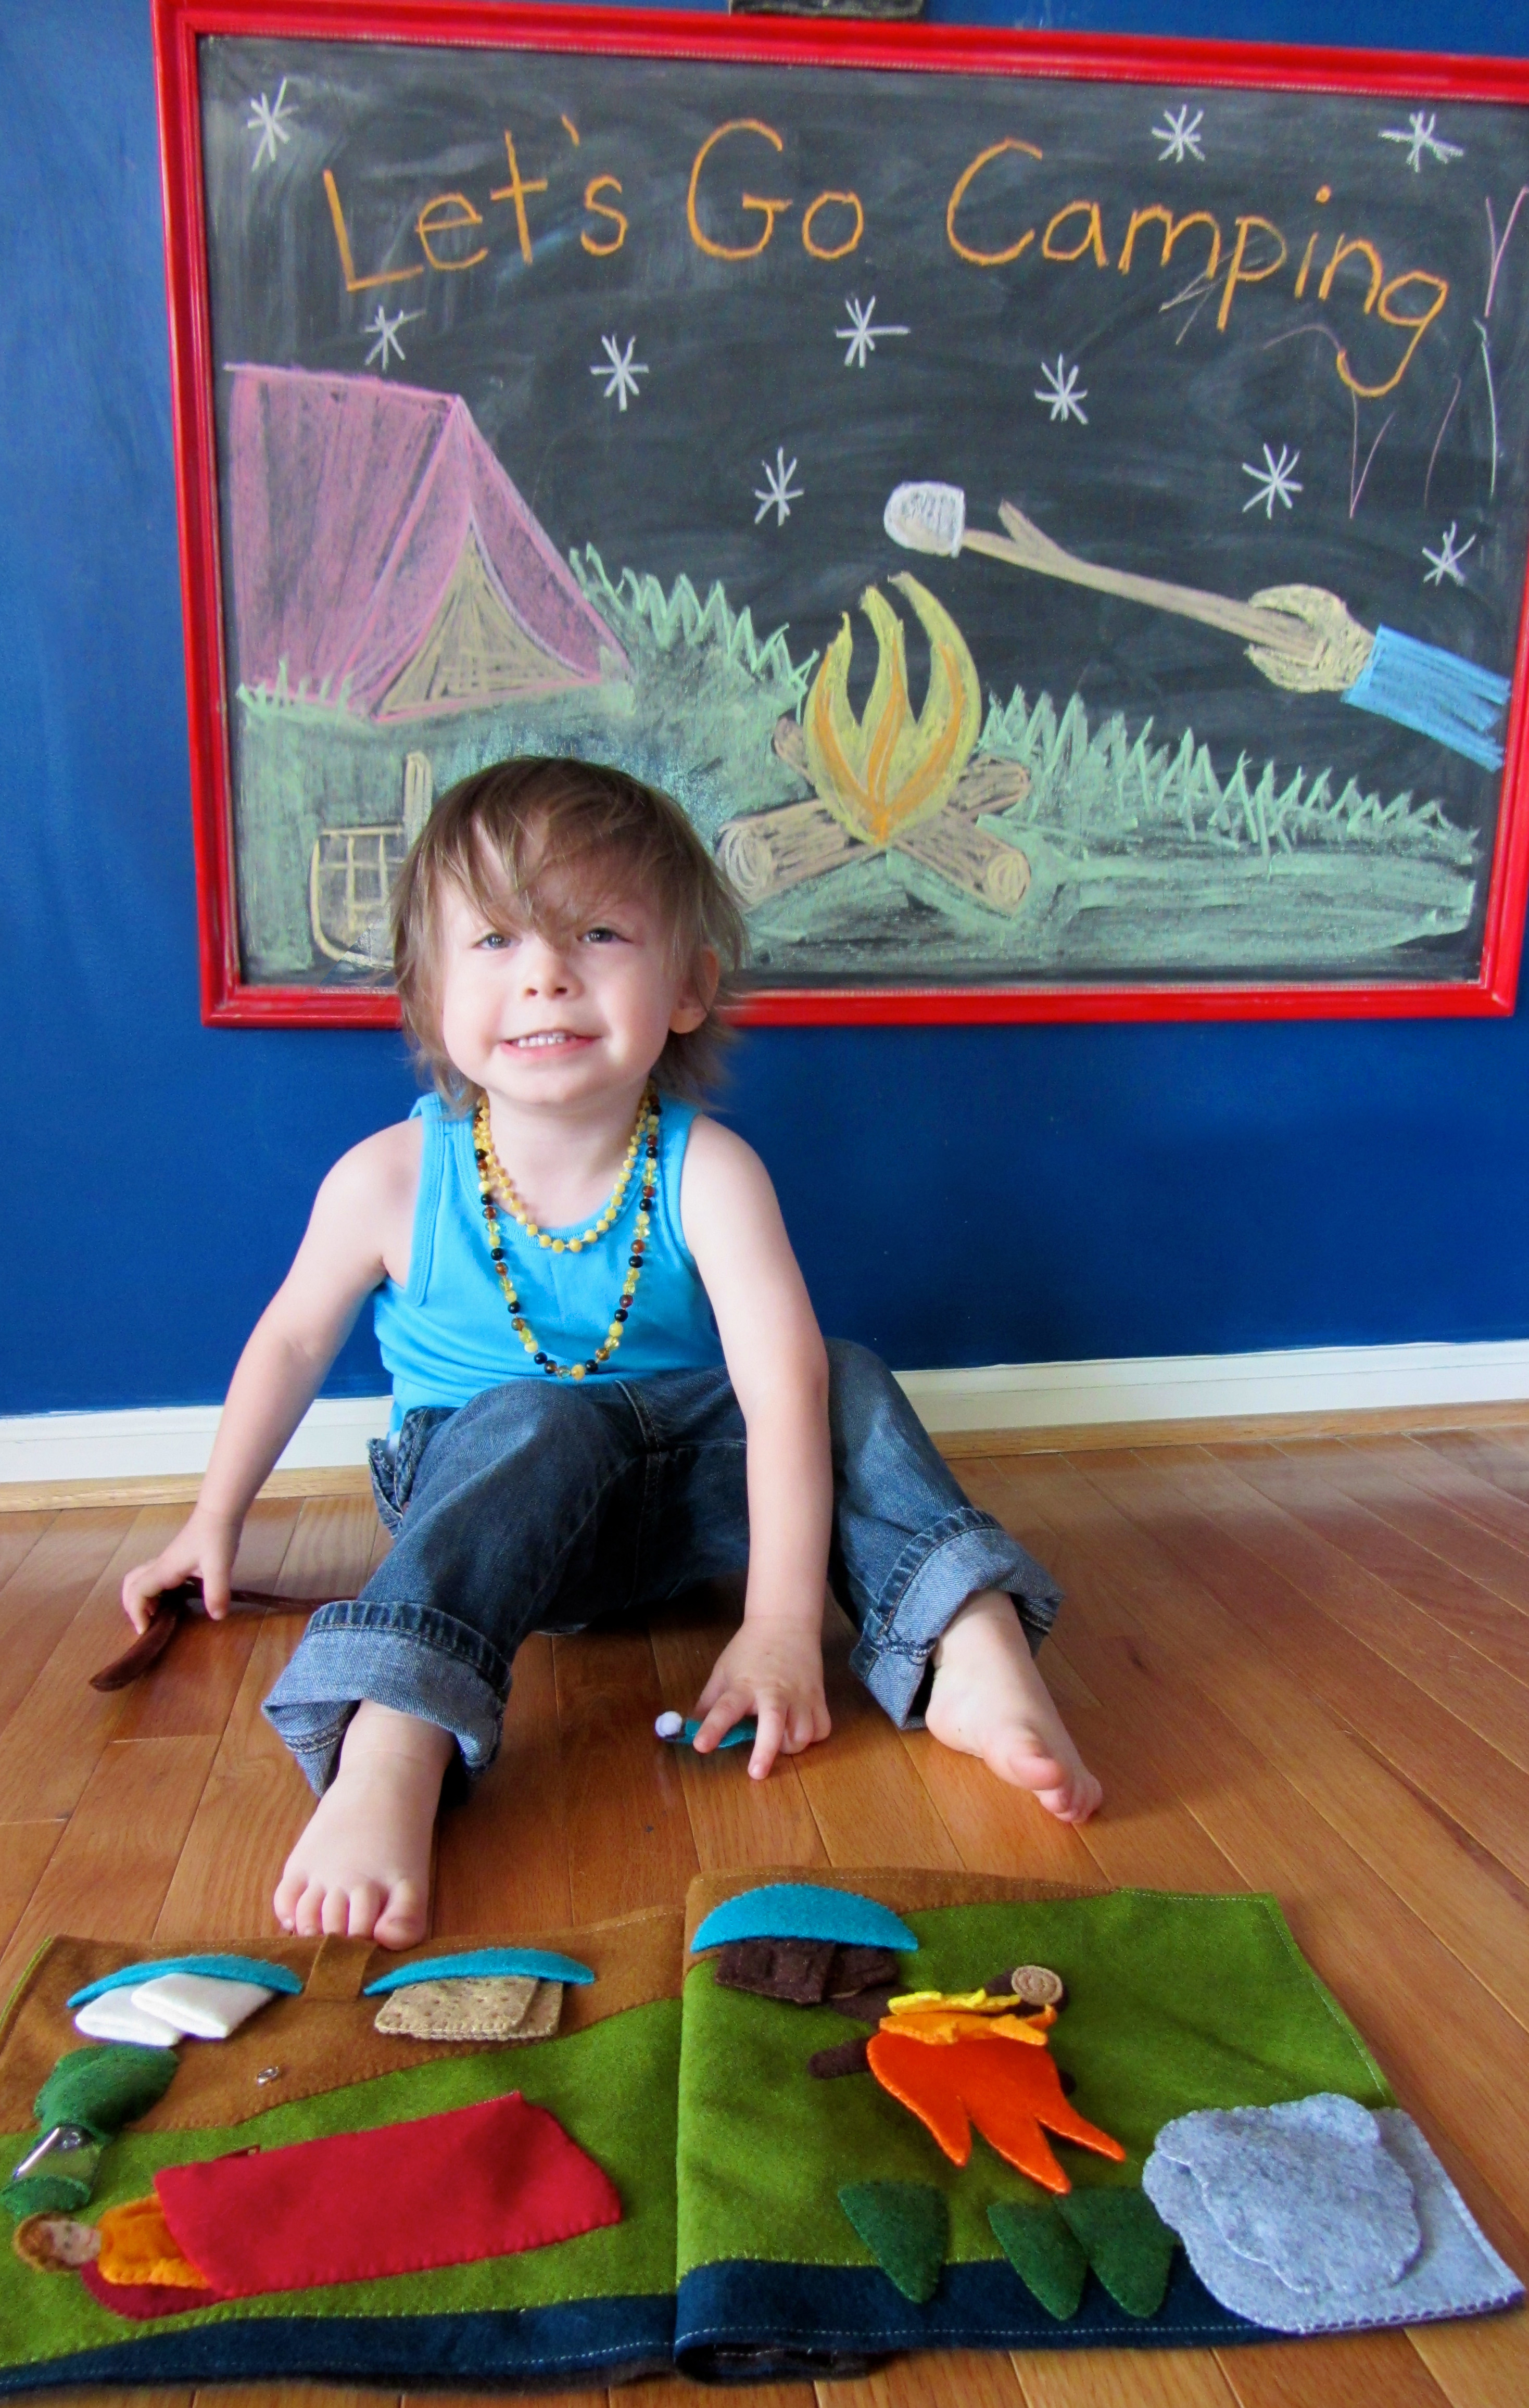
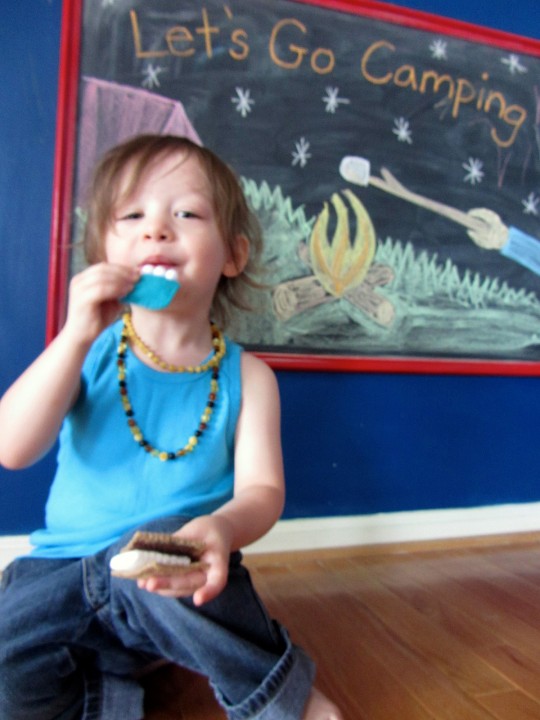
Jax is having a great time with this page. I think his favorite item is the hot cocoa and marshmallows. He loves the mini Jax, but can’t work the zipper yet. It will be good practice for him.
The Giveaway! I am super excited to announce that we’ve teamed up with AF&C to host a giveaway featuring many of the supplies needed to complete this page! One winner will receive the felt and crinkle material needed for the camping page, plus a mini LED light and a piece of clear vinyl for the lantern from my stash.
PLUS, two more winners will each receive a mini LED light.



I love the light but I think my favorite is the moveable person!
Just finished your Itsy-Bitsy Spider Page. Can’t wait to get started on the camping page!
Your pages are such an inspiration! Thank you for your amazingess! I can think of a couple stand-out things that I love about your camp page, the bendable little guy and the light up lantern would surely be a hit in our house!
I love the lantern and the smores!!!
I love your pages! The fabulousness lies in all the details! From the lantern to the snores to the bear to the sleeping bag -i love it all!
You are amazing! You are so creative and I love your pages.
This is a beautiful page (as they all are). Looking forward to starting this one for my little s’mores monster!!!! Thanks again for the inspiration!
your so creativs! Its super fun and interactive 🙂
I love the little camping light! My little boy hasn’t gotten to go camping yet (too hot!) this would be fun to make to show him what camping is 🙂 Minus the bear of course!
This may be the cutest page I’ve seen. All the details! I love it! Especially the lantern!
Love all your awesome quiet book pages and have FINALLY started mine! We are a camping family, so this is beyond perfect!
I plan to make 4, one for each of my kids. Yikes!
I love the interactive smores. Camping is so fun with kids, I have to make this page.
What I love about all of your designs is the details. Your attention to detail is AMAZING! From the zipper to the fire to the s’mores to the bear, it is ALL wonderful!!! Of course, the lantern is amazing! Your designs are such an inspiration!!!!
Love your patterns, you always amaze me!! I particularly love the marshmallows on the hot coco 🙂 Good job!
The bendable little Jax is my favorite. You are amazing and your work is incrediable. Thanks for sharing your patterns and ideas. They are truly appreciated.
I love that the marshmallows come of the stick. This would have bean great for 1st graders camping out under their desks.
I love the sticks you can take out to roast marshmallows!
I love this page!! I have three other pages to finish first but I cannot wait to get started!!!
That is just adorable!!! I love the lantern! Would love to win so that maybe I’ll actually start my felt quiet book!
I LOVE the felt! the colors are SO vibrant!! And your ideas are awesome! 🙂 Love the bendable jax and the keychain light! So simple! 🙂
I love the smores! That is such a cute idea 🙂
I love the lantern! I was going to start your city page next, but this might jump to the top of the to do list; it’s just so cute!
Your pattern is amazing! I especially love the s’mores, as they are the best part of summer in my opinion:)
smores is my favorite part. miam miam. reminds me of those camping nights.
Love the lantern, it’s a small but unique touch. Will have to consider wool it’s so pretty looking.
So cute. We love to go camping.
This page is so amazing! I love every last detail!
I love this template and I love all of the pages you post! You put in so much detail!
I love, love love the lantern!!!
I love the s’mores and the crinkle fire!
I like the marshmallows
I love how these s’mores actually look so real! My Kids are totally going to love this when I can get around to making it!! 🙂
I love the possible Jax.
Pingback: Tutorial: Camping quiet book · Needlework News | CraftGossip.com
That is such a clever idea for the fire. I think the grandchildren will have a lot of fun with this so it’s definitely on my “to do” list.
This is adorable! My 8-month old son has a onesie that says “camping is tasty” with a little raccoon roasting a marshmallow. The marshmallow is fuzzy felt, it’s so cute 🙂 This page reminds me of that and I will definitely be making it for him if I don’t win.
This is so cute, and has so many cool things about it. There are just so many awesome little details!
This is amazing. Definitely going to have to give it a go. Lovely – thanks for sharing.
You are brilliant!
Your quiet book is the best one i’ve ever seen. Do you sell them?
I don’t right now, but I’d love to one day…
Stephanie, I have two quiet books in the works (one a dollhouse, the other one spells out a little boy’s name), and now my daughter is expecting her first child, so I went looking for some fresh ideas. I hit the jackpot with your site! Oh, my – how lovely! The level of detail in your pages is what makes them so special. Thank you for your generosity in sharing your patterns – I will be making some of them. I babysit my 3yo granddaughter, Juju, daily, so I couldn’t wait to show her the treasure I had found. First we went to the Kitchen page – loved it, then the fairy tale castle – LOVED it, then the camping page – LOVED IT!!!, where she saw Jax’s picture, and asked who he was. When I told her, she said, “I want to GO to Jax’s house!” Haha – now THAT’s an endorsement! Wonderful! These are heirlooms – don’t sell them. They are works of art & will be collectible someday! As far as selling them goes, they would be cost prohibitive, due to the amount of time they take, but if someone was willing to pay… The problem is that they are each like a child of yours – so much love & care, thought & creativity goes into each one – it would be like selling a child!
Thank you for the lovely comment! It brightened my morning!
Forgot to add…you should also be signing each page!
Pingback: Get your craft on! « Green Thumb Mama
Pingback: Camping quiet book page
Can you tell me what size this camping page is?
Thanks!
Michelle
Hello
I am using this beautiful pattern that has inspired me and i just using a few ideas from it!
i’m sorry to be annoying but i’m using it for school and i need to know if the dome on the bottom of the lamp stops the torch from falling out and would children/babies open it up and get the torch out??? thanks so much, look forward to your reply, Annie.
Hi Annie! There is a snap holding the base of the lamp closed. If you open that, the light can slide out. If you’d like it very secure, I’d suggest sewing that seam shut separately, then undoing it if you need to change the battery.
Pingback: 20 Creative Camping Activities | About Family Crafts
Hi, I’m a girl scout leader and I’d love to make this , can you share the template.Awe that would be so great, thanks.
Hi
This my first attempt at making a quiet book! And just love this camping page!
Just a couple of quick questions as I haven’t been able to find the answers on the blog. What are the dimensions of these pages and also do you use material or felt as the base that you sew on. Thanks in advance for your help.
Alisha
Pingback: Craft Roundup: Repurpose Scraps into Sweet DIY Projects - Metro Parent