I’ve been quiet here on the blog while working on a large sewing project, though I’ve been posting regular updates on the Facebook page. I took a break from quiet book sewing to make a birthday present for one of Jax’s friends who was turning 2 years old. His friend adores all of Eric Carle’s books and was planning a Very Hungry Caterpillar
themed party.
I’ve been itching to try my hand at making a felt version of all the pretty food featured in that book, and I was excited to finally have the perfect reason to! I knew they would appreciate a handmade gift, so two weeks before the party, I started tackling the project.
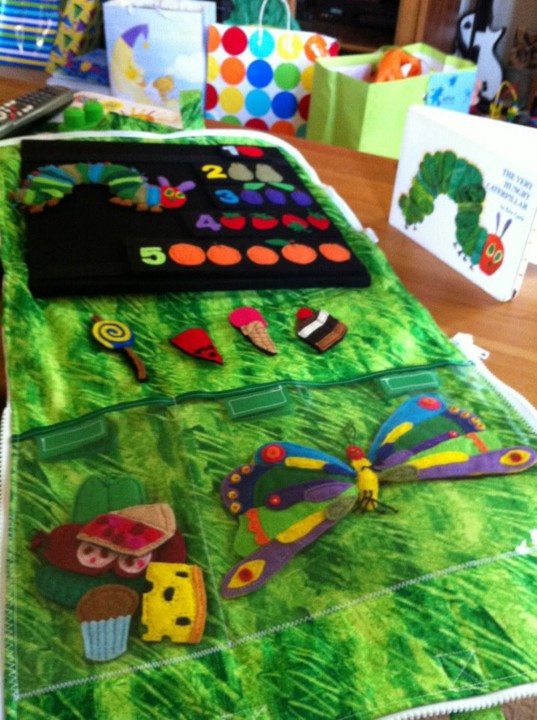
The felt items were made using only s felt from my scrap bags (I sort all my felt scraps by color and store them in freezer bags) with the exception of the black background felt. I would have preferred to have a white background like the book, but I was purchasing felt board to save time and money, and white wasn’t an option. (You could make your own felt board by covering a blank art canvas with flannel fabric.) I purchased this black felt board. It comes in green and purple, but I wanted to easily match the background to a felt color, so I chose black. The colors really pop on it!
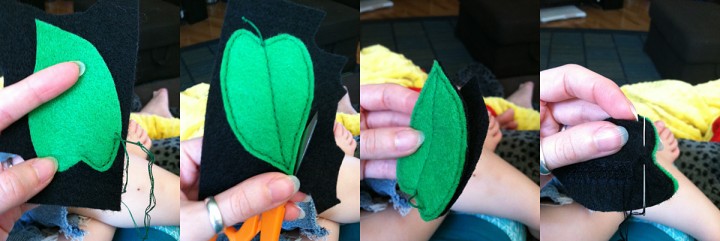
Because so much detail went into each piece, they were all heavy and wouldn’t stick to the board without the help of Velcro. I used Snag-Free Velcro so they wouldn’t snag each other when tucked away together in their pocket. Each item was sew to a base piece of black felt, trimmed to size, then backed with another piece of black felt with some Velcro sewn to it. I sewed to backings on by hand with a back stitch, only going through the two black layers of felt so the stitches wouldn’t show on the front.
 The Pattern
I’m afraid that I can’t post a pattern for this project here on my blog because I want to respect Eric Carle’s copyright. He does have a coloring sheet you could enlarge and use to make your own set. However, I have a PDF of all the sketches I did for my set, and I’d be happy to send it on to any of you lovely friends who would like to have it for your personal use. Please leave a comment below using the blog’s comment form (not the Facebook comment form – I don’t get notified of those!) In the email field, include the address you’d like me to send the PDF link to. I’ll do my best to send you an email within a day or two with the link.
Here is a quick run-down of how I made each item:
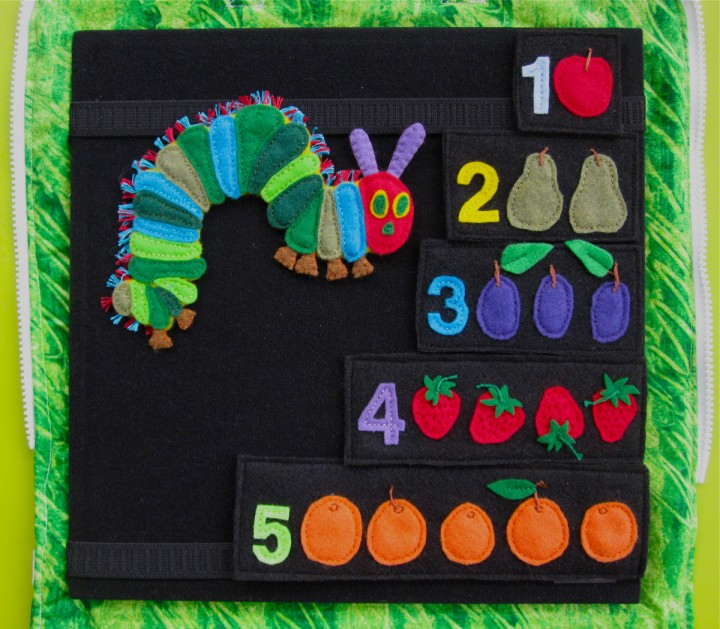
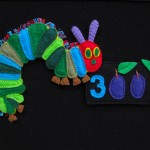
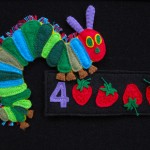
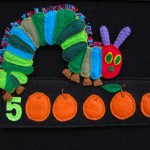
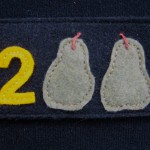
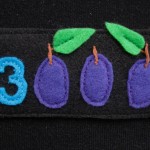
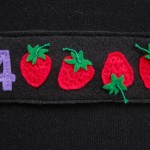
Fruits 1 – 5: For the sets of fruits the caterpillar starts out eating, I used rectangles of black felt as the background of each group instead of having tiny, separate fruits and numbers that would get lost. I sewed the fruits down to the background using back stitch and 2 strands of floss. For the stems, I used all 6 strands of floss: I made a knot in the end of my floss and came up from the back. I tied another knot flush against the felt to hold it in place, then made a knot at the end of the stem and cut of the rest. For some of the stems I went back down into the felt after the top knot to hold them in a certain position. Leaves were sewn down with a line of back stitch along the vein. For the strawberry tops, I made an x-shaped stitch in the center before doing the stem. The numbers are sewn on with back stitch down the center. I stitched little circles and open circles on the oranges to make the navels. I sewed all the rectangles to backing pieces with Velcro using the sewing machine to save time.
[img src=”http://www.imagineourlife.com/wp-content/uploads/2012/06/oranges.jpg” w=”600″ h=”200″]
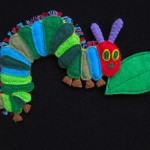
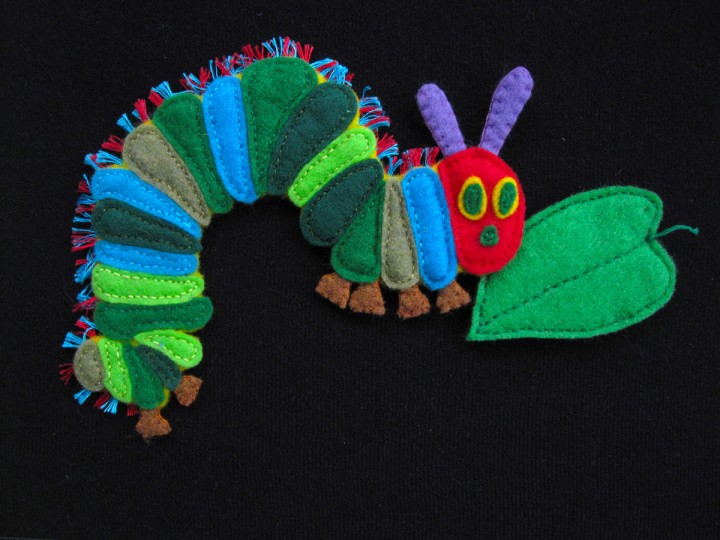
The Very Hungry Caterpillar: I tackled this guy first, as he is the star of the show. The caterpillar and the butterfly were the only ones I used yellow felt as the background for sewing down all the details (I still used black for the back side with the Velcro.) I cut his segments out of various colors of green and blue. The color variations are more subtle in the book, but I was working with what I had. Each segment is back stitched down. You may need to trim them up to get them just right – different felt stretches different amounts – especially with little, tiny pieces. for the feet and antennae, I used 3 layers of felt to make them stiff and blanket stitched round the edges.
The fuzzy fringe along the caterpillar’s back was the most annoying part of the whole project, but I didn’t want to leave it out! I made each little fringe the same way I did the fruit stems, but without the knot at the end: knot the floss, go through the back of the caterpillar (the yellow piece only), make another knot, then cut off and repeat. I alternated red and aqua blue, then went back and spread out the strands and gave him a “hair cut” so they were all even. To finish him off, I sandwiched the feet and antennae between the front piece and the black back piece with Velcro and sewed them together.
Leaf: I back stitched around the outside and down the center vein, then made a stem and sewed on the backing.
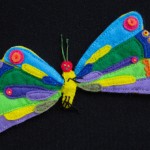
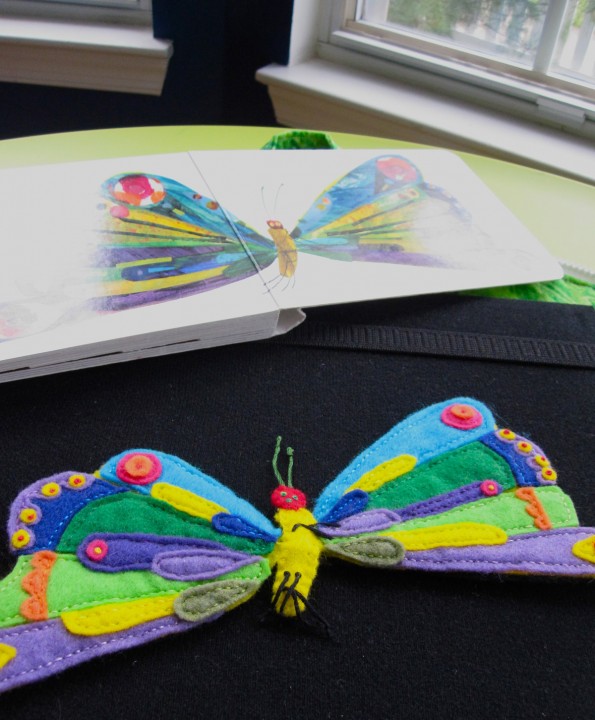
The Beautiful Butterfly: I took liberties when translating the butterfly from the book to a felt design, so you could certainly “wing it”! In fact, I only used my computer sketch for the basic shape, and ended up cutting out most of the pieces by hand. (I later drew them on the computer, so they are included in my PDF sketches.) Everything is back stitched down except the tiny felt circles – I have French knots in the center of those. I added two layers of yellow to his skinny body to add strength before sewing on the head. His face is satin stitched on and his legs and antennae are done the way I made the fruit stems. His arms are long stitches I added at the end. When he was all decorated, I cut out a backing of black felt to match, added Velcro and back stitched it on, only going through the yellow layer.
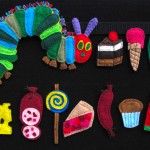
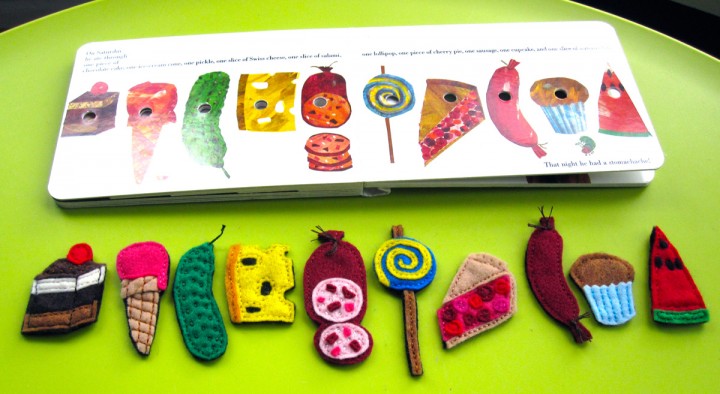
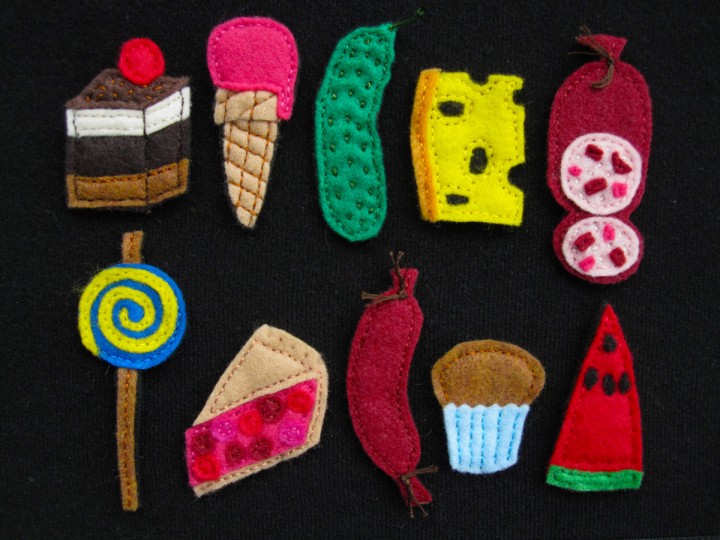
All the junk food items are sewn down to black felt then trimmed to size. The backs are all done the same: I cut out black felt to fit the finished item, sewed on Velcro, then back stitched it to the front, only going through the two black layers.
Chocolate Cake: I sewed the top and layer on, plus some dark brown back stitch to show the corner of the cake. I made light brown stitches to add texture to the top and then sewed the cherry on.
Ice Cream: I back stitched a grid design on the cone, then sewed around the edge of the ice cream scoop.
Pickle: After sewing it down, I made lines of little dashed stitches to add the bumpy texture then added a stem.
Cheese: I sewed a strip of dark yellow down the side to match the book, then sewed around the edges, I didn’t bother to cut out the holes in the cheese in the black felt.
Salami: After sewing down the body of the salami and the pink ends, I sewed down little scraps and made white stitches to match the book. I stitched a bit of brown thread to the “tied” end and tied it in a knot.
Lollipop: I sewed down the middle of a long strip of brown felt to make the stick. I took a long strip of yellow with a point at one end and sewed it down to the blue circle (starting with the tapered end in the center) in a spiral, then sewed down the exposed edges of the blue circle.
Pie Slice: The pie crust is sewn down around the edges, except for the extra crust along the top-back of the slice. I made a basting stitch that I pulled tight to give it a little ruffle. The pie filling is sewn down with scrap circles in pinks and reds to make the cherries.
Sausage: The sausage is simply sewn down around the edges with little brown ties added on to each end like the salami.
Cupcake: I cut out the top of the cupcake liner using pinking shears to give it a zigzag. I sewed down the cupcake, then sewed down the cupcake liner using vertical lines of back stitch.
Watermelon Slice: The watermelon is sewn down around the edges. The seeds I cut by hand (very hard to do because they are so tiny. Use sharp, micro-tip scissors!) the sewn down with a few stitches running vertically down the middle.
Because this felt set is a gift and I went with a 12″ x 12″ travel size felt board, I wanted to sew a quick case for it. I had limited time – just a few hours on on Saturday – so I don’t have many photos to the process, but I’ll do my best to explain it.
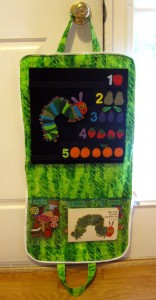
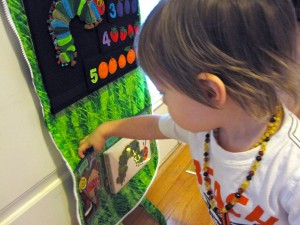
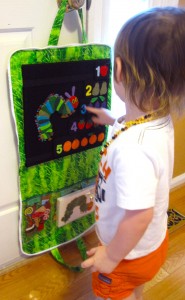
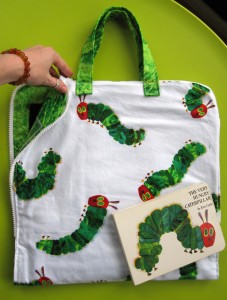
I made the case so it could be zipped shut for travel or storage, opened flat or hung from a door knob at toddler height for play time. I used Eric Carle fabric in Very Hungry Caterpillar white/green and Grouchy Ladybug Grass green/lime. I already had a 36″ white separating zipper and clear vinyl. I purchased a pack of fusible fleece.
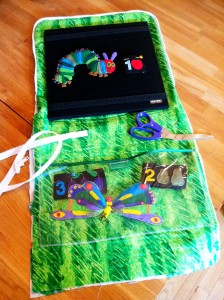
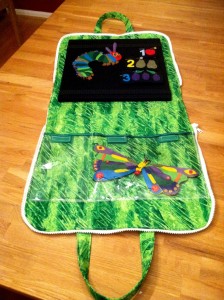
The finished size of the case when unfolded is 14″ wide by 28″ high (with the 12″ square felt board.) I cut rectangles out of both fabrics and the fusible fleece that were 15″ x 29″. I ironed the fusible fleece to the back of the green liner fabric according to the instructions. I cut a 14″ x 7″ rectangle of vinyl for the pocket. I sewed ribbon over the sharp upper edge of the vinyl, but it would be easiest to just use some bias tape. (I didn’t have any on hand.) I sewed the pocket down to the liner/fleece piece with a regular stitch followed by a zigzag to cover the sharp edges. I also divided it into a 4.5″ pocket and left the rest a large pocket for the book and bigger pieces.
I cut strips of the green fabric and lined them with the fusible fleece before making them into 1″ wide straps. There are a zillion ways to make straps. I started with a 2″ width, ironed .5″ edges in on each side, folded it in half and pressed, then sewed down each side and the ends.
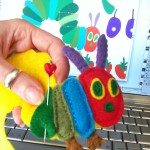
For the felt board, I sewed down two 11″ strips of black elastic. (See the photo at the top for an example.) I folded the ends of mine under (towards the center of the case) and sewed them with a zigzag on the machine. It is probably easiest if you sew the elastic on by hand after finishing the zipper so you don’t have to deal with the elastic folding your fabric in.
The zipper is the hardest part to explain – especially without photos. You may need to search around for zipper tutorials before tackling it. I drew some sketches of the steps I took. I used a zipper foot when sewing the zipper on.
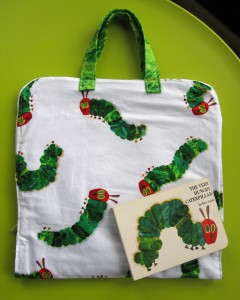
 Here is the finished case when closed!
I hope you enjoyed reading about this project! I had so much fun doing it, and I was very proud to hand it off to its new owner. If you create a felt board case or Very Hungry Caterpillar felt set of your own, let me know! I’d love to see it…


Hi! Could you please send your pattern? I know a little one who would love this felt story.
Thanks,
Claudia
These are just gorgeous. Really beautiful! I’m hoping to find time to make a set like this for my preschool class (I’m sure it won’t look as nice as yours). Thanks for sharing–I’m so inspired!
This is lovely. I would love to make one too. I would be so pleased if you could share your template with me. Thank you.
Vicky
I finished this a few weeks ago for my grandson’s second birthday. It was a big hit! Thank you so much for sharing the pattern.
I would love to have the pattern to this.
Thanks so much
Stephanie, What a stunning creation – you are truly talented!! Could you please send me the PDF pattern as I would like to ‘attempt’ to recreate this for a preschool.
Could you send me a copy of the PDF please? Thank you so much for alla the beautiful patterns and ideas!
Could I please get your very hungry caterpillar felt patterns for personal use? Thank You!
This is so cute. I’d like to make a set for my co-worker’s baby shower. Would you kindly send your pattern? Thanks so much. :0)
Hi!Could you please send your pattern? I want to make it.
Thanks!
It’s great. Could you please send your pattern? I love it
Hi! This is lovely!! Would you please send me a copy of your PDF instructions/pattern. I would really appreciate it! Thank you!
Elis
Love your patterns! Is it possible to get a copy of your pattern so I can make one for my kids? Thanks!
Please send the PDF of this. I can’t wait to make for grandchildren! It is truly an amazing book you have made. Thanks for sharing.
I would love a copy of your PDF sketches! This is such a sweet project – I am a huge fan of Eric Carle books!
hi,
just saw ur pattern and would love to make it for my son, its absolutly beautiful, could you send me the file pls? thanks!
This is so adorable! I would love to make this for my son. May I please have a copy of the pattern? Thank you!
Dear Stephanie, can i please have the pattern for the hungry catterpiler? I think my son would love it! Thanks a lot!!! Jutta from austria
Hi Stephanie! I absolutely love this and would love the patterns. Thank you so much for sharing!!
You are amazingly talented and I appreciate so much the fact that you share your ideas, patterns, and instructions with us! I love this hungry caterpillar project and would be so thankful if you would be kind enough to share your link with me. Thank you!
Hi!Could you please send your pattern? I want to make it. Is beautiful
Thank you very much
Please send me a copy, thank you.
Dear Stephanie
Loved your Hungry Caterpillar. I am a fan of Eric Carle books and would love to make this for my friends little ones. Could you please send me a copy of the pattern, thanks
Jayne
I love the very hungry caterpillar patterns and stitches. I hope I can make the props for my preschool students.
Could you share the pattern with me? Mu two years son loves hungry catterpillar but he doesn’t eat that much!
Thank you.
I would love a copy of the pdf. My daughter loves this book and would be a great way to entertain her.
Thanks
Hi Stephanie,
Could you please send me your templates? Your project is absolutely beautiful. Thank you in advance.
– Julie
I am going to be a great-aunt, again, and this time it is a little girl. I would like to make this for her. Would you please send me the pattern, and I can get busy sewing. Thank you. Beth from Michigan.
I have been doing research on quiet books lately, I’m looking forward to making one for my son. He’s only nine months now, so I figure I have some time to work on the pages. I have to say that the pages you have on your site are beautiful, I don’t think I will do them any justice but I’m sure that Jacob will think they are great. I’m hoping to work up to the hungry caterpillar page and if you are still willing would love the pattern. Thank you for your tutorials, they are incredibly helpful.
Loved your Very Hungry caterpillar felt board! I would really like the patterns for this story.
Thank you.
Sheila
Could you send me the hungry caterpillar pattern?
Hi
Could you please send me the pdf pattern I would love to make this for my little one.
Thank you
Thanks for sharing. i love this so much and May I have your pdf pattern plz. Thanks .
Please send me a copy of your pattern! I would love to make a set! thanks!
This is amazing! May I please have a copy of your PDF? My son loves The Hungry Caterpillar. Thank you!
May I please have your patterns? I have a little one who would love this!
Thanks!
I LOVE all of your pages and ideas! Keep up the good work!
Your website is very imaginative, Please send the Pdf files link for the Hungry Catterpillar
Hi! We are slightly obsessed with this little hungry guy. We would love to try and recreate this quiet book if you have a chance to send the PDF. Thank you SOOO much!! You are very very talented!
I had started this project a while back and now my friend would like me to make one for a baby shower. I seem to have misplaced the original PDF. Would it be possible for you to send again? Thanks so much!
I was wondering if i could get a copy of your PDF Pattern for the HUngry Caterpillar story. Would love to make this for my girls.
Please could I have a copy of your PDFs for the Very Hungry Caterpillar. A certain little group of nursery children would love this . Thank you in advance
I’m working my way through your beautiful quiet book patterns and would love to include the Very Hungry Caterpillar. Would you send me your pattern please?
Thanks!
I would love the PDF. Thanks!
I would love to have a copy of this. It’s AMAZING!!
Love it!!! Would you mind sending me the PDF? I want to turn it into a mobile for my son’s kindergarten teacher!!! Thanks so much for all your amazing patterns.
Hi, would like a copy of this PDF.. thanks…
I love you hungry caterpillar. Please would you send me a copy of your PDF.
I’m hungry caterpillar mad. Please could I receive a copy of your pdf. Thanks
Wow..these are fab!! Please could I have a copy of the pattern? Thank you so much! 🙂 xx
This is just the sort of project I’ve been looking for. I would never be able to sketch out the shapes needed, so kind of you to offer to send. Thank you very much.
Please could I recieve a copy!!!! By the way it looks fab!!!
[email protected]