I am so excited to introduce you to make latest big project! Those of you who follow along on Facebook or Instagram have already seen a lot of fun sneak peeks. Plus, it was YOU who voted on the Facebook page to make a world map the next quietbook project!
This project will be presented a little different than normal. Because it is SO BIG, I’ll be giving you a chance to sew along with me by posting a great deal of the patterns today. I am creating each piece by hand and then drawing up patterns from the finished product, so some elements will be provided in later posts.
Overview and Map Patterns • Africa • Antarctica • Asia • Europe
North America • Oceans • South America
The Plan
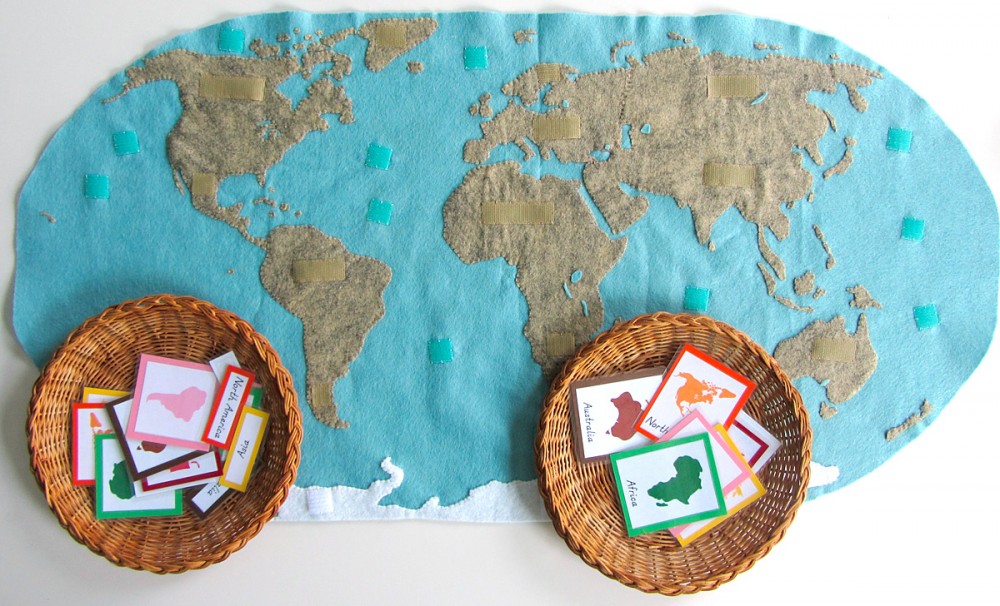
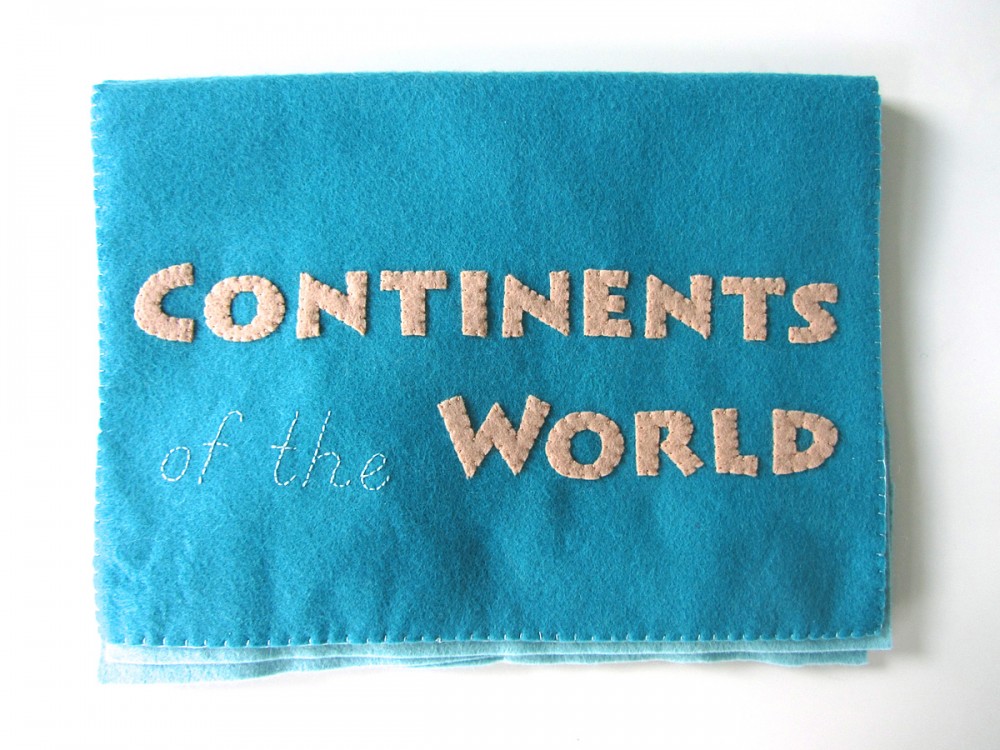
Today I am giving you the massive pattern for the world wall map and the continent puzzle pieces that can be attached to it. I also included the cover text for quietbook stores all the pieces. Here is pattern. [The pattern was updated 07/24/13 to add the water beside Baja California on North America. Sorry I forgot it!] And here is a pdf with the continent and ocean labels that get printed onto printer fabric. There will be additional posts for the other continents that will include patterns for regional animals and landmarks.
Materials
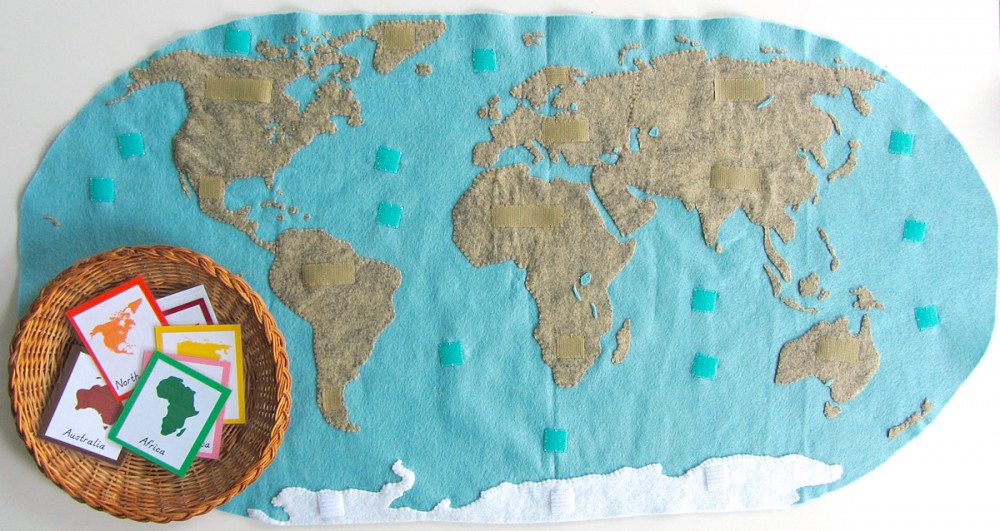
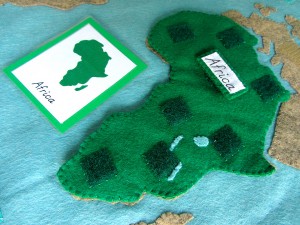
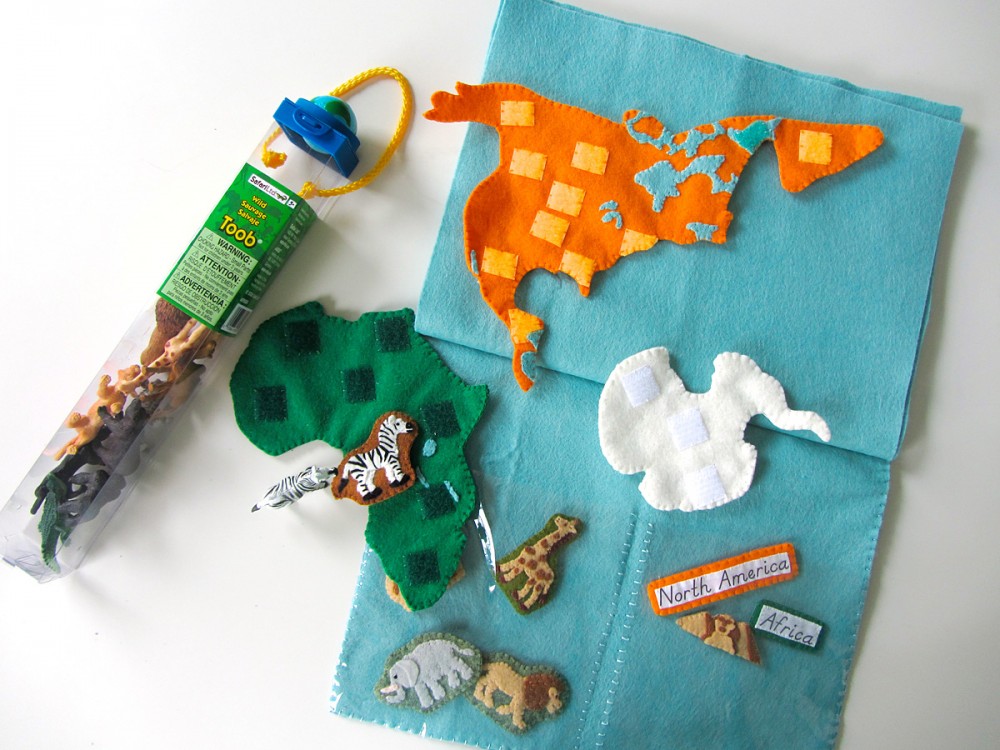
Felt: I am mainly using scrap felt to create the continents and smaller pieces of this project. The beautiful wool blend felt I get from American Felt and Crafts is just too good to waste! So I am digging into my scrap basket and using all I can. However, this project does require some larger cuts of felt. I ordered 1 yard of “Swan” blue felt from Benzie Designs. This was used to make the 34″ x 18″ wall map and then three 12″ x 18″ pages for the quietbook. I also ordered a 12″ x 18″ sheet of “Peacock” aqua blue felt for the cover, 2/3 yard of white (you only need enough for the long strip version of Antarctica, but I bough extra for other projects) and 1/3 yard of “Peppercorn” tan for the wall map continents. The continents are in traditional Montessori colors including: white, orange, pink, red, green, yellow and brown. I will eventually buy some backing felt or fleece for the back of the map to finish it off, but I have a few little bits to finish sewing first. Note – Antarctica is sewn down to the wall map due to the map projection. But I did also make a continent piece in its actual shape. You just can’t place it on the map.
Other: If you plan to print out the continent and ocean labels, you’ll need printer fabric. I use a roll that I can cut down to use in my 4″ x 6″ photo printer when I just have a little bit to print. I’ve also seen sheets for sale. For the pockets in the back of the book, you’ll need clear vinyl. I get mine in the home decor department of the fabric store. I am using felt glue
this time around to lightly tack down small felt bits before sewing them. It is working out great! I have that exact kind, but found a better price in the craft store. I will be adding some closures to the quietbook – two buttons and some elastic cord loops. I’m still looking for the right ones. The big thing you need… hook and loop! I use snag-free Velcro
inside the quietbook and on backs of all the loose pieces. It won’t fuzz up your felt when you close the book or store the pieces together. I also use a lot of colored hook and loop. I use the soft loop side on the fronts of the continents (for the animals and landmarks to stick to). For a stronger hold on the wall map, I used the hook side. This means I will have to put some tissue paper over it if I ever roll or fold it for storage to avoid fuzzing up the felt. I got this turquoise hook and loop
for the ocean. The tan Velcro is sold with black and white Velcro in the store. All the novelty colors are available from AFC. I didn’t have the best match in orange, but I am using pieces from my stash.
Felt Wall Map
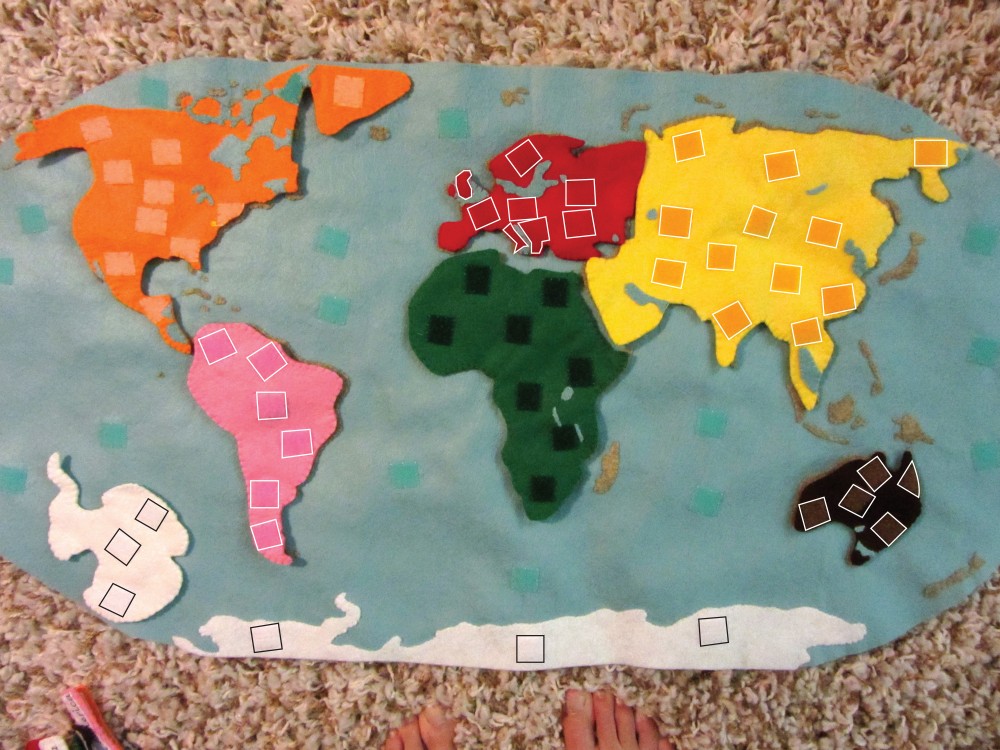
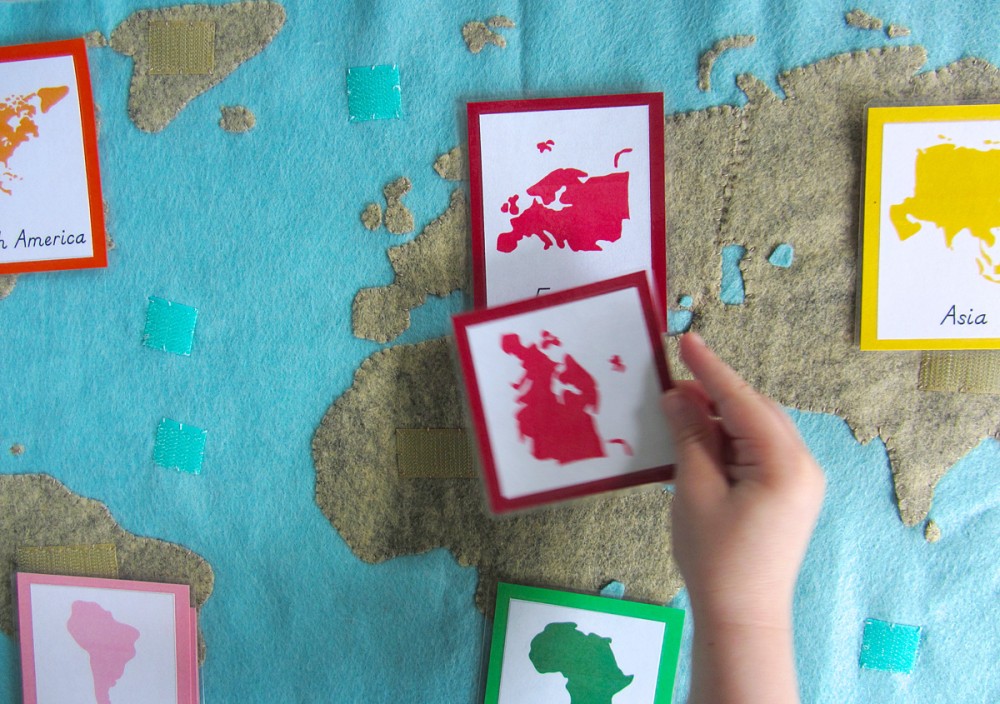
This piece is not yet finished (it needs a backing and loops at the top), but it is almost there! To make it, cut out all the large pieces and arrange them on the blue backing. Use a thin layer of glue to tack them down. Too much glue will make it tougher to sew through. Then cut out the zillion little islands and glue them down as well. I cut mine free-hand. I didn’t feel like it had to be super accurate at that scale – the overall effect when they are all in place is good enough! Once everything is glued down and dry, sew around all the edges. I used “Dual Duty Button & Carpet” thread in tan. Worked great!
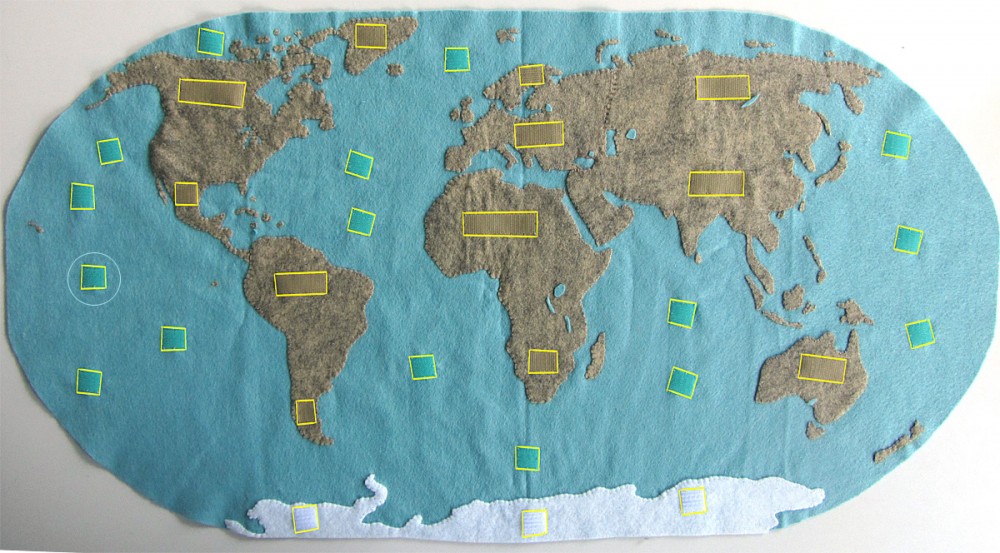
After that, sew strips of hook and loop on to the map where indicated in the above photo. The ocean ones are for sea animals, the land ones are to hold the continents. I will eventually sew a backing on with some hang loops at the top.
Quietbook
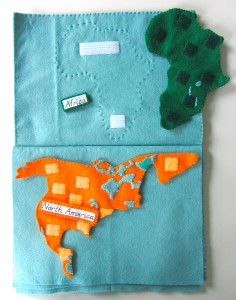
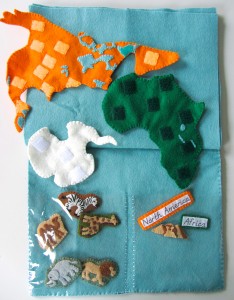
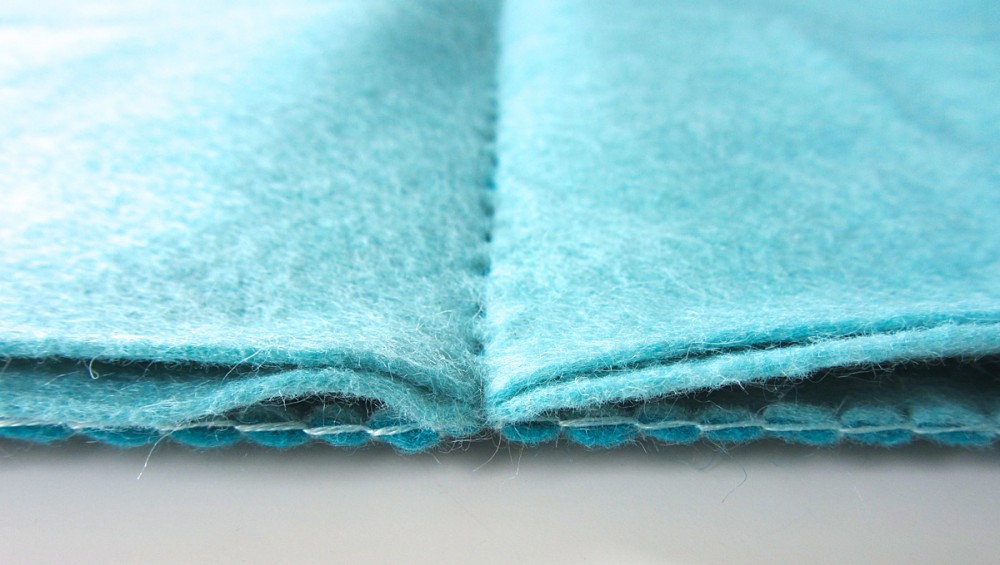
I have started this, but it is only about half done. To start the book, I stacked the 12″ x 18″ sheets with the cover piece on top, then sewed a dashed running stitch through the center. I then folded along the stitching to make the book. Once the sewing is done, each page is made by sewing two layers together. I have the first and last (cover) pages done in these photos.
I will go into more detail later, but the cover has the title letters sew on (“of the” is back stitched), and the last inside page has two clear vinyl pockets sewn on – one for animals of the world and one for labels and landmarks.
The pages will be sewn with dotted outlines and snag-free Velcro so you can match and store the continents. Some pages will have more than one continent, as shown.
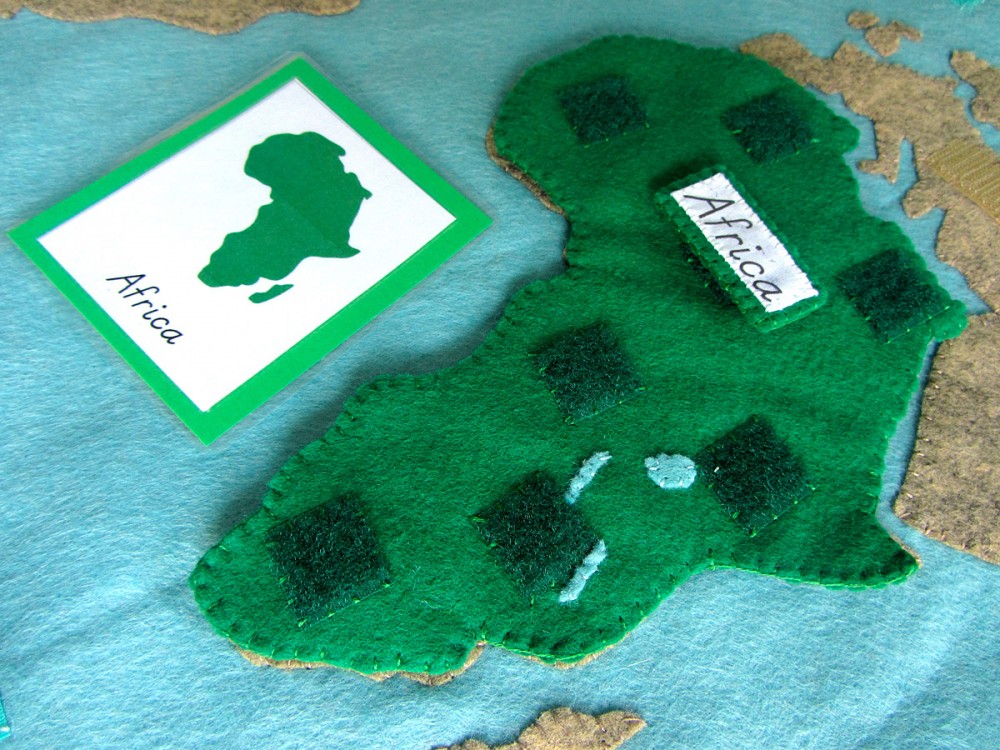
I came back to this post after finishing the continent pieces so I could share the final positions of the loop Velcro. Africa’s and North America’s are already posted in their patterns. See the rest above.
Montessori Continent 3-Part Cards
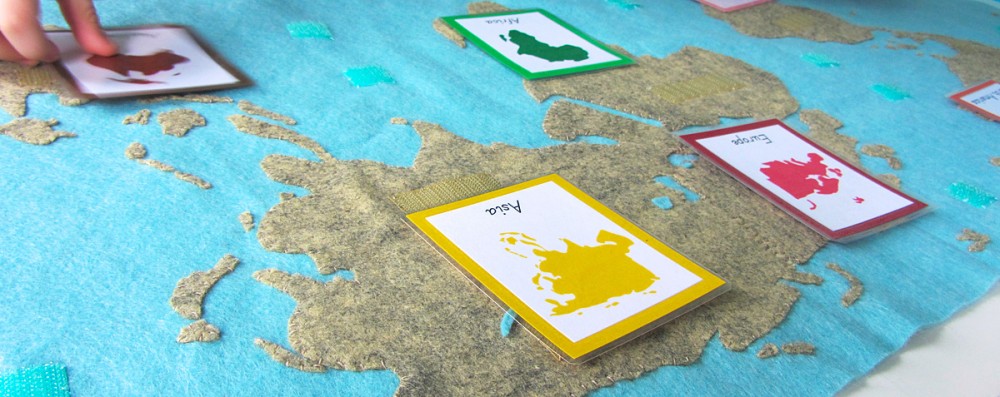
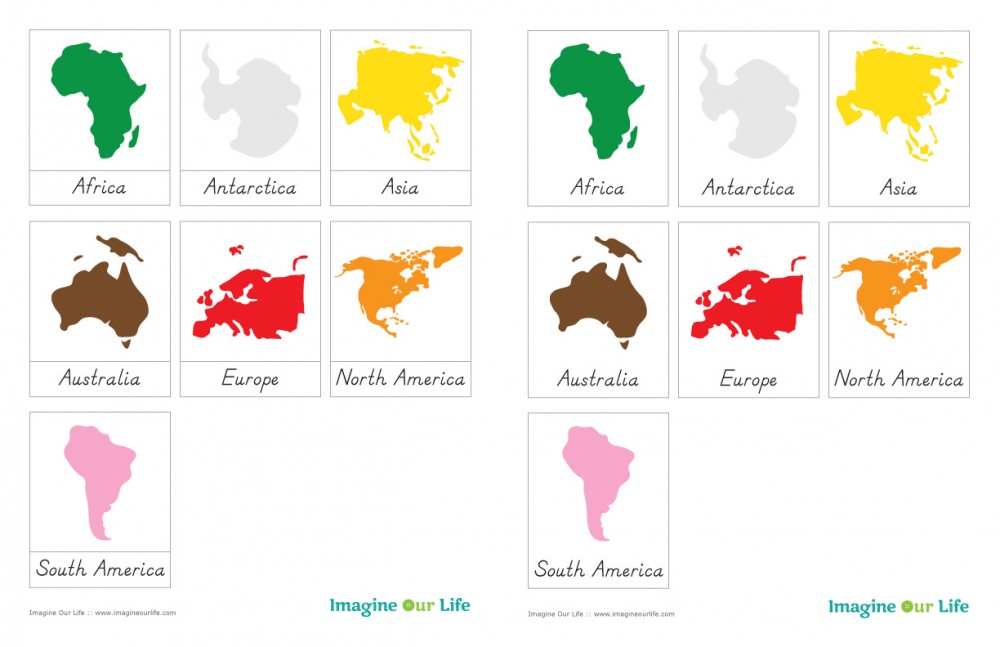
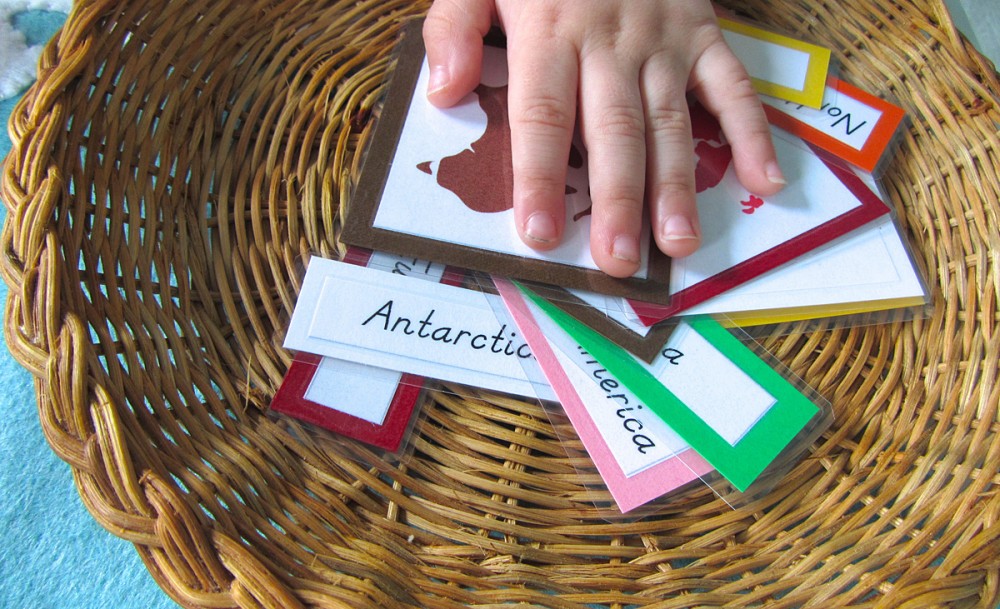
Jax just started his world continent unit with these 3-Part cards I made up for him. Click here to download my free pdf file to make your own. To make min, I cut them out, glued them to card stock then laminated them. I’m loving my new laminator!
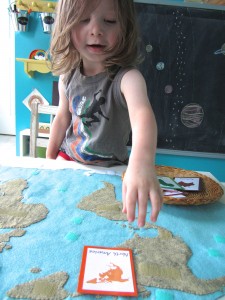
So far, I am presenting them to him to introduce the names and shapes, and we are matching them and finding them on the felt map. As he learns the names, he can start matching the labels to the pictures. Once all the felt continents are done, we will use them with the cards as well.
World Animals & Landmarks
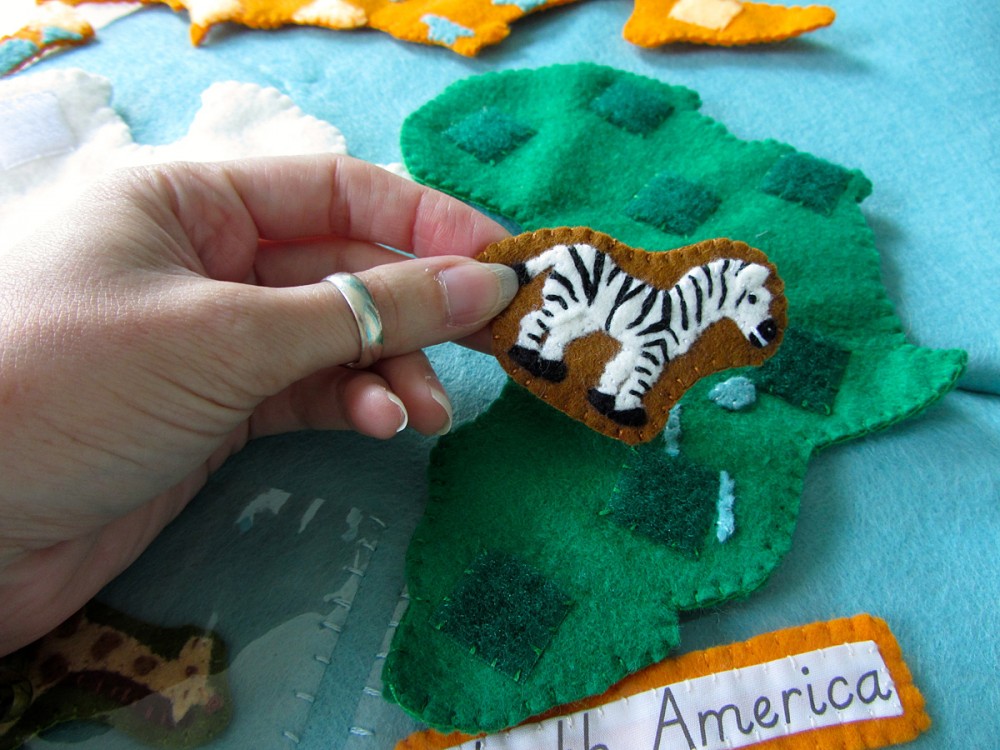
One of the most exciting parts of this project is still to come… I’ll be making little felt animals and world landmarks that can be placed on the continents and matched to the beautiful miniature replicas made by SafariLtd! I’ve been slowly collecting each TOOB I’ll need whenever I have 50% off coupons or store credit. They are so neat that I want to play with them myself!
Shopping List
√ Arctic TOOB
√ Around the World TOOB
√ World Landmark TOOB
√ Rainforest TOOB
√ panda cub
√ Whale TOOB
Land Down Under TOOB
√ River TOOB
√ Pets TOOB (hedgehog only)
√ snow leopard cub
√ peacock
√ leopard seal – other brand
I’ll be working with SafariLtd to bring you a great giveaway at the end of this project, so stay tuned!
I hope you’ll sew along with me!
I am giving you these patterns totally free, despite the days of work going into them. I think it will really help out teachers and homeschoolers alike! If you’d like to contribute in some way, you can read more here. Also, Jax’s wishlist is where I add homeschool items I need to buy. One easy way to help? Share this project and Imagine Our Life with your friends! Thank you!


Gorgeous!!!!
Oh wow, this is gorgeous!!!
This is absolutely fabulous, you’ve outdone yourself!
Love this idea! Will have to make it soon. What scale is the wall map? I live in Australia and would love to add some of the Pacific Islands if the sizing worked out manageable as I’d like my son to learn where they are also although they may be too tiny. Any suggestions on how you could add extra small pockets of land where needed?
I am so excited that you are posting your homeschool things that your are doing with Jax. This looks great, even it does look like a lot of work!
I am SO excited about this! I have been a big fan for a while now and this just tops the cake! I am building up my Montessori supplies to start this fall and this is so perfect! I have slowly been getting the toobs as well! I love them! You are seriously my hero! I love this!
What an AMAZING project! Thanks so much for linking up with Montessori Monday and sharing your fabulous printables. I featured your post as the Free Printable(s) of the Day at the Living Montessori Now Facebook page https://www.facebook.com/LivingMontessoriNow (and on Pinterest).
Thank so much, Deb! Your site has been an amazing resource for me! I will be posting more printables with this project as I go through all the continents.
This looks really cool. I can’t wait to work with my mom to make it.
My daughter is learning states right now, but I may start work on this as her Christmas present since we plan to learn countries next.
I’m just trying to figure out all the parts – is the quiet book mainly used as a way to hold everything when it’s not on the map? And the cards are for matching to the continents until the continents are all sewn? Since it will be a Christmas gift I’ll have time to get all the parts done before she uses it, so for budget sake I don’t want to make too much extra if we won’t need it. I’m also planning to embroider country outlines onto continents… so that will take a little extra time!
Oh, and the tan for the wall map is one layer, but all the continents are two layers of felt sewn together, right?
Thanks for sharing this!
The quietbook is extra – many of my readers only do quietbooks, so I added that option. You can store your pieces on the map or in a basket.
Yes, the tan is just sewn to the map in one layer. The loose colored puzzle continents are two layers for strength and to hide the stitching.
I hope that helps! I’d love to see what you do!
This is so amazing! I have begun a few of your older patterns and hope to do this one as well. Thank you so much for sharing!
Pingback: Traveling with Kids – Montessori-Inspired Activities | LivingMontessoriNow.com
This is such a gift!!! Thank you for sharing it with my family!
This is sooooo cool! I’m not very good at sewing but I have to find a way to make this big project for my little one. I L-O-V-E it!
BTW, I’m going to share this in my blog (linking back here, of course). I will publish the post in a few days, here’e the link: http://wp.me/p3kGf5-e1
Pingback: Quietbook – Weltkarte | Erstlingswerke
Pingback: Proyecto “Continentes” – “Continents” Project | Montessori en Casa
oh wow.. i decided to try and get the felt together for the world map. I willhave to buy from the USA. since yardayge of wool felt os SOOOO expensive over here… even if it is made in Germany. Well.. And I really hate the feeling of synthetic felt… wow.. I will now have to wait about 4 to 6 weeks for the felt to arrive… grrr… maybe I will go and look in some stores if they carry felt that does not fell too squeaky…
Love the patterns!!!
thank you from Russia! I love felt, Montessori and my son. your work is very great!
This is AMAZING!
I’m going to start doing Montessori homeschool with my daughter in September. I would love to be able to hang this map in her play/school room. Thanks so much for sharing. I just wrote a materials list and will be getting started on this soon!
Thank you so much for the patterns and all the work you’ve been doing. I’m a homeschooler of 4 and think the kiddos would love this. So I’m going to making this for them. Thanks!!
Drop dead gorgeous!! Really beautiful……… 🙂
Pingback: Proyecto “Continentes” II: Materiales – “Continents” Project II: Materials | Montessori en Casa
wow, this is amazing! I will definitely make one for my kids!
I sent you an email regarding 3-part cards for this project 🙂
I think I am going to do it. I am going to do this! I just finished the alphabet for my son who just turned a year old.
I am going to try to follow along, because this is just TOO RAD.
I just have one thing to say. You are missing Vancouver Island (in British Columbia) I was born there, live in quebec now, but Victoria is the capital of BC. It is a beautiful large island.
Thanks for the tutorial, I hope I can do it! I will start to gather my materials. Ill have to read through the posts to see what is needed. Do you have a detailed simple version of materials needed?
Thanks!
Candice
Beautiful! Thank you for sharing!
Pingback: Montessori-Inspired Continent Activities with Animal Figures and Landmarks - Europe | LivingMontessoriNow.com
This is lovely & wonderful. Thank you for sharing!
Pingback: Montessori Monday: Montessori-Inspired Continent Activities Using Replicas - Africa | LivingMontessoriNow.com
Absolutely beautiful, started working on one for my sons yesterday, don’t look as stunning and perfect but it doesn’t matter…thank you for the inspiration!
Pingback: Activity of the Week – Continent Map Work | LivingMontessoriNow.com
I’m amazed every time I see a new addition to your project, Stephanie! I just had to go back and add your photo and original post to my Continent Map Work post at http://livingmontessorinow.com/2011/04/18/activity-of-week-continent-map-work/
Pingback: Montessori-Inspired Continent Activities with Animal Figures - Australia | LivingMontessoriNow.com
Pingback: What Materials Should I Get for my Preschooler? | Pumpkins and Me
You are truely an inspiration. Maybe I missed it but could you send me the link the the Australia continents stuff? Thanks!
I haven’t done Australia yet!
So nice! You have done a fantastic material. I like it very much! Thank you for sharing!
Pingback: Homemade DIY Montessori Felt Wall Map Puzzle – No Sewing! | Our Homeschool Journey
Thank you so very much for posting your templates online. Using my own method of assembly, I created the felt wall map as a Christmas gift. I was lucky to have already stumbled upon the Toobs when we started homeschooling and with each trip to the store, buying another one. My little one couldn’t wait to find out where all the animals lived.
http://childdrivenlearning.wordpress.com/2013/12/30/homemade-diy-montessori-felt-wall-map-puzzle-no-sewing/
sorry to be daft but can you explain the velcro placement? on the map is the grippy rough part facing up with the soft loop on backs of continents? then the loop is also ontop of continents while grippy part on the pieces? i think i have read the post too many times that it has lost sense to me!
I love using Velcro’s Snag-Free hook & loop on felt projects, but it only comes in white. It can sticks strongly to other s-f Velcro and to hook (rough) Velcro, and sticks gently to loop (soft) Velcro. I hate how white Velcro looks on colored felt, so I only use it on the backs of all the pieces, plus on Antarctica.
On the map I have hook tan velcro. The continents are heavier and the map needs to really grab onto the s-f Velcro on the backs of them. On the fronts of the continents I use soft loop Velcro in colors that match. This is because the continents get stacked up and put in a felt book – you don’t want the hook stuff snagging on everything! The s-f Velcro on the backs of all the little pieces works well on the loop that’s on the continents because they are so light.
Hope that helps!
Pingback: Christmas Crafts! | Virginia's Virtues
This is soooo amazing! It’s exactly what I have been looking for! I cannot wait to get started on this; my children will love it! THanks for all your hard work and for sharing! You’re incredible!!
Hi Stephanie, I came across your site today and was wondering if I could e-mail you some questions I have about quiet books. It’s kind of long to type here, so I was hoping that you could e-mail me and we could respond that way.
Thanks so much – hope to hear from you. (I mainly want to start a small business with kids stuff and quiet books would be an item. I’ve been told that I need to go through consumer protection services before starting a business. Don’t know if that’s true. Thought you could give me some insight on starting the process?)
Thanks, Denise
Pingback: Traveling with Kids - Montessori-Inspired Activities | LivingMontessoriNow.com
Pingback: Montessori Materials Review (Geography) |
Pingback: World Map | Live with Liz
Pingback: Teaching Geography With Elementary Students
Pingback: A Day in First Grade | Helping Elementary Students Learn About Geography
Pingback: Making Geography Come To Life
Pingback: Felt World Map | Pumpkins and Me
Pingback: Montessori Geography
Hello Stephanie,
This is so amazing. You inspire me to make this for my son. I have already started purchasing all of the supplies. I was wondering, do you cut all of your cut-outs by hand? And if you do how do,you do it? I am so excited to get started
I cut out the paper, then pin or hold it on the felt and cut around it. A lot of people use the “freezer paper technique”. I really enjoy cutting tiny bits of felt. Make sure to use micro-tip scissors!