Sunday Souvenir – 9/11

Has it really been 10 years? It doesn’t seem that long ago that we woke up to phone calls from worried family. We lived very close to Dulles airport and watched the tv in horror as the towers fell and helicopters and fighter jets flew overhead. Dan’s brother was in DC and had to walk out. I spent the week glued to the news in tears, and had nightmares every night.

That morning I wrote in my blog, “we were just woken up by phone calls from family members.. what the hell is going on? bombs? ack. mark needs to leave dc. ack. shit. who is doing this? i am torn between sitting here with my mouth hanging open and crying.

what a terrible day. i didn’t work – i couldn’t think. i am struggling now to do some site work. danny is on the phone with his brother (who eventually got out of dc by walking to clarenden) talking about it all. in the afternoon i had to get away from it all so i took dia on a walk around the neighborhood. at first i couldn’t escape the news – cars passing by and contractors out working on new houses were all blaring the coverage. i kept walking into a neighboring townhouse complex and stopped to chat with a lady i have met there and her sweet dog. in the evening i needed a nap – not sure why… i have to go to bed on time tonight because the dogs need to be at the vet at 8am.

while i was washing the dinner dishes they showed a clip of people falling from the wtc after jumping. how horrifying. i can’t stop thinking about how awful things must have been in there to make people choose the certain death of falling 90 stories.

i am still stunned. love and kind thoughts to everyone involved.

My thoughts and heart are with all those who lost loved ones or were affected by what happened 10 years ago.

Where were you on 9/11/01?

Leave a comment if write a Sunday Souvenir and you’d like your link to be added!

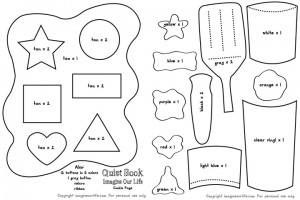
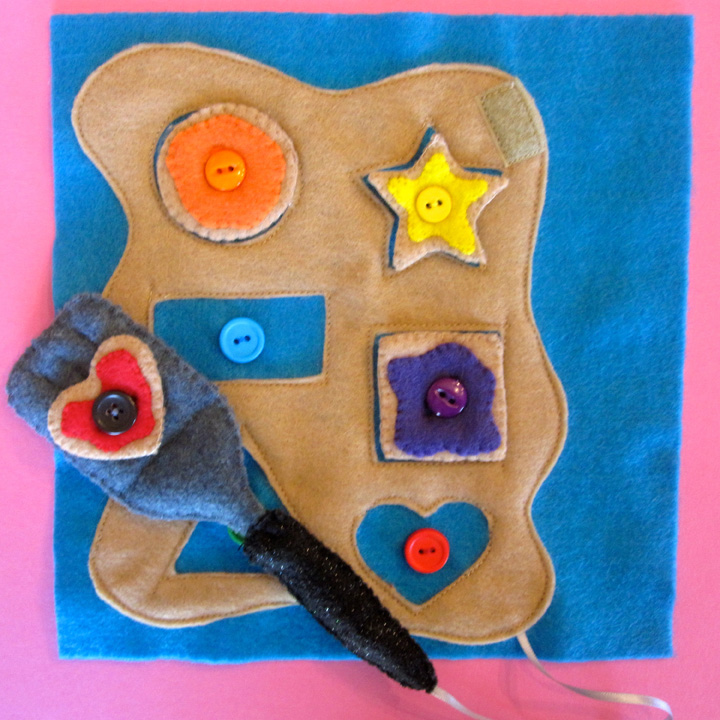
Cookie Shapes & Colors Quiet Book Page

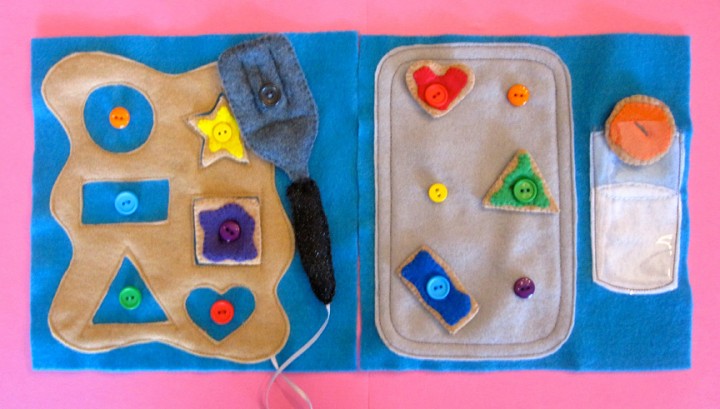
The next set of pages for Jax’s quiet book is done! This cookie-themed layout helps practice shapes, colors and buttoning. One side has the dough where you can match the cookie shapes. There is a spatula you can put cookies on. It’s attached by Velcro and a ribbon so it can’t get lost. The facing page has a cookie sheet where you can match the cookie frosting to the button colors. There is also a glass of milk to “dunk” them in.


The supplies I used were: two sheets of turquoise felt cut to 9″ squares for the background, felt (in white, light gray, dark gray, black glitter, tan, red, orange, yellow, green, blue, light blue and purple), clear vinyl, ribbon, Velcro, a gray button, 2 buttons for each rainbow color, batting, and matching embroidery floss/sewing thread. You could swap your buttons on the shape side with shape buttons if you had them. I was trying to save money.

I hand-sewed everything on the cookies: the frosting to the top, top to the bottom, then homemade buttonholes. You could machine-sew, but I already had the thread colors as embroidery floss. Took me about 30 minutes per cookie by hand. I cut a rectangle of grey with rounded corners for the cookie sheet. I machine-sewed it twice around the edge to give it dimension. The milk glass was done on the machine except for some stem stitch to show the surface of the milk. The vinyl was left open at the top to make a pocket.

The cookie dough was machine-sewed on and all the buttons sewn on by hand. I made sure one end of my 8″ ribbon was under the dough when I sewed it, then the other end was in the spatula handle. The spatula was all hand-sewn with a layer of batting. The piece making up the main “metal” piece went down into the handle for stability. I also stitched some lines into it for both looks and sturdiness. The button was one from my stash that came as a spare with some item of clothing. I just picked a dark gray one that was the same size as the others. There is a square of black Velcro on the back of the spatula and the other half, in tan, on the dough.

So far, Jax loves to dunk his cookies (“Dip! Dip!”) but can’t undo the buttons on his own. This will help him learn. I created a free pattern for your personal use as I went along. Let me know what you think of it! Please share photos or a link if you create your own version. Jax and I would love to see!

I’ll be starting the next page tomorrow – Starbucks inspired! I’ve already cut out most of the felt. If you missed them, here are the space pages I finished with free patterns.

Making (Wooden) Fruit Salad

So Jax adores his play kitchen… He asks to go “cook” by saying “Num! Num! Num!” – which is also the sound he makes when he “taste-tests” his culinary creations. I only want to fill his kitchen with sturdy, wooden food (I’m not a fan of plastic and felt would just be covered in dog hair) that will last. Two great brands for wooden food are Melissa & Doug and Plan Toys (The breakfast set is so cute!) Both are a little pricy (Plan more so than M & D). The craft stores around here carry a limited (but changing) selection of Melissa & Doug and when combined with a 50% off coupon, I can get a crazy deal!


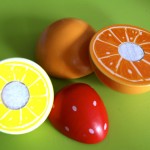
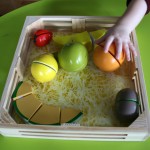
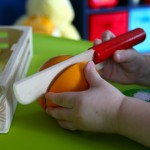
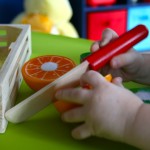
Our second set of wooden food is the Melissa & Doug Deluxe Wooden Cutting Fruit Crate. This set helps with manual dexterity as you are able to chop up the fruit with a play knife. It is pre-cut and held together with Velcro. Jax will learn to match the fruit pieces together and recognize the insides and outsides of fruits. Later, it will help introduce the basic concept of fractions.

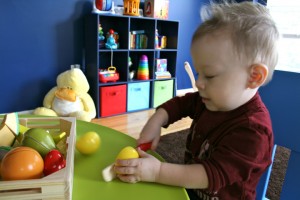
It was love at first sight with this set for Jax. It comes in a large, shallow crate which he brought over to his table, sat in his chair and started examining all the fruit. I showed him how to “chop”, which he loved. The velcro makes a nice “Crunch!” sound when you cut through it. More often than not he tried to cut with the handle of the knife, so he’ll have to practice that a bit.

The melon and banana are in multiple pieces that don’t stick together quite as well (because there are more parts), but Jax likes those because they are easy to pull apart with his hands.

He has already made me several fruit salads, so I think this set is a hit!

Disclaimer: I was not compensated for this review and purchased the item myself. I just wanted to share what we thought of it!

Another Take on Toddler Nursing

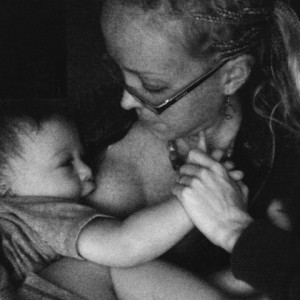
A while back I wrote about nursing Jax now that he is over a year old and in toddlerhood. Mayim Bialik recently posted on Kveller.com about her experiences nursing her son now that he is 3 years old.

She wrote, “Fred nursed for a solid 12 months with no supplements, no solid foods, and not even a sip of water. He got the hang of eating solids around 18 months, but continued to nurse all day (with bottles of pumped breastmilk when I was at work), and on demand all night. A typical night involved no less than four wake-ups and sometimes six (every 2 hours on the clock for 12 hours of bed time was not unusual). This went on for almost 3 years.

When you are committed to child-led weening, what do you do when your child is still nursing past when you expected you’d stop?

Mayim shared, “I never ever believed that I would be nursing a child over the age of 3. But now that I am, I believe when he is done, he will be done. I believe that he will not need to nurse before he walks down the aisle to greet his bride under the chuppah, and I believe that nursing is natural and beautiful and wonderful. I believe in being conscious of where I nurse my toddler and I also believe that there is nothing wrong with nursing Fred.

Read her full post here.

Astronaut Quiet Book Page

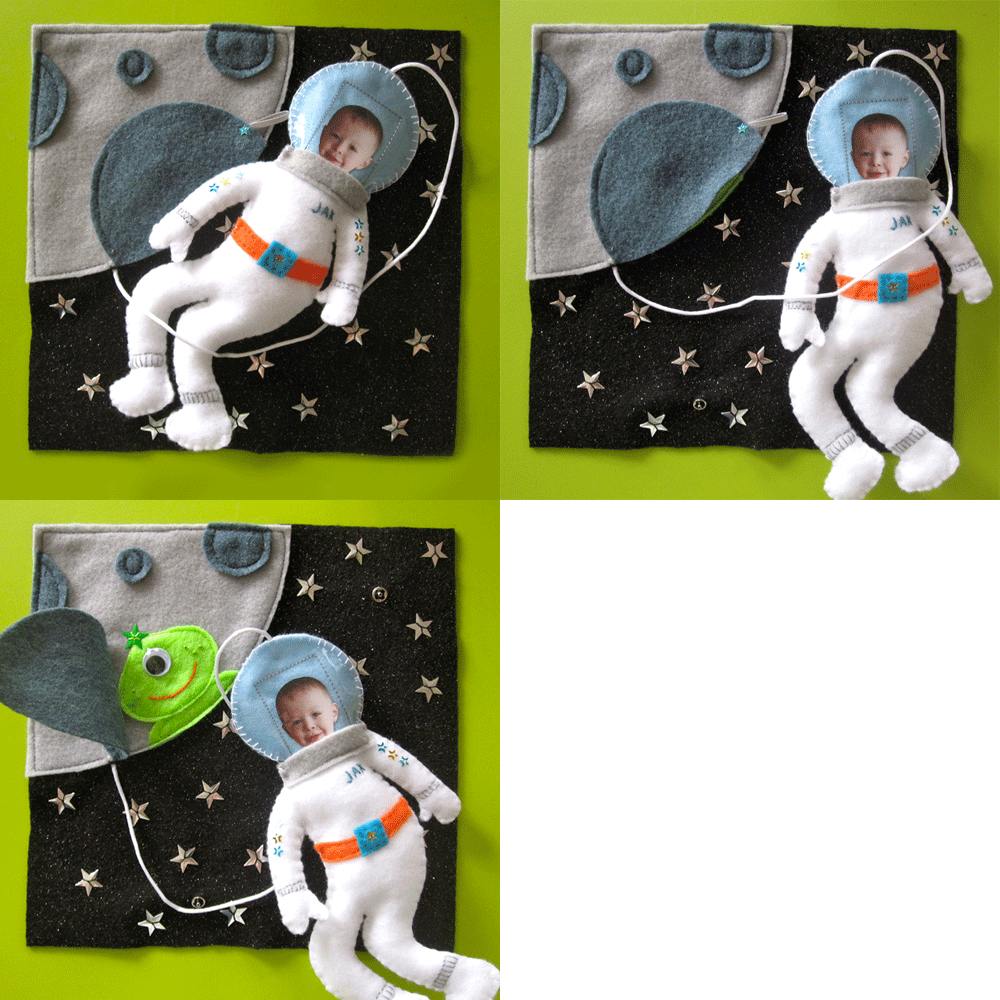
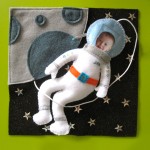
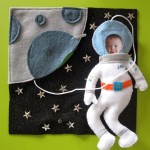
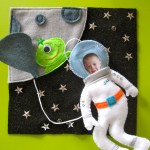
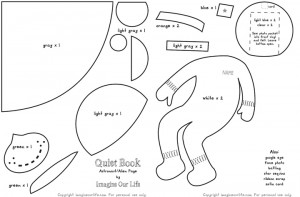
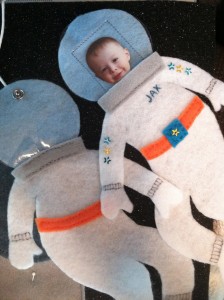
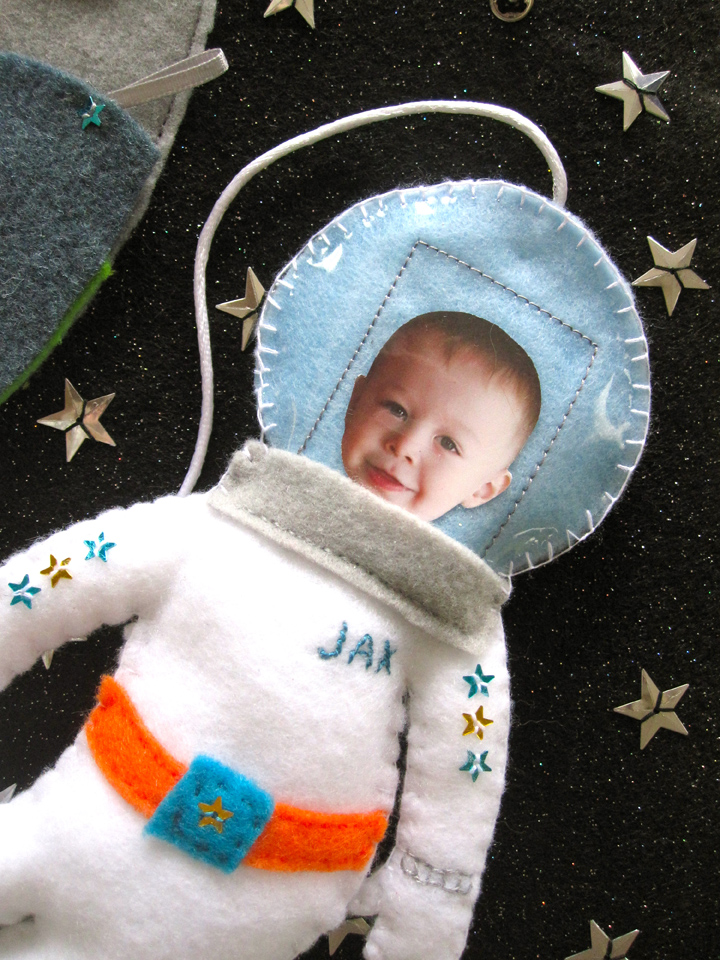
Here is the second space page in Jax’s quiet book. I think it came out super cute! I created a pattern as I worked on this page, and I’m sharing it with you all for your personal use. If you use the pattern, I’d love to see your version! Link back to me or leave a comment!


This page has a peek-a-boo alien and an astronaut that can snap on and off the page. The face has a spot for a 1.25″ x 1.5″ face photo. I plan to make my book pretty thick, with a 2″ spine and possibly a zippered cover. You can omit the batting/stuffing in the astronaut and just sew the two sides together if you want yours thinner.

I did use star sequins in this design, but you can leave them out or replace them with felt or embroidery if you have a young baby who puts things in their mouth. Whatever works best for your situation! My other materials were: felt sheets (black glitter, dark gray, light gray, lime green, white, turquoise and light blue), matching threads, batting/stuffing, clear vinyl to make the helmet shiny, white satin cord from my beading stash and a scrap of ribbon to use on the peek-a-boo door.

Once I cut everything you, I machine-sewed the craters to the moon, sewing only the left side of the large on to make a hinge (I added a ribbon loop and sequins to make a handle.) I used a stem stitch in orange to sew the alien’s mouth, French knots for freckles and a self-stick google eye. I machine-sewed the alien down behind the door and sewed the moon to the backdrop. You can do it easier by just sewing the door on last, though it wasn’t any trouble for me. I left a small gap under the moon and hand stitched one knotted end of the satin cord underneath. I added a star hand-sewn to the alien’s head.


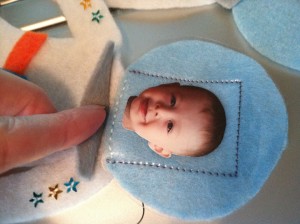
Next I decorated the two sides of the astronaut. Both got straight stitched ribbing at the wrists and ankles and an orange belt. The front got a belt buckle, Jax’s name in stem stitch and some stars. I did a line of stitching on each side at the neck to attach the blue helmet. I placed a helmet vinyl piece over the front and used the sewing machine to sew a rectangle with an open bottom to make a photo pocket. You can use lighter thread if you want to hide yours. The the neck piece was hand-stitched on the bottom only to make a flap to hold the photo in. The back of the astronaut’s helmet got the vinyl attached at the neck with stitching on both the top and bottom of the neck piece. With one end of the cord on the wrong side, I sewed a snap to the back of the helmet. Another snap went on one foot. Then I sewed him all together, filled with batting, with a blanket stitch.


The backdrop got hand-sewn star sequins and the other half of the snaps. Jax cracks up when we open the peek-a-boo window, and he says “Baby!” when he sees the photo. Hopefully soon he will recognize it is him.

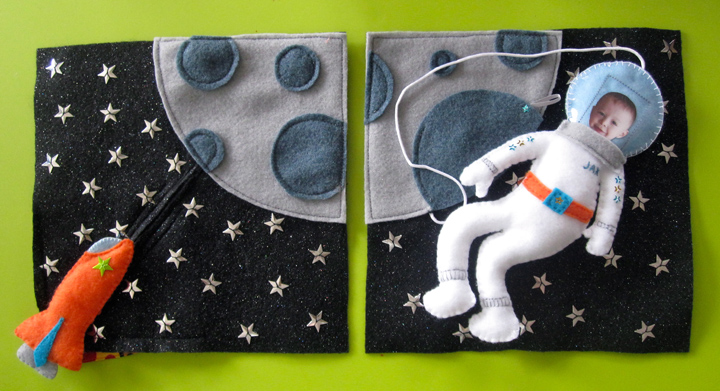
Here are the two space pages together. I could have lined up the craters, I decided I don’t mind since there will be space between the pages for the binder rings. What do you think? I have a zillion more ideas I plan to try to make before our plane ride to California in November, so stop back for more!

Link Party: The Idea Room

Sunday Souvenir: A Favorite Photo

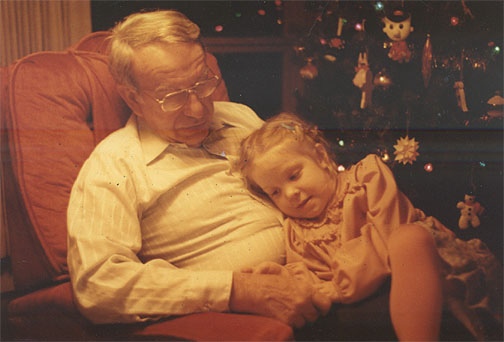
Just barely making it in time for Sunday Souvenir. The long weekend threw me off. So a simple post this time, of one of my favorite childhood photos. It is of my grandpa and I. How I loved to curl up on his lap and use his tummy as a pillow! I adored visiting them in Iowa. My grandpa will be 95 next month.

Do you have any photos from your childhood that give you the warm fuzzies every time you look at them?

Leave a comment if write a Sunday Souvenir and you’d like your link to be added!

Rocket Ship Quiet Book Pattern

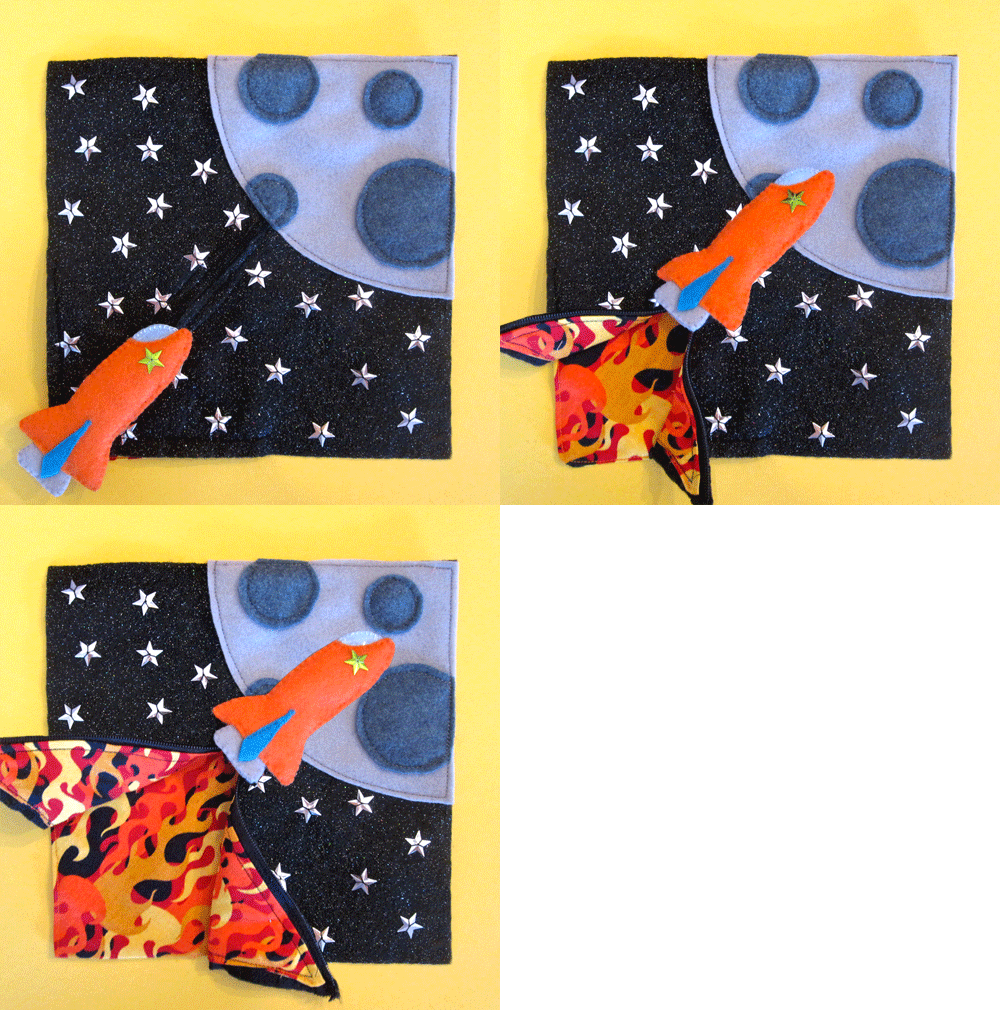
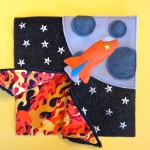
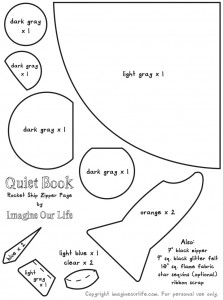
I have the first page of Jax’s Quiet Book finished! This page was inspired by Handmade by Jill’s rocket page and the fact that Jax’s grandpa was a rocket scientist (astrophysicist.) I created a pattern as I worked on this page, and I’m sharing it with you all for your personal use. If you use the pattern, I’d love to see it! Link back to me or leave a comment!
   

The page is designed to learn how to work zippers. There is a hand-sewn felt rocket ship attached to a zipper. When the rocket soars towards outer space, the zipper opens to reveal flames.

I did use star sequins in this design, but you can leave them out or replace them with felt or embroidery if you have a young baby who puts things in their mouth. Whatever works best for your situation! My other materials were: felt sheets (black glitter, dark gray, light gray, orange, turquoise and light blue), matching threads, batting/stuffing, a scrap of clear vinyl to make the window shiny, 7″ black zipper and a scrap of ribbon ton attach the rocket to the zipper pull.

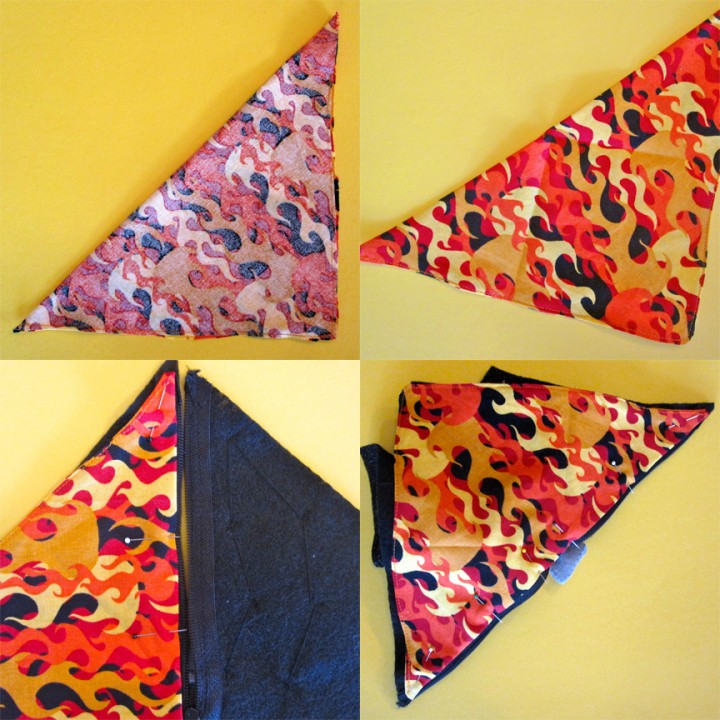
It’s all pretty self-explanatory from the pattern and photos, but the flames are a little tricky. Here’s what I did… I sewed the rocket together with some batting to make it dimensional. I decorated the moon with craters. To add the zipper, I pinned it face down onto the back of my black felt then sewed it with a zipper foot. On the front of the page, cut the felt open up the center of the zipper to make the opening. Sew down your decorated moon to cover the top of the zipper opening.

For the flames: Fold the 10″ square into a triangle, right sides facing, press and sew (leaving a hole to turn it right-side-out.) Note that my square was a little too small so my seam allowance is tiny and it came out wavy. Learn from my errors! Turn the triangle right-side-out and press the hole shut. Top stitch all the way around, closing the hole. The triangle will get folded like origami so that the two outer points meet down at the bottom point when the zipper is closed. I pressed mine like this before moving on. Unzip your zipper and pin one side-corner of the triangle to the back side of a lower corner of the page, leaving room so you don’t sew through the zipper. Repeat for the other side. You will have to fold up the page a bit to get both sides pinned, and there will be an inch or so crossing the zipper that can’t be pinned/sewed. It will be hidden behind your page once you put on a backing or another page (unless your zipper goes up really high! I tested mine with the pins before sewing.) Sew each side separately, then you’re done!

Details...

Jax is already really excited about the page, but he can’t practice unzipping until I put it into the book. I am halfway done the facing page – a spaceman – so check back this week for that free pattern!

What do you think of my first page?

Link-o-rama!

It’s been another crazy week here. Only one day with a sitter watching Jax, so working has been challenging. And let’s not even talk about chores! Are you ready for the weekend?

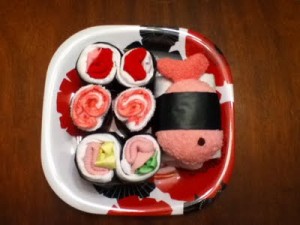
  • I’m in love with this baby shower sushi idea! A fun change from diaper cakes and onesie cupcakes.
  • This gorgeous lamp was made with a Sharpie paint marker!
  • These handmade envelopes would make giving gift cards much more personal.
  • I’ve been trying to sketch my quiet book ideas on-the-go with my finger and my iPhone. How amazing is this tablet?

Loving It – Quiet Books

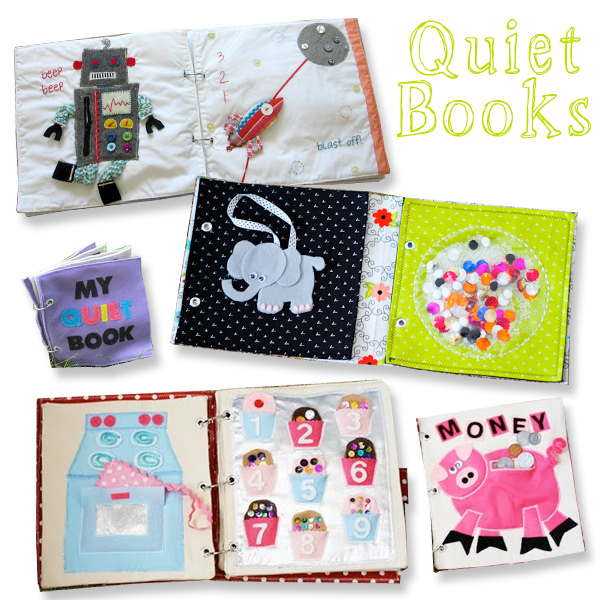
I have a new obsession! Quiet books! Quiet books are fabric books full of fun surprises and activities to keep toddlers and young children *quietly* entertained. With a 5+ hour plane flight coming up in November, this might be a great project! Any sewing fans want to create some pages for me? I have too many ideas and too little time for them all!

I am 100% doing a robot and space ship thanks to ideas by Handmade by Jill. I love the glitter pouch here, and the idea of attaching an animal with a ribbon that baby can velcro on and off. Cupcakes and an oven! Simple and sweet, bound with grommets. Check out my Pinterest board for more inspiration.

I think I’ll make one with 9″ x 9″ pages (felt comes in 9″ x 12″ sheets.) Felt pages can be exactly that, fabric pages will need a .5″ seam allowance all around. Button holes for binder rings once I sew two pages together. Then a fabric cover with handles and a closure strap.

If you’d like to create a page for Jax, let me know! This is going to be a fun project that can use sheets of felt and fat quarters of fabric.

Have you made a quiet book before? I’d love to see!

Edited to add: I’ve been busy! Check out all my Quiet Book pages with free patterns here!

Toddler Shoes

How much do you spend on toddler shoes? I always want to spend the least amount possible when it comes to clothes for Jax – he grows out of them so fast! But, is it a good idea to go cheap when it comes to shoes?

I am just starting to build a fall wardrobe for Jax (obviously nothing from last year when he was 6 – 10 months old fits him now) and got lucky with some good shoes from the thrift store for only $2.50 a pair. When looking at new shoes in the stores, there are certainly cheaper options for $15 – $20, but for little feet still getting used to walking and running, are they a good idea? You want them to be built in a way that will support their feet in the healthiest way possible. But I don’t want to spent $46 dollars!

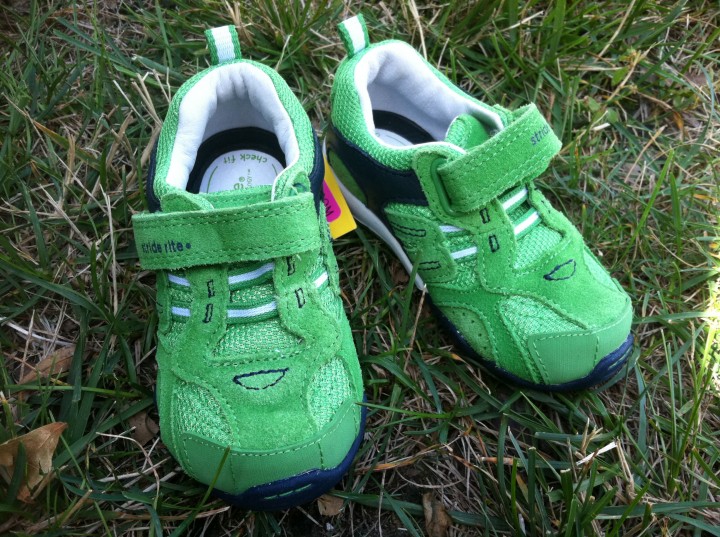
I was in Nordstroms with Jax (we park there at the mall because they have the best bathroom with a nursing room) and paused to check out the sale rack of shoes. I saw these green sneakers a size up from where he is now and couldn’t put them down. I took Jax out of the carrier and let him run around in them. They stay on but with tons of room and actually fit his thick feet. And: So. Stinking. Cute. And $20 off! I always check online on my phone before buying things, and everyone had them for $45 or $46.

What ultimately made it impossible for me to put them back on the shelf was the fact that Jax’s Halloween costume will be head-to-toe green. And I plan to make the top half a hoodie he can wear as a coat past Halloween. I’m so in love with them! It makes the fact that his hand-me-down orange sneakers are getting too small a little easier to bear.

So, while it felt painful to buy shoes for $26, I do realize they are a great deal, really good for his feet, and perfect for both his costume and wearing every day. But I’m cheap and don’t like to spend that much on *my* shoes. When I do splurge, I end up with good shoes that last a long time. I need to find that balance between quality and value.

What do you think, dear internet? How much are you willing to spend on your little ones’ shoes? Any favorite pairs?

Thrift Store Gems

We are making weekly trips to the thrift store to start building a library for Jax. I plan to make some sort of reading corner for him, most likely using picture rails or spice racks from Ikea. (Just need to convince my husband to make the long drive there!)

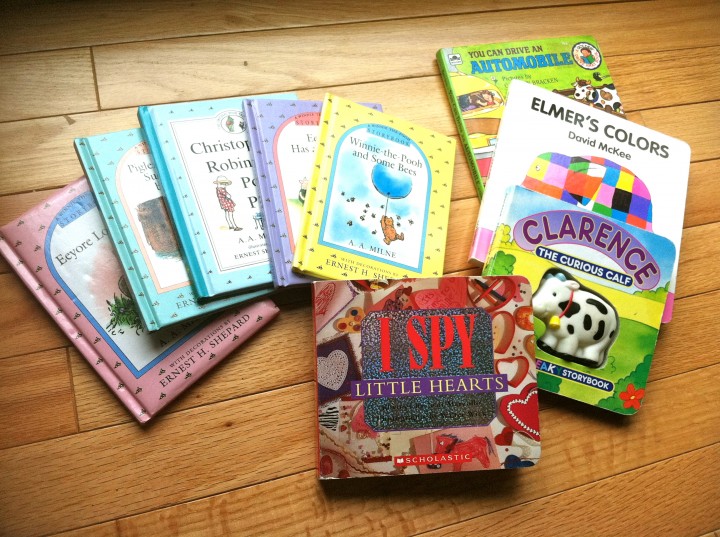
Here is what we got for $7.50:

Five small Winnie-The-Pooh books, I Spy Little Hearts, Elmer’s Colors, Clarence the Curious Calf (that squeaks!) and You Can Drive an Automobile.

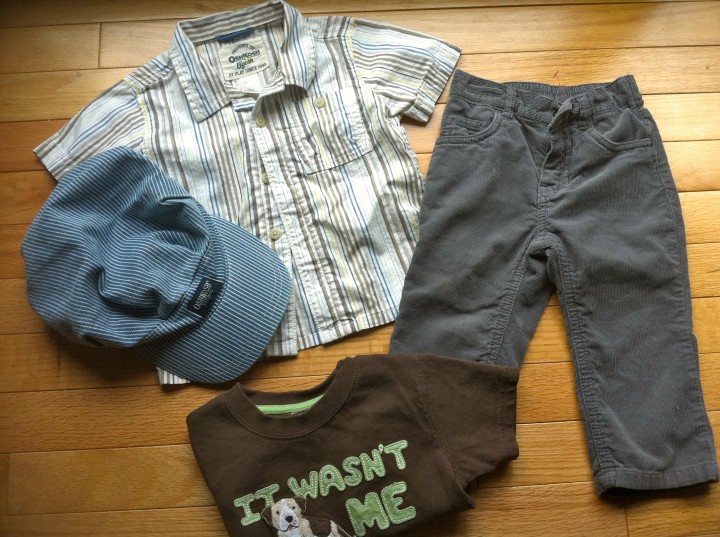
We got lucky with his clothing size this time. We got: an OshKosh train engineer hat and button down, Gymboree t-shirt and Cherokee cords (in gray!)

While I was there, I showed the shopkeeper a photo of how his kitchen turned out. She was shocked at the transformation. She took my contact information in case the oven door should turn up, but it’s unlikely.