Tag Archives: Free

Sock Matching Quiet Book Page

Would you like to sew and sell items made from this pattern? Commercial licenses are available!
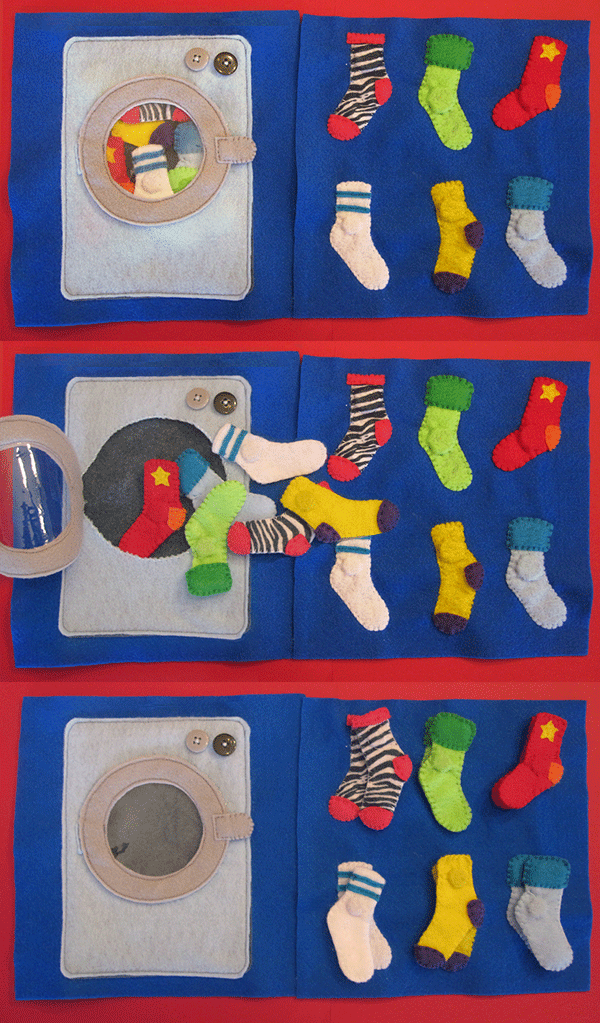
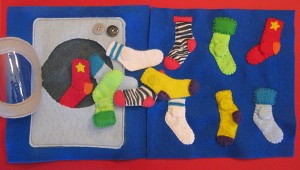
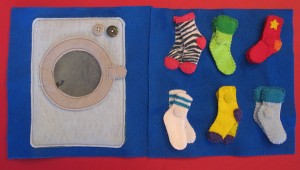
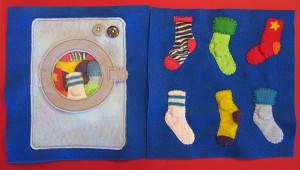
Another quiet book page is ready for Jax’s book! When I was doing the laundry this week, I managed to pull 6 of Jax’s tiny socks out of the dryer before I found one with a match. That inspired this page!

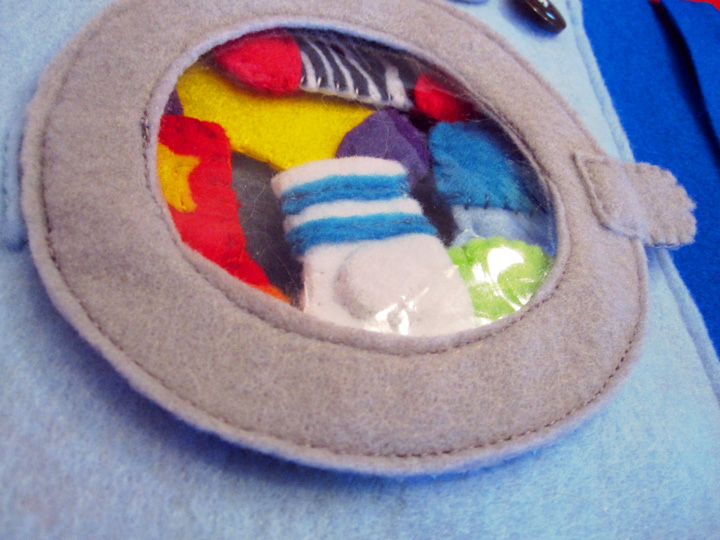
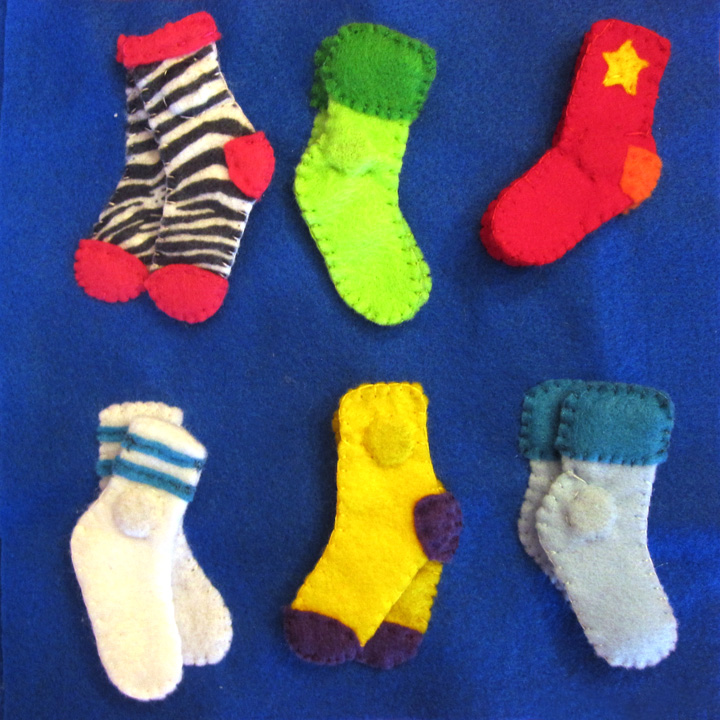
This page has a dryer with a clear door closed with a snap. Inside there are 6 socks without their other halves. The opposite page has the remaining socks. You match them together and the stick with magnets.
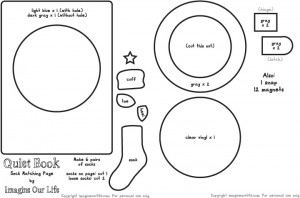
     

My materials were: two 9″ blue felt squares, felt (in light blue, gray and charcoal for the dryer, then assorted scraps for the socks), clear vinyl, a snap, 2 buttons and 12 magnets. I had to use 2 different sizes as I didn’t have enough small ones. I put those in the loose socks and the heavier ones on the page. Either size worked fine. You can find them in the craft store.

I started by laying the dryer back and front together on the page and machine stitching around the outside. I pieced the door together by layering the clear vinyl between the two door rings. I also stuck the double-layer door hinge in the left side. I sewed twice around the ring. I placed the door in position and tucked the hinge into the pocket (trim it if it doesn’t fit with the door in the right place.) I hand-sewed the hinge down through all the layers of the page. Using 5 strands of embroidery floss, I whip stitched around the hole of the dryer to fortify it a bit. The latch got a snap on one piece, then I sewed it by hand to the right side of the door. I lined the other half of the snap under it and stitched it on. I added buttons to look like the controls on the dryer.
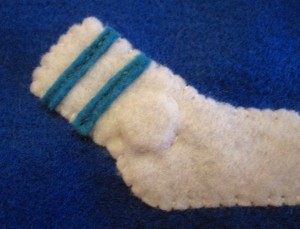
I had fun with the socks. You need to cut three of everything for each sock design: one layer for the sock appliquéd to the page and to sides for the loose socks. My pattern includes pieces to make a cuff and colored toes and heels. I also included a little star. My favorite socks are the white and aqua tube socks and the zebra print with hot pink accents! When you sew them together, place a magnet inside and stick a ring around it so it doesn’t shift.

Jax was fascinated as he watched me sew the little socks. He is big into socks and shoes right now. When it was all done, he begged to try it out. I was surprised how fast my little 19-month-old understood what to do. He just started pulling the socks out of the dryer and sticking them to their match! Go Jax

For more free quiet book patterns, go here! If you use this pattern, please add a comment or link to me. I really would love to see your version! Go crazy with the socks!

Penguin & Igloo Quiet Book Page

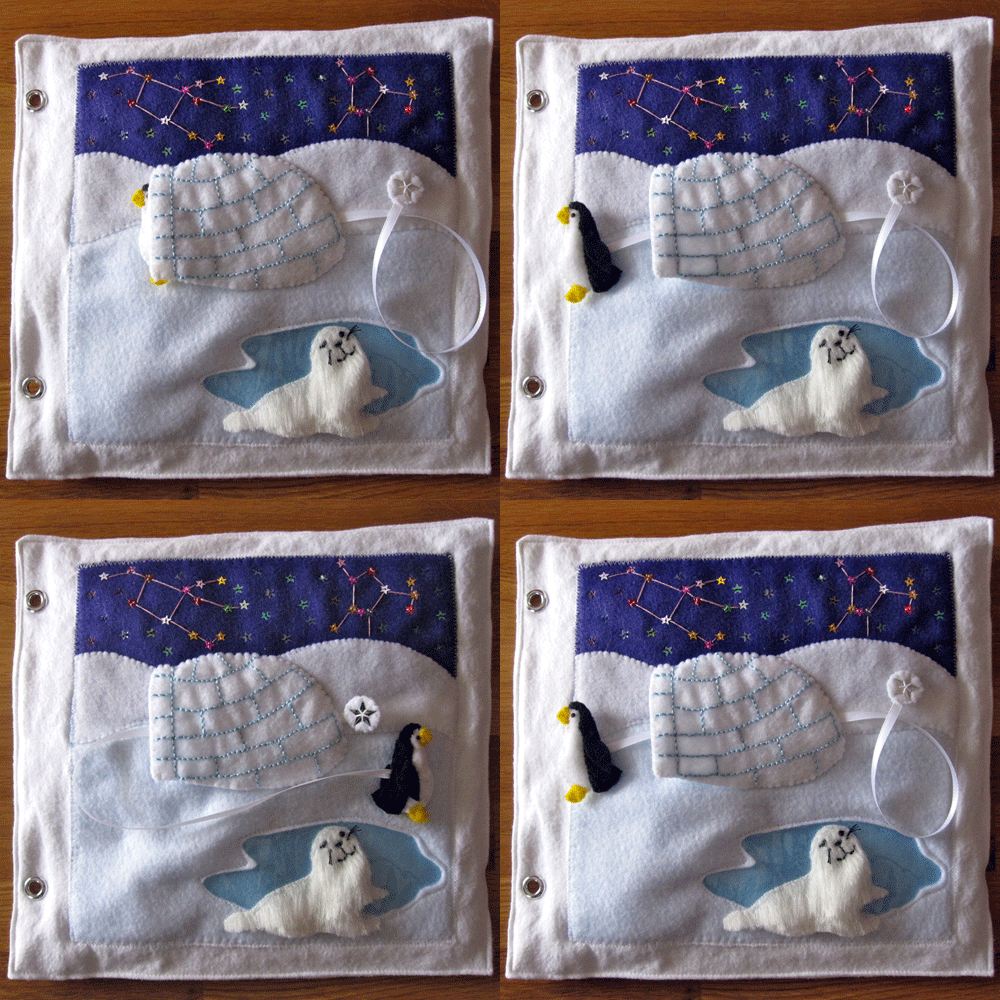
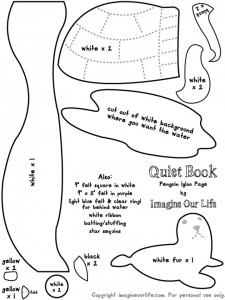
Welcome to Antarctica! This is the next quiet book page for Jax’s book! As you can see, I’ve finally started sewing some actual book pages. It is a bit labor-intensive, so I only have 2 double-sided pages done so far. I decided to be thrifty and use plain white fleece with some batting inside and 2 grommets per page. I’d considered using themed fabrics that matched each page, but the cost would be too high.

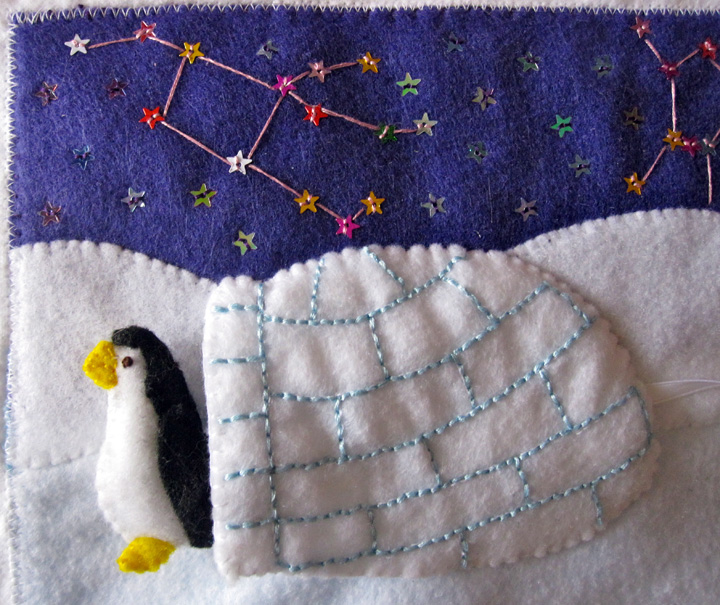
The page features a stuffed penguin who comes out of his igloo attached to a ribbon. You can pull the ribbon to make him go back into his igloo. A furry baby seal is smiling by a frozen pool. You can see two constellations in the sky (Not accurately placed, I know. But, penguins don’t live in igloos either!)


My materials were: a 9″ white felt square (if your pages are a different size, adjust the white hill and purple sky pieces to match your page width), purple felt for the sky, felt (in white, sky blue, black and yellow), clear vinyl, white fur (I used this), batting/stuffing, white ribbon, star sequins and floss/thread to match.

I started with my white square and used the water shape to cut a hole for the pool. then I layered some clear vinyl over light blue felt and put those behind the opening (I made my light blue cover the page from the hills down so it made the white ground slightly blue.) Using a machine, I stitched all the way around the pool.

The only other thing I did on the machine (beside sew the actual book page) is stitch white-on-white guides for all the lines on the igloo. That made it easier for me to hand-embroider straight lines to show the ice blocks. I used all 6 strands of light blue embroidery floss (I usually use 2 strands for everything.) When all the igloo embroidery was done, I sewed the felt backing piece on to hide the back of the stitching. I then sewed a rectangle of purple to the top of the page to create a night sky, then layered the white, snowy hills on top.

To make Mr Penguin, I made a French knot in brown on each of the white pieces for his eyes. I then sewed the two pieces together with some batting and his feet to make a little naked penguin. I made sure one end of a white ribbon was coming out of his back. I folded the beak over his nose and sewed that on. I layered the two halves of his black “suit” over his back and stitched them on. The last step was sewing the tops of his flippers onto each side. To make a little pull tab for his ribbon, I sandwiched the other end of it between two felt circles and decorated it with star sequins. You could just embroider a star or snowflake.

I cut the baby seal out of white fur then shook off any loose hairs. I gave him a little haircut to help show of his shape and shorten his face fur. His face has a satin stitch nose, straight stitch smile and eyes made from one straight stitch in the outer corner and a French knot. To make whiskers, I knotted a few strands of thread behind his cheeks then again in the front, then cut it to size. I stitched baby seal directly to the pool.


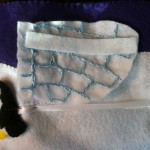
To make the slider ribbon, I took a long piece of scrap felt and  cut it to the width of my igloo. (The picture shows my igloo before I sewed the backing piece on. I ended up moving my strip to the halfway point of the igloo, so it ended up a little shorter than shown.) Pin your ribbon to the page (no pins where the felt tube will be!) then sew the strip of felt like a tube over top of it. Remove the pins then sew your igloo in place. I sewed from the top of the door to where the ribbon comes out of the back, then sewed from below that ribobon opening to halfway across the bottom. This left a flap of igloo that can lift up to let Mr Penguin in and out easier.

I decorated my night sky with star sequins, some of which I sewing into southern hemisphere constellations. You can copy the placement of mine from my photos, or even design your own (your baby’s name, perhaps?) If you aren’t comfortable using sequins, you could use felt or just embroider stars.

What do you think of it?

For more free quiet book patterns, go here! If you use this pattern, please add a comment or link to me. I really would love to see your version!

Starbucks Quiet Book Page

What’s a quiet book? It’s a (generally handmade) fabric book full of learning activities. It’s meant to be played with in situations that require children to be still and quiet, like plane rides, church, waiting rooms, etc… They take a lot of time, love and effort to make, but the end result is a cherished family heirloom!

Page 5 in Jax’s quiet book is in honor of our love for Starbucks. Being a work-from-home mom, I only talk to my coworkers by phone and IM. If I have no errands to run, I can go days without seeing an adult besides my husband. So our local Starbucks became a place to take a break and interact with others. It became a beloved routine for baby and I, and he loves all of his “girlfriend” baristas and sharing (or not sharing!) pumpkin bread with me.


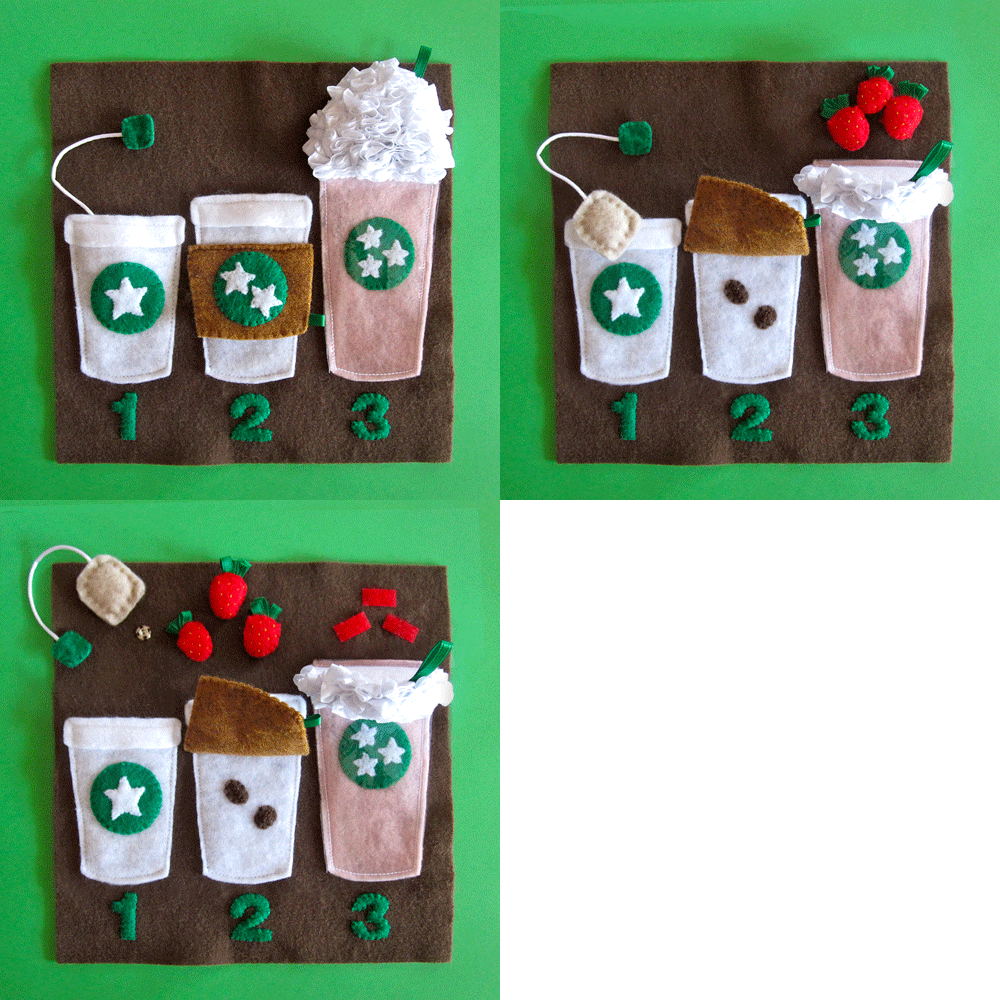
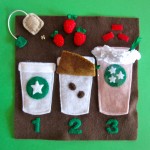
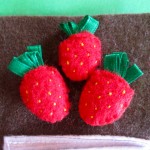
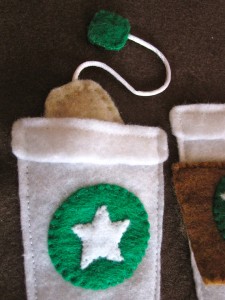
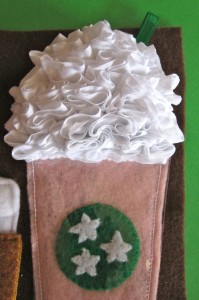
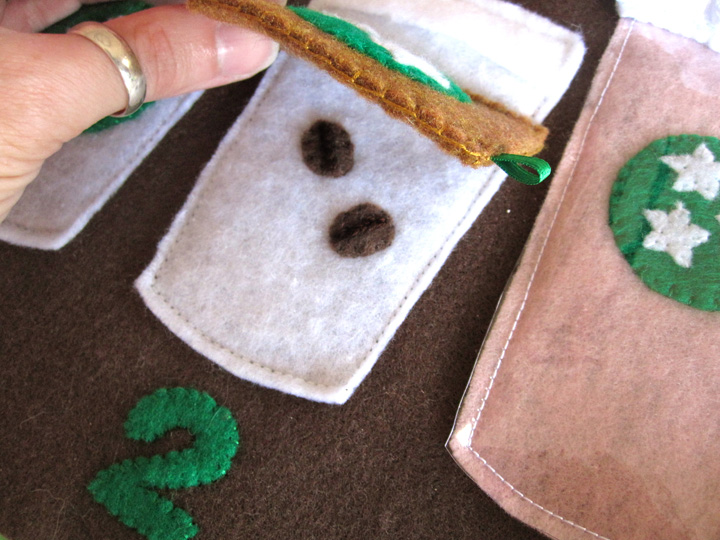
This page has features the numbers 1 – 3, as Jax has started counting along with me. Three is his favorite number to say. It also practices manual dexterity. For number 1, you can pull the one tea bag out of the cup and unsnap it from the page. For number 2, you can lift the cup sleeve to find the two coffee beans. For number 3, you can pull down the whipped cream to find 3 strawberries and pull them off the velcro.

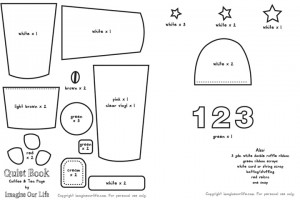
My materials were: a brown felt square background, felt (white, green, pink, light brown, brown, cream and red), matching embroidery floss (plus mustard yellow for strawberry seeds), white machine thread, clear vinyl, white double ruffle ribbon, green satin ribbon, batting, a snap and red velcro.

To make the strawberries, I stitched tiny yellow seeds on each piece. I took 4″ of green ribbon and folded it into 4 loops. I made a stitch at the bottom then fanned it out. That got layered with batting into the two sides of each strawberry (one side with velcro) that I stitched together with a blanket stitch.

I stitched the stars on to the green circles, then stitched circle 1 on to the first cup, circle two onto a sleeve piece and circle three onto the pink frapaccino piece. To finish cup 1, I stitched the lid on then machine-sewed three sides down onto the background, leaving the top open to make a pocket. For cup 2, I blanket stitched the two sides of the sleeve together with a little loop of green ribbon to help Jax spot the flap. I stitched the two coffee beans down onto the cup. I machine-sewed the lid on then the cup down onto the background and the top of the sleeve flap in place. For cup 3, I machine sewed the pink cup and clear vinyl down onto the background. I folded the double ruffle ribbon lengthwise as I hand stitched it in swirls to one of the whipped cream felt pieces. When that was done, I stitched the backing on and added a ribbon loop straw. I sewed the bottom of the whipped cream on to the cup with the machine.


The tea bag was hand-stitched with a slightly smaller piece of batting and a piece of white satin cord layered in. On the other end of the cord I sewed the two halves of the tag, one side with a snap. The other part of the snap went on the page above the first cup. I finished up by putting red velcro down under the whipped cream to hold the strawberries. I’ll be adding some brown string to the strawberries so they don’t get lost on the plane.

I’m pretty much in love with this page, and Jax is too. He adores the tiny strawberries and wants to clutch them in his little hands. he lifts the flaps and says “boo!” I think he’ll enjoy playing with it when the book it all sewn together.

For more free quiet book patterns, go here! If you use this pattern, please add a comment or link to me. I really would love to see your version!

Astronaut Quiet Book Page

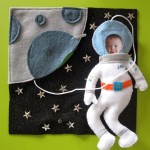
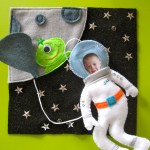
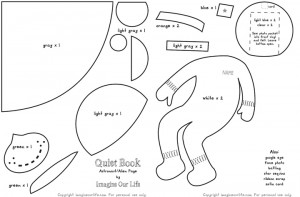
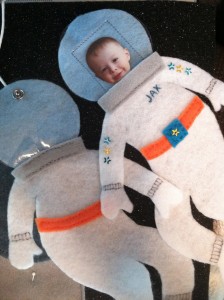
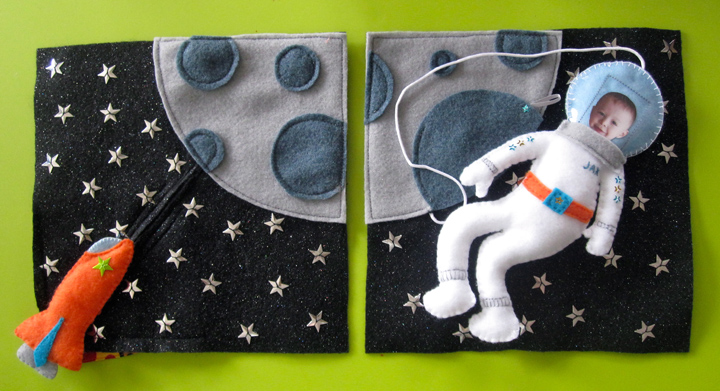
Here is the second space page in Jax’s quiet book. I think it came out super cute! I created a pattern as I worked on this page, and I’m sharing it with you all for your personal use. If you use the pattern, I’d love to see your version! Link back to me or leave a comment!


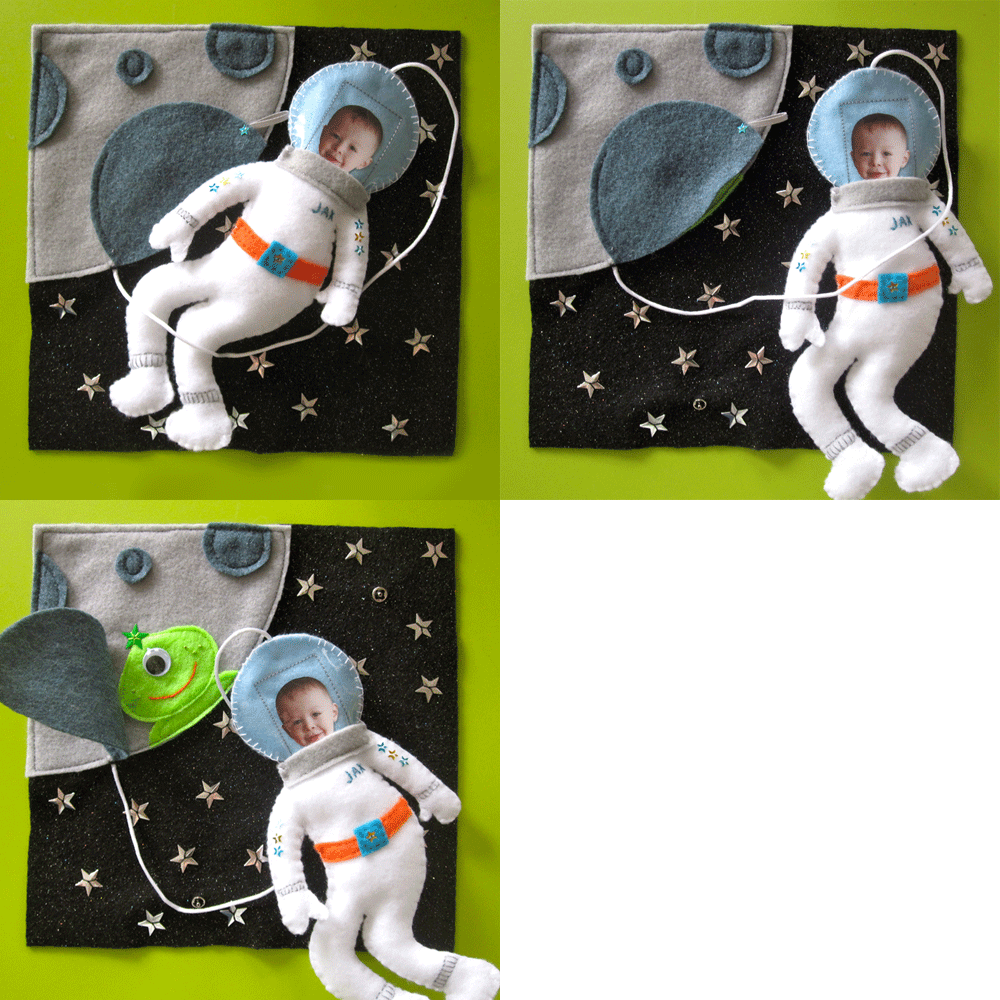
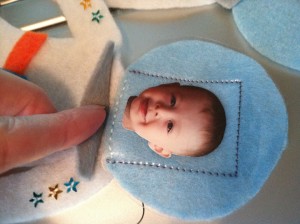
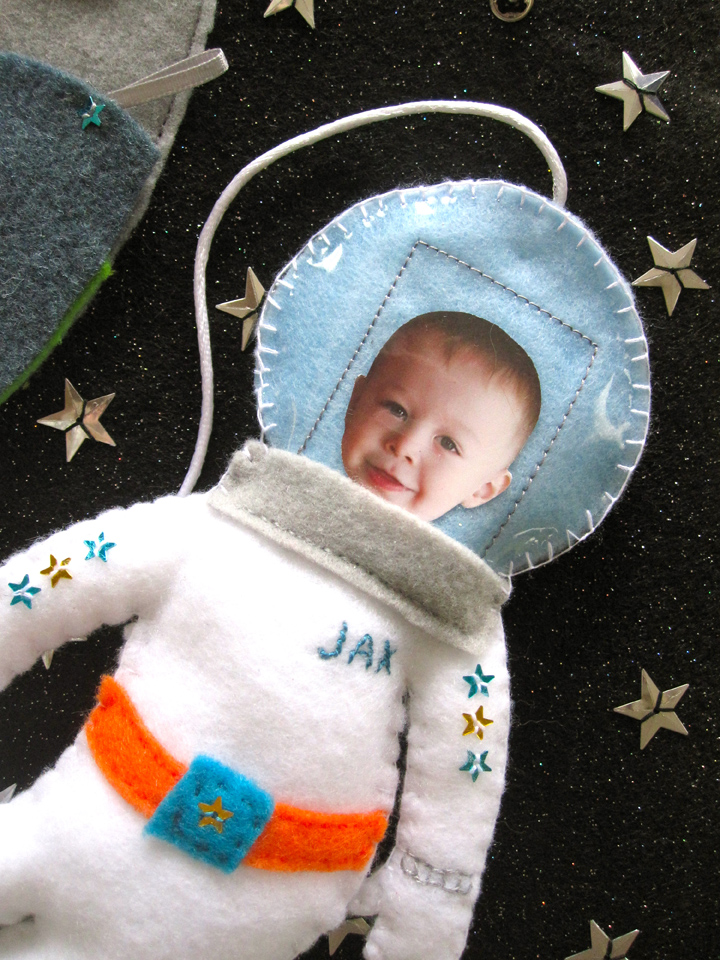
This page has a peek-a-boo alien and an astronaut that can snap on and off the page. The face has a spot for a 1.25″ x 1.5″ face photo. I plan to make my book pretty thick, with a 2″ spine and possibly a zippered cover. You can omit the batting/stuffing in the astronaut and just sew the two sides together if you want yours thinner.

I did use star sequins in this design, but you can leave them out or replace them with felt or embroidery if you have a young baby who puts things in their mouth. Whatever works best for your situation! My other materials were: felt sheets (black glitter, dark gray, light gray, lime green, white, turquoise and light blue), matching threads, batting/stuffing, clear vinyl to make the helmet shiny, white satin cord from my beading stash and a scrap of ribbon to use on the peek-a-boo door.

Once I cut everything you, I machine-sewed the craters to the moon, sewing only the left side of the large on to make a hinge (I added a ribbon loop and sequins to make a handle.) I used a stem stitch in orange to sew the alien’s mouth, French knots for freckles and a self-stick google eye. I machine-sewed the alien down behind the door and sewed the moon to the backdrop. You can do it easier by just sewing the door on last, though it wasn’t any trouble for me. I left a small gap under the moon and hand stitched one knotted end of the satin cord underneath. I added a star hand-sewn to the alien’s head.


Next I decorated the two sides of the astronaut. Both got straight stitched ribbing at the wrists and ankles and an orange belt. The front got a belt buckle, Jax’s name in stem stitch and some stars. I did a line of stitching on each side at the neck to attach the blue helmet. I placed a helmet vinyl piece over the front and used the sewing machine to sew a rectangle with an open bottom to make a photo pocket. You can use lighter thread if you want to hide yours. The the neck piece was hand-stitched on the bottom only to make a flap to hold the photo in. The back of the astronaut’s helmet got the vinyl attached at the neck with stitching on both the top and bottom of the neck piece. With one end of the cord on the wrong side, I sewed a snap to the back of the helmet. Another snap went on one foot. Then I sewed him all together, filled with batting, with a blanket stitch.


The backdrop got hand-sewn star sequins and the other half of the snaps. Jax cracks up when we open the peek-a-boo window, and he says “Baby!” when he sees the photo. Hopefully soon he will recognize it is him.

Here are the two space pages together. I could have lined up the craters, I decided I don’t mind since there will be space between the pages for the binder rings. What do you think? I have a zillion more ideas I plan to try to make before our plane ride to California in November, so stop back for more!

Link Party: The Idea Room

Rocket Ship Quiet Book Pattern

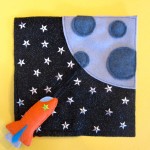
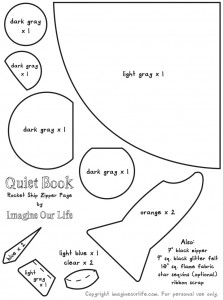
I have the first page of Jax’s Quiet Book finished! This page was inspired by Handmade by Jill’s rocket page and the fact that Jax’s grandpa was a rocket scientist (astrophysicist.) I created a pattern as I worked on this page, and I’m sharing it with you all for your personal use. If you use the pattern, I’d love to see it! Link back to me or leave a comment!


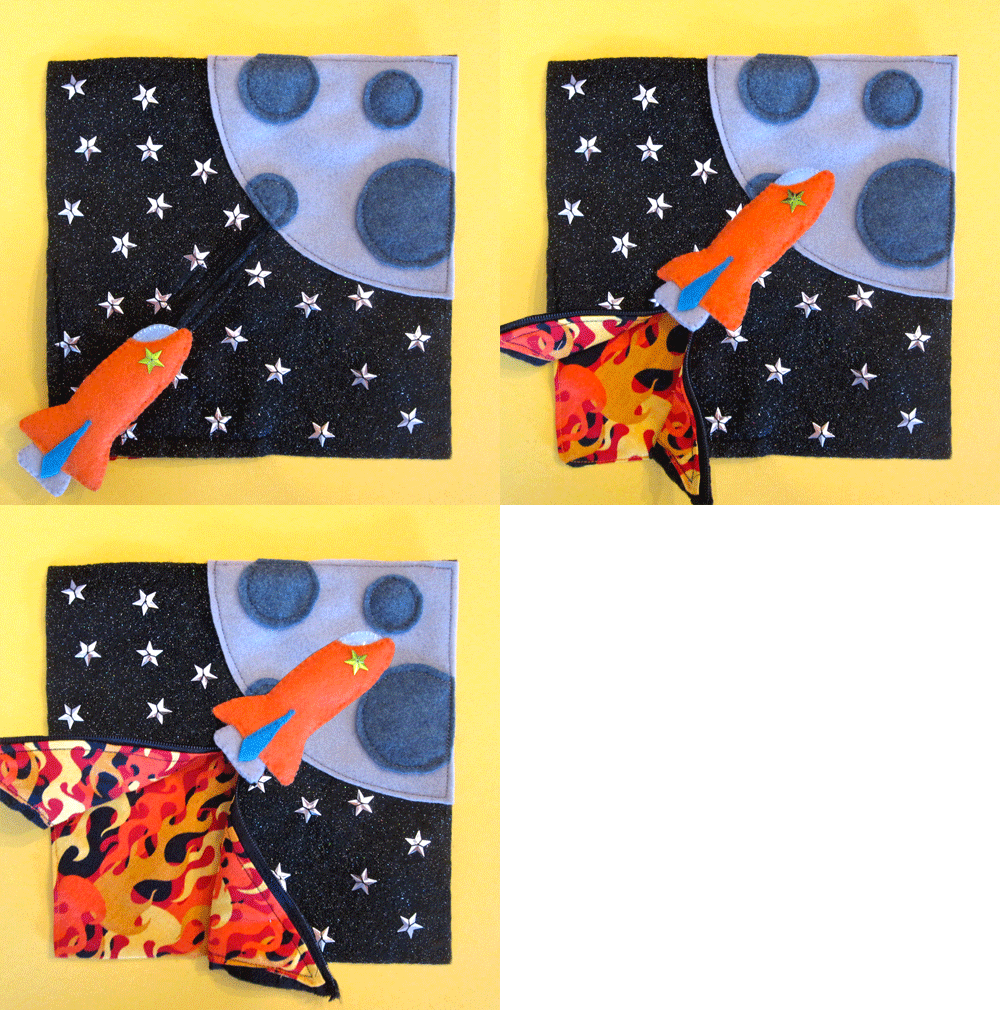
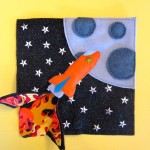
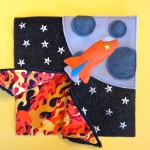
The page is designed to learn how to work zippers. There is a hand-sewn felt rocket ship attached to a zipper. When the rocket soars towards outer space, the zipper opens to reveal flames.

I did use star sequins in this design, but you can leave them out or replace them with felt or embroidery if you have a young baby who puts things in their mouth. Whatever works best for your situation! My other materials were: felt sheets (black glitter, dark gray, light gray, orange, turquoise and light blue), matching threads, batting/stuffing, a scrap of clear vinyl to make the window shiny, 7″ black zipper and a scrap of ribbon ton attach the rocket to the zipper pull.

It’s all pretty self-explanatory from the pattern and photos, but the flames are a little tricky. Here’s what I did… I sewed the rocket together with some batting to make it dimensional. I decorated the moon with craters. To add the zipper, I pinned it face down onto the back of my black felt then sewed it with a zipper foot. On the front of the page, cut the felt open up the center of the zipper to make the opening. Sew down your decorated moon to cover the top of the zipper opening.

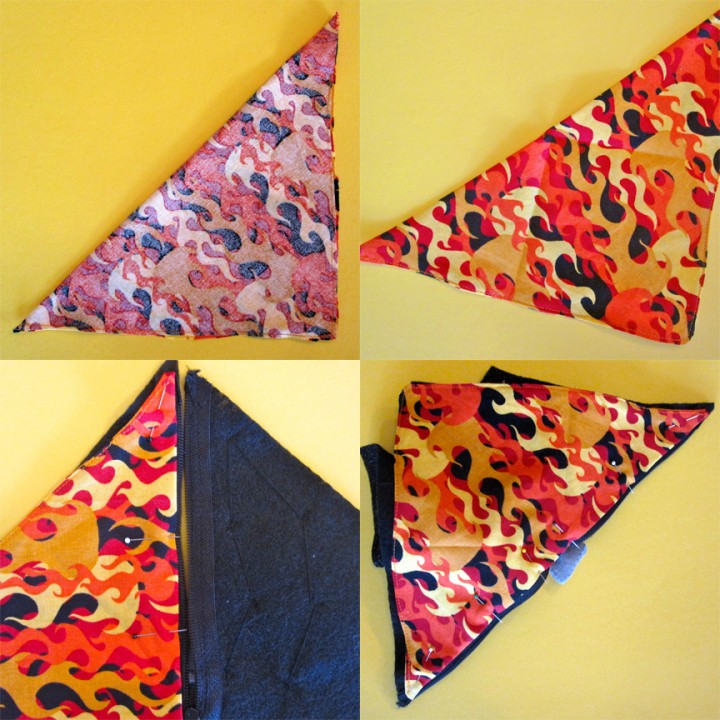
For the flames: Fold the 10″ square into a triangle, right sides facing, press and sew (leaving a hole to turn it right-side-out.) Note that my square was a little too small so my seam allowance is tiny and it came out wavy. Learn from my errors! Turn the triangle right-side-out and press the hole shut. Top stitch all the way around, closing the hole. The triangle will get folded like origami so that the two outer points meet down at the bottom point when the zipper is closed. I pressed mine like this before moving on. Unzip your zipper and pin one side-corner of the triangle to the back side of a lower corner of the page, leaving room so you don’t sew through the zipper. Repeat for the other side. You will have to fold up the page a bit to get both sides pinned, and there will be an inch or so crossing the zipper that can’t be pinned/sewed. It will be hidden behind your page once you put on a backing or another page (unless your zipper goes up really high! I tested mine with the pins before sewing.) Sew each side separately, then you’re done!
Details...

Jax is already really excited about the page, but he can’t practice unzipping until I put it into the book. I am halfway done the facing page – a spaceman – so check back this week for that free pattern!

What do you think of my first page?

Grand Opening Giveaway!

To celebrate the new blog, we are having a giveaway! Most likely, the prize with be a surprise pair of earrings or bracelet handmade by me in your choice of color(s). Perhaps we’ll throw in a drawing by Jax! You can vote on or suggest a prize in our Facebook poll.

To enter, “like” our page on Facebook, then leave a comment below. You must include a valid email address by 6pm on Friday 6/24. The winner will be chosen randomly Friday evening. (We made it to 5 entries, but we added a few more hours to enter!) All my real life friends are welcome to enter!