Tag Archives: Patterns

Mini Advent Ornaments Set Four

Mini Advent Ornaments Set Four

I can finally mark a major sewing project off my list holiday season! It was one that was chosen by my readers in our Facebook page: a felt Christmas tree play set! I hope you’ve been sewing along with me as I’ve shared the toddler-friendly tree pattern and tutorial and the first, three sets with you. But it’s not too late to join in! These mini ornaments bring a whole lot of holiday cheer and work up fast. Choose a few to stick in someone’s stocking or tie to a present as a gift tag!

Mini Advent Ornaments Set Four

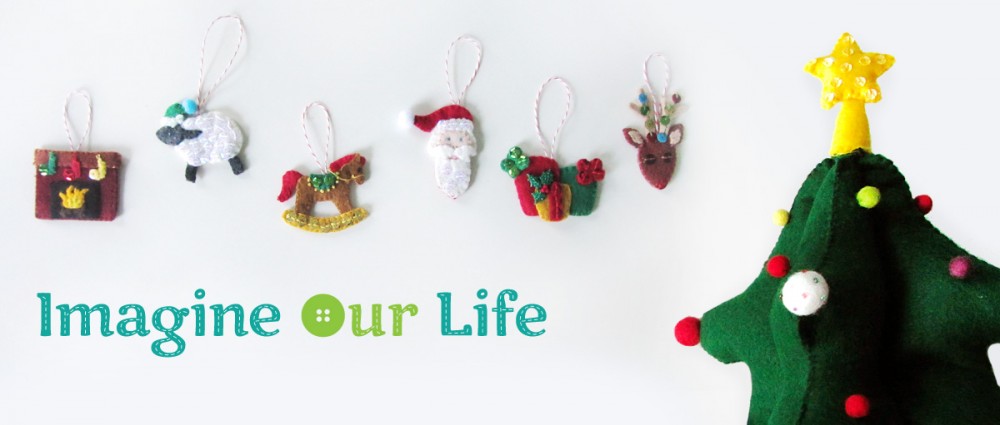
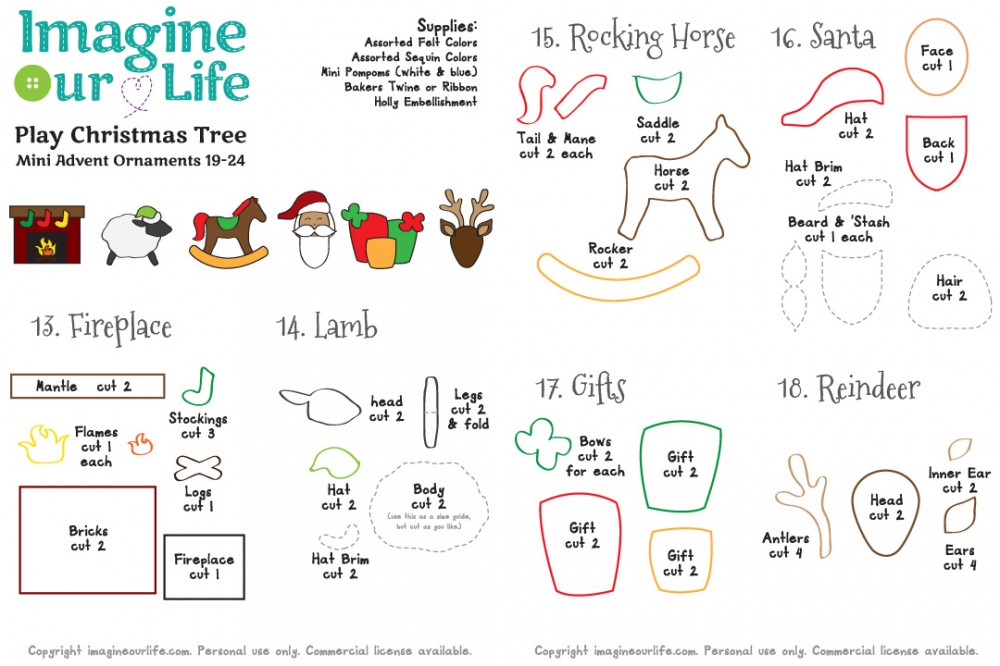
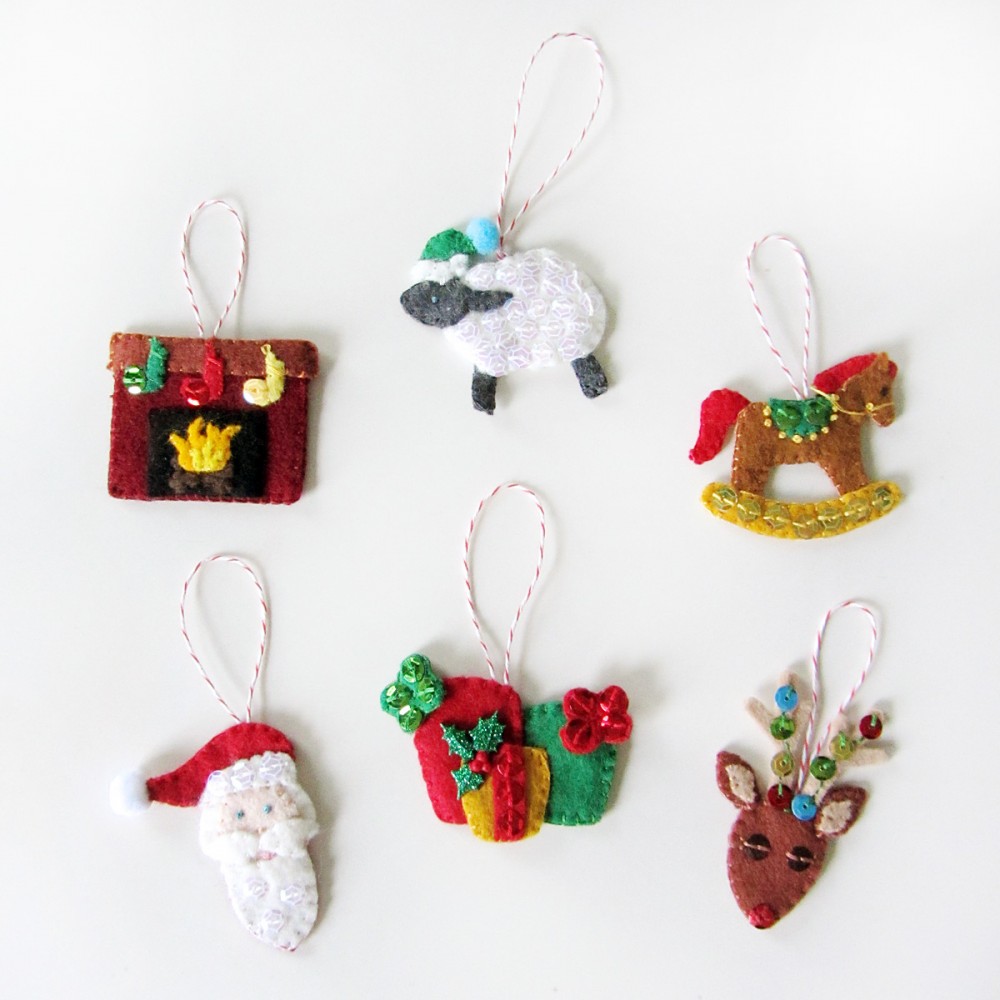
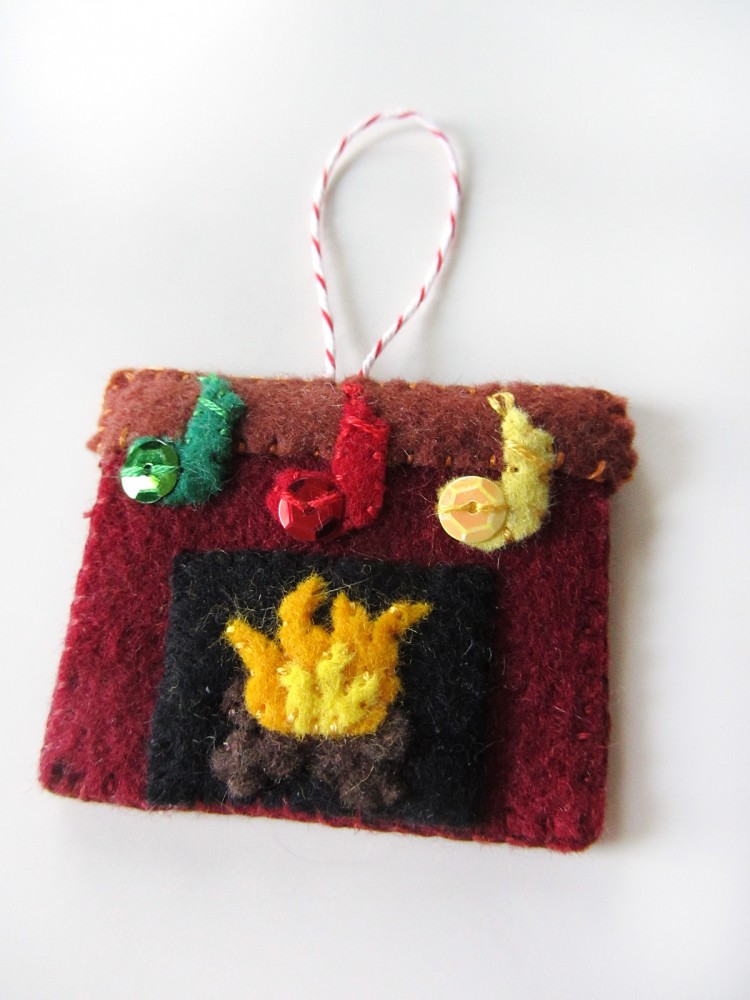
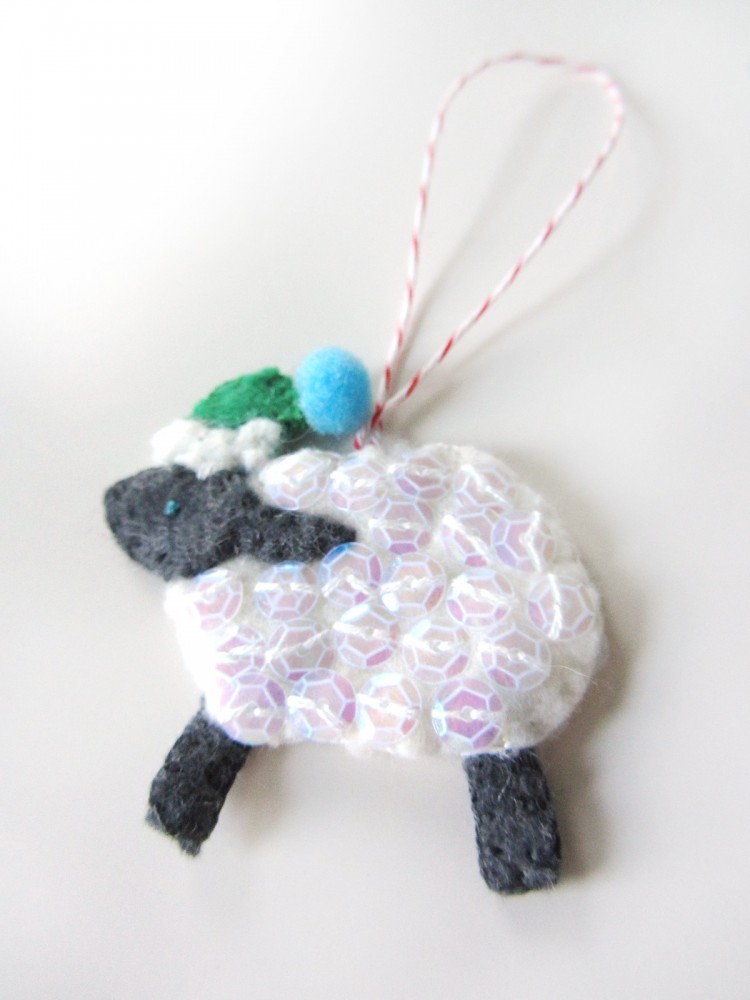
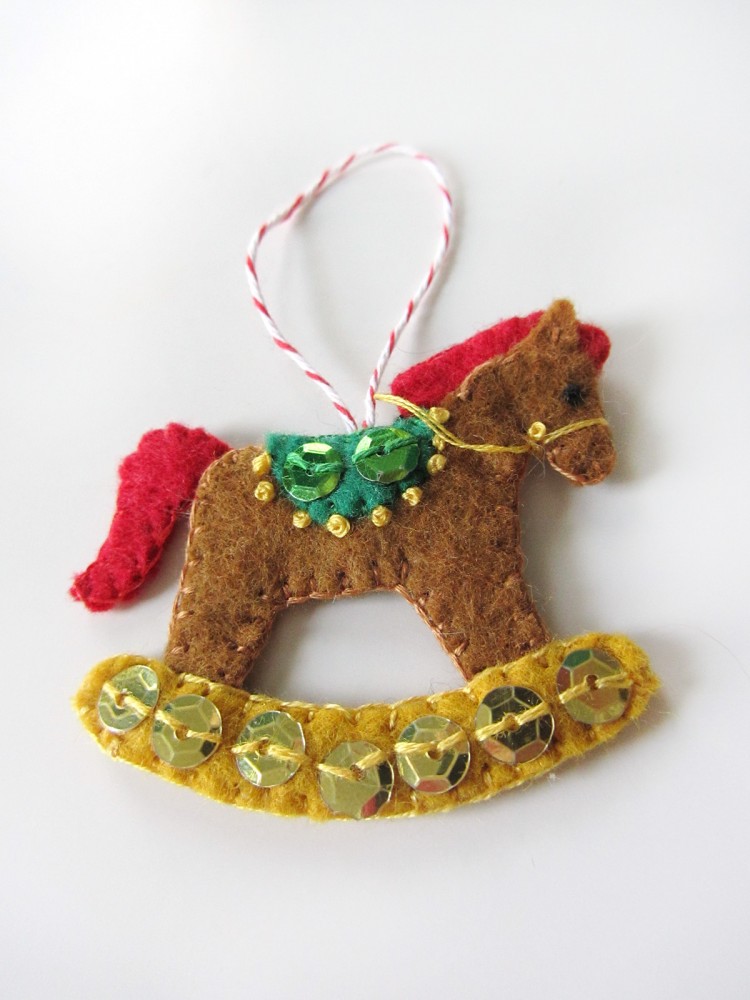
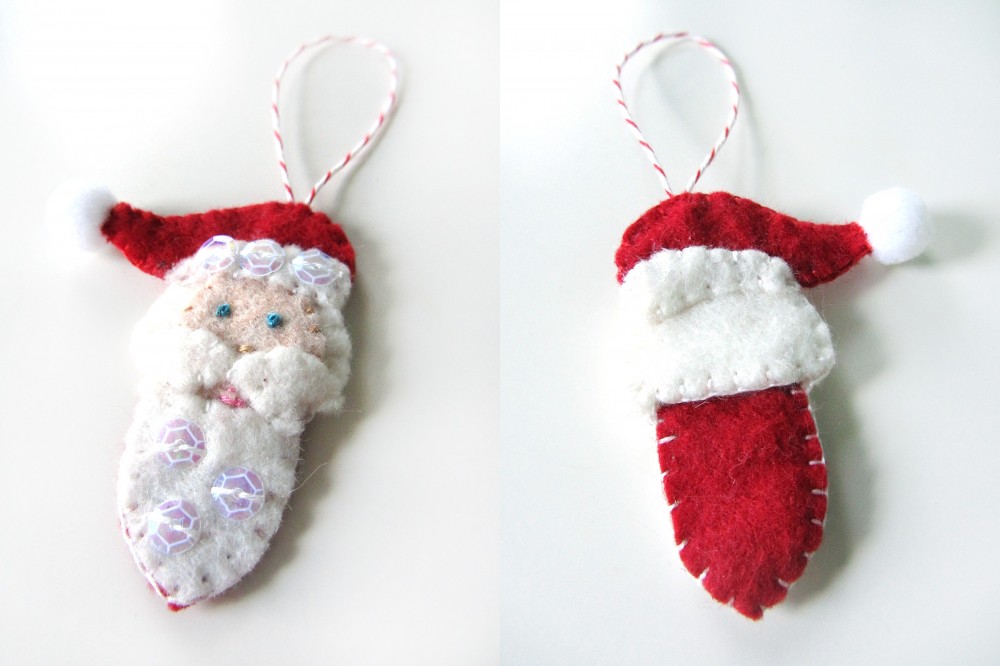
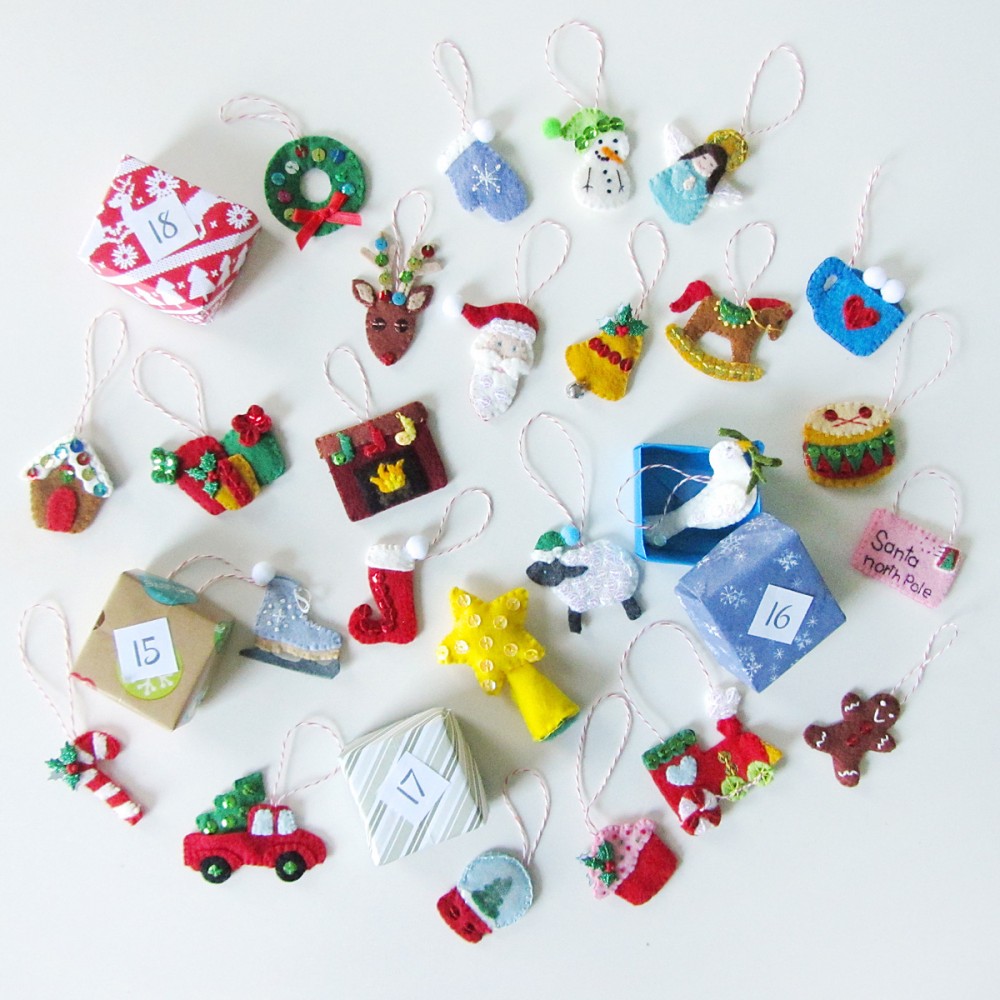
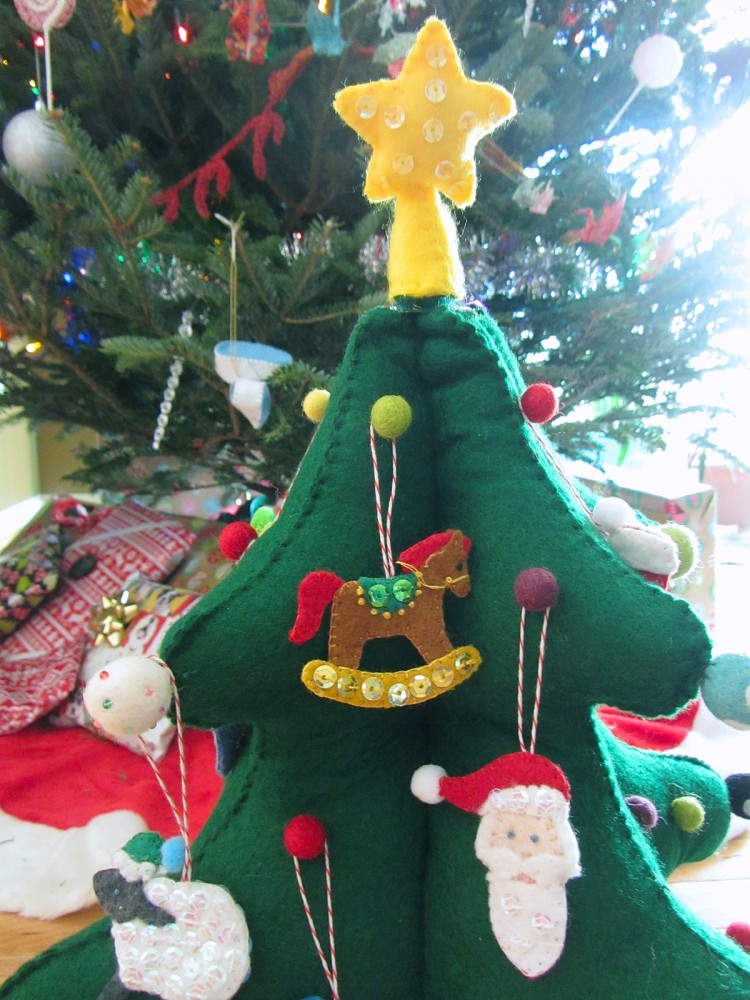
I designed 24 ornaments, and I’ve been giving Jax one to unwrap every day leading up to Christmas. I shared the ornaments in batches of 6. Ornaments 19-24 are: a fireplace, a lamb, a rocking horse, Santa, gifts and a reindeer.

To see all the posts in this series, click here.

Mini Advent Ornaments Set Four

What I Used:

Mini Advent Ornaments Set Four

For all of the ornaments: I cut pieces of baker’s twine, doubled it over and tied a knot in the ends. When stitching the tops of the ornaments together, I made sure the knot of the twine loop was inside. I also made sure to stitch through the knot to secure the loop.

Mini Advent Ornaments Set Four

19. Fireplace

Fore the fireplace, I tacked down with glue the logs and flames to the black fireplace area, then stitched everything down. I stitched the black area to the bottom center of the front of the bricks, then stitched the front mantle on along its bottom. I glued down three stockings, then sewed them down with a sequin on the toe of each. I did a long stitch at the top of each for a cuff, and a single loop of a lazy daisy stitch at the top corner. On the back, I stitched the back mantle on along the bottom, then stitched the front and back together, catching a loop of twine at the top.

Mini Advent Ornaments Set Four

20. Lamb

Oh, this sweet little lamb! She is quite simple, but you can believe me that all those crystal sequins are a labor of love. I started by gluing the heads onto each body piece, then sewing sequins onto the whole thing. (I provided a basic body shape in the pattern, but I found it worked best to trim the body into wooly bumps freehand.) I took the legs and folded them in half, gluing them down then stitching all around. I stitched the body of the sheep together with the twine loop at the top and the legs at the bottom. I stitched the two sides of her face together. I glued the hat brims onto the hat sides, then layered them around her head and sewed them together and onto her head.

Mini Advent Ornaments Set Four

21. Rocking Horse

I started this cute rocking horse by gluing the saddle on, then sewing it. I added two green sequins on each side, then bordered it with French knots. I gave him black French knot eyes. I sewed the two sides of the main and tail together then glued them in between the two finished sides of the horse, as they are too small to pin. I stitched all around the horse catching a twine loop at the top, skipping the ears, but making a little brown stitch in the center of each. Using gold floss, I made an anchor stitch under his chin then looped the floss around his muzzle, then made a French knot on each side. I then loosely looped the floss behind his neck and made an anchor stitch to keep it from pulling out.

Mini Advent Ornaments Set Four

22. Santa

Ho, ho, ho! I had to do Santa! I started him by gluing his beard and mustache onto his face. I stitched them down, then added some crystal sequins to his beard. I made two straight pink stitches for his mouth, a peach stitch for his nose and two blue French knot eyes. I stitched the beard to his red back piece around the outside, the stitched his face and corners of his ‘stash onto one of the hair pieces. Then I sewed the back hair piece to the front. I glued the hat brims on and stitched crystal sequins to the front one while sewing them down. I layered the two hat sides onto his head and sewed them together and onto him. I added a white pompom to the tip of his hat.

Mini Advent Ornaments Set Four

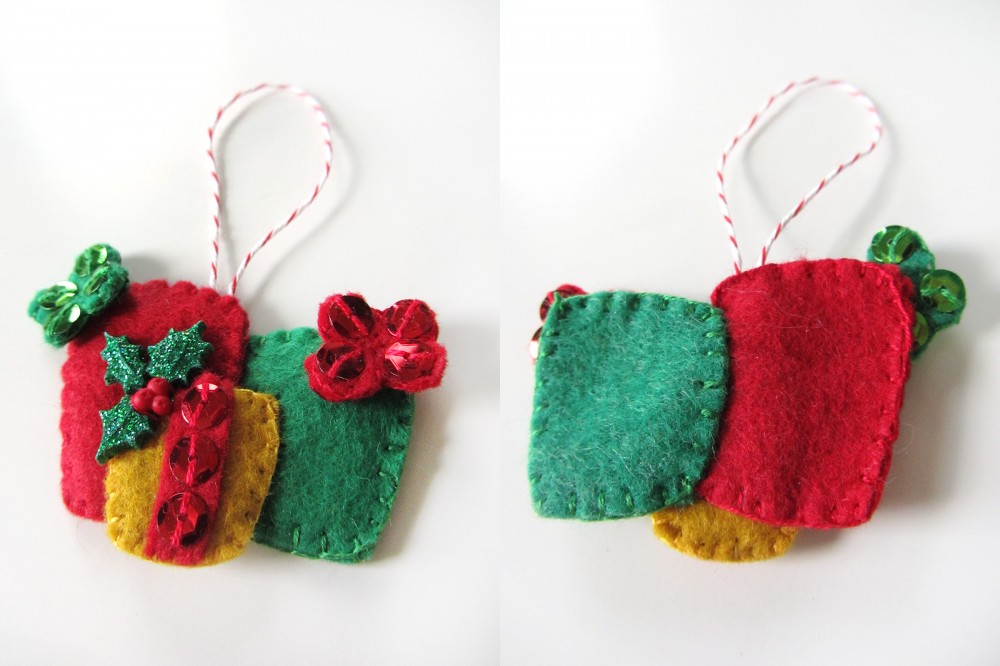
23. Gifts

These three little gifts could be made in any colors. I went with a classic Christmas palette. I stitched each of the two larger gifts separately, then stitched them together, only going through one layer of felt to hide the stitches. The corner of the red gift got the loop of twine. For the two bows, I decorated each loop with a sequin, sewed the two sides together, then stitched them on with some crossed stitches only in the center. On the gold gift, I glued down a strip of red felt as a ribbon and trimmed it to fit. I sewed a trio of sequins on to decorate it. I put the back and front together and started sewing them together with blanket stitch at the bottom, then laying it on the other two gifts and sewing through bother the gold gift and the top layer of felt of the other two while sewing the last three sides. I finished it with a plastic holly embellishment that I stitched on with red thread around the berries.

Mini Advent Ornaments Set Four

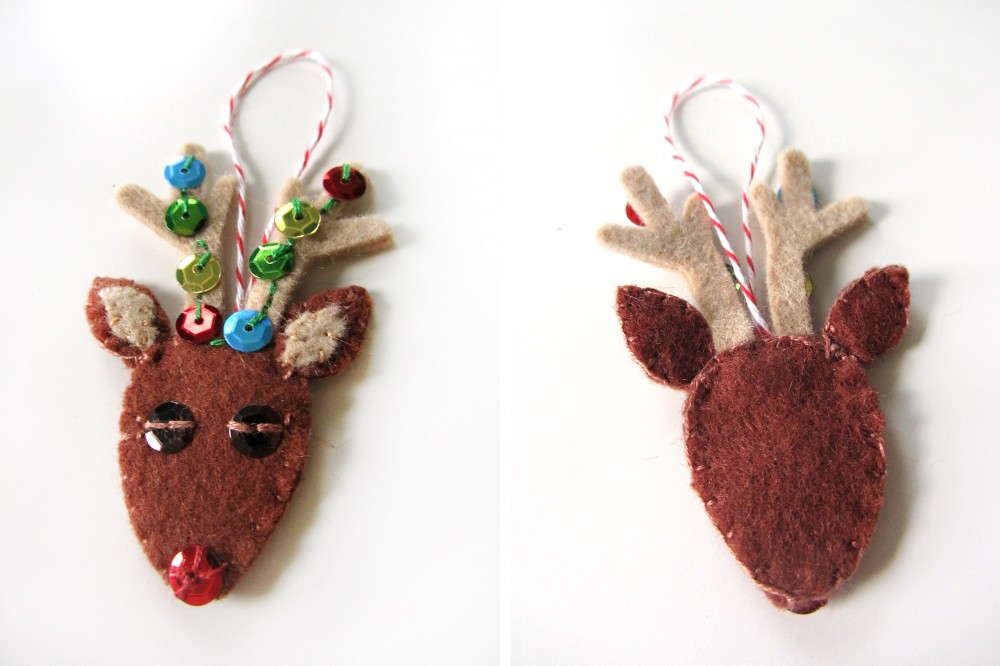
24. Reindeer

I started the reindeer by gluing the two layers of each antler together and setting them aside. I made sure to glue them edge-to-edge as I wasn’t sewing them together. I decorated the front of his face with a red sequin nose and brown sequin eyes. I glued then sewed the inner ears to the front ears, then sewed the front ears to their backs. I sewed the face pieces together with the antlers and a loop of twine at the top. I stitched the ears to the front top of the head. On the top of one antler, I made a line of back stitch running down, across and up to the top of the other. I stitched colored sequins along the way, using only one stitched in each so the dangle like holiday lights.

Mini Advent Ornaments Set Four

And now all the ornaments are complete! Which have been your favorites? It is so hard for me to choose, but I’ve really liked the tree truck, the dove and the hot cocoa cup. This project and its patterns are completely free for you to use for personal use. If you’d like to purchase a commercial license, visit my Etsy shop and contact me if you don’t see a current listing for it.

Mini Advent Ornaments Set Four

If you are making a set, I’d love to see your finished ornaments! Tag me on Instagram @iolstephanie (if you are private, I’ll have to request to follow you), mention me on Twitter @iolstephanie or post a picture on our Facebook wall. I love what I’ve seen so far! If you’d like to support my free site in other ways, visit my support page. If you’d like to get my posts the moment they go live in your email inbox, sign up here.

Mini Advent Ornaments Set Four

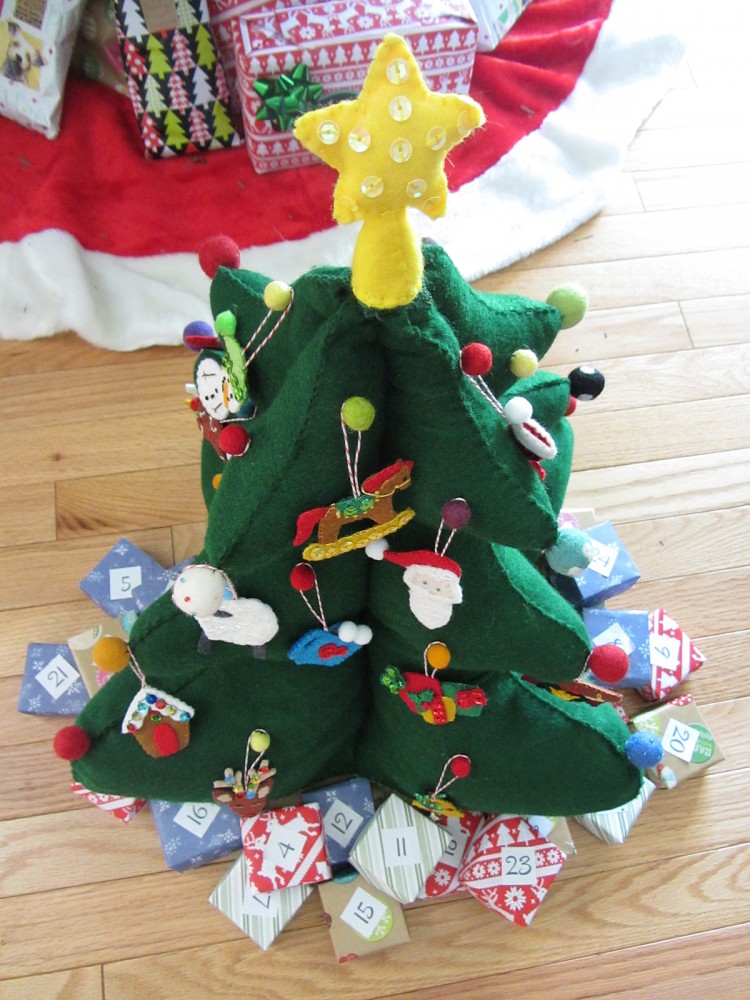
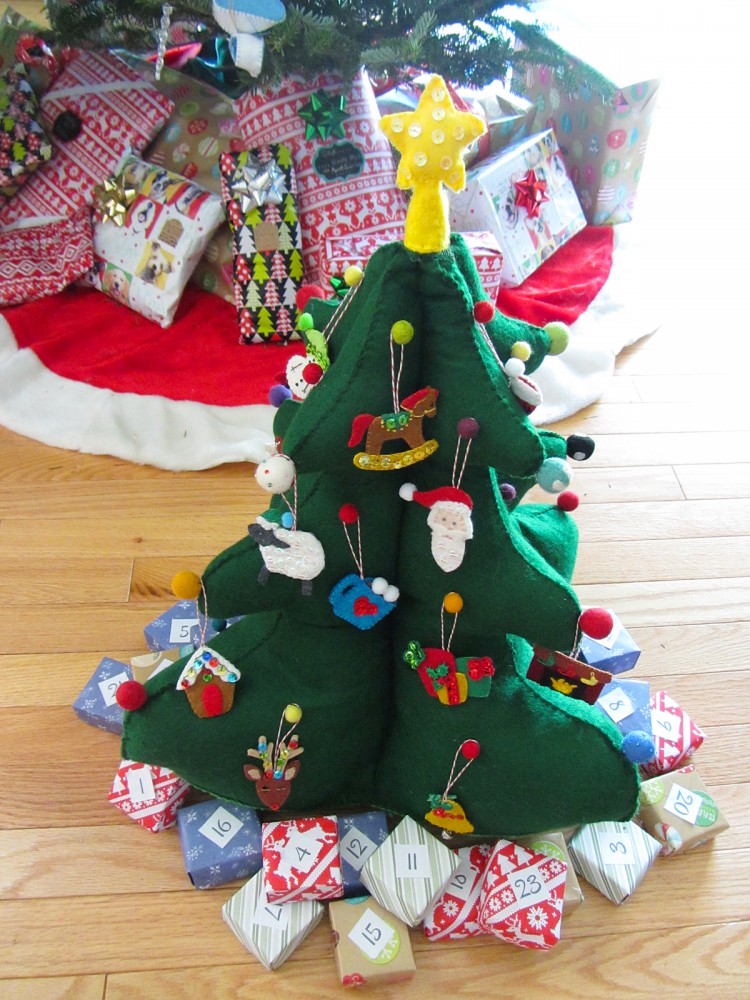
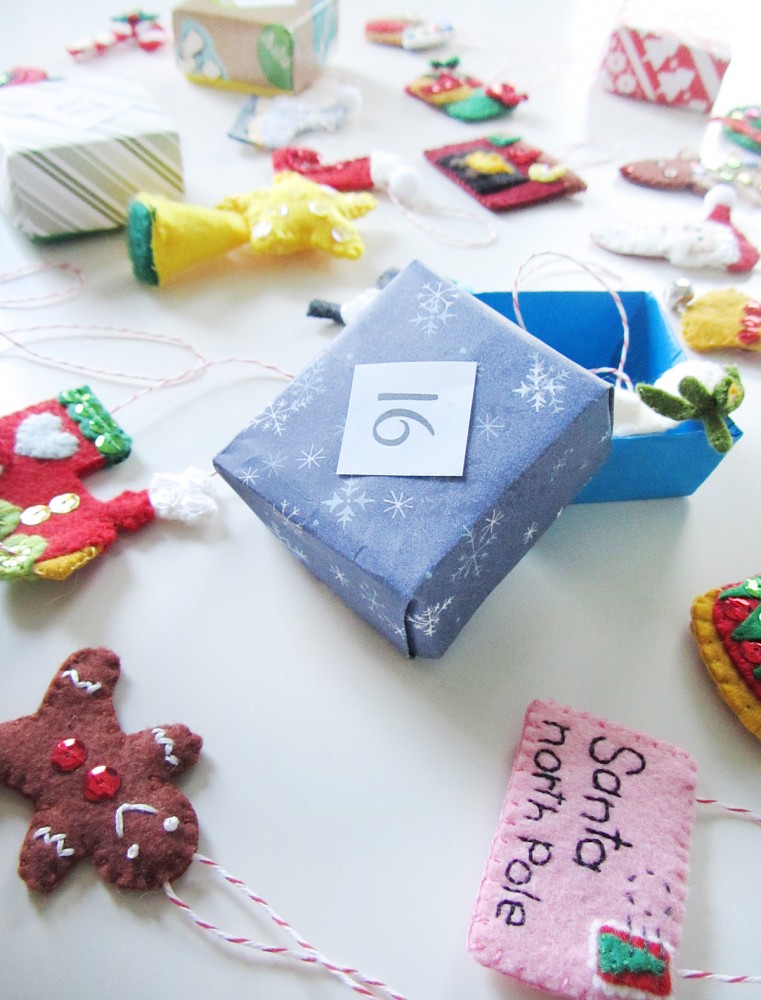
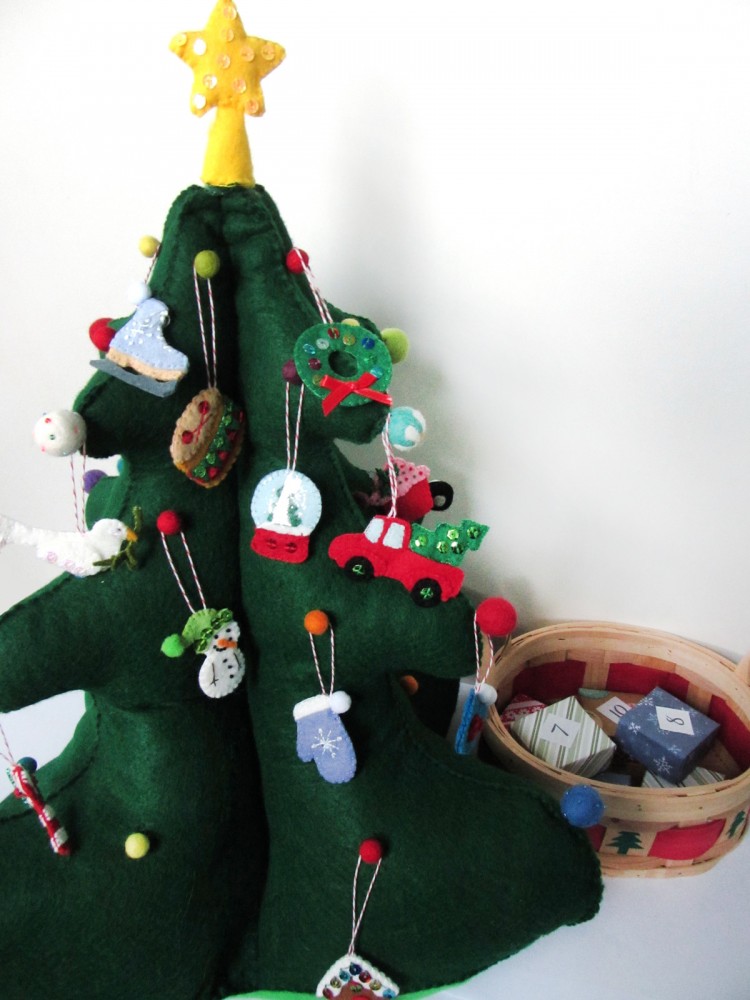
I’ve been giving Jax his ornaments in little origami boxes (mine use 6″ papers) with printed numbers on top. I have them all in in a Christmas basket and he finds the right one each night. I started out adding candy treats in there as well, but he lost interest so I stopped. He’s really gotten into opening them and asks me all day long if it is time yet.

http://greeneyed.com/2010/12/page/3/

Happy holidays!
 

Mini Advent Ornaments Set Three

Mini Advent Ornaments Set Three

My large sewing project this holiday season was one that was chosen by my readers in our Facebook page: a felt Christmas tree play set! I hope you’ve been sewing along with me as I’ve shared the toddler-friendly tree pattern and tutorial and the first, two sets with you. But it’s not too late to join in! These mini ornaments bring a whole lot of holiday cheer and work up fast.

Mini Advent Ornaments Set Three

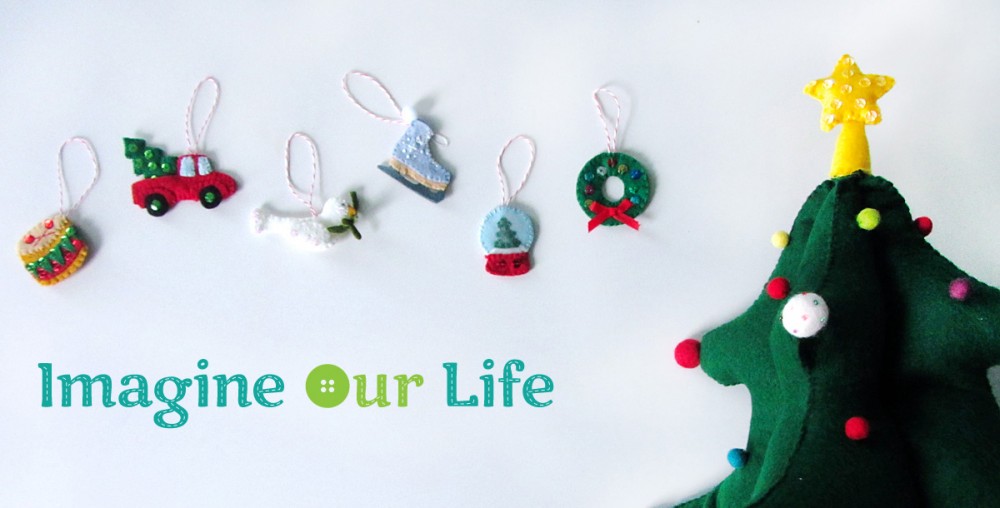
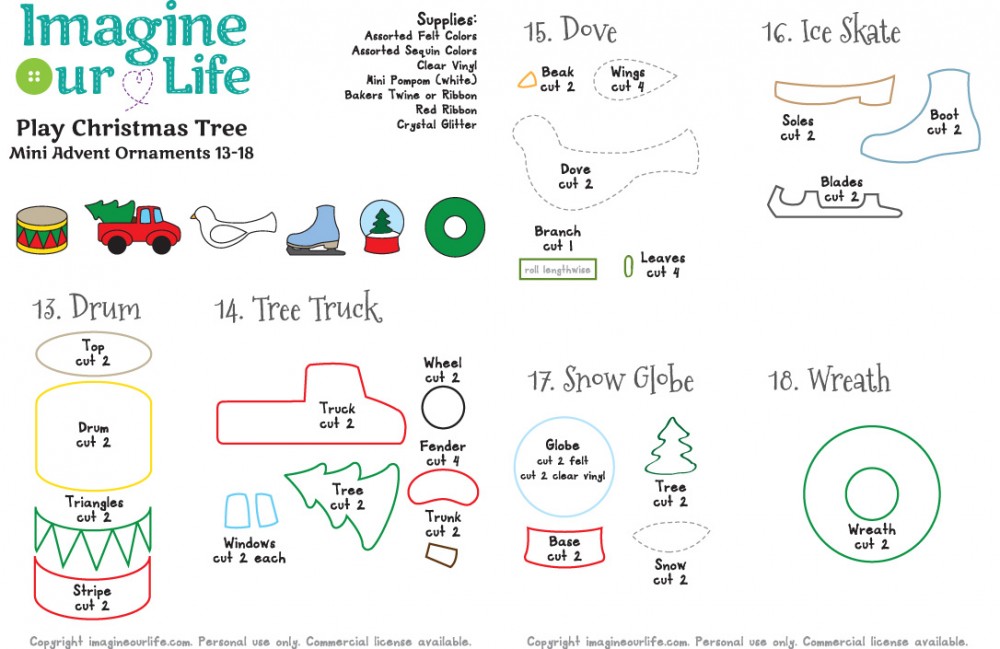
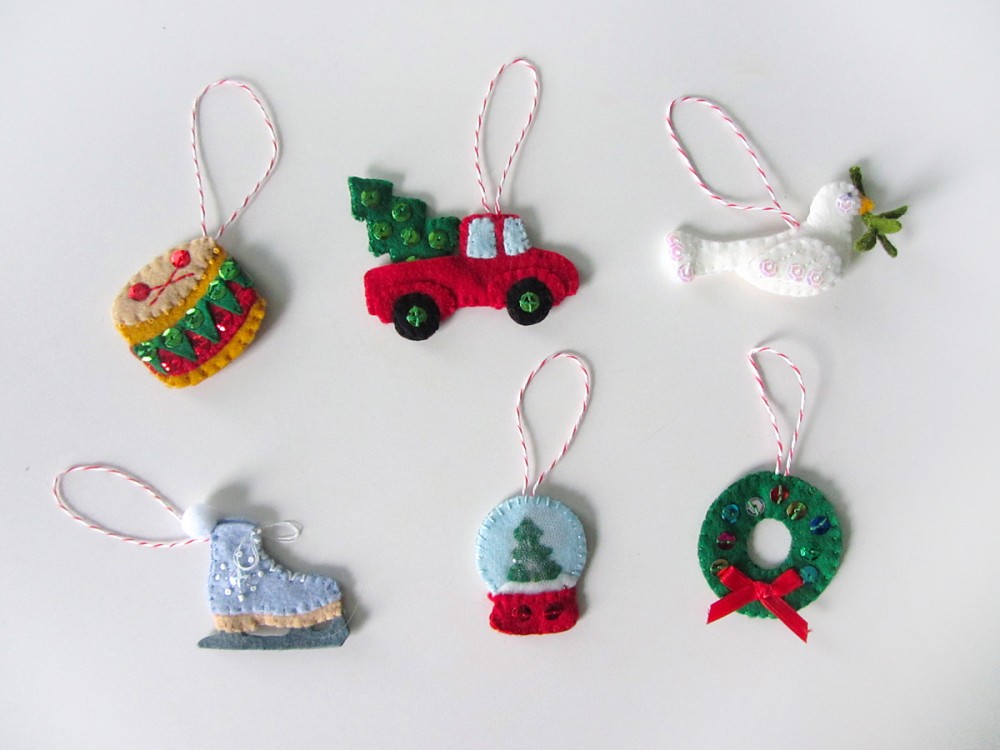
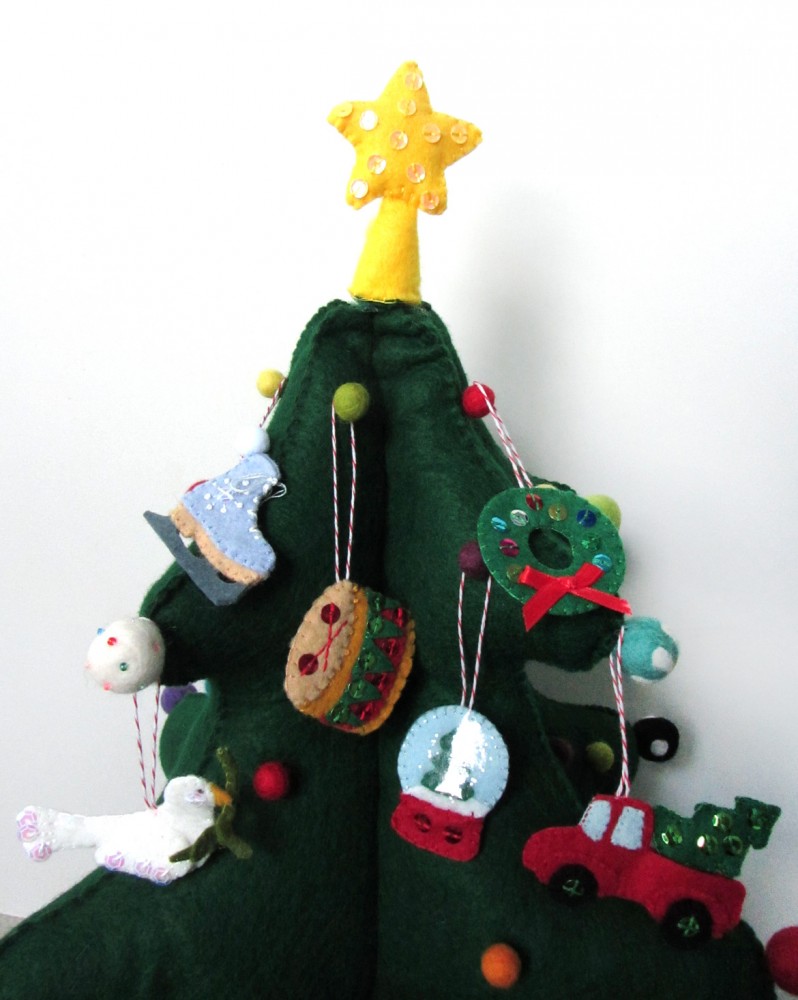
I will be designing 24 ornaments, and giving Jax one to unwrap every day leading up to Christmas. I’ll be sharing the ornaments in batches of 6. I am planning two more sets next week to finish the project. Numbers 13-18 are: a drum, a truck with a tree, a dove, an ice skate, a snow globe and a wreath.

To see all the posts in this series, click here.

Mini Advent Ornaments Set Three

What I Used:

Mini Advent Ornaments Set Three

For all of the ornaments: I cut pieces of baker’s twine, doubled it over and tied a knot in the ends. When stitching the tops of the ornaments together, I made sure the knot of the twine loop was inside. I also made sure to stitch through the knot to secure the loop.

Mini Advent Ornaments Set Three

13. Drum

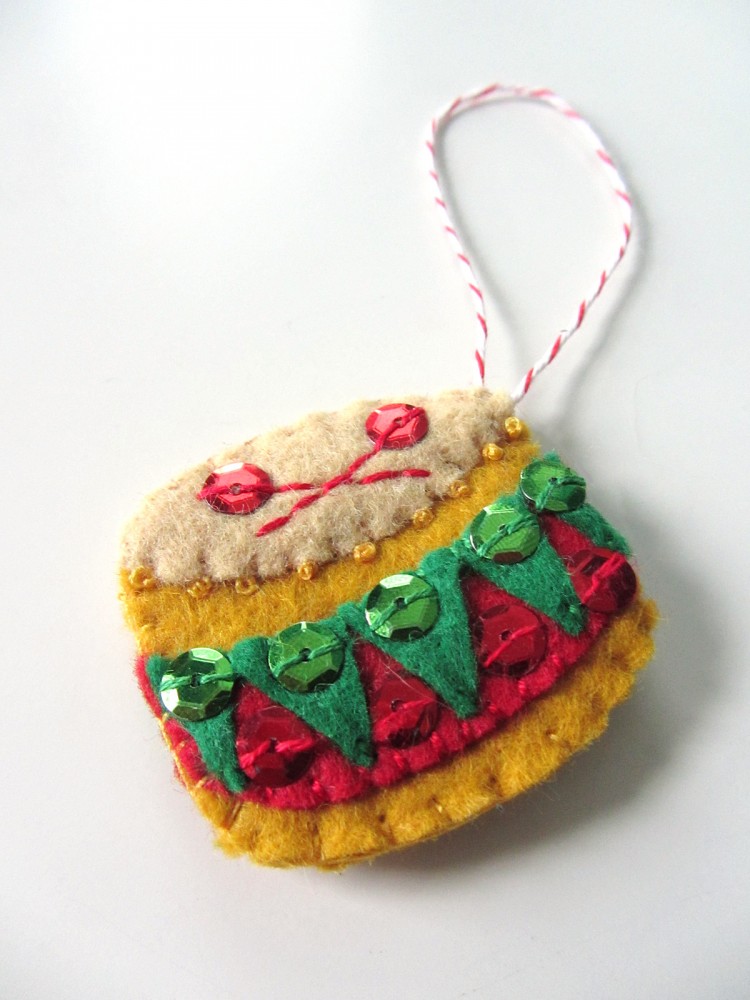
My husband is a drummer, so we already have a few little drums for Jax. All that aside, this little drum came out much cuter than I expected! I started by gluing down the red and green bands to each side of the drum, the stitched them down. I also added red and green sequins. I stitched the drum heads on, then made rows of gold French knots along their edges. On the front of the drum, I back stitched two drum mallets and used red sequins for the heads. I stitched around the edge of the drum, catching a loop of twine at the top corner.

Mini Advent Ornaments Set Three  Mini Advent Ornaments Set Three

14. Truck with a Tree

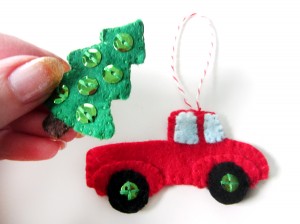
We haven’t gotten our Christmas tree yet, but I’m really anxious to! I was inspired by all the cars and trucks taking home their trees, so I designed this truck. It had to be red- Jackson’s favorite color!

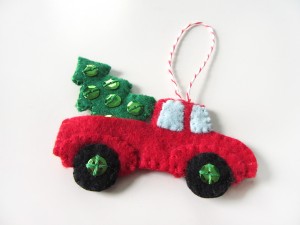
To sew the truck, decorate each side the same. Tack down the parts, then sew around the fenders and windows. Stitch green sequins into the cents of each tire. Put the two sides of the truck together, and sew each pair of tires together, going through all the layers on the upper halves. Sew the truck sides together, leaving the truck bed an open pocket and catching a loop of twine in the top of the cab.

For the little tree, I stitched green sequins onto each side. I then tacked the two sides of the truck together and stitched them around the edges. I layered them between the two tree sides, and stitched it all together. The tree can stick into the truck pocket, or come out!

Mini Advent Ornaments Set Three

15. Dove

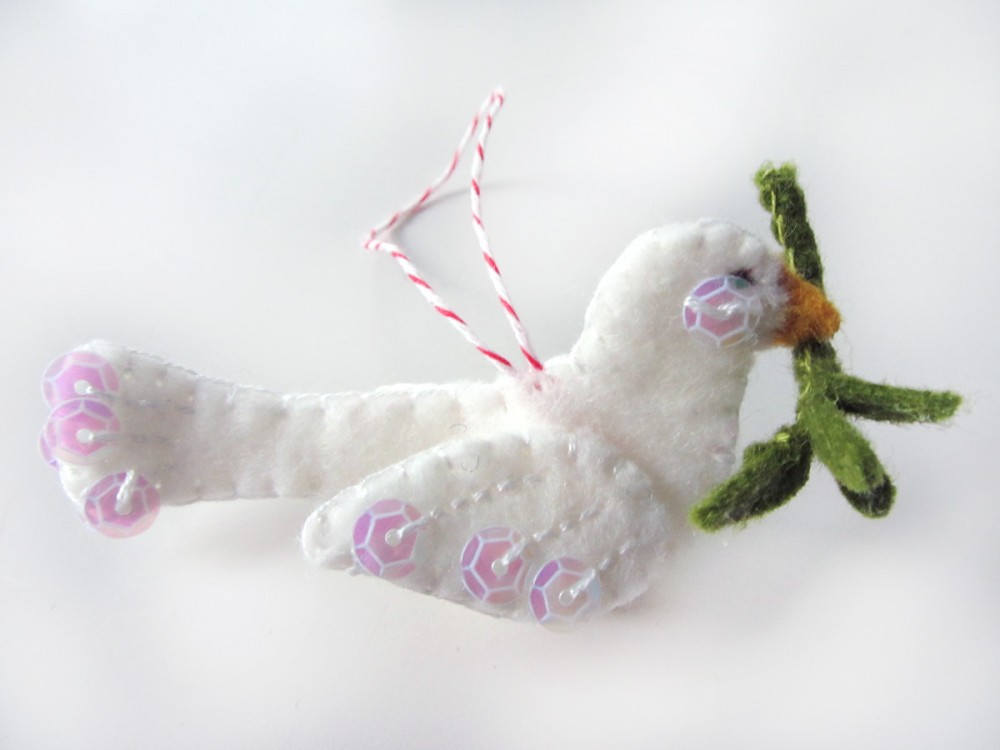
I am in love with this little dove! To begin, I stitched the outer piece of each wing with stripes of back stitch. At the end of each line, I stitched a crystal sequin. I left the bottoms of the sequins hanging free. I did the same rows of stitches and sequins on the tail of each body piece. I sewed each decorated wing piece to a plain one, then stitched them on along their fronts. I stitched sequin cheeks onto the dove’s face on each side, and added brown satin stitched eyes. I stitched the two sides of the dove together all the way around, catching a loop of twine in her back and the two beak pieces (sewn together) in her face.

To make the olive branch, I rolled the branch felt lengthwise and blanket stitched up its length. I then worked my way back down, stitching leaves on in a staggered pattern. I coated each leaf with felt glue and let them dry to make the sturdier. If you have a younger (or rougher) child, you may need to skip the delicate olive branch. Once the branch was dry, I stitched it to the under side of her beak.

Mini Advent Ornaments Set Three

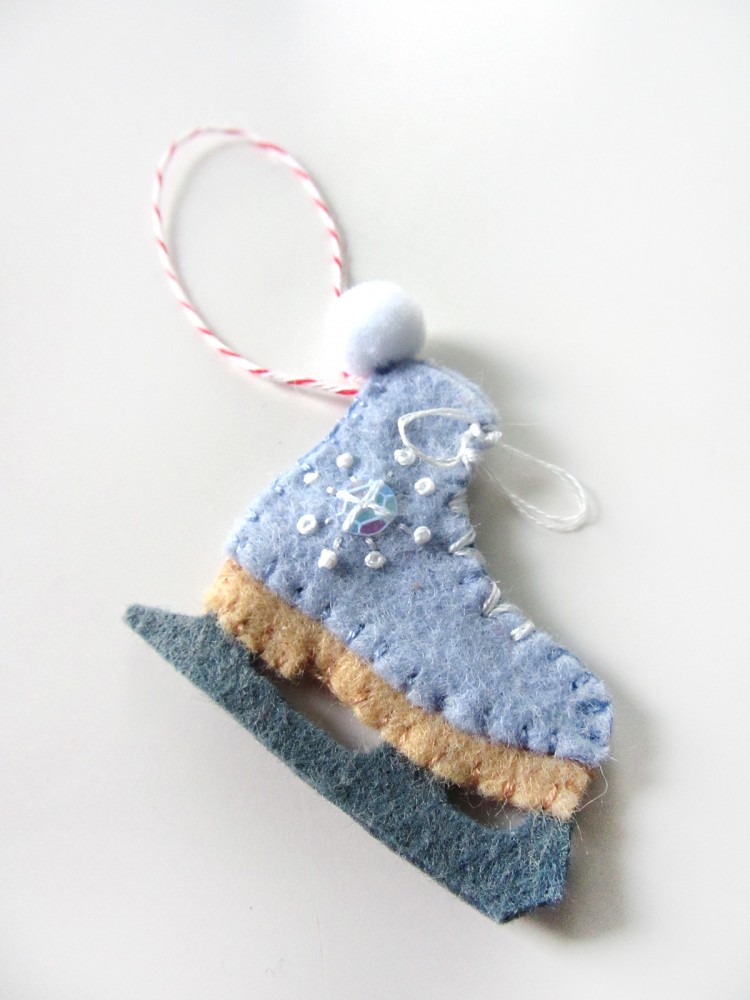
16. Ice Skate

For this little ice skate, I glued together the two sides of the gray blade using a thicker layer of glue than I’d normally use. I didn’t want stitches taking away from the crisp look of the blade, so I made sure they were thoroughly glued together. I then tacked the tan sole pieces onto either side of the blade and stitched them on along the sides and bottom. I decorated each of the sides of the boot with a crystal sequin and some stitches and French knots. Then I layered the two sides around the sole and blade and stitched them on along the sides and bottom, catching a loop of twine in the upper back corner. I left the top open, like a real skate. I used white floss to stitch zig zags along where the shoelace would be, and stitched on a looped bow. I finished it off with a mini white pompom.

Mini Advent Ornaments Set Three

17. Snow Globe

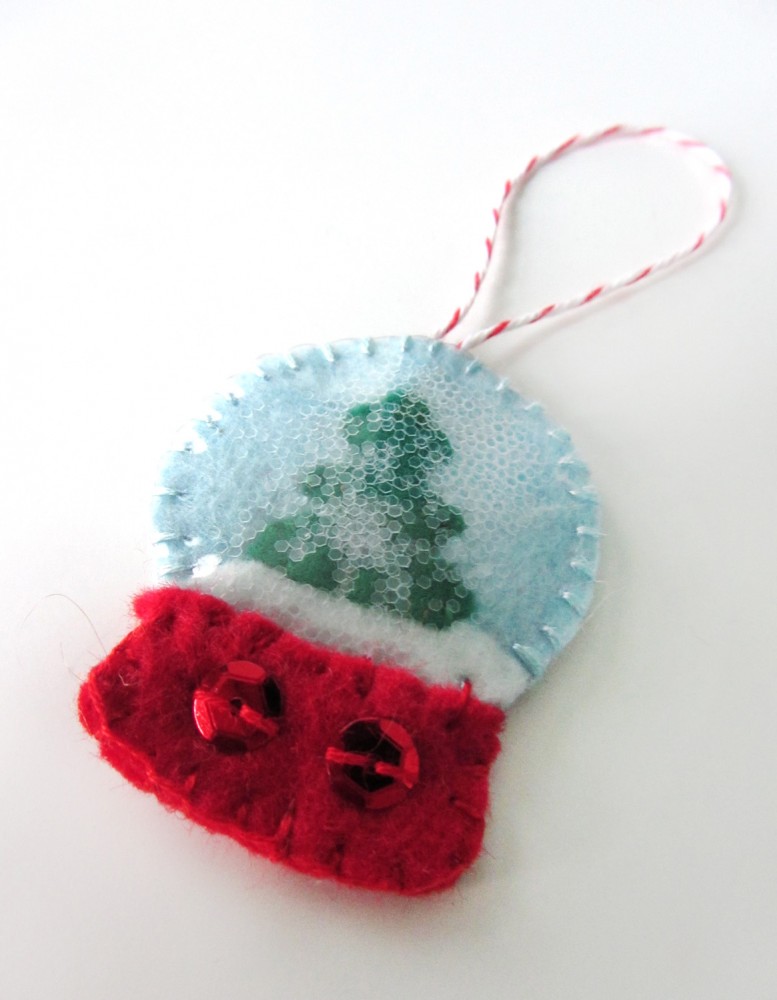
I have to give credit to American Felt and Craft for the idea of a snow globe ornament. This is my (mini) version!

I started by prepping the two sides of the red base with some stitched on sequins. I then glued the snow and trees to each of the blue globe backgrounds and letting them dry. I stitched each of the trees down, but didn’t stitch the snow as only a bit of the edge was exposed. I thin layered the two pieces back-to-back and sandwiched them between two circles of clear vinyl. Starting at the snow line, I stitched up and around through all the layers, catching a loop of twine at the top. I used a blanket stitch and pulled it firmly. I went all the way around the blue edge and stopped at the other side of the snow line.

I turned the snow globe upside-down, and carefully poured a little crystal glitter in to each side (about a 1/4 teaspoon – whatever fits but doesn’t obscure the view too much). The glitter won’t really move around, so having see-through glitter is key. Keeping it upside down, I sewed that bottom edge closed. I then sewed on the red base.

Mini Advent Ornaments Set Three

18. Wreath

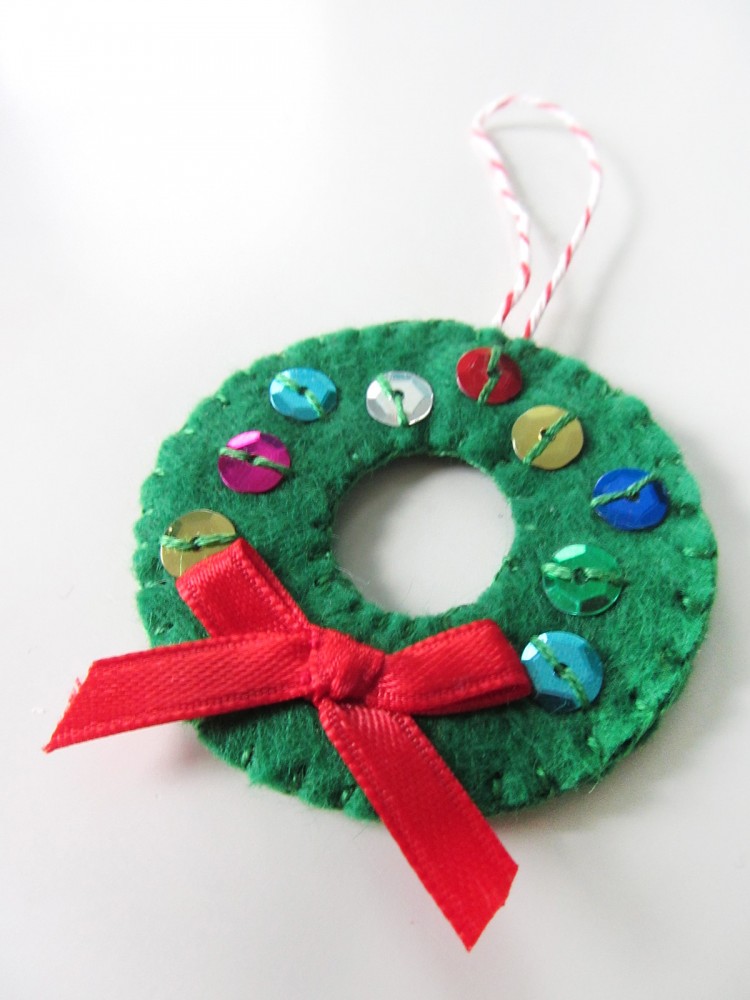
The wreath is quick and easy, but very pretty. On the front, I took a little bow I’d tied in ribbon and stitched it down using tiny stitches around the knot. I then stitched colorful sequins around the ring on both sides. I stitched the fronts and backs together, making sure to catch a loop of twine at the top.

 Mini Advent Ornaments Set Three

Which one is your favorite of this set? What would you like to see next? I have to design 24, and your idea may be one! Stop by Facebook or Twitter, or comment here with your ideas. I have a couple planned that were reader suggestions!
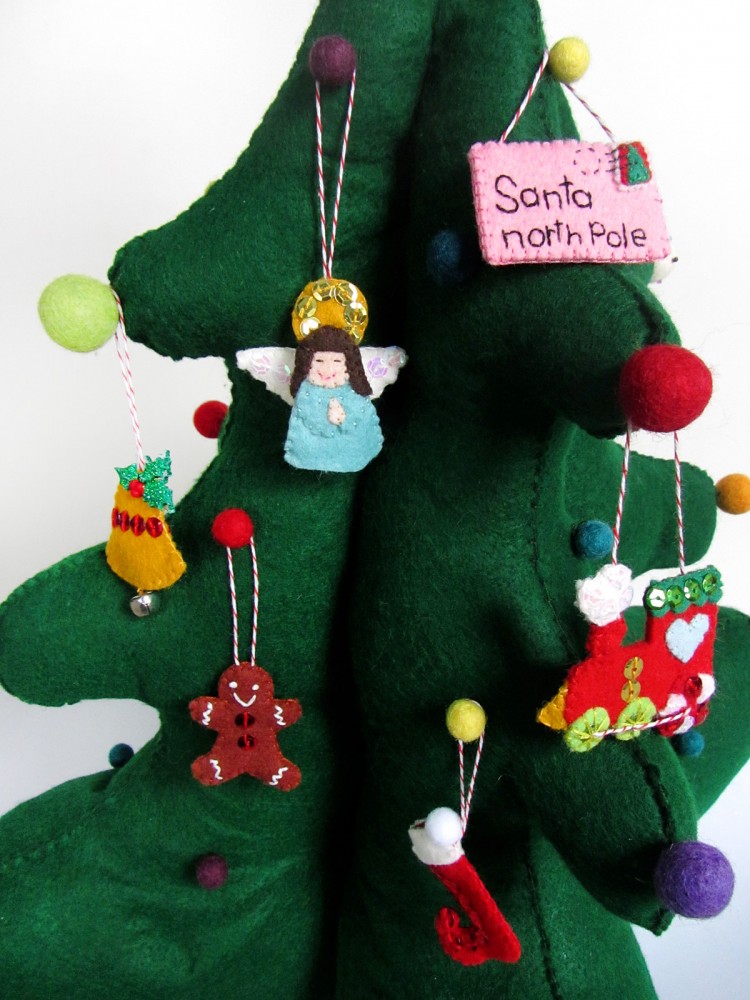
If you are making a set, I’d love to see your finished ornaments! Tag me on Instagram @iolstephanie (if you are private, I’ll have to request to follow you), mention me on Twitter @iolstephanie or post a picture on our Facebook wall. I love what I’ve seen so far!
I have to say a quick happy birthday to my fabulous big (and only) brother! He is so wonderful, and a big reason why I’d love a sibling for Jax (the husband disagrees.) He has been a big help on all of my more technical projects and is very creative himself. Check out his puppetry!

Happy birthday big bro!! Love you! <3


Mini Advent Ornaments Set Two

Mini Advent Ornaments Set Two

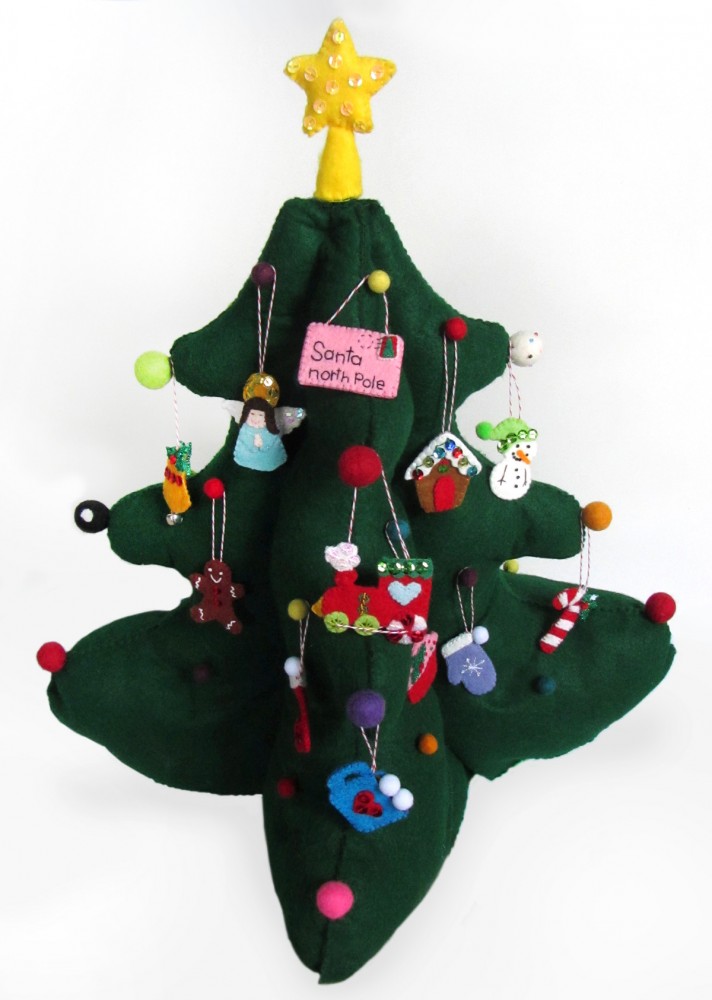
My large sewing project this holiday season was one that was chosen by my readers in our Facebook page: a felt Christmas tree play set! I’ve already share the toddler-friendly tree pattern and tutorial and the first set of ornaments with you, but now it’s time to decorate even more!

Mini Advent Ornaments Set Two

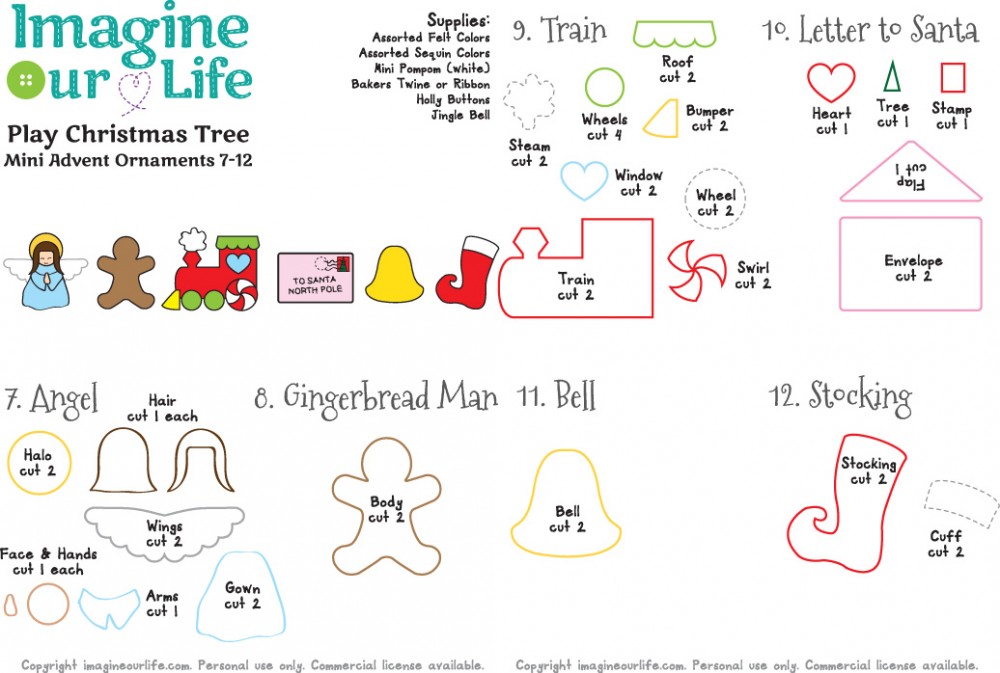
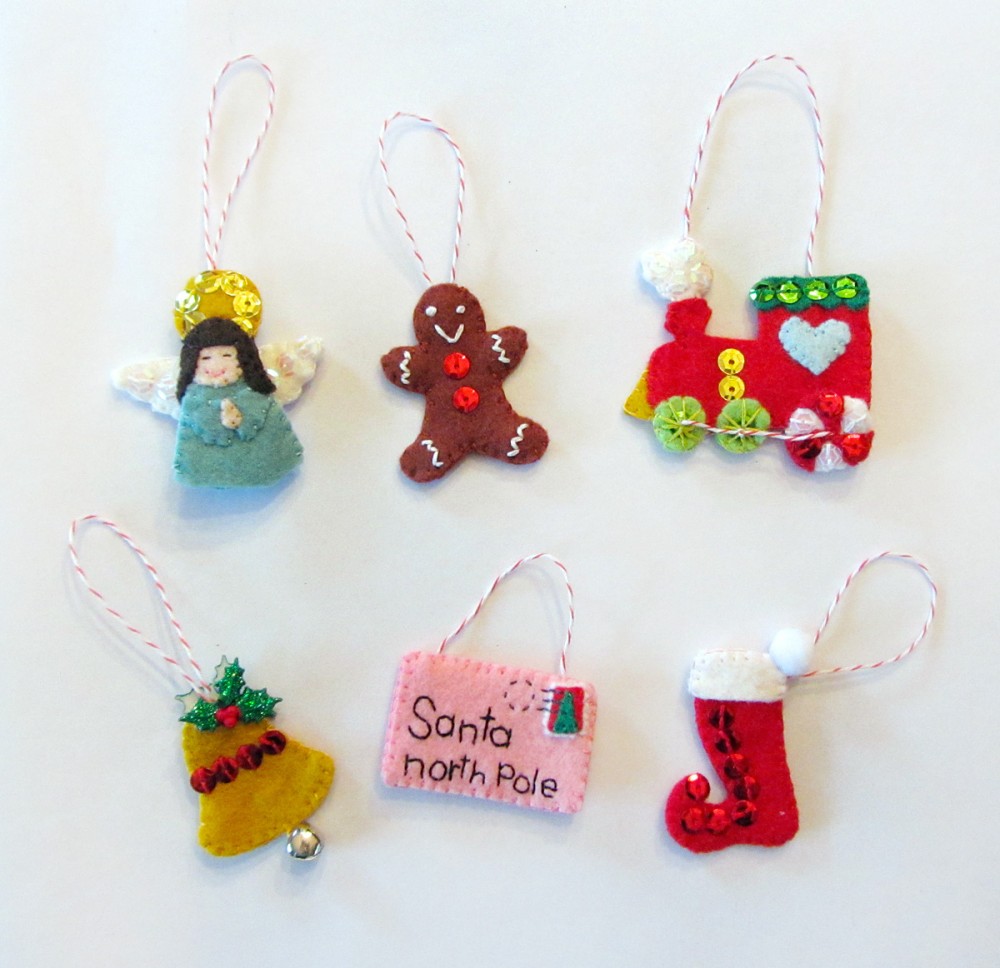
I will be designing 24 ornaments, and giving Jax one to unwrap every day leading up to Christmas. I’ll be sharing the ornaments in batches of 6. I am planning two more sets next week to finish the project. Numbers 7-12 are: an angel, a gingerbread man, a train, a letter to Santa, a bell and a stocking.

To see all the posts in this series, click here.

Mini Advent Ornaments Set Two

What I Used:

  • The Pattern
  • Felt scraps from American Felt and Craft (from my scrap bag – choose any colors you like)
  • Sequins (I used Classic Red, Moss, Gold and Crystal)
  • Felt Glue (great for holding tiny bits in place when pins are too big!)
  • Mini Pompom (I used white)
  • Baker’s Twine (I’m on year two using this cone)
  • Jingle Bell
  • Holly Embellishments (These, but try to get them at the craft store cheaper)

Mini Advent Ornaments Set Two

For all of the ornaments: I cut pieces of baker’s twine, doubled it over and tied a knot in the ends. When stitching the tops of the ornaments together, I made sure the knot of the twine loop was inside. I also made sure to stitch through the knot to secure the loop.

Mini Advent Ornaments Set Two

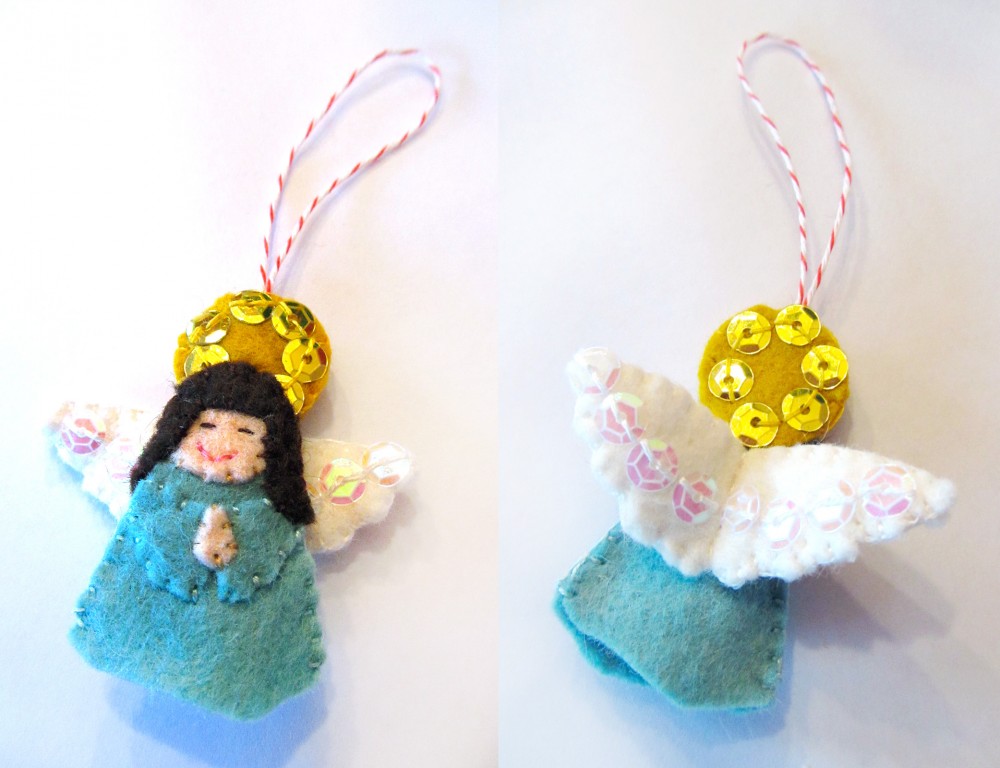
7. Angel

This little angel is so very special to me. I recently lost a loved one very suddenly. She adored angels. This one is for her.

I started by adding the sequins. On the back of the wings, I sewed a line of crystal sequins all the way across. On the front of the wings, I stitched 3 on each end. I stitched the two sides together around the outside. For the back of the halo, I stitched on a ring of 6 gold sequins. On the front of the halo, I stitched a ring of 5 (none where the head overlaps.) I put the two sides together with the back hair piece layered in place between, added a loop of twine and sewed the halo around the outside.

I then tacked down the face, arms, hands and front hair to the front gown piece. I stitched down the arms, hands and chin, then made a back stitch mouth and eyes. I tacked the halo/back hair piece to the back of the gown, then laid the wings in place. I back stitched a vertical line down the center of the wings to attach them. I stitched up the sides of the gown, and stitched the hair on, sewed the front and back together at the sides.

Mini Advent Ornaments Set Two

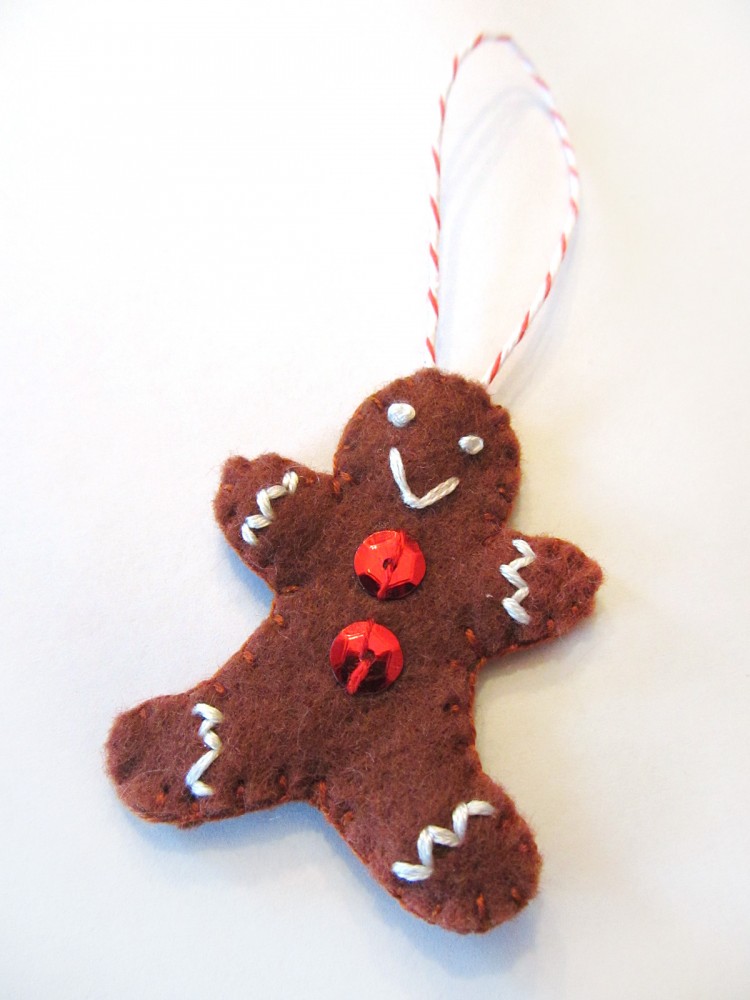
8. Gingerbread Man

The gingerbread man works up quickly! Using 4 strands of white floss (instead of my normal 2) I back stitched in a zig zag at his ankles and wrists on both sides. On the front, I gave him two red sequin buttons, a smile (made like a lazy daisy stitch) and two French knot eyes. I stitched the two sides together with a loop of twine at the top.

Mini Advent Ornaments Set Two

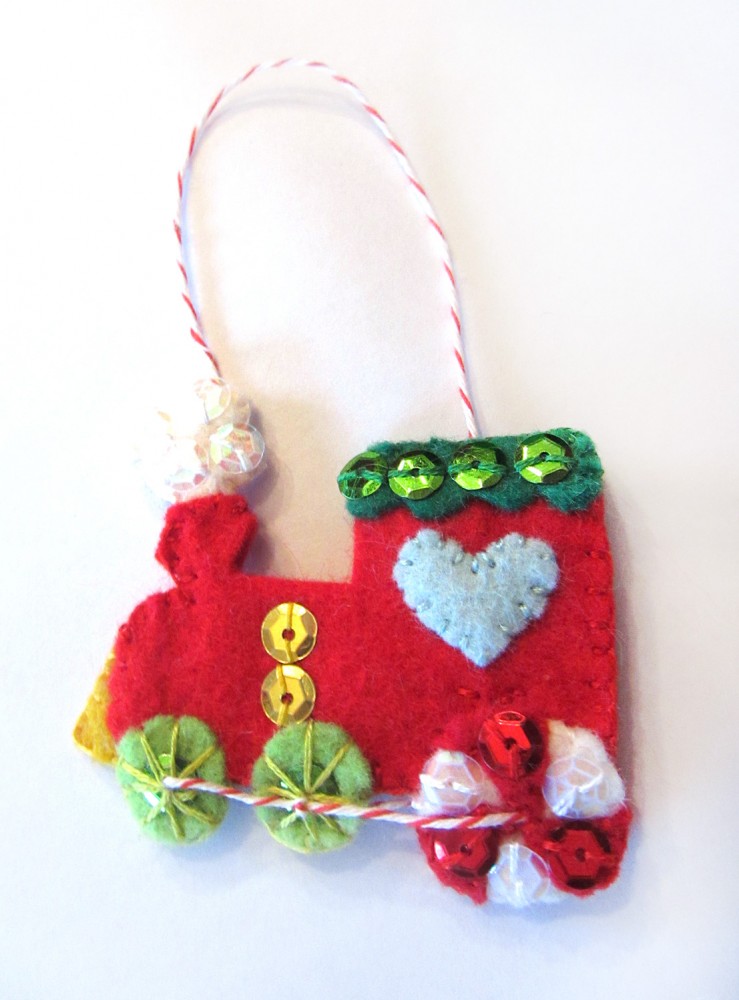
9. Train

The little red train is the same on both sides. I started by stitching crystal sequins to both sides of the steam, then sewing both sides together. I stitched the two bumper sides together. I glued the red swirls to the big white wheels then stitched them down and added red and crystal sequins. I stitched the wheels in place on the train bodies at their tops.

I used felt glue to tack down the roof pieces, windows and green wheels. I stitched the windows down and added rows of green sequins along the roof pieces. on the green wheels, I stitched a green sequin to the center of each using a starburst of long stitched to look like spokes. I decorated each train body with two gold sequins. I laid the two train sides together with the bumper and steam in place, as well as a piece of twine at the top (knotted at each end) then sewed them together around the outside.

Using a large-eyed needle, I threaded a piece of baker’s twine and knotted the end. I stuck the needle between a gap in the two sides of one of the candy wheels and came up through the center. I made a loop in the center of the middle green wheel, then went down through the center of the front green wheel. My needle came out of the center of the front green wheel on the other side, and I repeated everything in reverse. I ended it by bringing the needle out of one of the gaps in the last candy wheel, tying a knot as close as I could, cutting the twine and tucking the knot into the wheel.

Mini Advent Ornaments Set Two

10. Bell

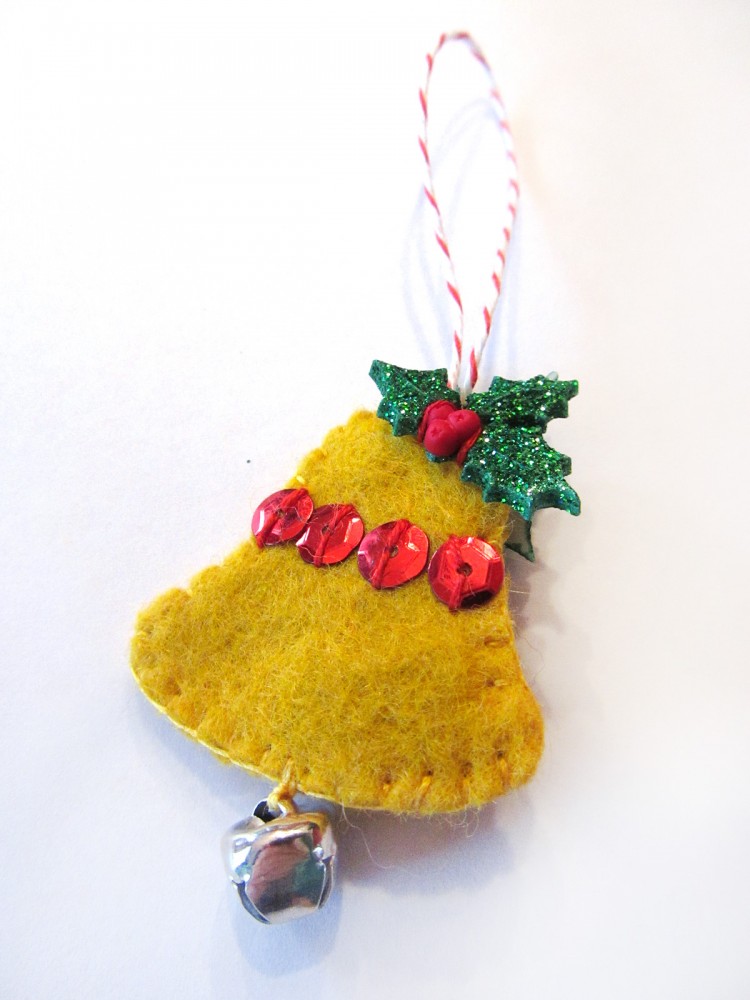
The little gold bell is a fun addition to the tree play set, as it really jingles! On each side, I sewed a row of red sequins. I stitched each side together with a loop of twine at the top, pausing at the bottom to sew a jingle bell in place. I stitched holly embellishments on each side using red thread around the berries.
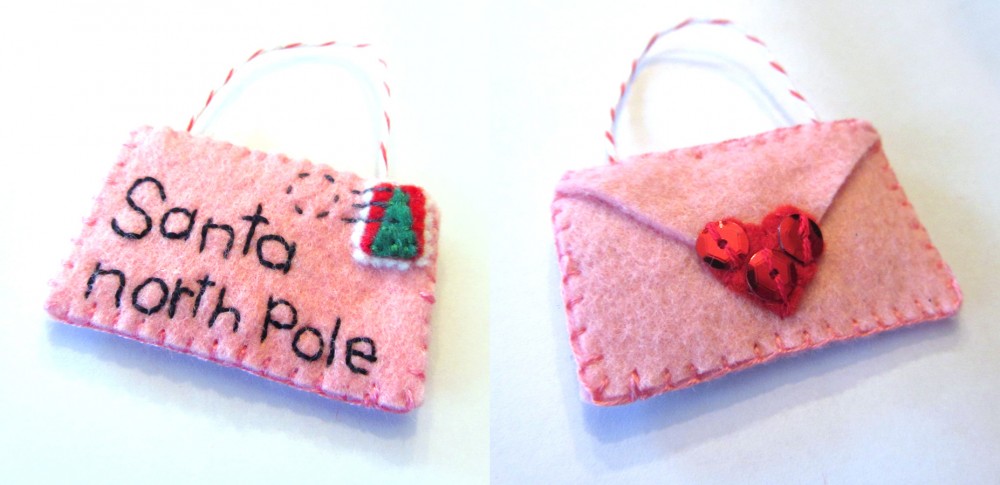
Mini Advent Ornaments Set Two11. Letter to Santa

This little letter has a long way to go! I started by freehand stitching the words “Santa north pole” using back stitch. I tried to make it look like little kid handwriting. I cut a piece of white felt a little larger than the red stamp and used my micro-tip scissors to pink the edges. (You could use pinking shears, but I thought mine were too larger for the scale of the stamp.) I glued the three pieces of the stamp together, then sewed them to the letter front all around the red rectangle. I also sewed the green tree down, but left the white pinked edge loose. Using gray floss, I stitched a dashed circle and three back stitched lines to make the postmark.
For the back of the envelope, I tacked the tip of the fold down with glue, then stitched the red heart on top. I added three red sequins. I stitched the front and back of the envelope together with a length of twine (with knots at each end) in the top.

Mini Advent Ornaments Set Two

12. Stocking

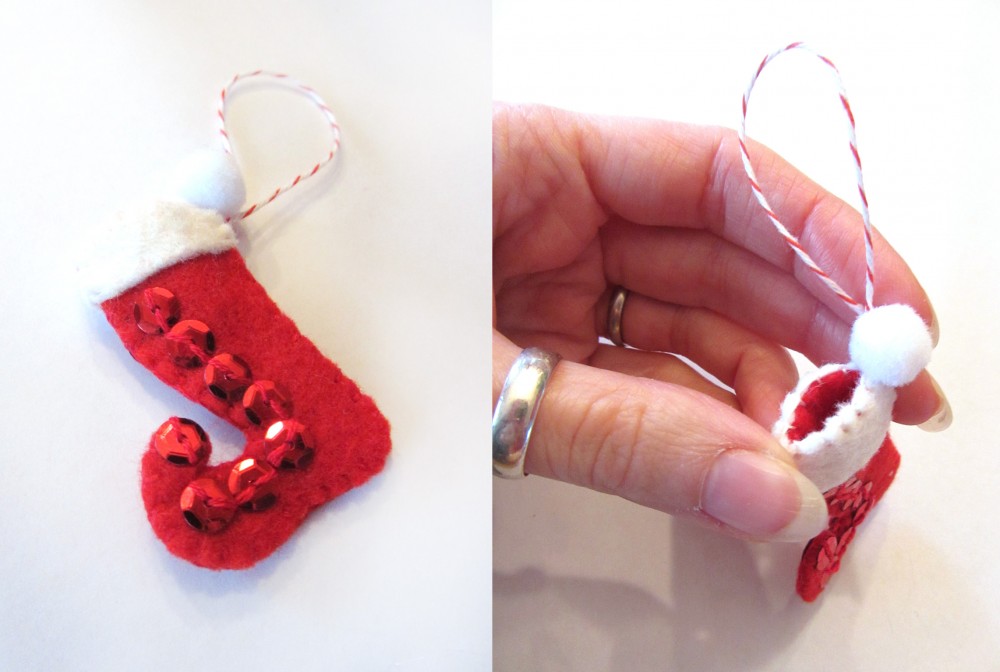
The little elf stocking actually opens! I started by stitching a line of red sequins on each of the stocking sides. I then sewed the two sides together, leaving the top open. I tacked the white cuffs in place with glue, catching a loop of twine in one side, then sewed up the sides and around the top. I added a tiny white pompom to the side with the twine loop.

 Mini Advent Ornaments Set Two

Which one is your favorite of this set? What would you like to see next? I have to design 24, and your idea may be one! Stop by Facebook or Twitter, or comment here with your ideas.

If you are making a set, I’d love to see your finished ornaments! Tag me on Instagram @iolstephanie (if you are private, I’ll have to request to follow you), mention me on Twitter @iolstephanie or post a picture on our Facebook wall.

Mini Advent Ornaments Set One

Mini Advent Ornaments Set One

My large sewing project this holiday season was one that was chosen by my readers in our Facebook page: a felt Christmas tree play set! I’ve already share the toddler-friendly tree pattern and tutorial with you, but now it’s time to decorate!

Mini Advent Ornaments Set One

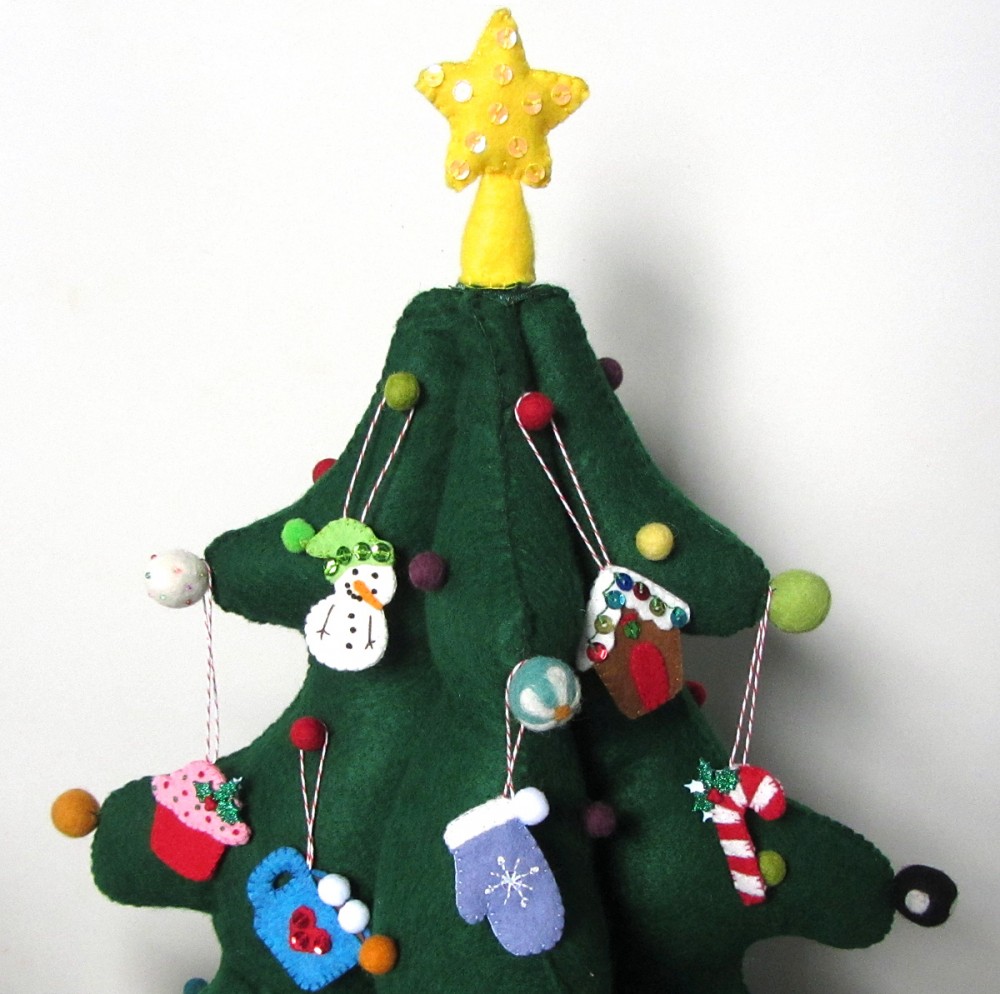
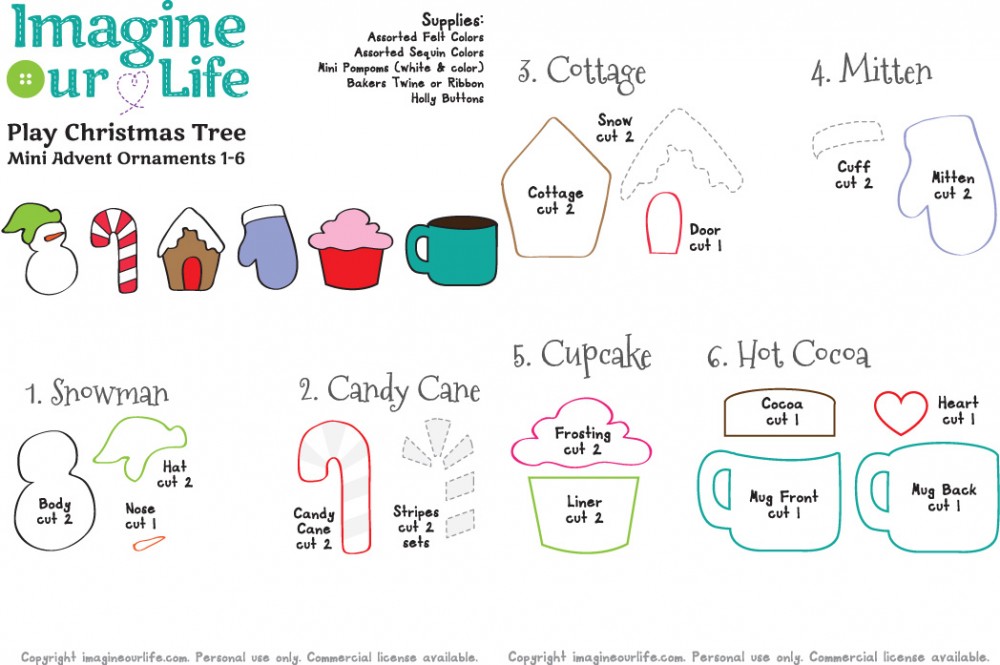
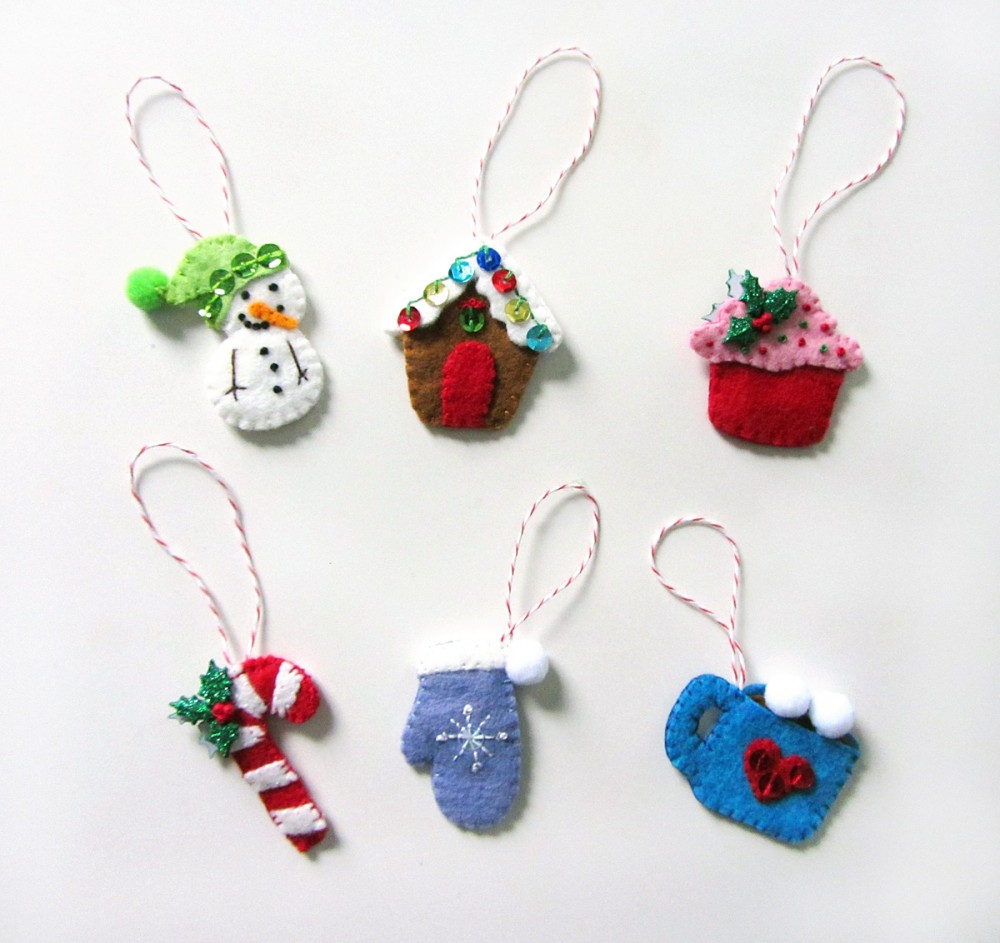
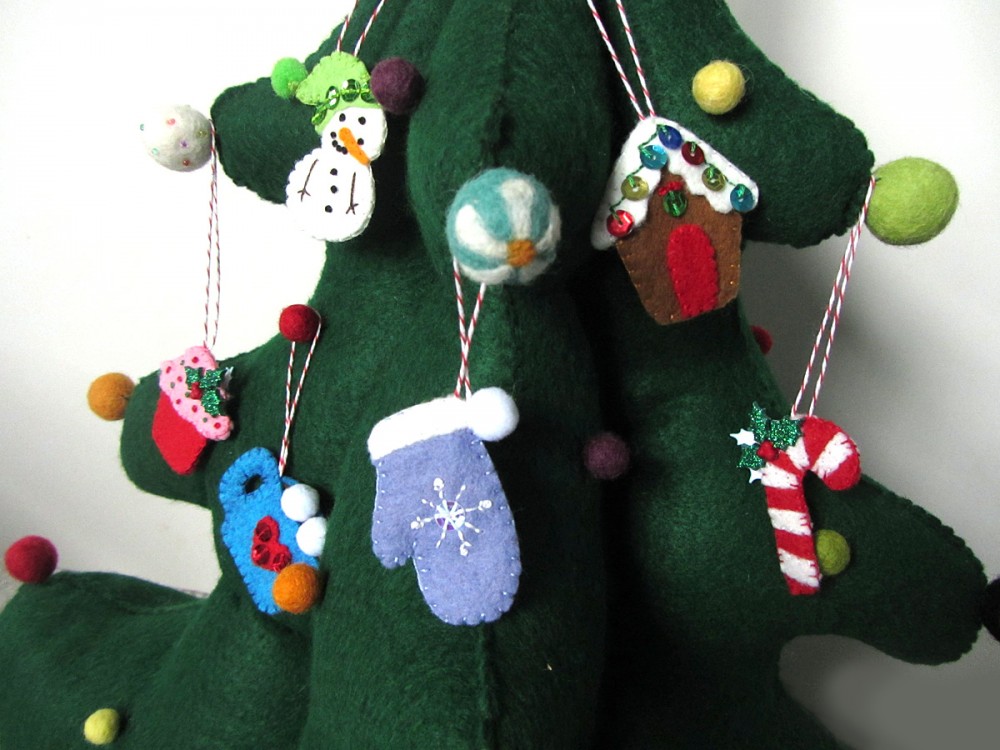
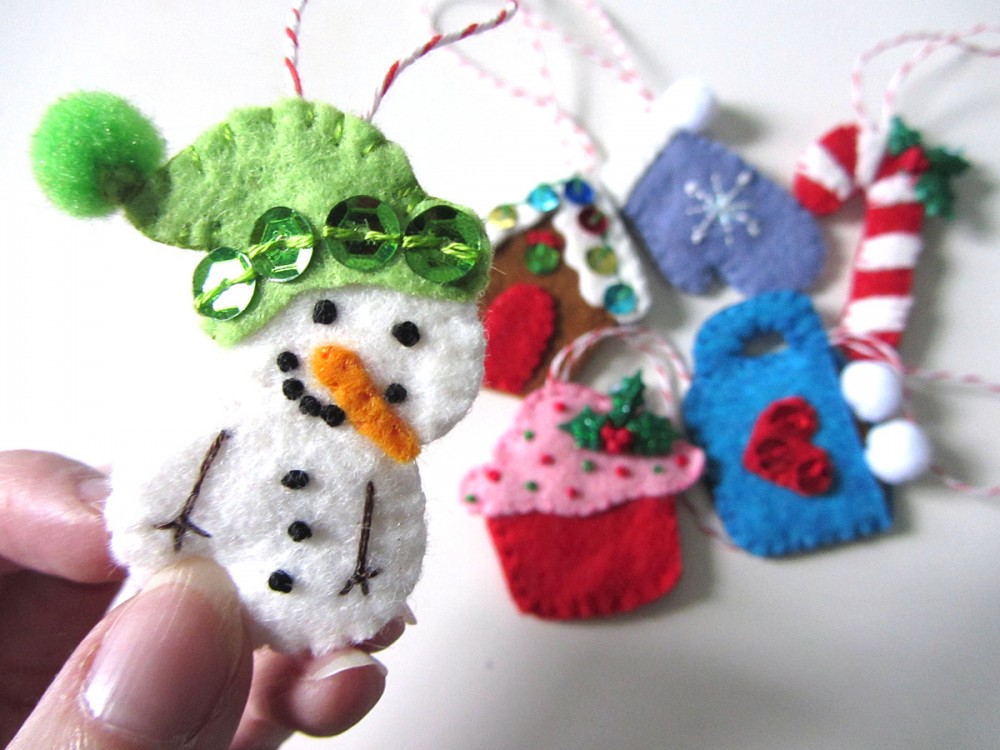
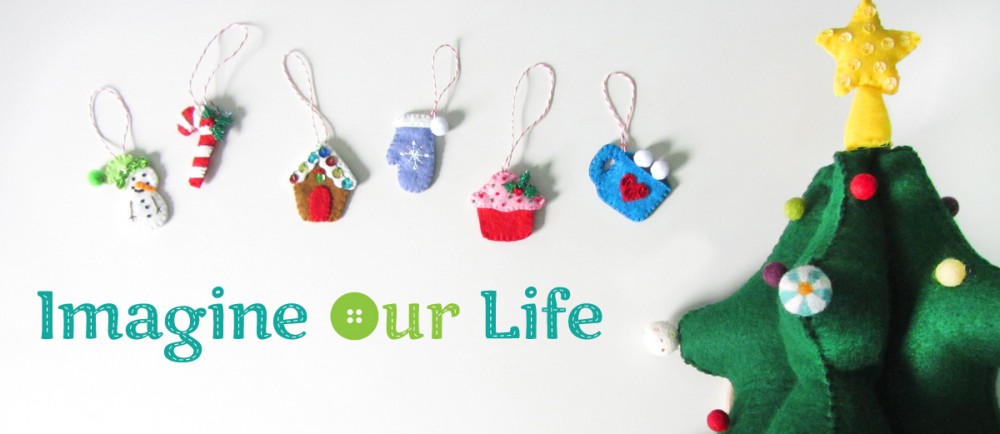
I will be designing 24 ornaments, and giving Jax one to unwrap every day leading up to Christmas. I’ll be sharing the ornaments in batches of 6. I am planning 2 sets this week and two sets next week. The first 6 are ready for you: a snowman, a candy cane, a cottage, a mitten, a cupcake and a mug of hot cocoa.

To see all the posts in this series, click here.

Mini Advent Ornaments Set One

What I Used:

  • The Pattern
  • Felt scraps from American Felt and Craft (from my scrap bag – choose any colors you like)
  • Sequins (I used Confetti and Crystal)
  • Felt Glue (great for holding tiny bits in place when pins are too big!)
  • Mini Pompoms (I needed white and a green)
  • Baker’s Twine (I’m on year two using this cone)
  • Holly Embellishments (These, but try to get them at the craft store cheaper)

Mini Advent Ornaments Set One

For all of the ornaments: I cut pieces of baker’s twine, doubled it over and tied a knot in the ends. When stitching the tops of the ornaments together, I made sure the knot of the twine loop was inside. I also made sure to stitch through the knot to secure the loop.

Mini Advent Ornaments Set One

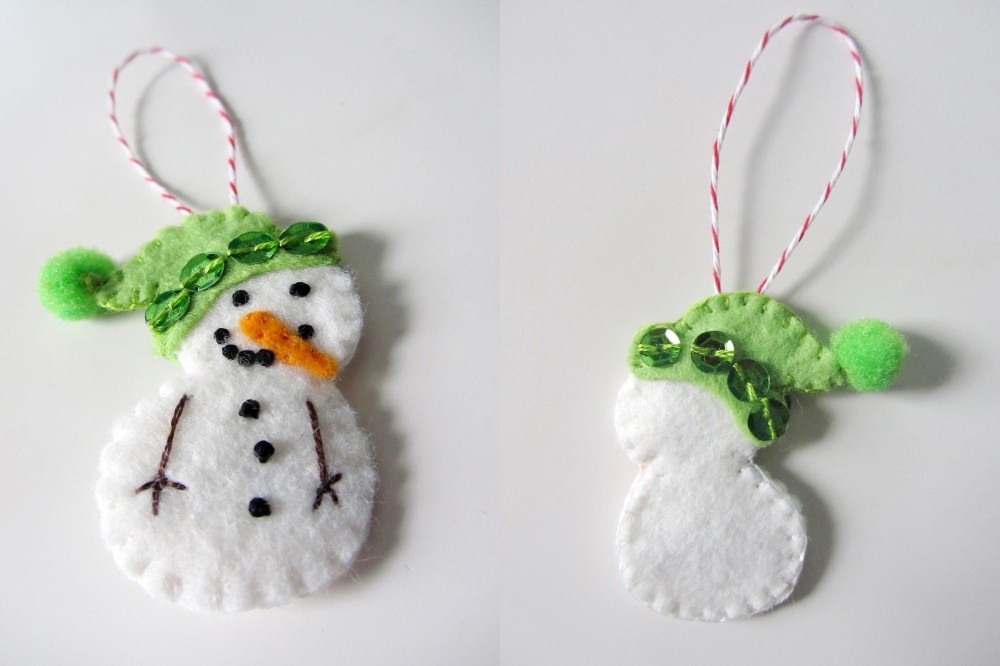
1. Snowman

This little snowman makes me smile! The way he is holding his tiny stick arms reminds me of how Jax stands and wiggles when he is really excited about something but trying not to show it. To making him, I started by embellishing the front body piece. I stitched the carrot nose on, then used French knots to make eyes, mouth and buttons. His arms are just long stitches with some little ones at the ends for fingers. I then sewed green sequins onto the brim of both sides of this hat while they were layered on their corresponding body piece. I stitched all the way around both sides of the ornament, adding the twine loop at the top. I finished him by stitching a tiny green pompom to the tip of his stocking hat.

Mini Advent Ornaments Set One

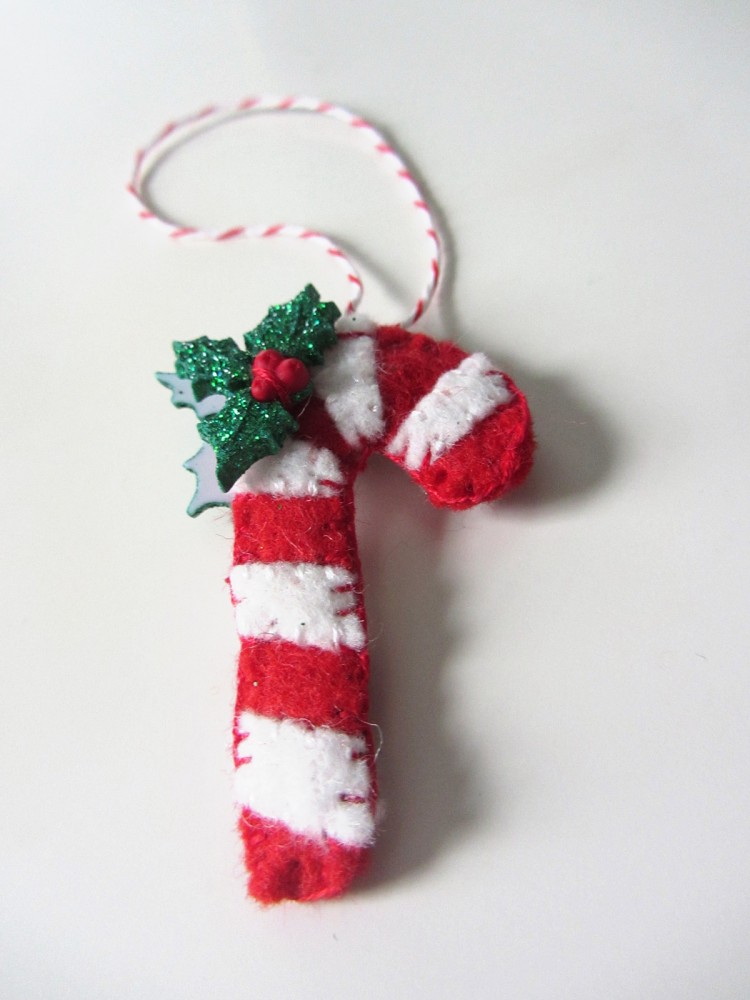
2. Candy Cane

I had to make a candy cane for Jax’s little tree! They are such a Christmas classic. To make the candy cane, I lightly glued the white stripes onto the two red canes. I stitched down the white parts, then sewed both sides together, adding a twine loop at the top. On both sides of the candy cane, I stitched on holly embellishments. These aren’t buttons, so I used red thread and attached them near the berries.

Mini Advent Ornaments Set One

3. Cottage

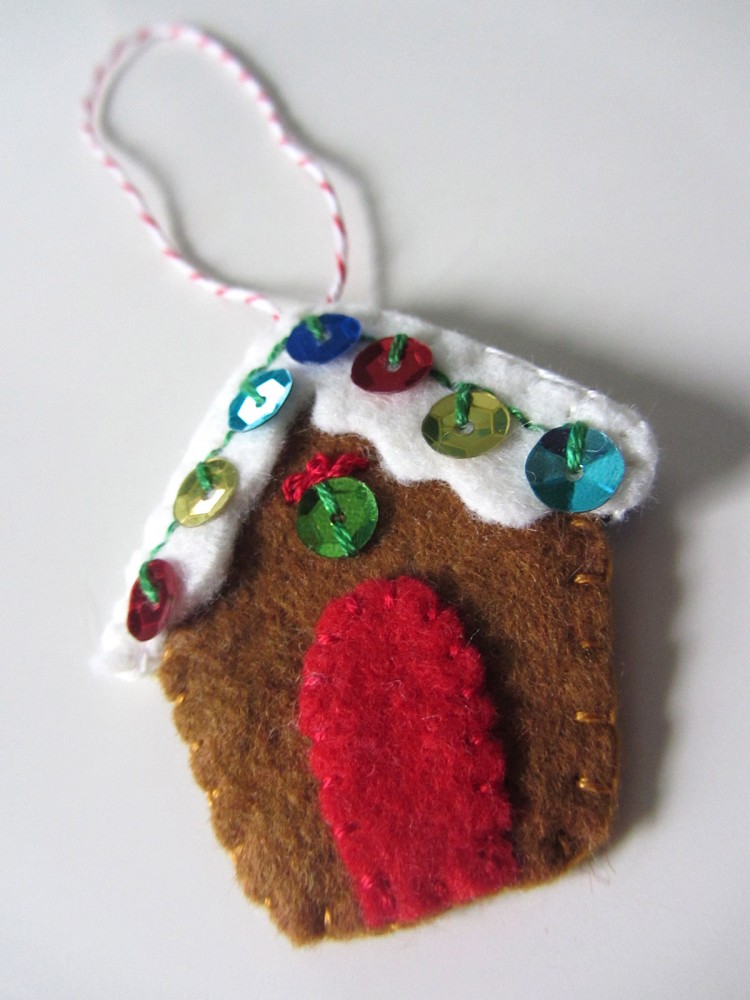
The Christmas cottage is very simple but very sweet! I used sequins to make colorful strings of lights. I started by embellishing the front of the house. I stitched on the red door, then sewed a green sequin on as a wreath. Above the wreath, I stitched two loops (lazy daisy stitch) and a French Knot to made a bow. I then took the two snowy roof pieces, laid them on their corresponding house pieces and stitched the lights on each. I did this with back stitch in a swagged line, with one stitch into the top of each sequin light to allow them to dangle. I stitched around both sides of the cottage, catching the twine loop in the top.

Mini Advent Ornaments Set One

4. Mitten

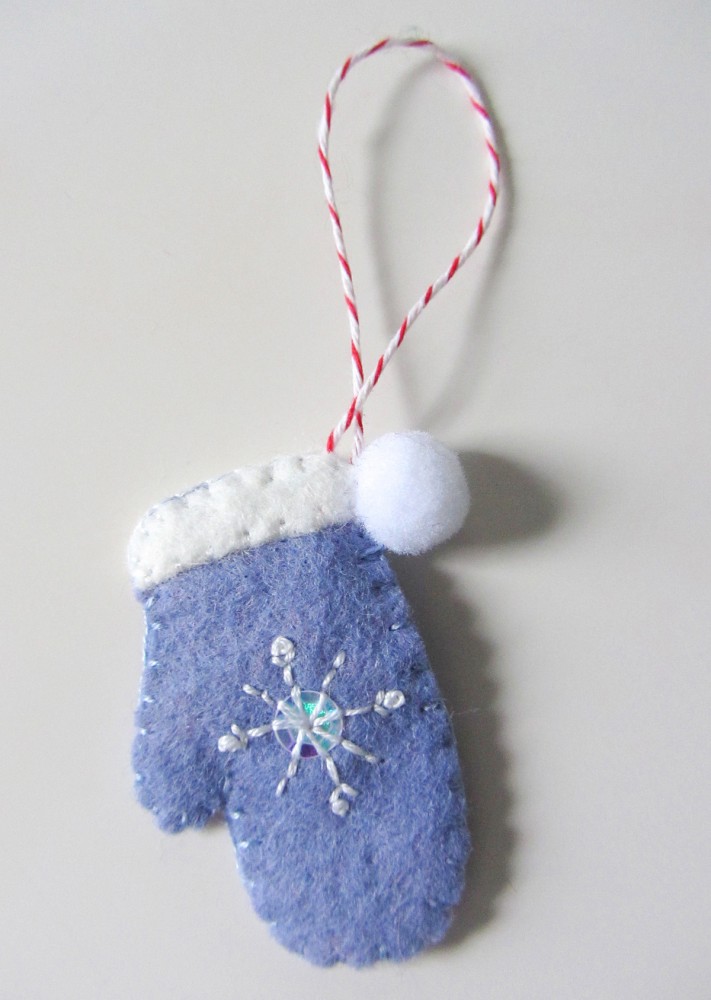
This little mitten turned out so dainty and cozy! I decorated each side with the same stitched pattern of a starburst in back stitch and a few French Knots. There is a crystal sequin at the center of each starburst. I stitched the white cuffs onto each side, then sewed the sides together with a twine loop at the top corner. I added a little white pompom to finish it.

Mini Advent Ornaments Set One

5. Cupcake

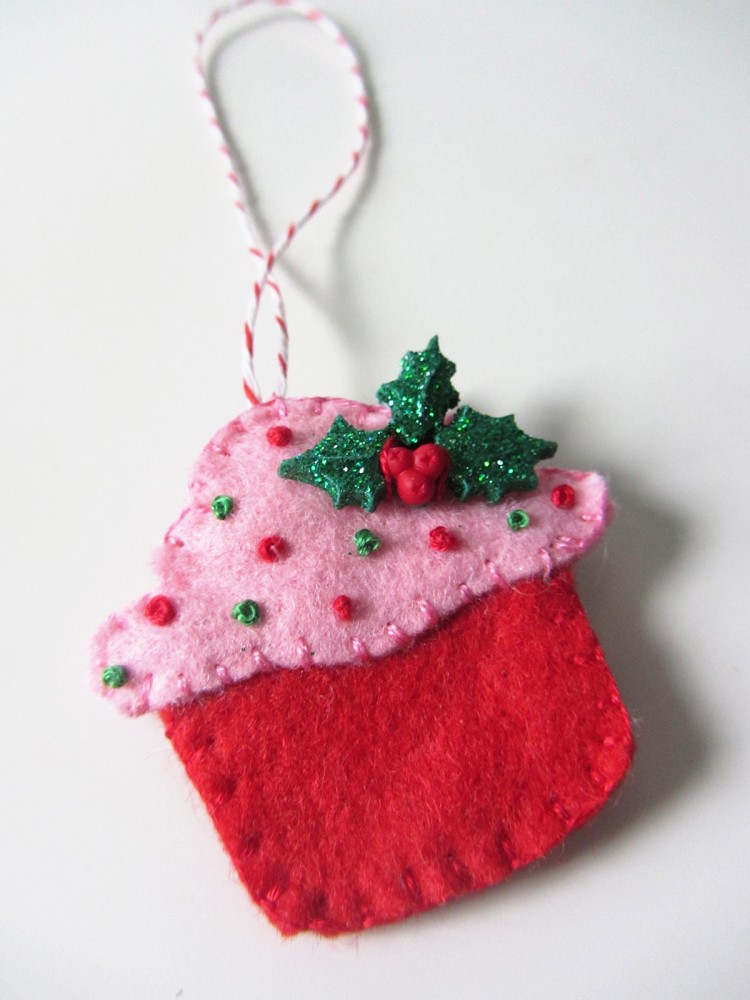
This little holiday cupcake could be decorated any way you’d like! I went with pink, as Jax loves strawberry *anything*. I stitched the frosting pieces to the liners, then embellished both sides with red and green French knots. I sewed the two sides together with a loop of twine at the top, then stitched holly embellishments onto each side.

Mini Advent Ornaments Set One

6. Hot Cocoa

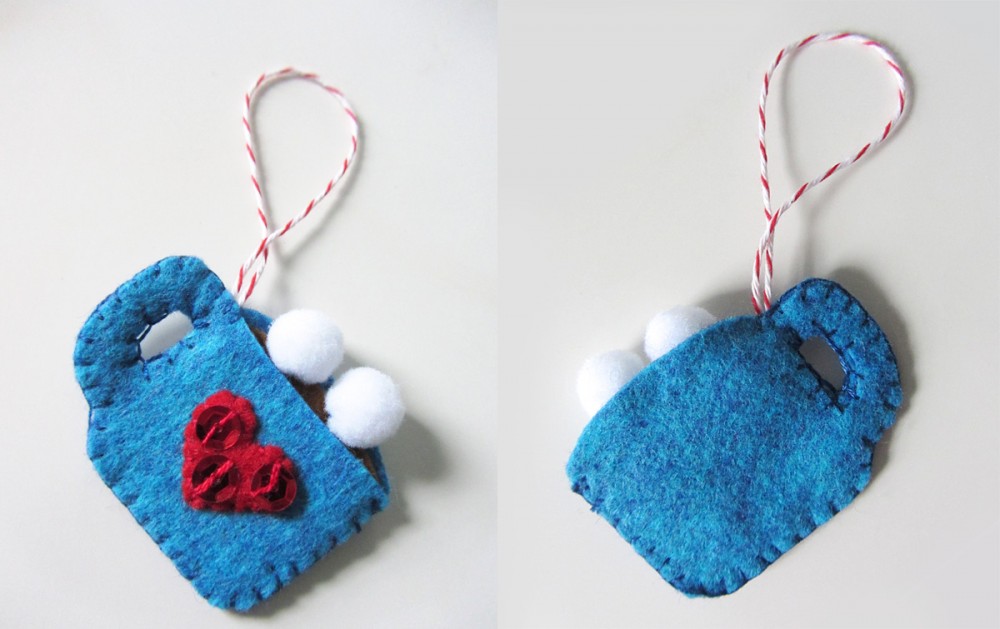
I love this little mug of hot cocoa! you might recognize it from the camping quiet book page. I did make a few changes, though. I started by sewing a red heart onto the front, then adding three red sequins. I glued the brown cocoa to the inner side of the mug back, then sewed the front and back together, I didn’t sew around the top, so I attached the twine loop at the top of the handle. No cocoa is complete without marshmallows, so mine were added via stitched-on mini pompoms.

Mini Advent Ornaments Set One

Which one is your favorite? What would you like to see next? I have to design 24, and your idea may be one! Stop by Facebook or Twitter, or comment here with your ideas. I’d love to see your finished ornaments! Tag me on Instagram @iolstephanie (if you are private, I’ll have to request to follow you.)

Mini Advent Ornaments Set One

Stay tuned for mini ornaments 7 – 12 later this week. I’ll be posting sneak peeks on Facebook and Instagram.


Animals of Europe for the Montessori Wall Map & Quietbook with Printables

Animals of Europe for the Montessori Wall Map & Quietbook with Printables

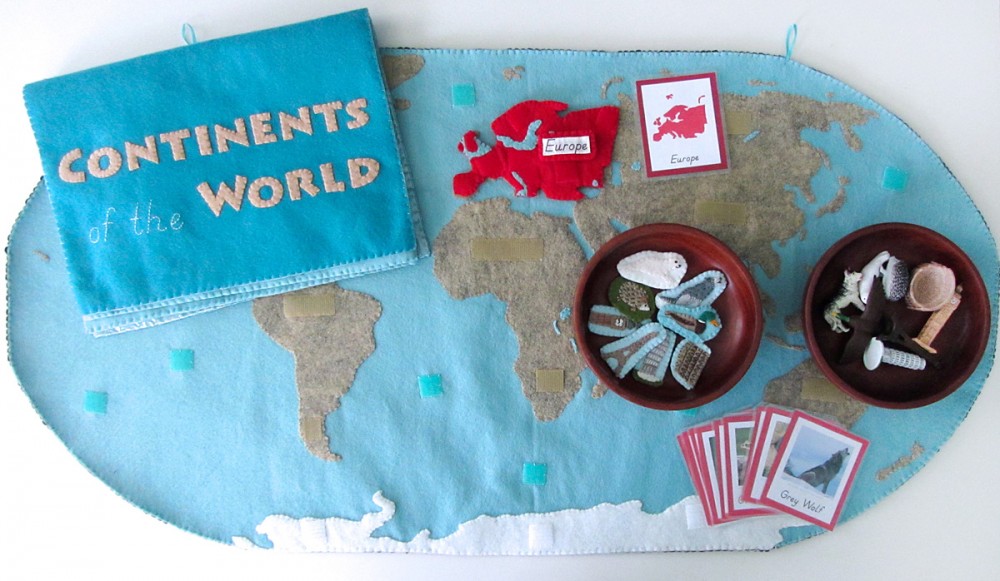
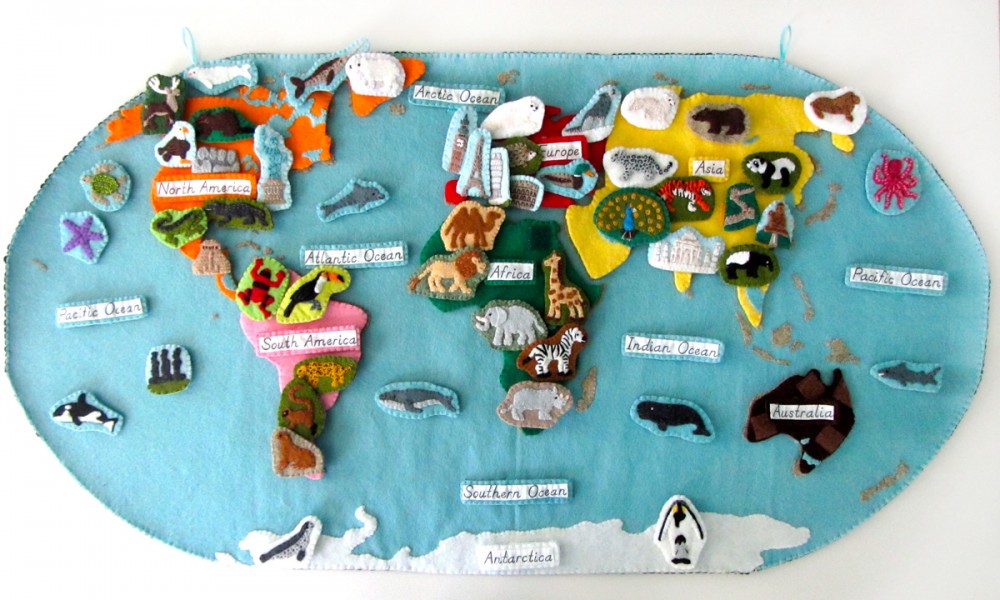
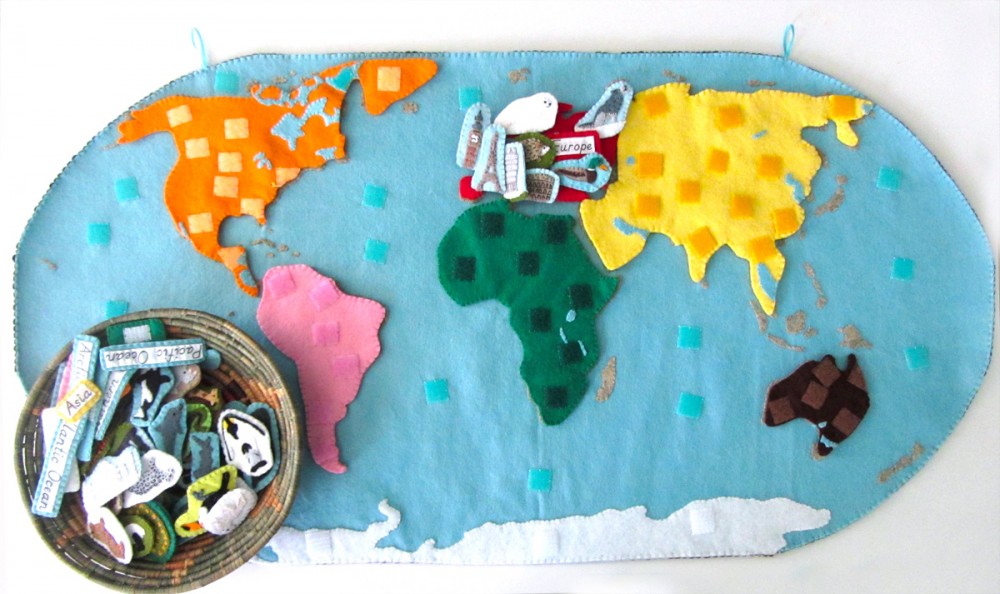
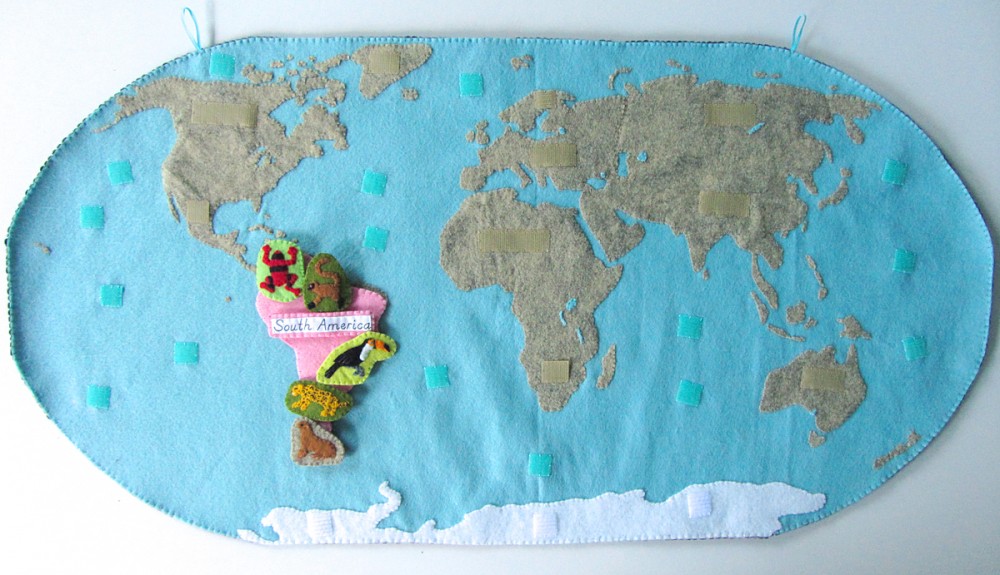
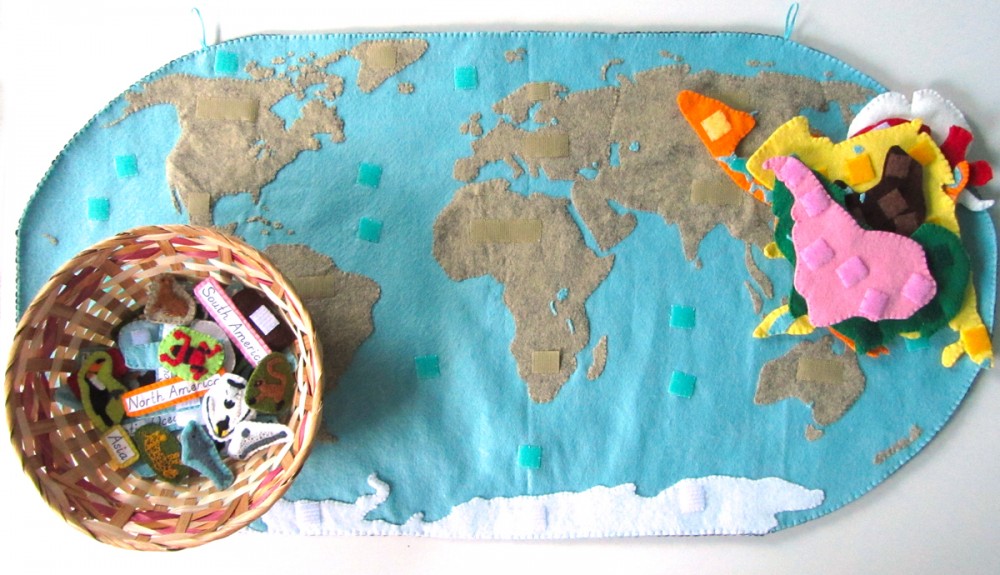
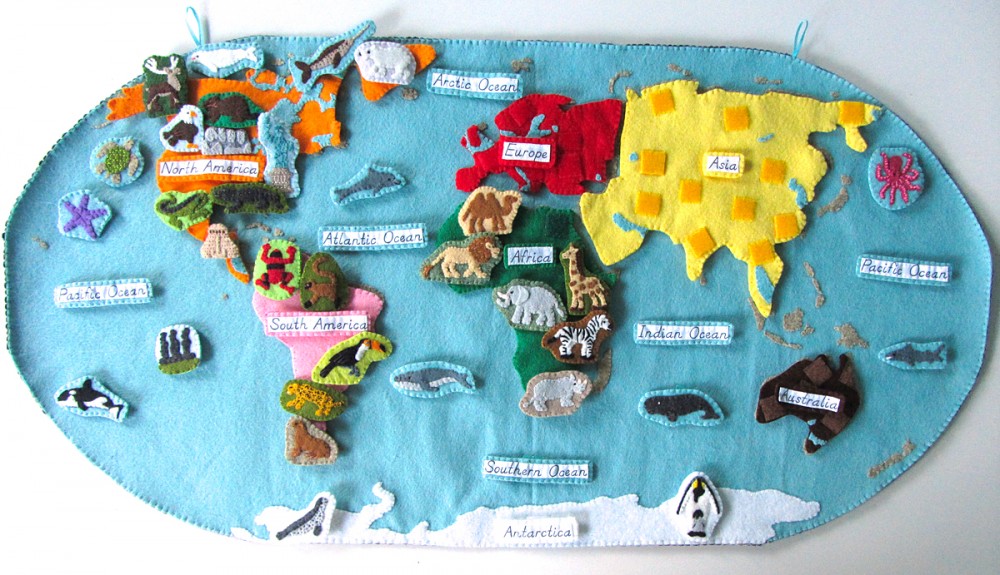
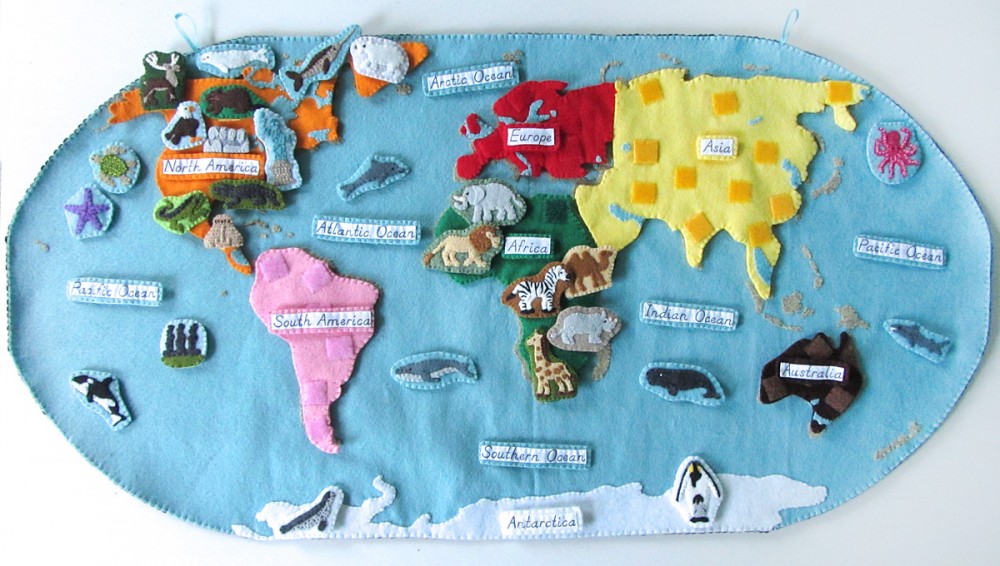
Are you ready for the next installment of the Montessori wall map? This has been the most epic sewing project ever… If you haven’t been introduced to our Montessori wall map and quiet book yet, you can read all about it here. This post is for the continent of Europe.

Animals of Europe for the Montessori Wall Map & Quietbook with Printables

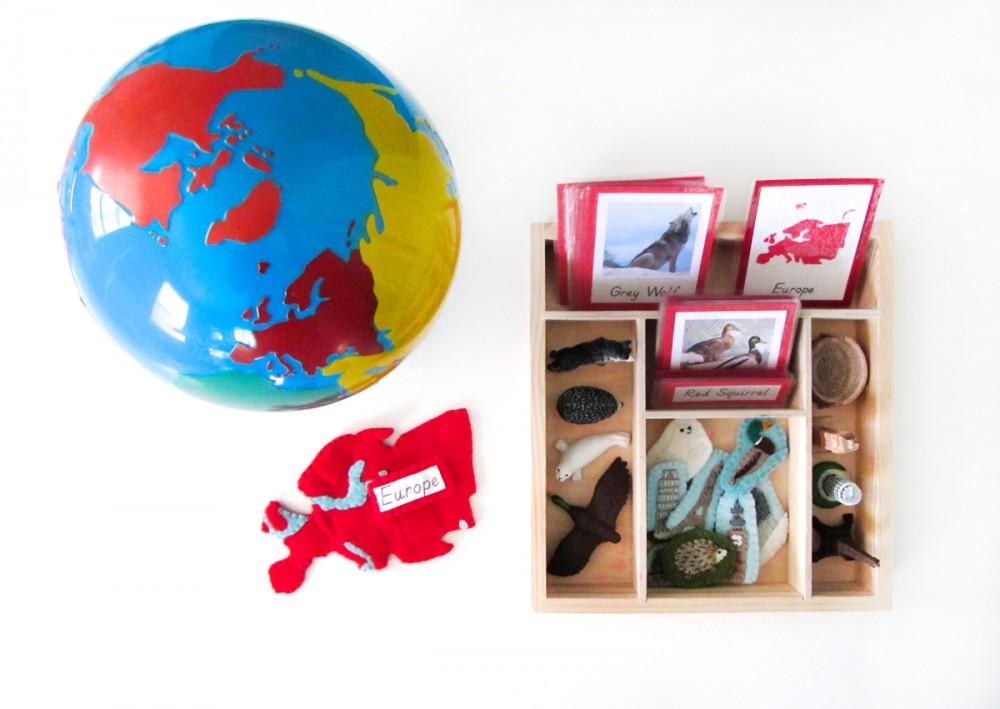
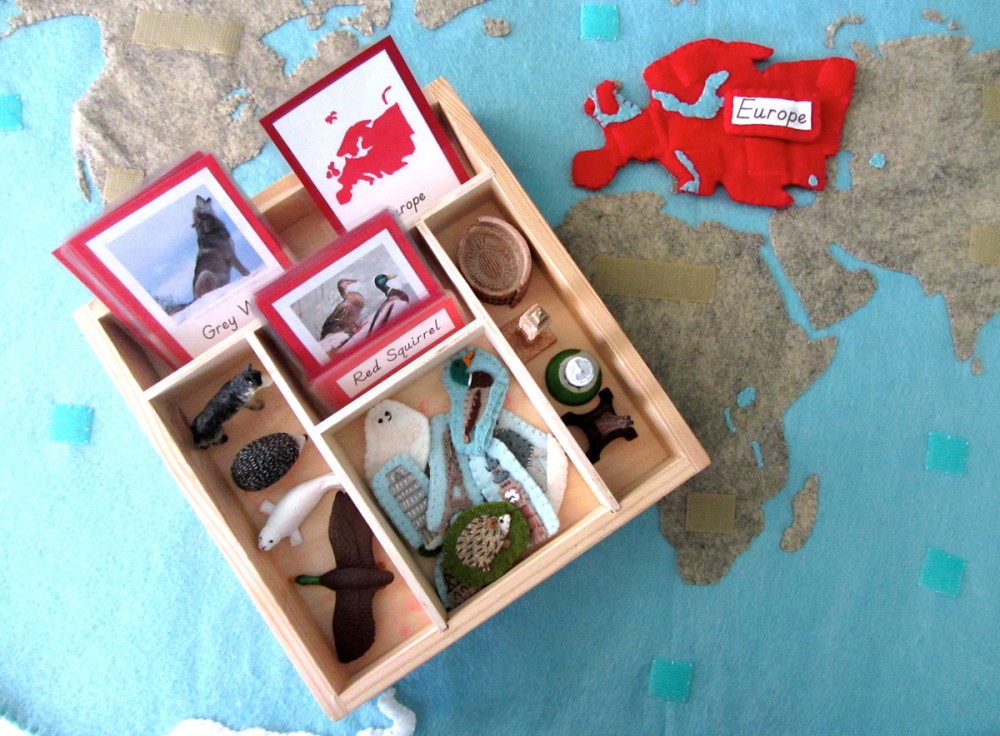
Our Europe 3-Part Card Tray

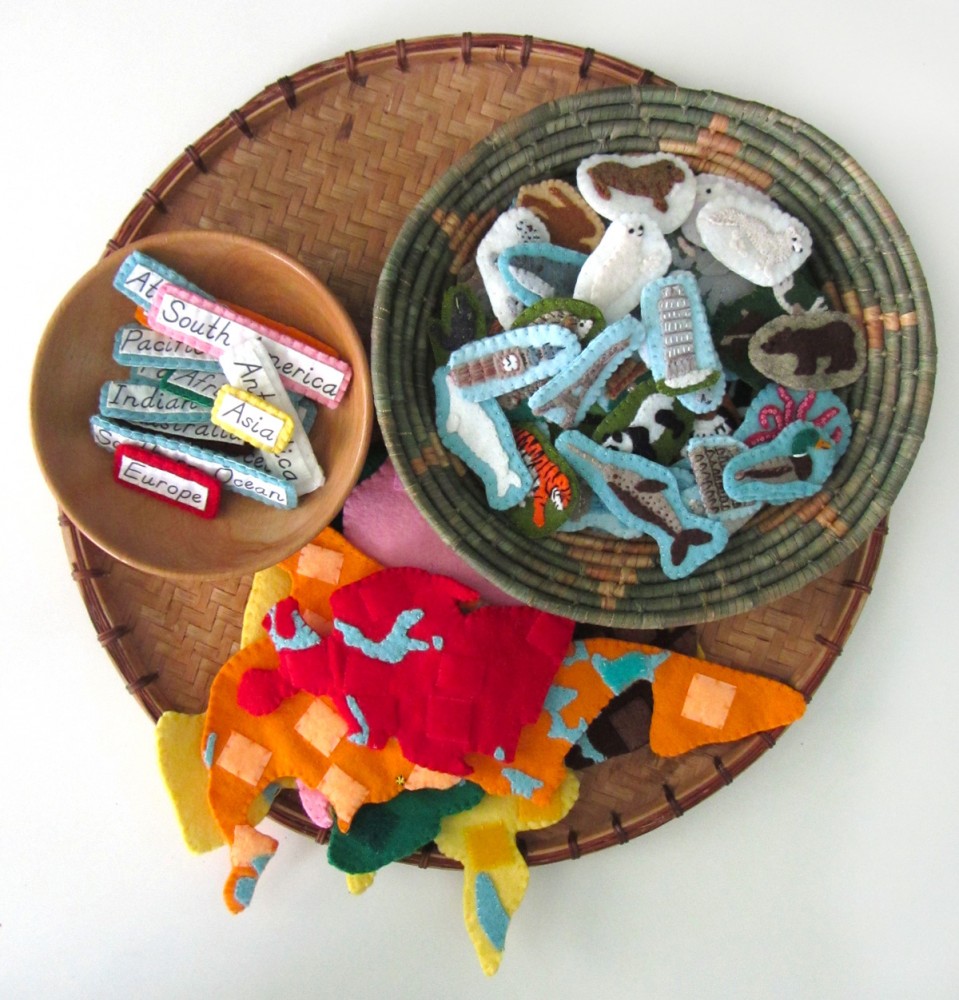
Every continent (and the oceans) will have landmarks and animals. Europe has so many amazing landmarks! I ended up choosing an even mix of animals and landmarks for this project.

Overview and Map PatternsAfricaAntarcticaAsia • Europe
North AmericaOceansSouth America

Animals of Europe for the Montessori Wall Map & Quietbook with Printables

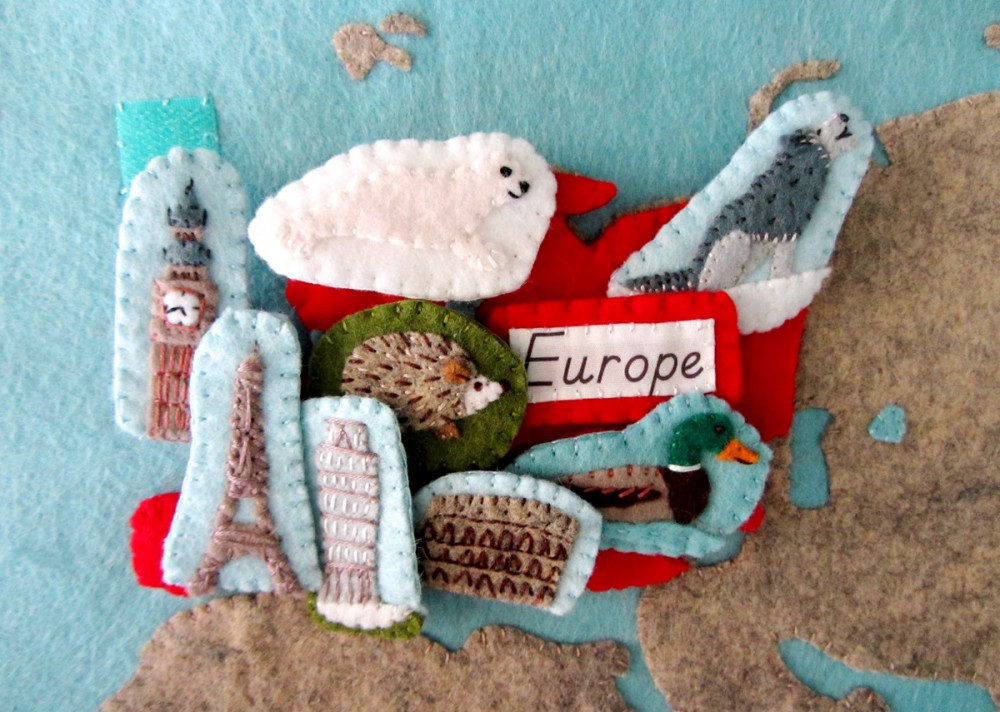
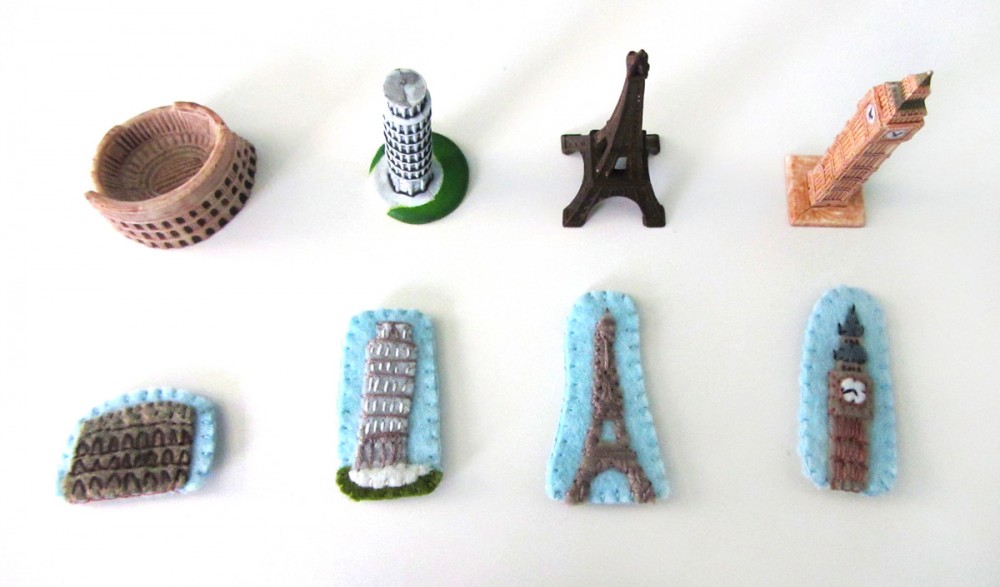
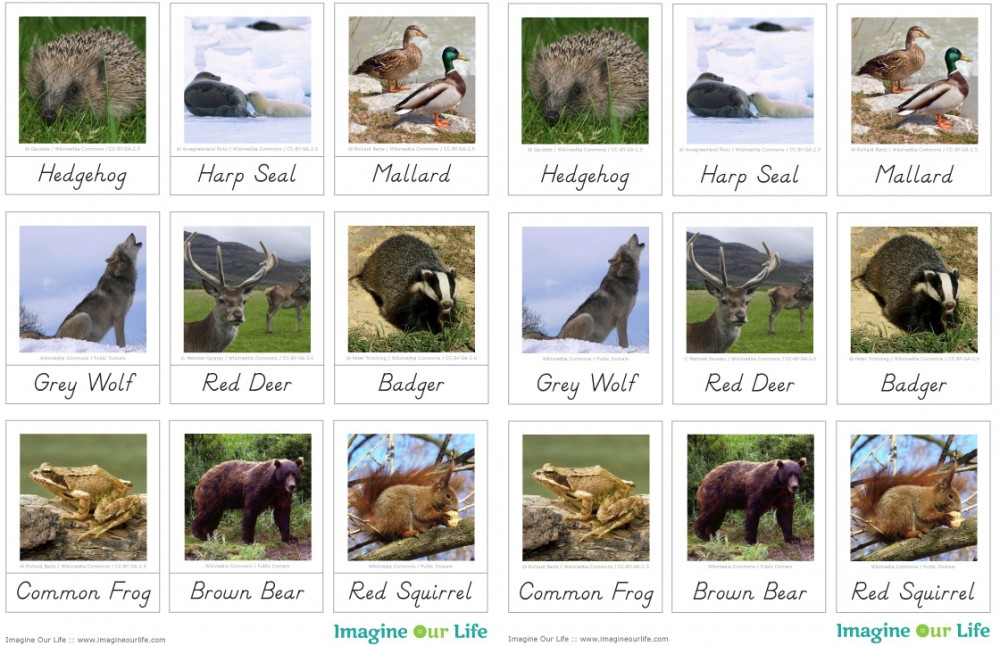
Those of you who follow along on Facebook or Instagram have been seeing what I’ve been creating for Europe. Things are definitely a tight squeeze when you put everything on the map at once. There is just so much awesome in a small area! I made: the Eiffel Tower, Big Ben, the Tower of Pisa, the Colosseum, a harp seal, a mallard, a hedgehog, and a grey wolf. My choices were influenced by which figurines were available from SafariLTD’s TOOBs.

Animals of Europe for the Montessori Wall Map & Quietbook with Printables
This project is totally free for you to use (though commercial use requires a license.) If you’d like to support my designs, one way is to make a purchase off of Jax’s Amazon wishlist. I use his list to bookmark school and craft items until I am able to get them. For more ways to contribute to this site, visit my support page.

Materials I Used

The Pattern (see the first post for the main patterns)

Felt from American Felt & Craftbig apple [red], cilantro [olive green], pastry [golden taupe], gold nugget [gold], chocolate [deep brown], fresh linen [off white], chai [taupe], doe [brown], jade [green], sparrow [light blue], ice [aqua blue], stone [heather taupe], elephant [charcoal], graywhite and black.

Hook & Loop – I used white snag-free Velcro on the backs of all these pieces and red hook & loop (loop only) on the front of the Europe puzzle piece. My red hook & loop was from here.

Felt glue to tack down the pieces before sewing, printer fabric for the continent label, embroidery floss in colors to match the felt and micro tip scissors.

Animals of Europe for the Montessori Wall Map & Quietbook with Printables

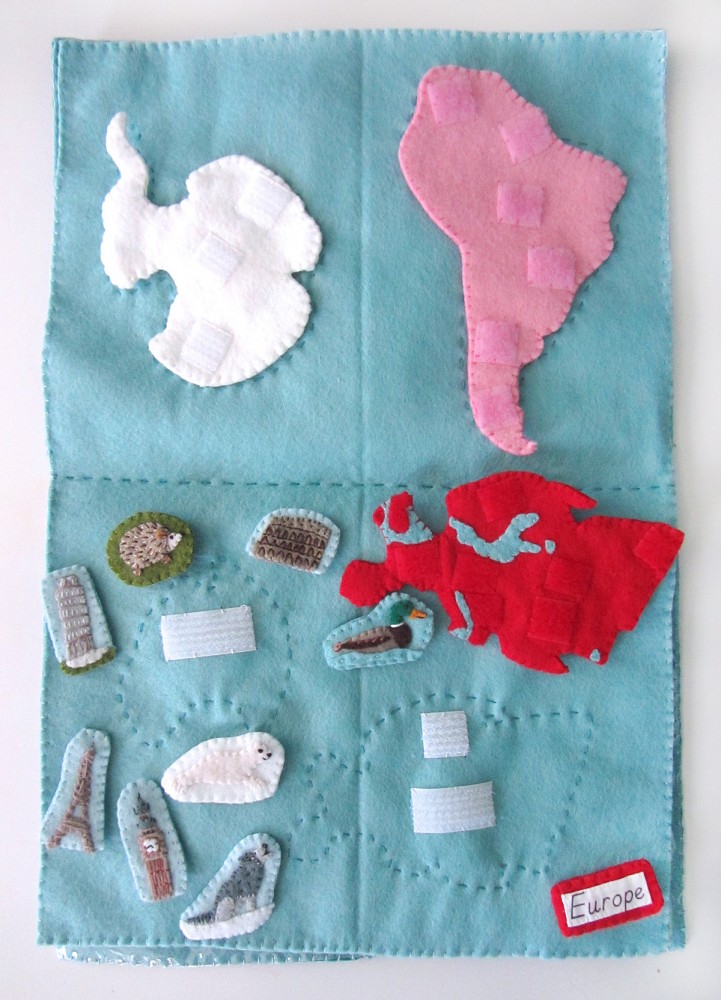
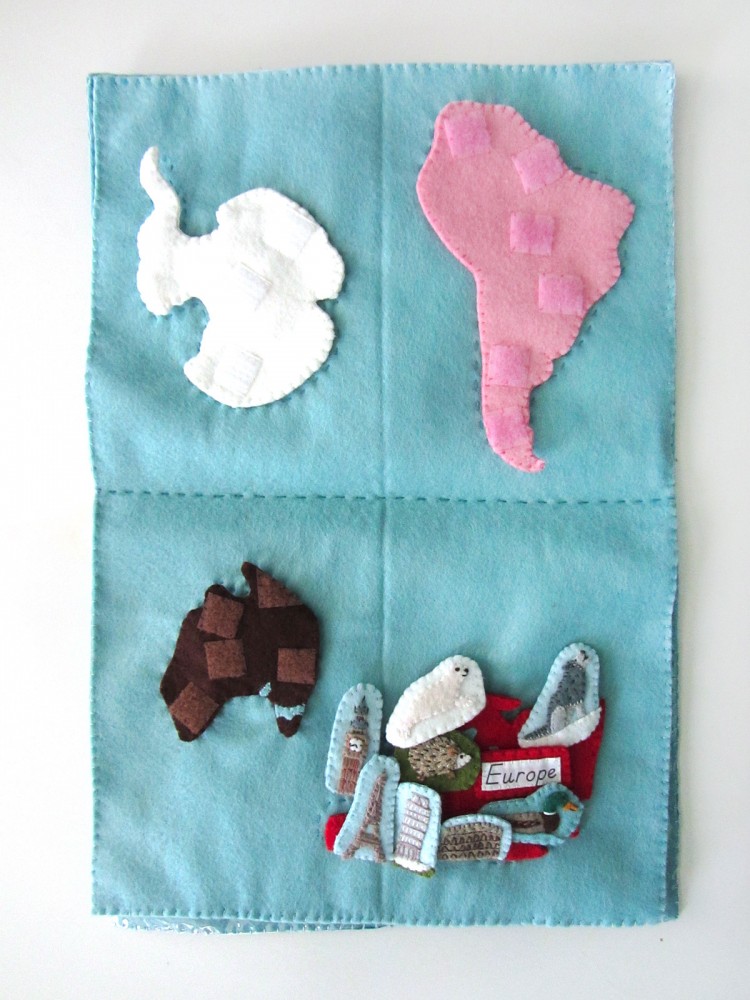
For the Europe quiet book page, I sewed a running stitch (dashed) outline around the Europe pattern piece and sewed down snag-free Velcro to line up with the Velcro on the back of the Europe piece.

Europe: (Felt used: big apple red) For the Europe continent puzzle piece, I sewed down pieces of red loop Velcro. On the back, I sewed strips of white snag-free Velcro to correspond with the Velcro in the quietbook and the wall map. I finished it by sewing the two sides together around the edge with a blanket stitch.

Animals of Europe for the Montessori Wall Map & Quietbook with Printables

Label: (Felt used: big apple red) For the continent label, I folded under the edges (just a tiny bit to hide the rough edges) and creased it with my nails. The printer fabric held the folds nicely without ironing. Then I stitched the label to some red felt and trimmed it down to be a border. I cut a matching felt rectangle for the back, sewed snag-free Velcro to it and then sewed both sides together.

Animals of Europe for the Montessori Wall Map & Quietbook with Printables

For all of the animals, I started by gluing the pieces down to a scrap of background felt with a very light amount of felt glue. I glue multiple animals at a time to give them time to dry. I sewed them down, trimmed the background and cut a matching backing piece. I sewed snag-free Velcro to the back and sewed both sides together with a blanket stitch.

Animals of Europe for the Montessori Wall Map & Quietbook with Printables

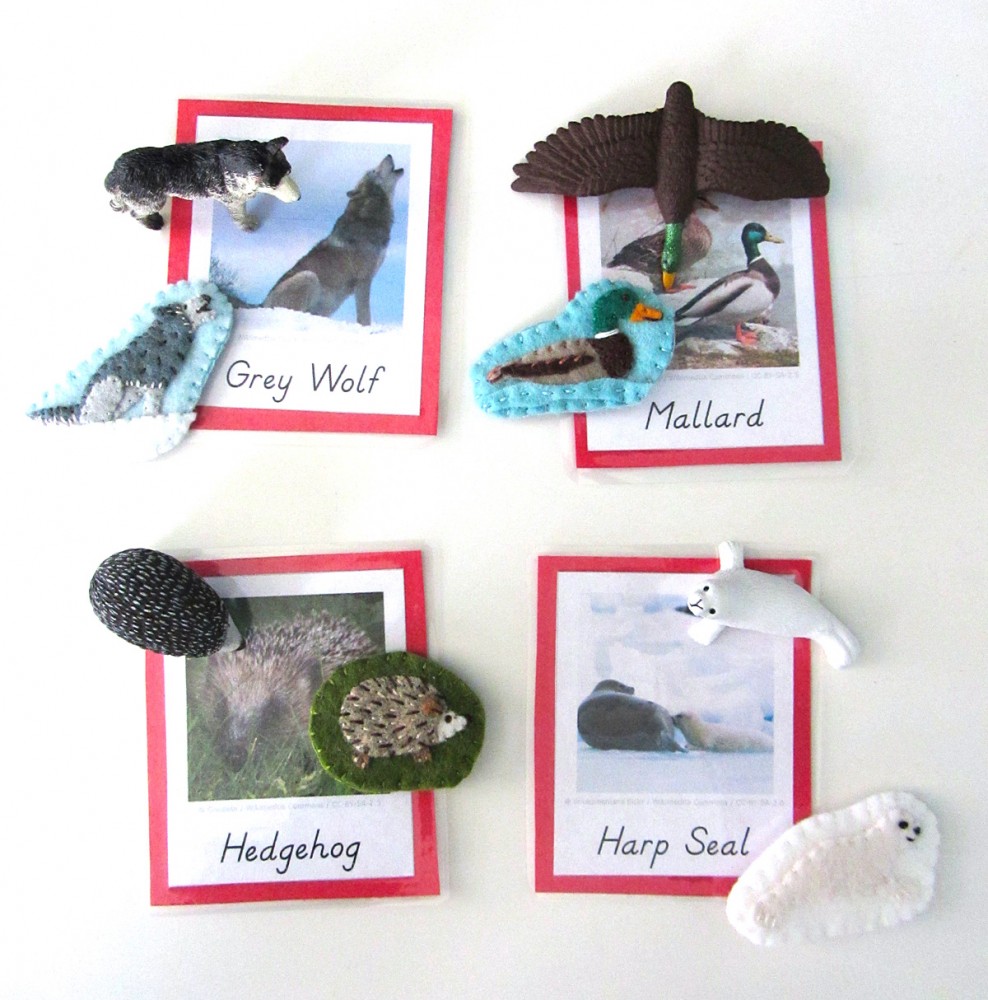
Harp Seal: (Felt used: fresh linen off-white for the baby seal, white for the background) The harp seal is super simple! I tacked down his body with glue and sewed around the edges. I made a small stitch for a mouth and satin stitched a nose. His eye is a black French knot.

Animals of Europe for the Montessori Wall Map & Quietbook with Printables

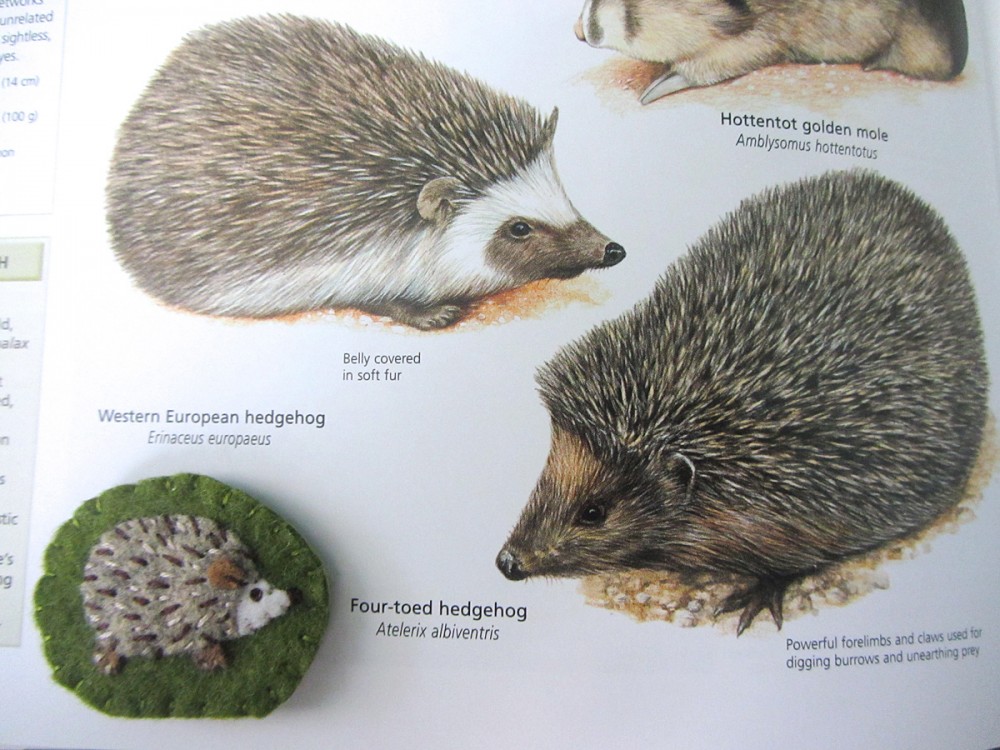
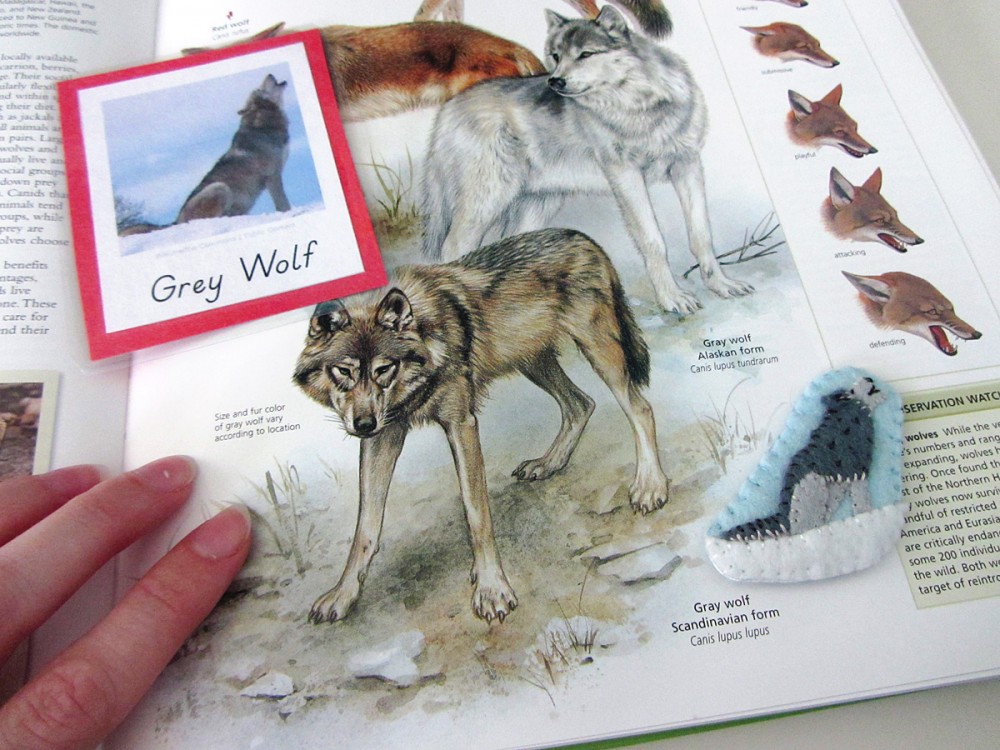
We love this animal encyclopaedia!

Hedgehog: (Felt used: stone heather taupe for the body, doe brown for the ear and legs, fresh linen off-white for the face and cilantro olive green for the background) I first glued down all her parts in the proper order, adding the ear last. I stitched all the way around the edges and made a stitch at the base of her ear. Using brown, I made a French knot eye and satin stitched nose. On her back, I used dark brown and cream to make stitches to show the texture of the spines.

Animals of Europe for the Montessori Wall Map & Quietbook with Printables

Grey Wolf: (Felt used: gray and elephant charcoal for the body and white for the snow and sparrow light blue background) I started by gluing down the front leg piece and the face (using the back/chest pieces to find the positioning. I then glued down the back/chest, followed by the hind leg and the ear. I cut a curvy piece of white and glued it down over where his feet would be to make the ground. Once it was dry, I trimmed around the wolf and stitched everything down. While stitching down the darker gray piece, I made my stitches longer and a little “sloppy” to make his fur look shaggy. Along the underside of his tail, the edge of his face and under his chest, I made light gray stitches the same way. His eye is a little stitch to make it look closed, his nose is satin stitch and his mouth is just lined with two straight stitches.

Animals of Europe for the Montessori Wall Map & Quietbook with Printables

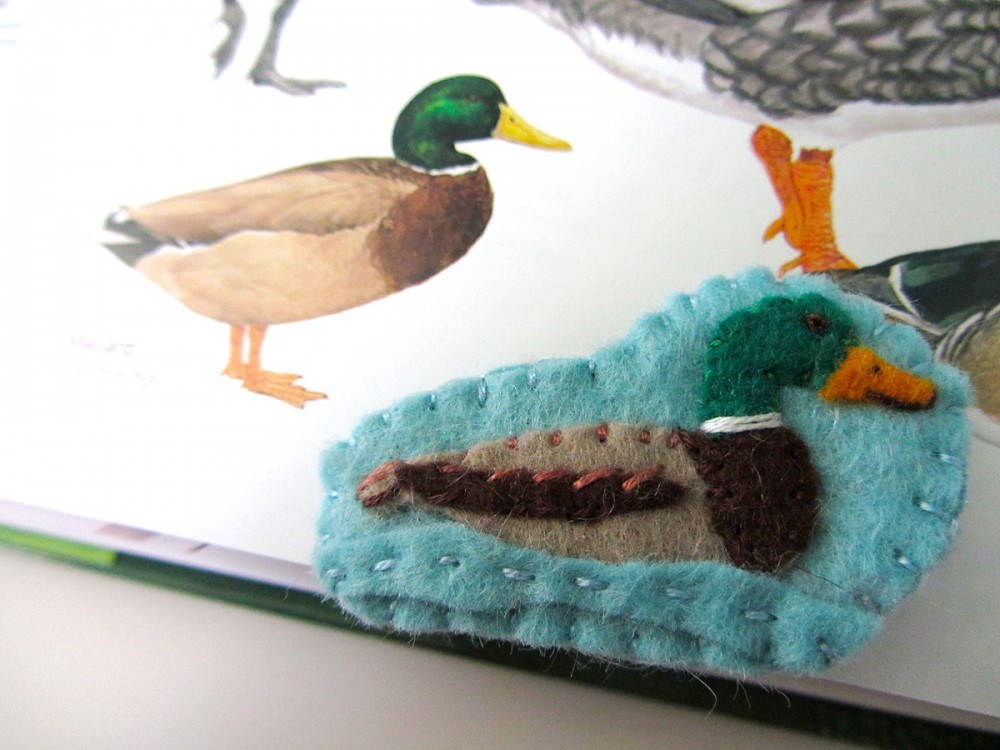
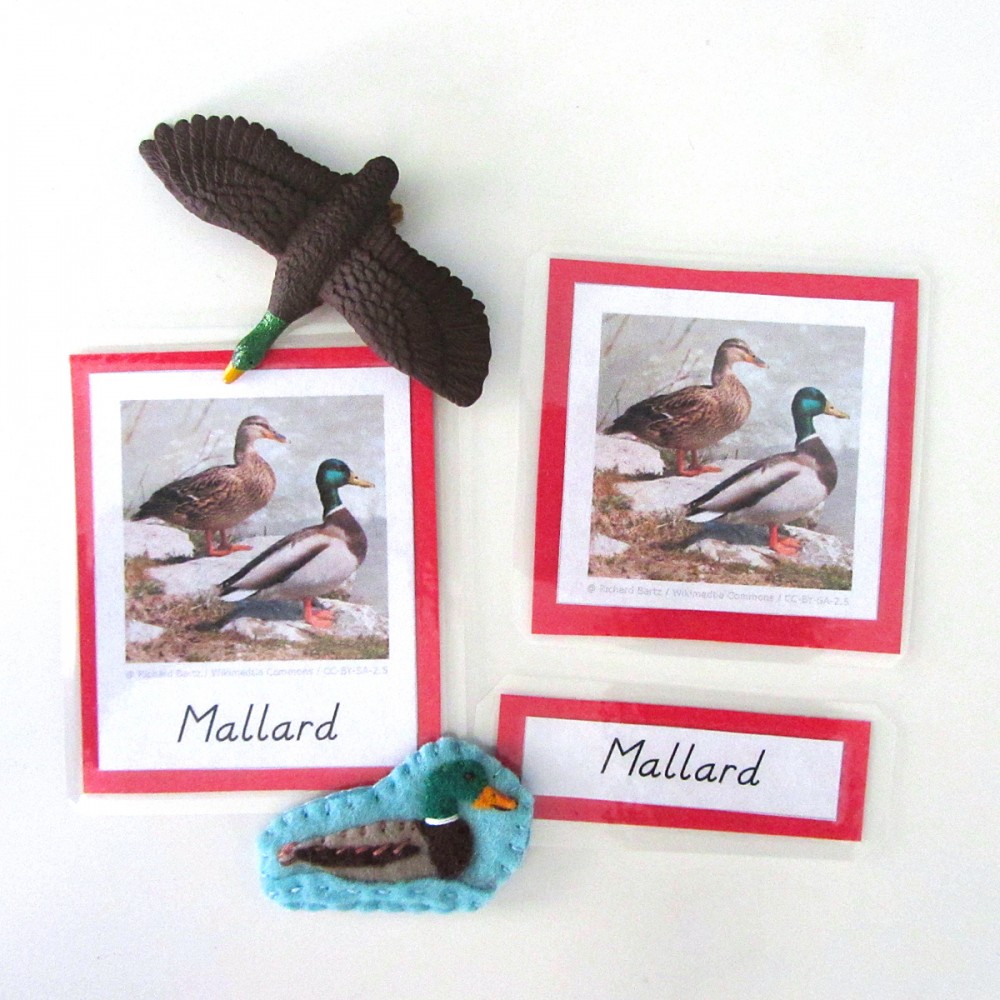
Mallard: (Felt used: gold nugget gold for the beak, jade green for the head, chai taupe for the body, chocolate deep brown for the chest and wing and ice aqua blue for the water and background) I glued down the body and head pieces, then glued the chest and wing on top. I cut a thin, wavy blue strip for water and glued it down over the bottom edge of the mallard. I stitched down all the mallard’s edges, then using dashed stitches, I stitched through the center of the water wave. At her neck, I made two long stitches in white. The eye is a French knot in brown, with a tiny stitch for a nostril and two long stitches to make the beak opening.

Sewing the Landmarks

For all the landmarks, I started by sewing the front piece. Then I cut out a backing felt to match the final shape and added some snag-free Velcro to it. I finished sewed around the whole edge, switching colors where needed. For all of the detail work, see the photos for a sample of where to stitch.

Animals of Europe for the Montessori Wall Map & Quietbook with Printables

Colosseum: (Felt used:stone heather taupe for the building and sparrow blue for the background) I glued down the building and stitched down the edges. With brown floss, I stitched 3 rows with back stitch. On the lower three levels, I stitched arches using a lazy daisy stitch that is open at the bottom. On the top level, I made tiny vertical stitches for windows.

Tower of Pisa: (Felt used: gray for the building,  white  for the ground ,cilantro olive green for the ground and sparrow blue for the background) I cut out a small green piece for the ground, then glued it down with the white ground on top. I glued the building on top. Using a medium gray floss, I made long stitches across the building to make each level. On the bottom level, I used it to make vertical stitches for columns. On the top level, I made an arch with an open lazy daisy stitch. I switched to white floss and made the rest of the columns.

Eiffel Tower: (Felt used: chai taupe for the structure and sparrow blue for the background) The Eiffel Tower is tacked down in place with glue, then I stitched around all the edges. I made criss-crossed stitches all over it similar to the beams it has. In some spots I made long horizontal or vertical stitches to make the real tower.

Animals of Europe for the Montessori Wall Map & Quietbook with Printables

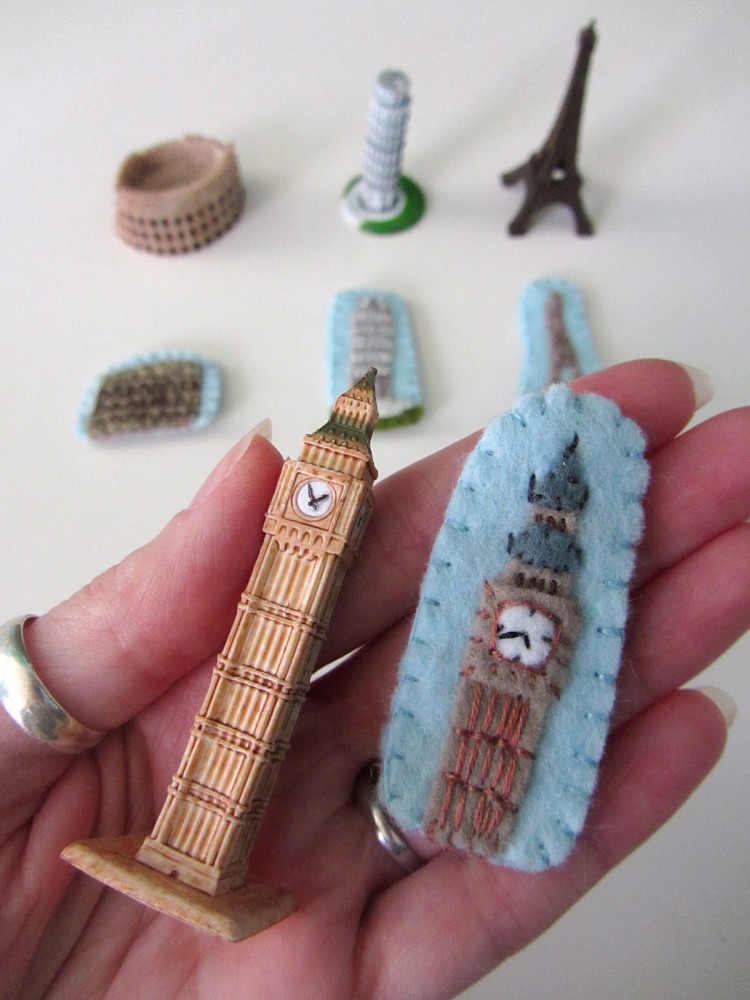
The beautiful landmark replicas seen here were provided by SafariLTD. I am working with them to make this project the best it can be.

Eiffel Tower: (Felt used: pastry golden taupe for the building, white for the clock face, elephant charcoal for the roofs and sparrow blue for the background) For Big Ben, I glued everything in place then stitched down the roofs and the sides of the clock square piece. On the tower, I made rows of back stitching with long, vertical stitches in between. I stitched black clock hands on, then stitched a square around it in the taupe floss. Using dark brown, I made little windows above the clock. Using gray, I made the points coming off of the roofs.

Animals of Europe for the Montessori Wall Map & Quietbook with Printables

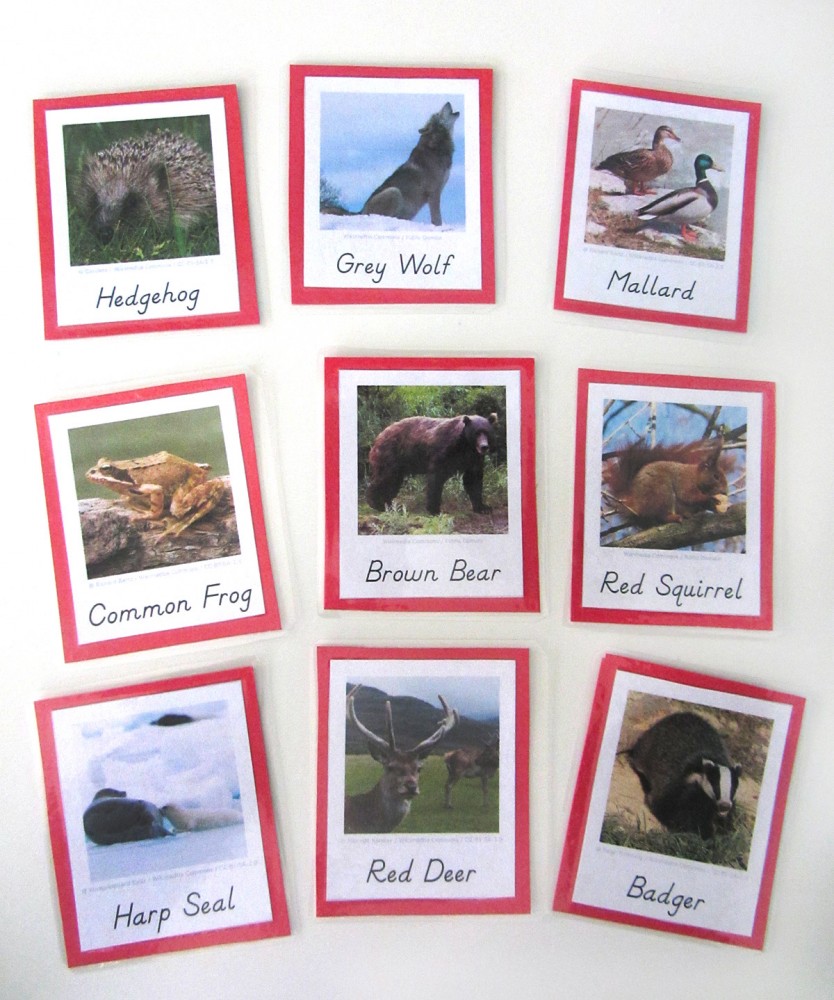
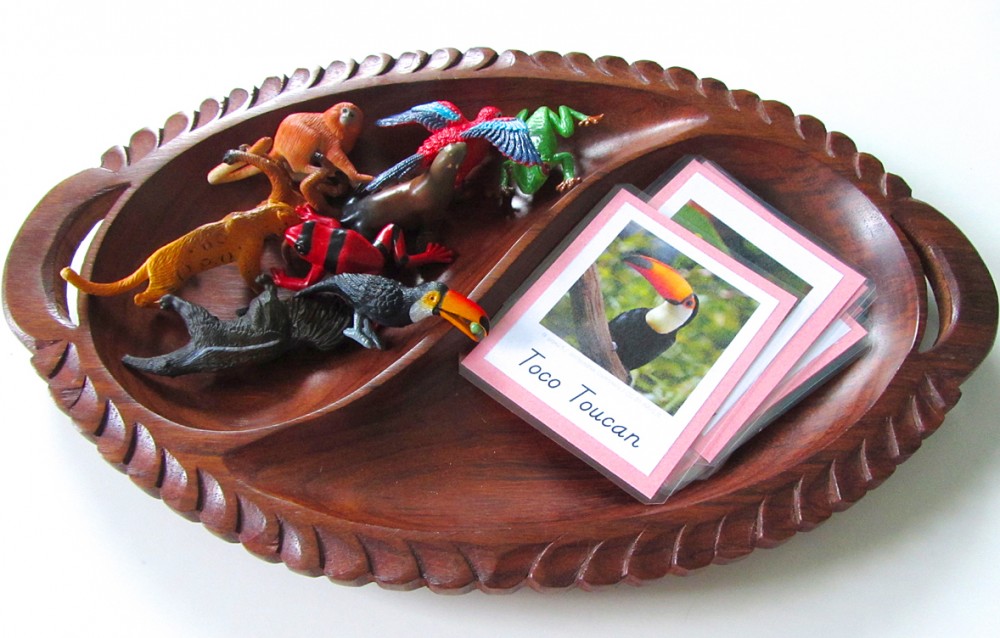
Montessori European Animals 3-Part Cards

The series of 3-Part cards I am making for this project is something that Jax will be using for many years in homeschool. I have been focusing on the animals in these posts, but at the end of the project I will make a set featuring all the landmarks we sewed. Eventually, we will expand our collection of cards even more to include cultures, more landmarks, and so much more. Three part cards are extremely flexible learning tools.

 Animals of Europe for the Montessori Wall Map & Quietbook with Printables

Click here to download my free pdf file to make your own animals of Europe cards. To make mine, I cut them out, glued them to red construction paper (to match Europe’s Montessori color) then laminated them. I use this laminator and I’ve been very happy with it. It makes everything so shiny and strong! My photos come out slightly faded from the printer (I use normal paper) but turn gorgeous after lamination. (Quick tip: Add a dab of glue stick on the back of your pieces before you place them in the lamination pouch to keep them from sliding around as you feed it through the machine.)

Animals of Europe for the Montessori Wall Map & Quietbook with Printables

Our main way of using the cards for now is to pull out our SafariLTD’s TOOB figurines and  match them to the pictures. We like to watch short videos about an animal, then study some pictures and draw our own. The TOOBs we used for these animal cards are: River TOOB (mallard), Arctic Toob (harp seal, wolf – which is actually a husky!) and Pets TOOB (hedgehog).

SafariLTD kindly provided the World Landmark TOOB and the Around the World TOOB for this continent. We are working with them to make this project the best is can be!

Animals of Europe for the Montessori Wall Map & Quietbook with Printables

I know many of you are sewing along (or plan to after the holidays!) If you are, stop by my Instagram @iolstephanie and leave a comment on one of my photos (I can’t see your photo if it you are private, but I can request to follow you temporarily if you leave a comment on mine about it) or share photos on Facebook. You can also email me. I love seeing what others make from my patterns!

Animals of Europe for the Montessori Wall Map & Quietbook with Printables

Please be sure to visit the other ideas featured on Montessori Monday. There are many great links!

Montessori Monday

Polar Family Felt Ornament Patterns – Penguins & Polar Bears

Polar Family Felt Ornament Patterns - Penguins & Polar Bears

Last year I made a set of felt holiday ornaments with the theme of Christmas Cottage. I really enjoyed the process of designing and sewing them, so I knew I’d do it again this year. I made some loose sketches and chose a color palette so I could order supplies, then began designing the patterns once November started. (Eek, it’s November!!)

Polar Family Felt Ornament Patterns - Penguins & Polar Bears

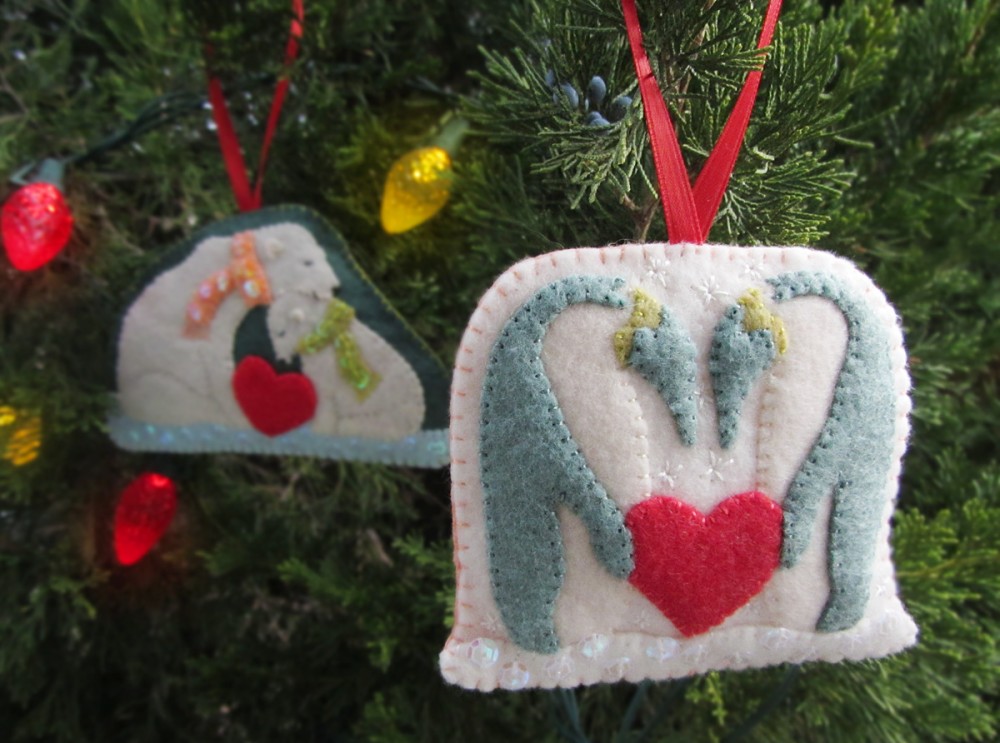
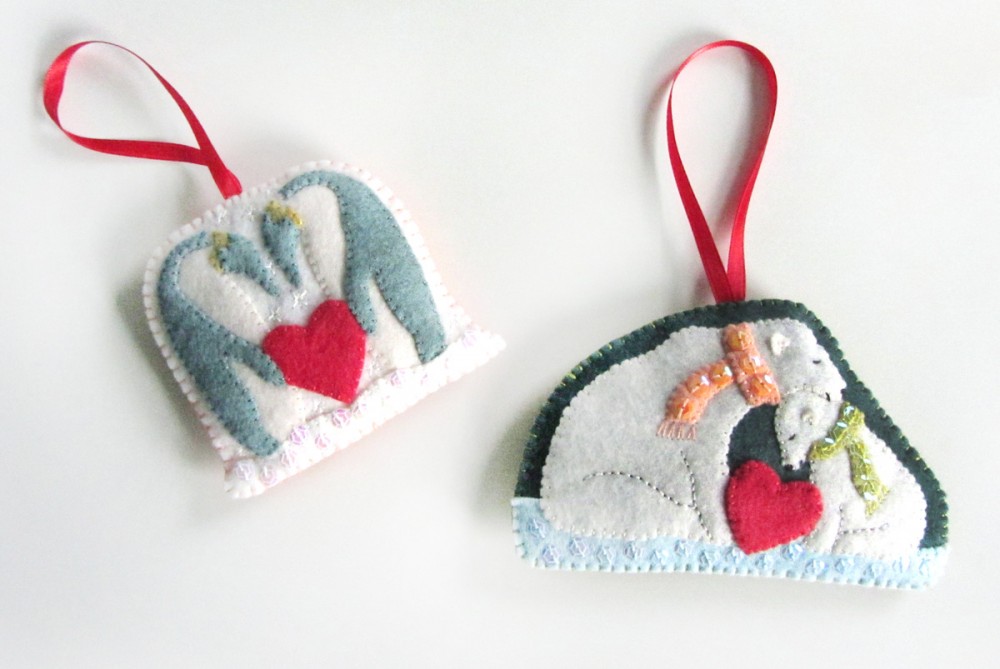
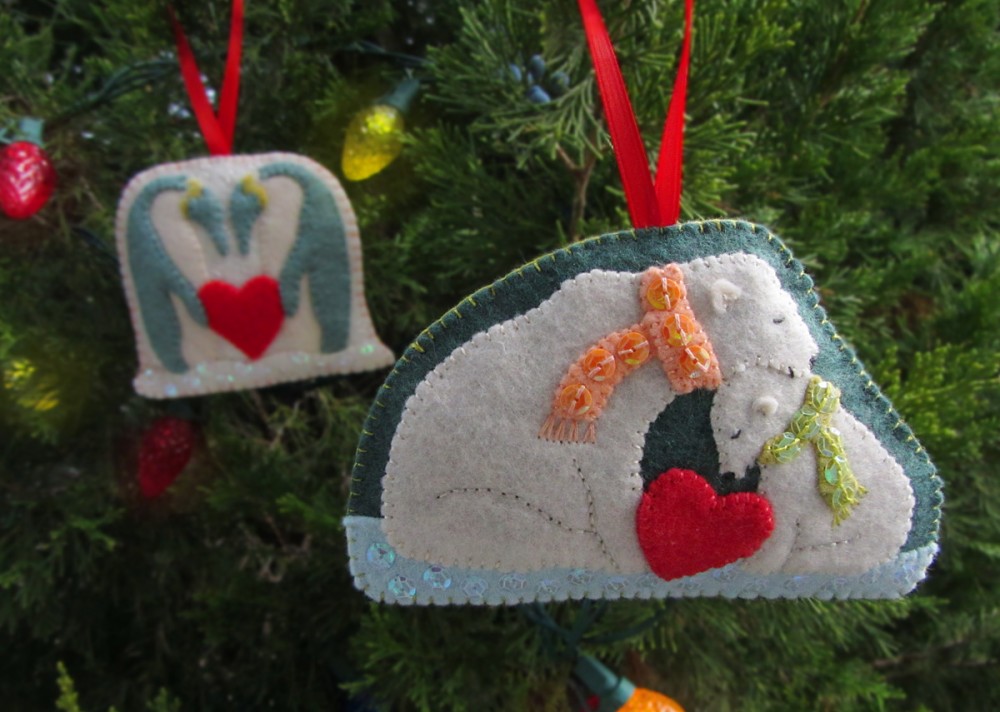
This year’s theme is Polar Families, inspired by some of the animals Jax and I have been studying in homeschool with our world continent project. There will be four designs: a penguin daddy and chick, a narwhal family, a pair of penguin mates and a polar bear mama and cub. The latter two are featured in this post.

Polar Family Felt Ornament Patterns - Penguins & Polar Bears

What I Used

I am listing all the supplies I’ll use for the 4 ornaments, noting the ones not needed for these two.

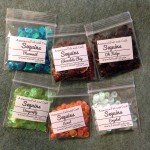
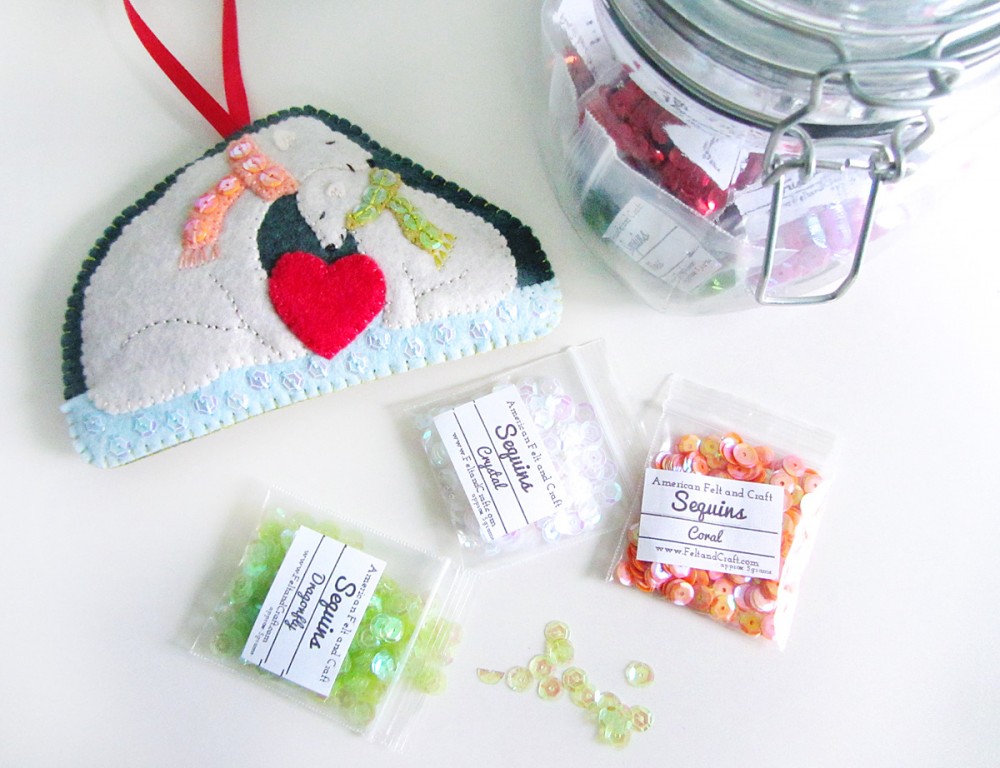
These beautiful sequins are a new offering of American Felt and Craft!

These beautiful sequins are a new offering of American Felt and Craft!

Polar Family Felt Ornament Patterns - Penguins & Polar Bears

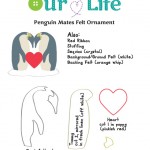
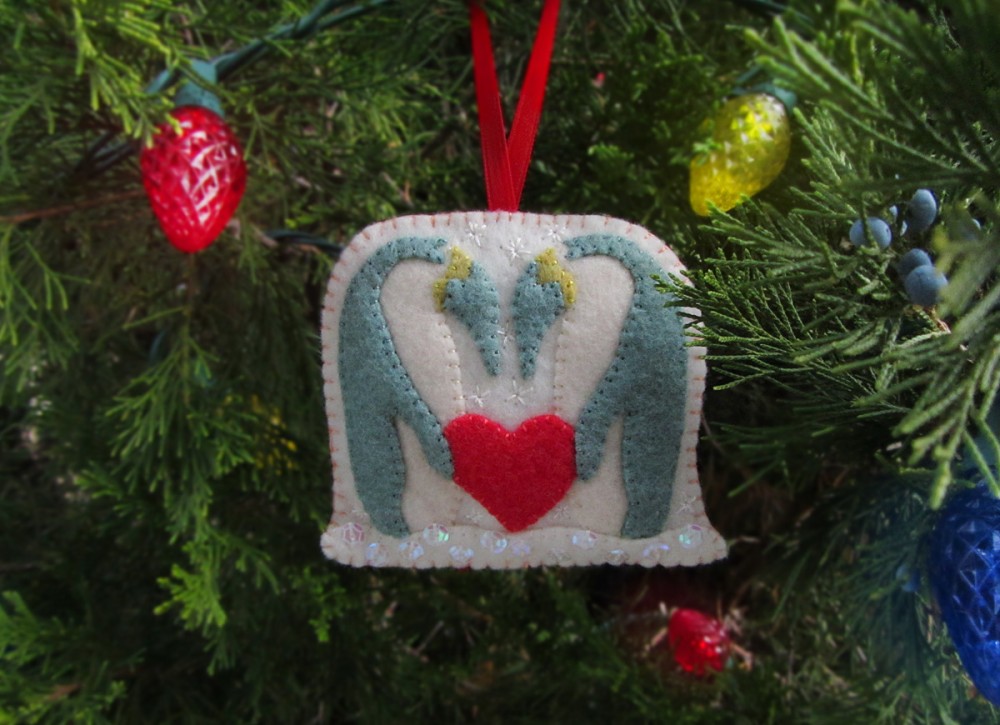
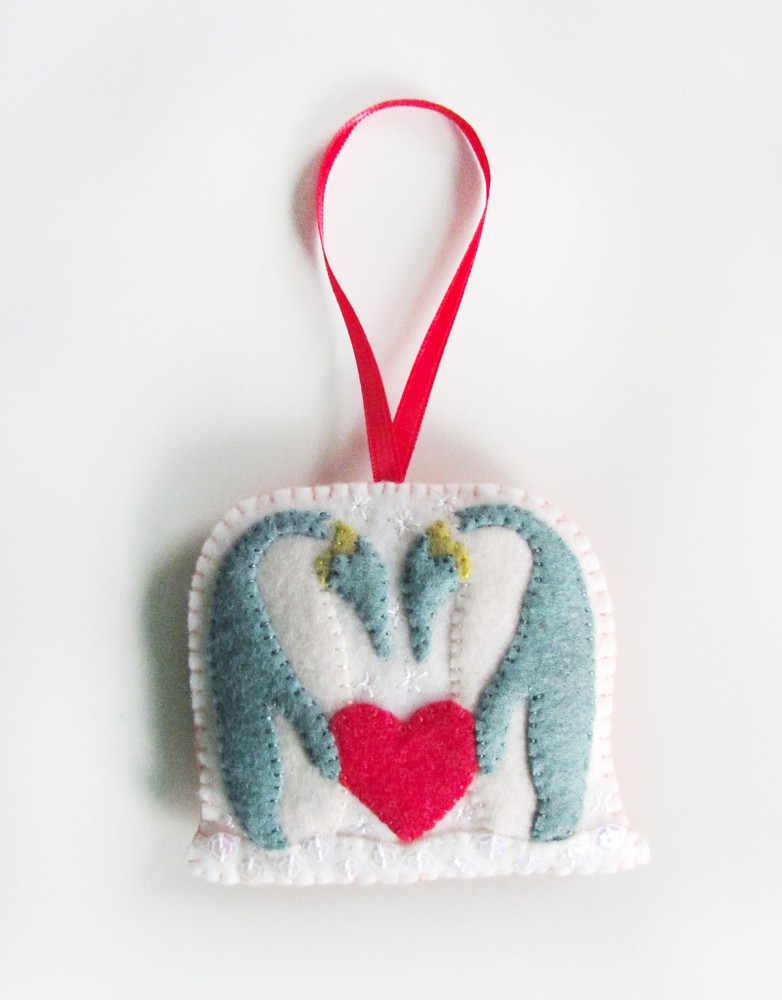
Penguin Mates

 After I cut out all my pieces, I tacked them into place on white felt with a thin layer of felt glue. I cut a wavy strip of white felt for the snowy ground and tacked it down across the bottom. Then I trimmed down the background felt so there was just a small edge around the penguins.

Polar Family Felt Ornament Patterns - Penguins & Polar Bears

For the penguins, the heart and the top of the snowy ground, I stitched all the edges down with matching floss. (I use 2 strands.) I stitched crystal sequins randomly onto the snowy ground using 2 stitches each.

Polar Family Felt Ornament Patterns - Penguins & Polar Bears  Polar Family Felt Ornament Patterns - Penguins & Polar Bears

On the white background, I stitched snowflakes: a plus sign shape of four stitches, all stitched towards the center, then four more longer stitches on the diagonal in between.

Polar Family Felt Ornament Patterns - Penguins & Polar Bears

I cut a length of red ribbon and a piece of orange whip (coral orange) felt to fit as the ornament’s backing. I stitched all the way around, adding stuffing halfway and catching the ribbon loop in the top. I used a blanket stitch.

Polar Family Felt Ornament Patterns - Penguins & Polar Bears

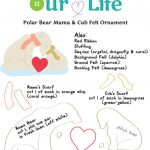
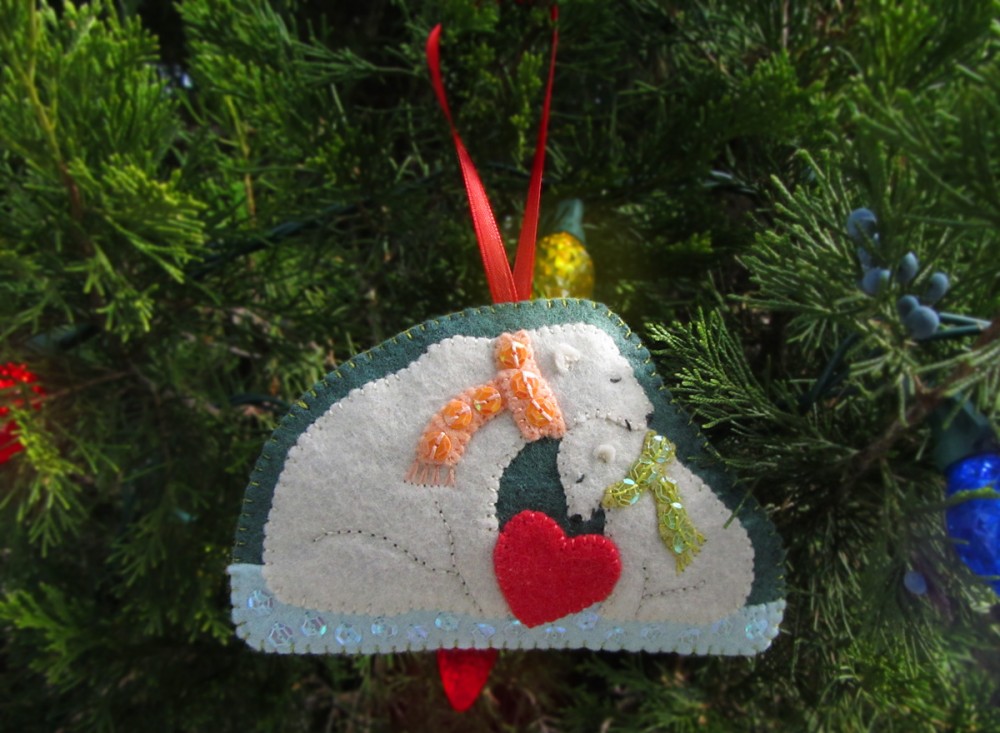
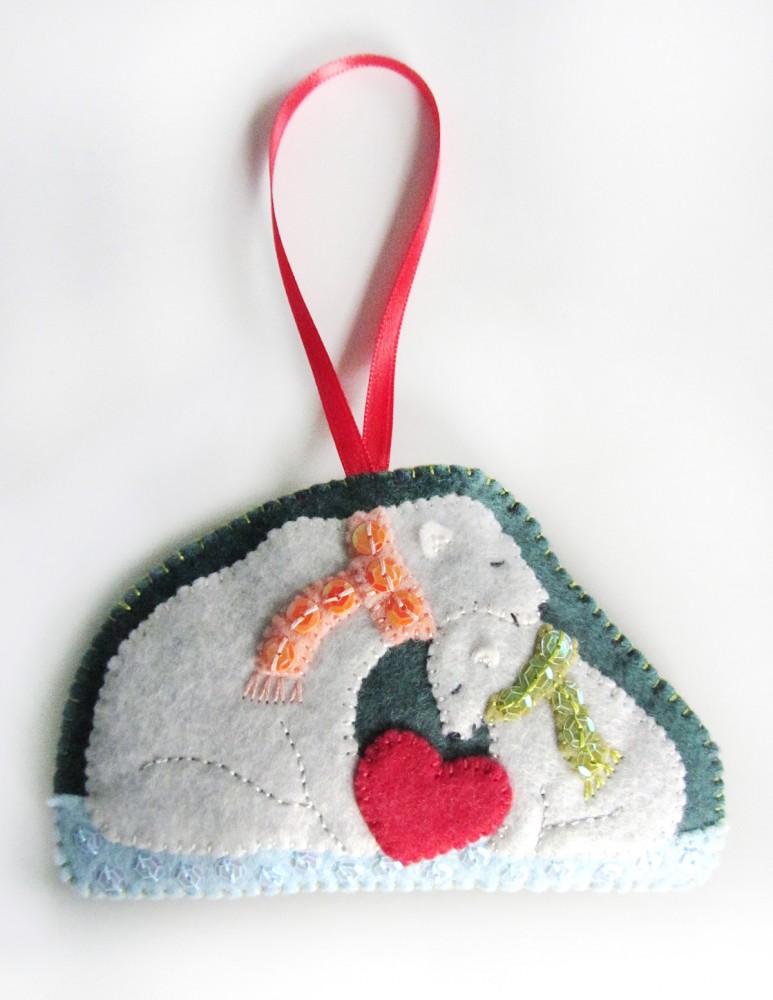
Polar Bear Mama & Cub

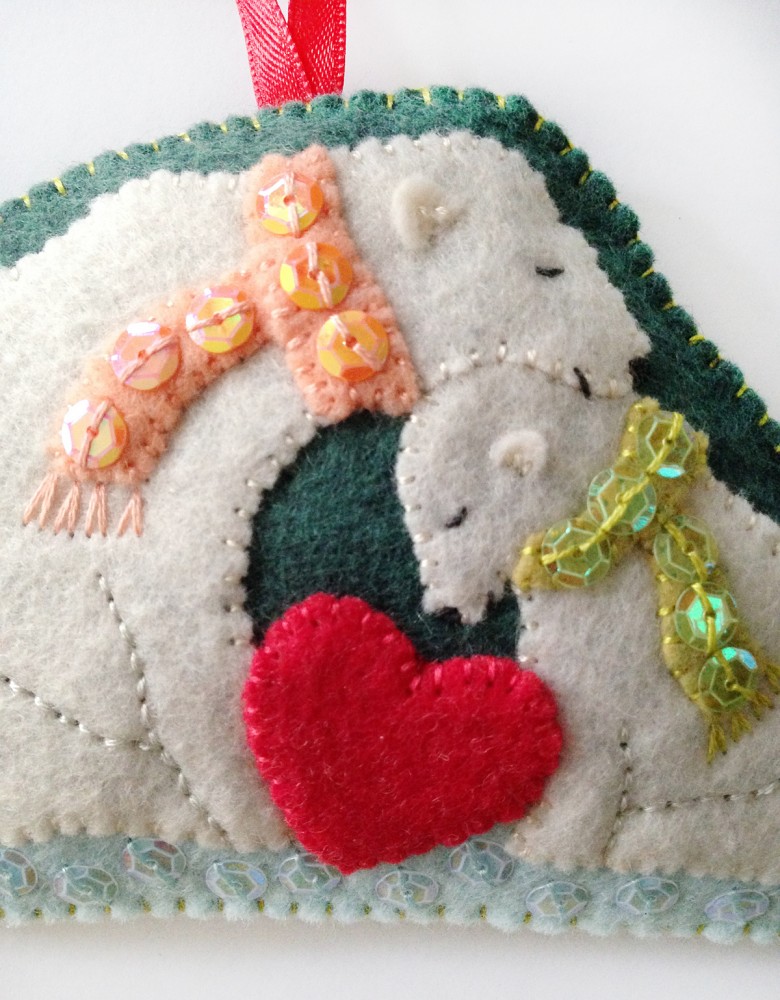
After I cut out all my pieces,  I cut a wavy strip of sparrow (light blue) felt for the snowy ground and tacked it down across the bottom dolphin (grayish teal) felt with a thin layer of felt glue. Then I tacked down the remaining pieces, only sticking the base of ear ear down. I trimmed down the background felt so there was just a small edge around the polar bears.

Polar Family Felt Ornament Patterns - Penguins & Polar Bears

For the polar bears, the heart, the scarves and the top of the snowy ground, I stitched all the edges down with matching floss. (I use 2 strands.) I stitched crystal sequins randomly onto the snowy ground using 2 stitches each. For the ears, I made three small stitches in the base of each so the rest of the ear could stick up. On the mama’s scarf, I stitched coral sequins. I stitched dragonfly sequins onto the cub’s. At the bottom of each scarf, I made 4 upside-down V stitches as tassels. The polar bear’s noses are satin stitched. Their mouths are straight stitches. For the eyes, I made a curved stitch, then tacked the curve in place with a teenie tiny stitch wrapped around the center, much like you’d do with the lazy daisy stitch.

Polar Family Felt Ornament Patterns - Penguins & Polar Bears

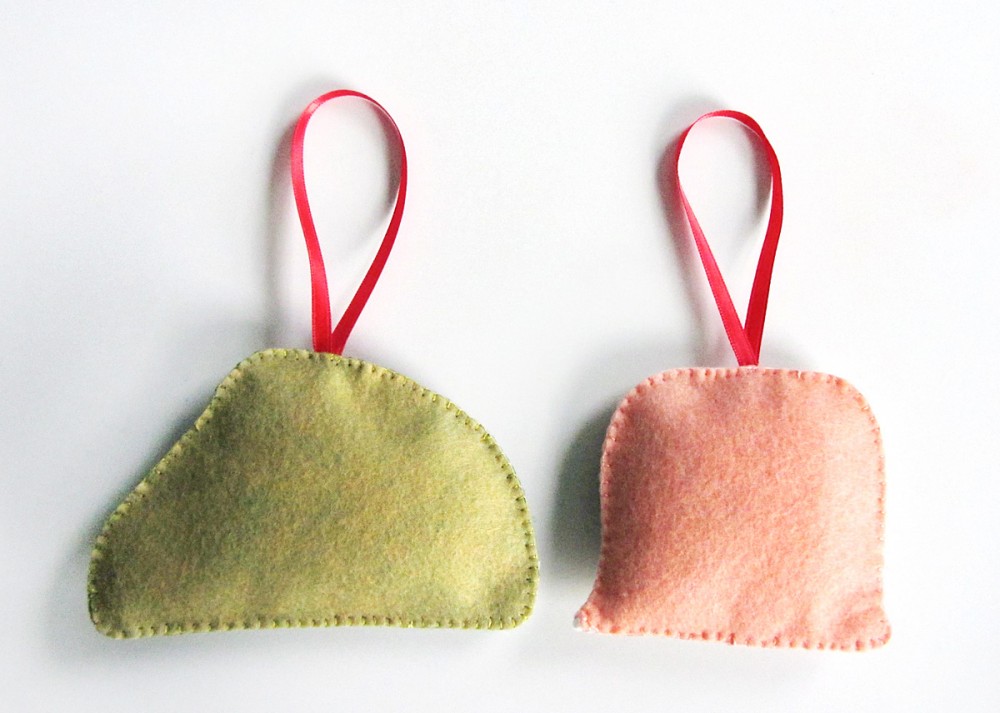
I cut a length of red ribbon and a piece of lemongrass (green-yellow) felt to fit as the ornament’s backing. I stitched all the way around, adding stuffing halfway and catching the ribbon loop in the top. I used a blanket stitch.

Are you an Etsy or craft fair seller? Would you like to sell these ornaments, or any other item sewn from an Imagine Our Life pattern? Visit my Etsy shop and contact me for custom commercial licenses. All authorized sellers get featured on the website.

If you make one of these ornaments, I’d love to see it! Stop by our Facebook page, or mention me @iolstephanie on Instagram or Twitter. (If you are private on Instagram, I’ll have to request to follow you to see it.) Happy holiday crafting!

Preschool Handbells: New-Sew Felt Musical Notes and Printables

Preschool Handbells: New-Sew Felt Musical Notes and Printables

Jax loves music. He LOVES it. If any song comes on, whether he’s heard it before or not, he is singing along. I’ve been collecting musical instruments for him, mainly from the thrift store. He loves to ask me to put music on for him while he “plays” along on his guitar or drums.

Arts are important in our family. I grew up in music and art. I have a Bachelors in Art Studio. My husband played in bands growing up and deejay-ed for years. We definitely want Jax to have strong roots in the arts from an early age.

Preschool Handbells: New-Sew Felt Musical Notes and Printables

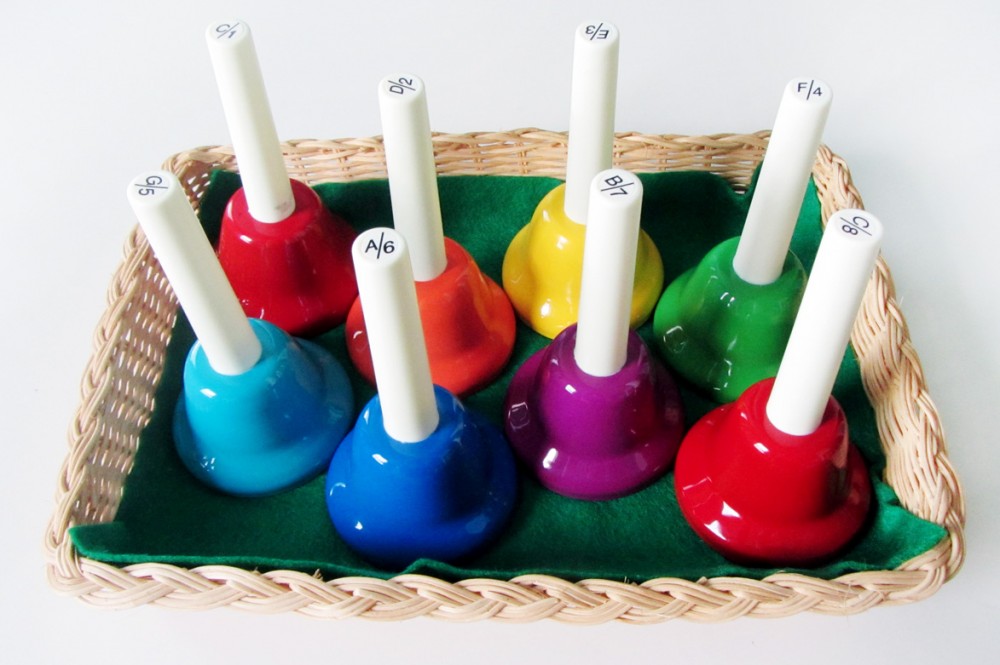
Since Jax is only 3.5 years old, I needed to think of both his manual dexterity and his emotional maturity right now when planning our music homeschool unit. I needed something that he could use easily so that the frustration of not being able to make a note correctly was not a concern. I chose handbells. They are available in color-coded educational sets aimed to help children learn which bell plays which note. Music + Rainbows? Jax’s idea of heaven!

There are other choices that still let you start with color-coded notes (just make sure you are happy with the colors the instrument uses!) like a xylophone or Boomwhackers.

Preschool Handbells: New-Sew Felt Musical Notes and Printables

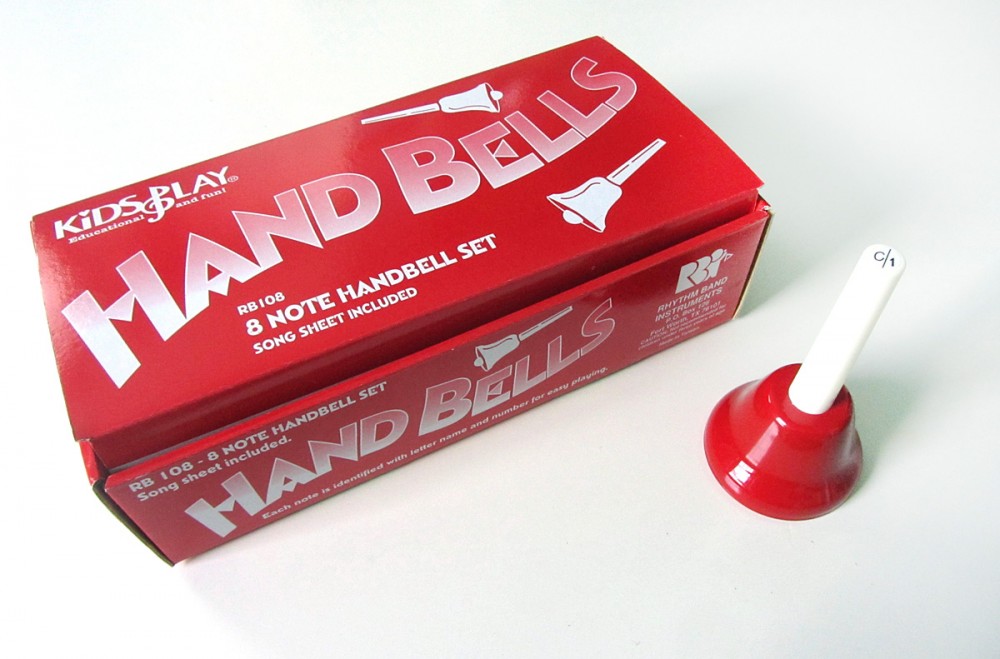
Thanks to my aunt, who values how dear music is to our family, Jax got his started handbell set. I chose the Kids Play Rhythm Band 8 Note Handbell Set because add-on sets were available should we need them in the future. They also use fairly standard colors.

Preschool Handbells: New-Sew Felt Musical Notes and Printables

Introducing Handbells

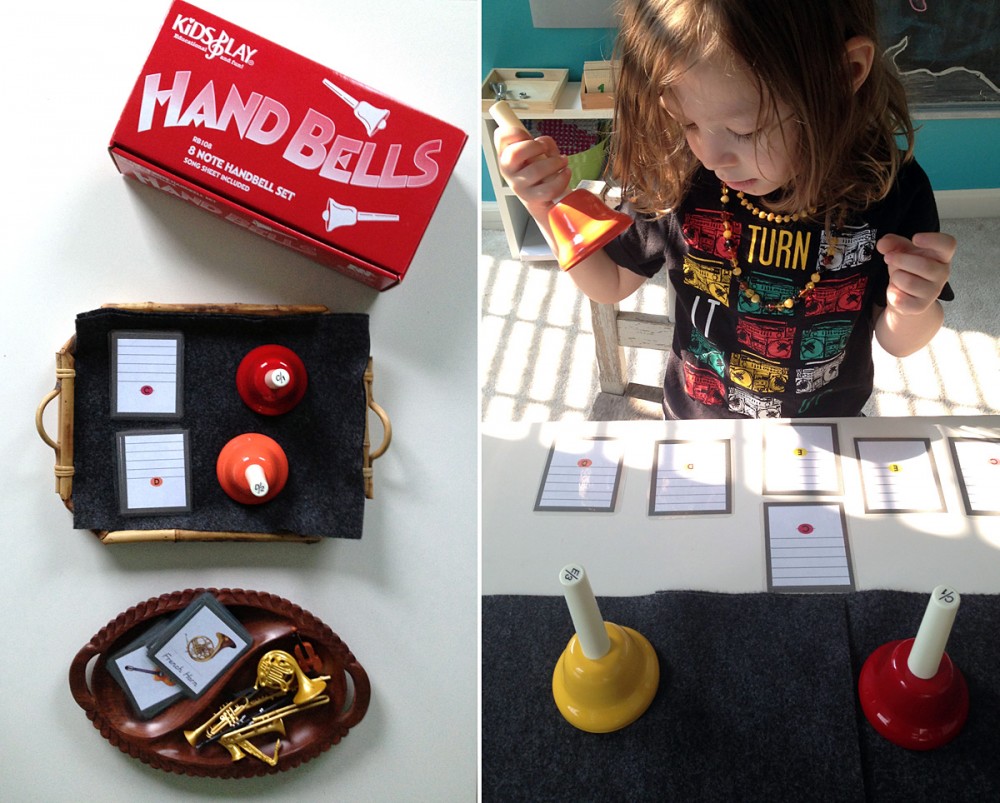
Preschool Handbells: New-Sew Felt Musical Notes and PrintablesWe started our music unit with some 3-part cards introducing musical instruments. Jax already recognized most of them, so it was mainly a review.

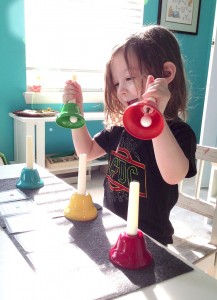
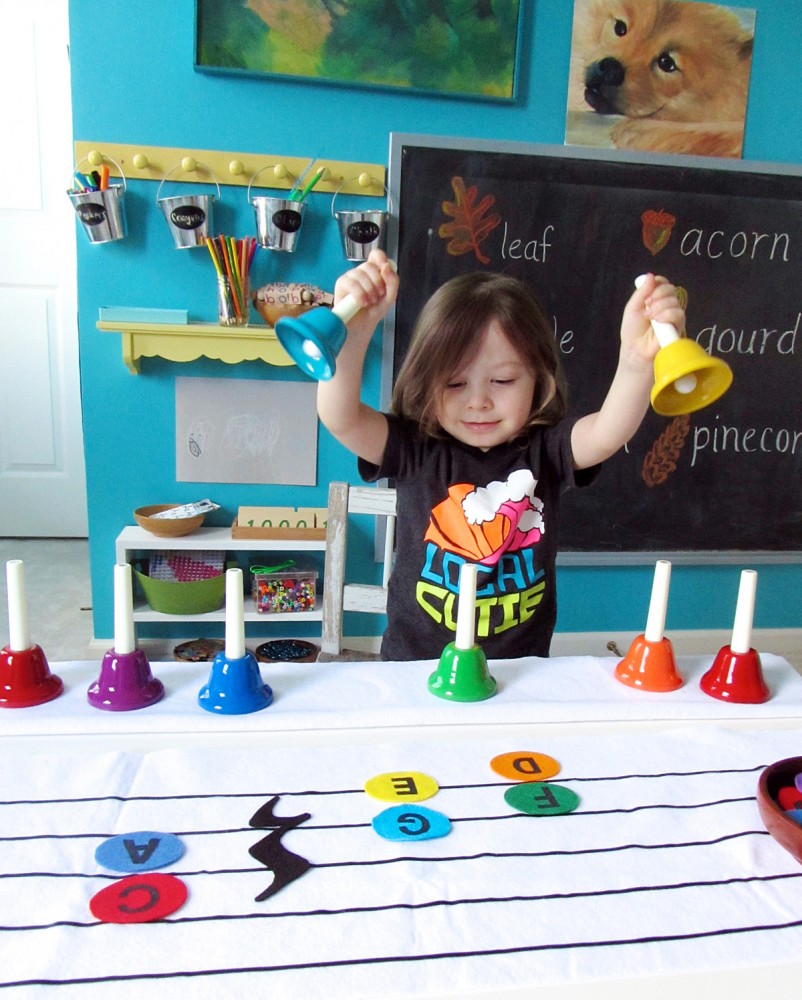
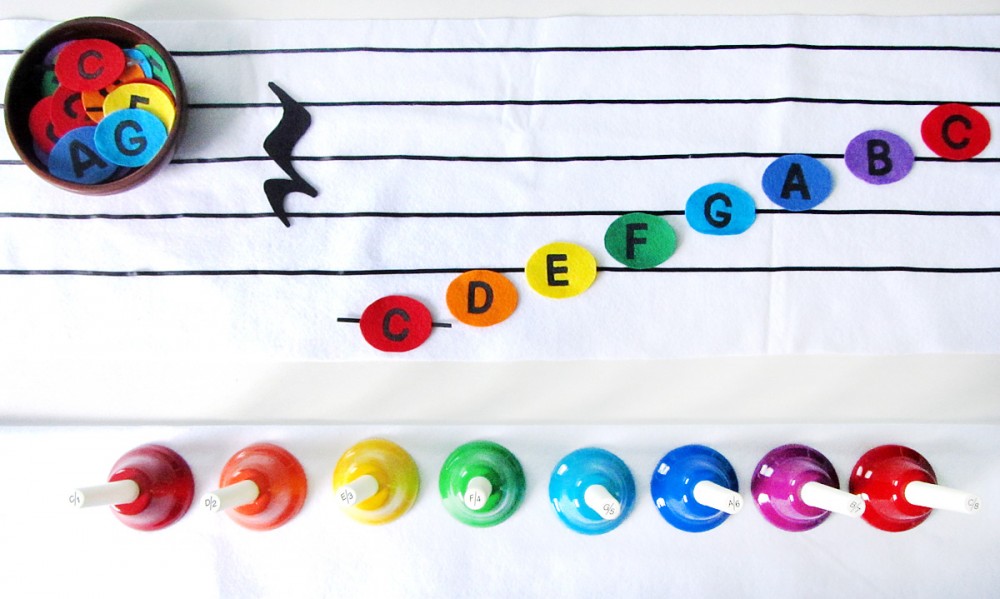
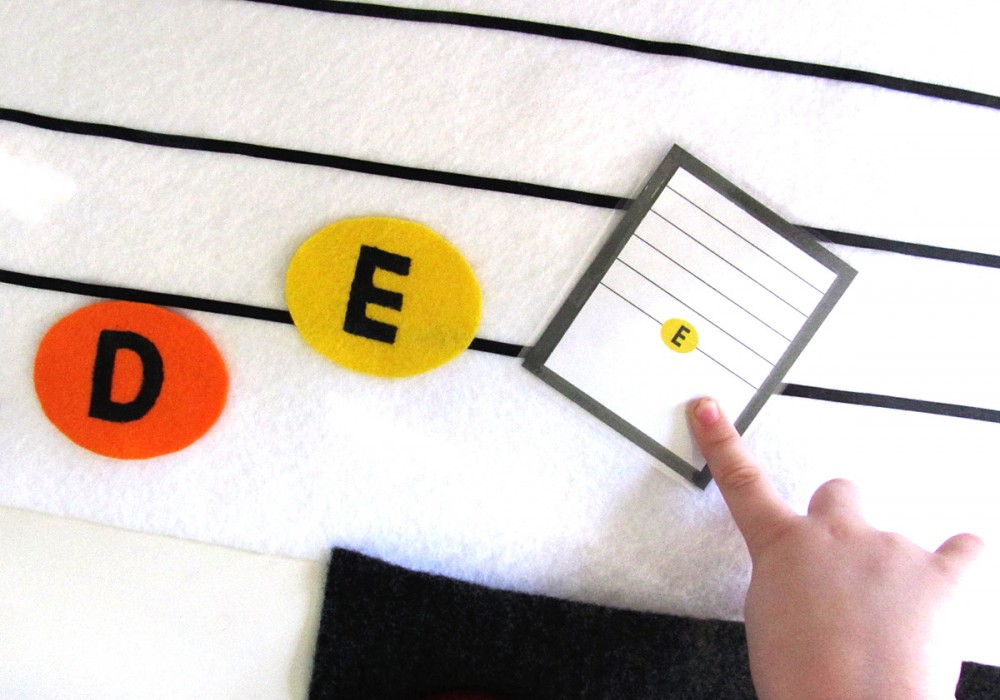
When our bells arrived, I started by presenting two bells on a tray with a mat and matching cards showing where each bell’s note is on the music staff. I showed him how the bells’ colors and letters match the cards, then we practiced sounding the bells and switching between the two notes. We moved on to playing the note on the card I held up. He had no problems, so I let him have a third bell. With all three matching note cards, we made patterns to play.

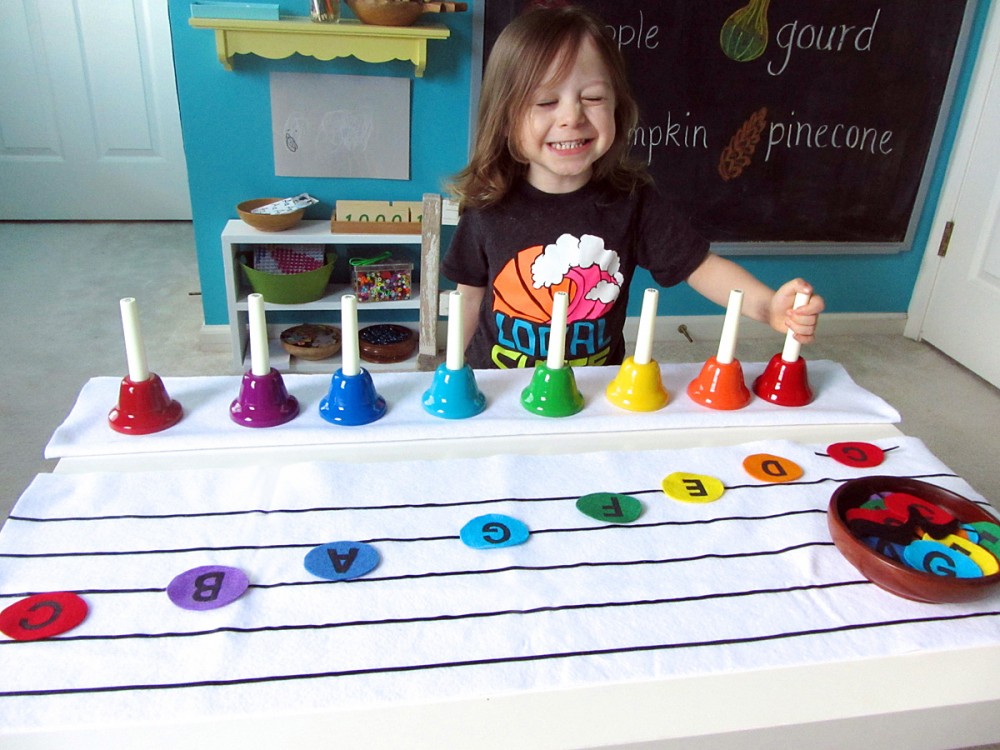
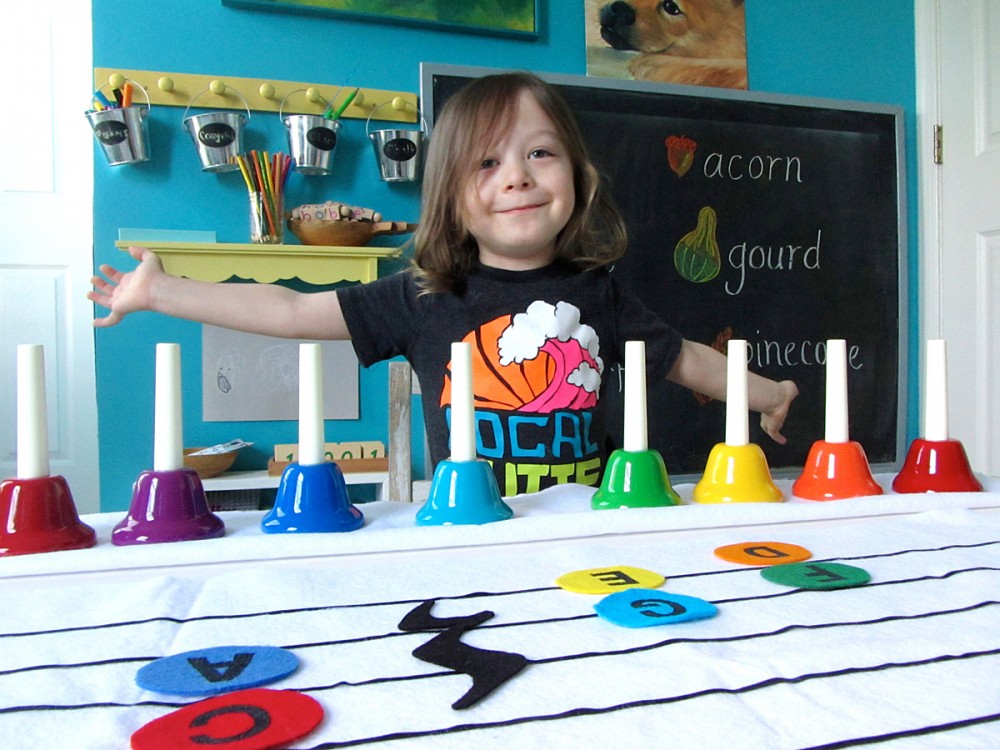
We continued on this way, earning a new bell about once a week. It took us about 2 months to work up to the full set of 8 bells. (He actually earned the last one the day we took photos.) I always include a rolled up felt mat on the handbell tray. Jax knows we have to unroll it and place it on the table for the bells. When playing the handbells, setting them on the mat dampens (cuts off) the ring. We started with two sheets of felt, but now use a long strip the width of our table.

Exploring with Handbells

There are a lot of ways your child can explore music and sound with handbells. Some of the things we’ve done are:

Preschool Handbells: New-Sew Felt Musical Notes and Printables

• I showed him that he could play two bells at once. We noted that it doesn’t sound good to play two bells that are next to each other at the same time. The discordance was obvious to him, but he hasn’t quite connected yet that skipping a bell when playing two at once sounds better. This is something I encourage him to explore.

Preschool Handbells: New-Sew Felt Musical Notes and Printables

• We play find the bell – I ask him for a certain color/number/letter note and he plays it. When I ask for the lower C bell, I call it “middle C” (named for its position on a piano. The higher C is our newest bell, and I will be calling it “treble C”. You can also hold up the musical note cards and have them play the right bell.

Preschool Handbells: New-Sew Felt Musical Notes and Printables

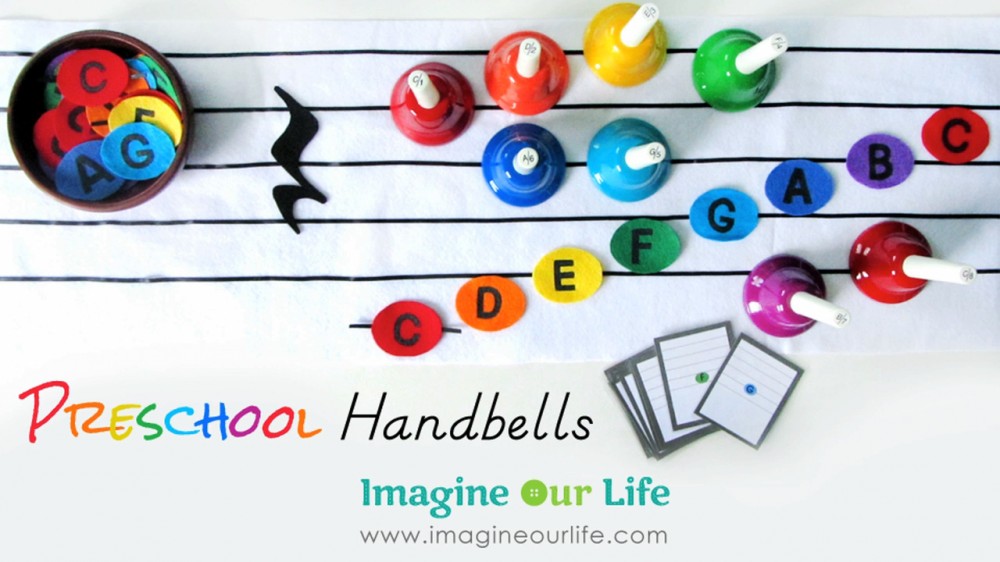
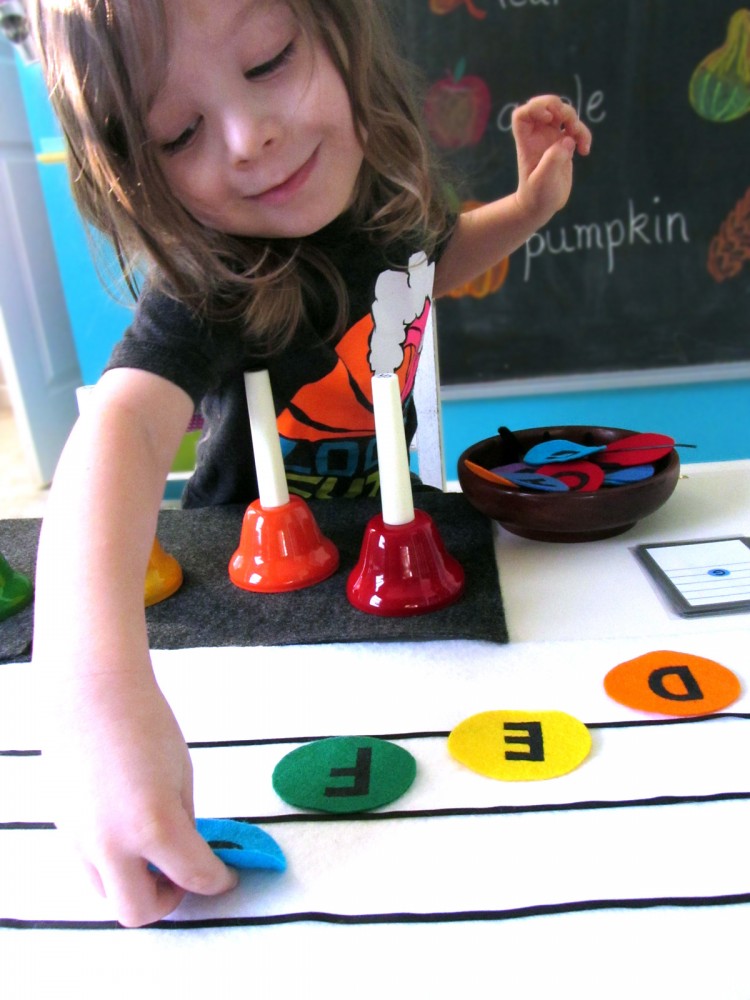
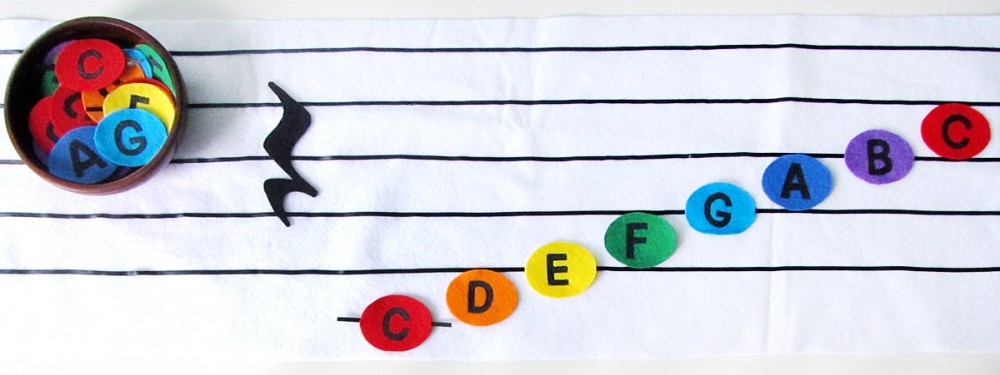
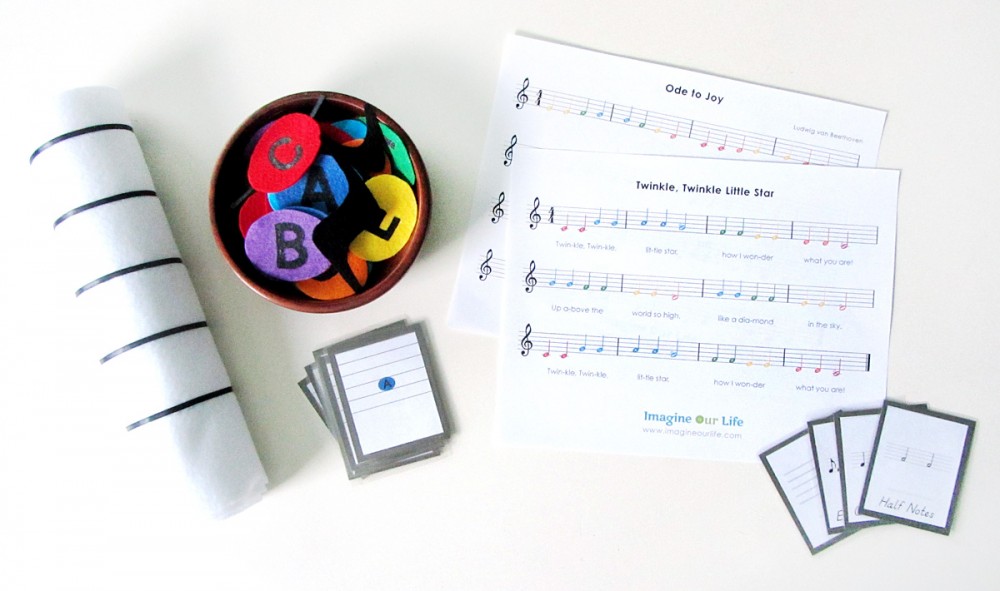
• Composing music can be done by preschoolers! Taking a cue from Montessori’s moveable alphabet, you can have the notes ready for your child to place on the music staff. Using control cards to help them place them on the correct line, they can arrange some notes and play their composition. My music notes are made of felt and involved no sewing for once!

Preschool Handbells: New-Sew Felt Musical Notes and Printables

Preschool Handbells: New-Sew Felt Musical Notes and PrintablesNew-Sew Felt Music Staff

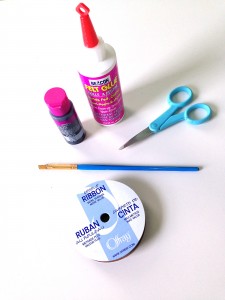
Materials:

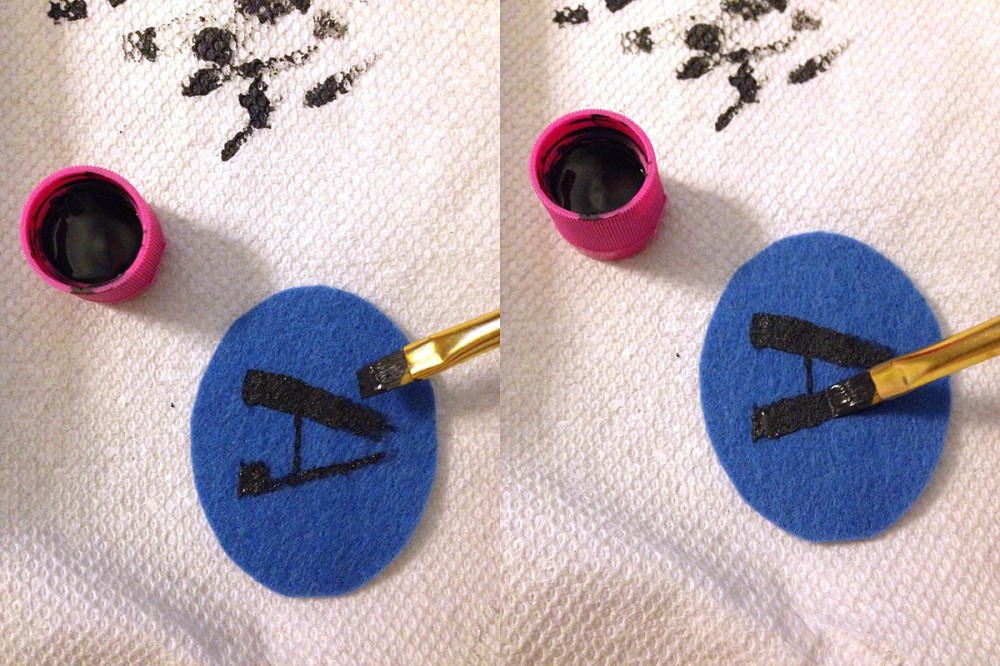
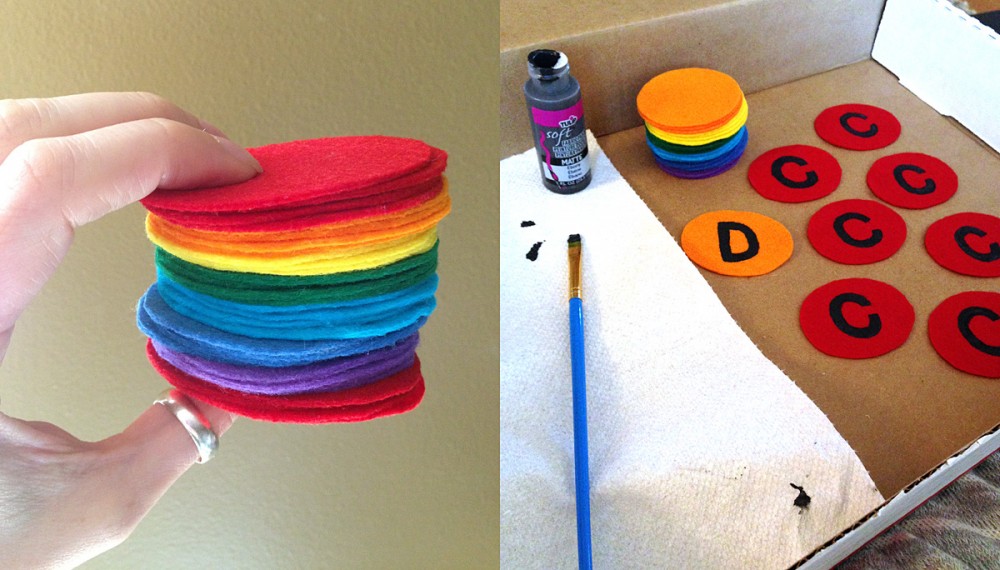
Start by cutting out your ovals. You need 8 red and 4 each of orange, yellow, green, aqua, indigo and violet. Using the narrow part of your paintbrush, sketch your letter onto the oval with fabric paint. By starting thin, you can adjust the size of your final letter: if you drew it too small, paint the final thick lines towards the outside of your sketch. If you drew it too big, paint the final lines towards the inside. I used the full width of my size 8 flat brush to make the final painted letters. This kept the lines a consistent width.

Preschool Handbells: New-Sew Felt Musical Notes and Printables

Take 4 of your red C’s and cut strips of black ribbon an inch wider than the oval. Coat the entire top of the ribbons trip with felt glue (including the raw edges to keep them from fraying.) Center the oval on top, press it down and allow it to dry. This adds ledger lines to the middle C’s that go below the staff.

Preschool Handbells: New-Sew Felt Musical Notes and Printables

Cut out as many rests as you’d like. I have two quarter rests for now. I’ve included the rectangle needed to make half and whole rests.

To make the staff, cut a 12″ strip out of your 36″ wide felt. You can adjust the width to suit your needs. 36″ is the width of our school table. You could even use the full 36″ x 36″ felt piece and make 3 rows of staff lines if you have room to lay or hang something that large. Using the spacing guide, glue 5 strips of ribbon down to the felt and allow it to dry before use. make sure you allow enough room at the bottom for middle C’s ledger line to be properly spaced.

Preschool Handbells: New-Sew Felt Musical Notes and Printables

For now I am presenting the notes in a bowl with matching control cards and the rolled up staff chart. I think we will do some games in the future with matching and sorting the notes to each other and to the control cards.

Preschool Handbells: New-Sew Felt Musical Notes and Printables

Preschool Handbells Music Unit Printables

I have a lot of printables for this unit – many I haven’t even started using yet. Before I use them, each printable will get laminated. I also like to mount my 3-part cards to colored paper or card stock prior to laminating.

Preschool Handbells: New-Sew Felt Musical Notes and Printables

Colored Music Note Control Cards

These cards show the position of each of the notes used in the 8 note handbell set. They are color coded to match the bells. Later I will make a new set that do not have color. Grab the free printable here. (This file was updated on 01/16/14 to fix the wrongly-positioned B. You can also get a page with just the fixed B cards here.)

Music Symbol 3-Part Cards

This is a set of Montessori-style 3-part cards that cover basic music symbols. So far I’ve only given him a few of the cards to start getting used to seeing. You can download the free printable here.

Preschool Handbells: New-Sew Felt Musical Notes and Printables

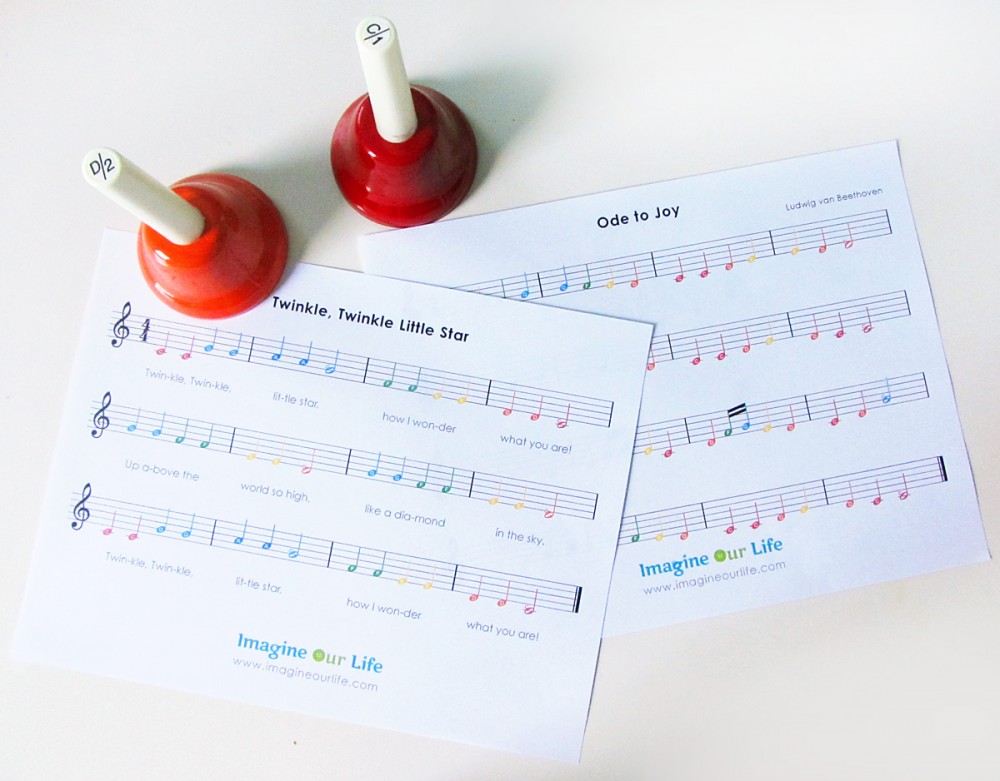
Twinkle, Twinkle & Ode to Joy

I wrote up the music to two fairly easy songs that can be played with the first 6 notes in the handbell set. For now, I play them for him and we use them as reference to set up his felt staff so Jax can play small excerpts. You can grab the song sheets here.

Preschool Handbells: New-Sew Felt Musical Notes and Printables

We are having so much fun with our music unit! Have you done any music homeschool lessons with your preschooler? I’m excited to see where Jax goes with music as he grows older.

Here is a Pinterest ready picture for you!

Preschool Handbells: New-Sew Felt Musical Notes and Printables

Visit Montessori Monday on Living Montessori Now for more great homeschool ideas!

Montessori Monday

Autumn Leaves Quiet Book & Fall Homeschool Unit

Autumn Leaves Quiet Book & Fall Homeschool Unit

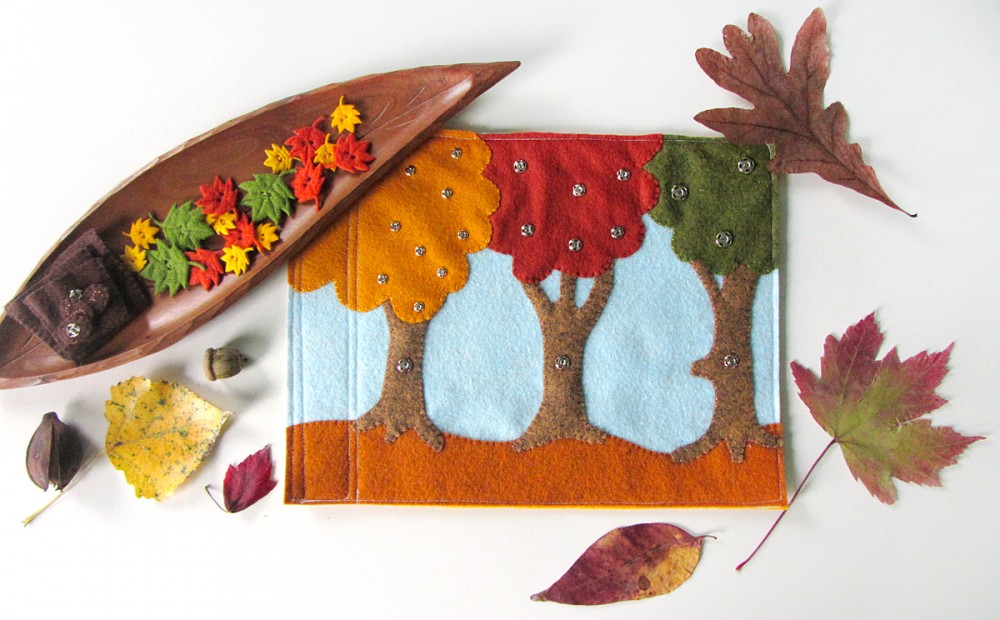
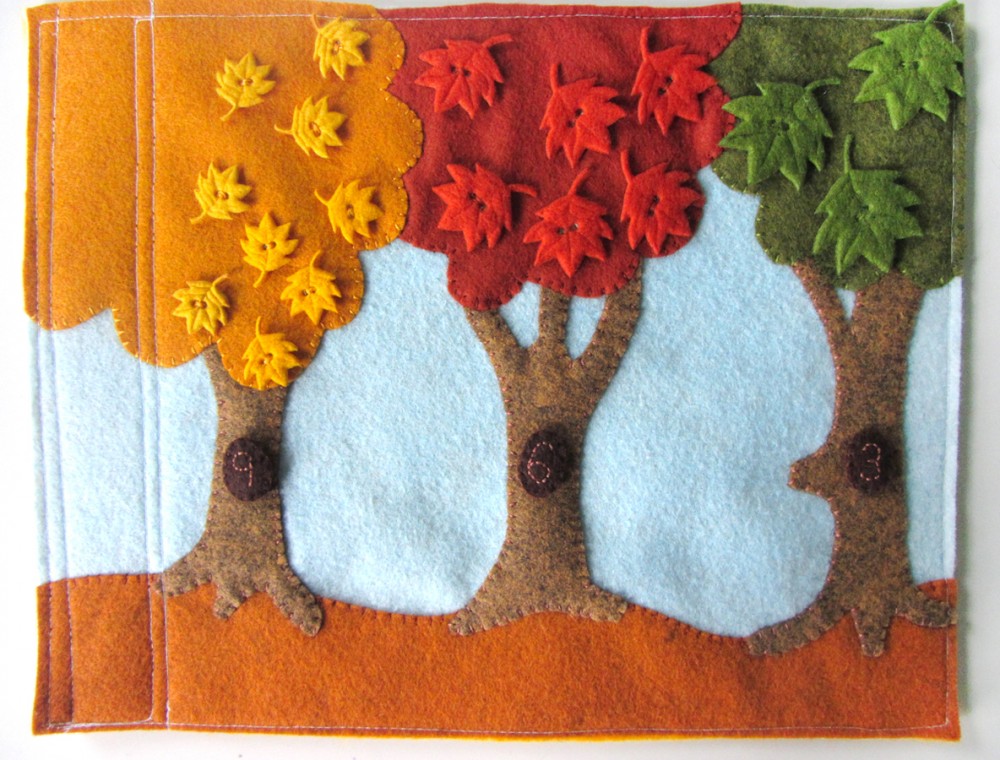
This quiet book page was designed last year, but I ran out of time before autumn ended to actually sew it. This year I made sure to pause my projects and get it finished. We don’t have any trips coming up that require a quiet book, so I especially like making ones that fit in well on our Montessori homeschool shelves. This page certainly does!

Autumn Leaves Quiet Book & Fall Homeschool Unit

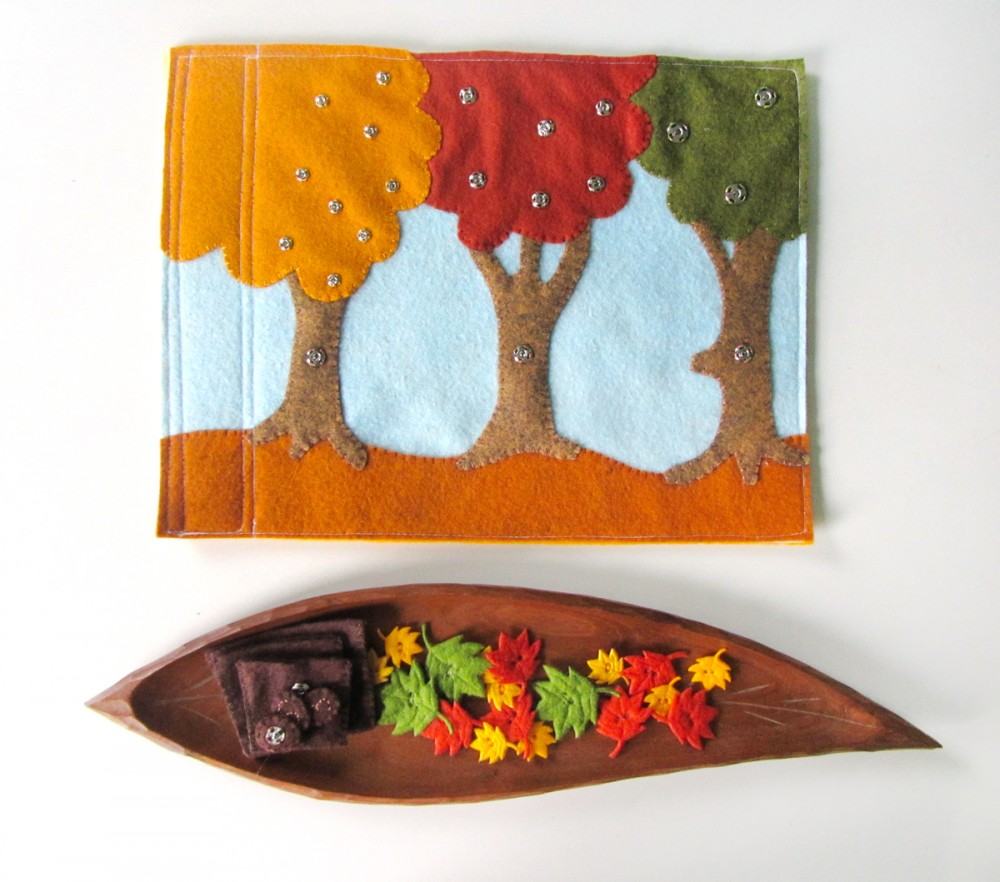
There are a number of features to this page: practice with snaps (which improves motor skills and the ability to dress yourself), sorting colors,  sorting sizes, and counting.

Autumn Leaves Quiet Book & Fall Homeschool Unit

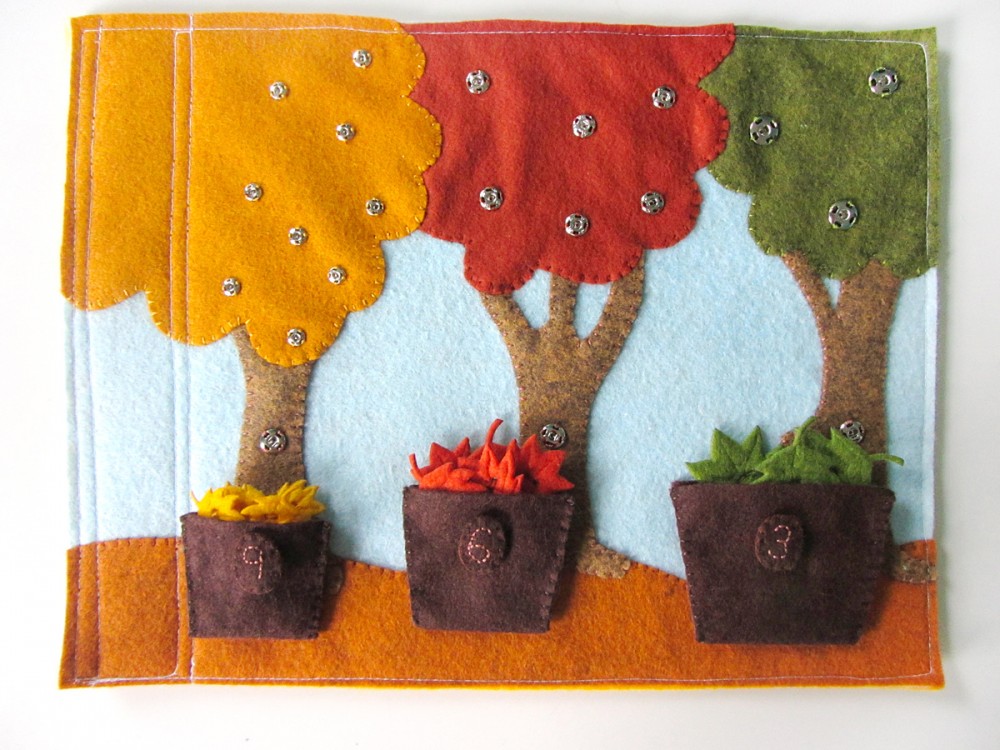
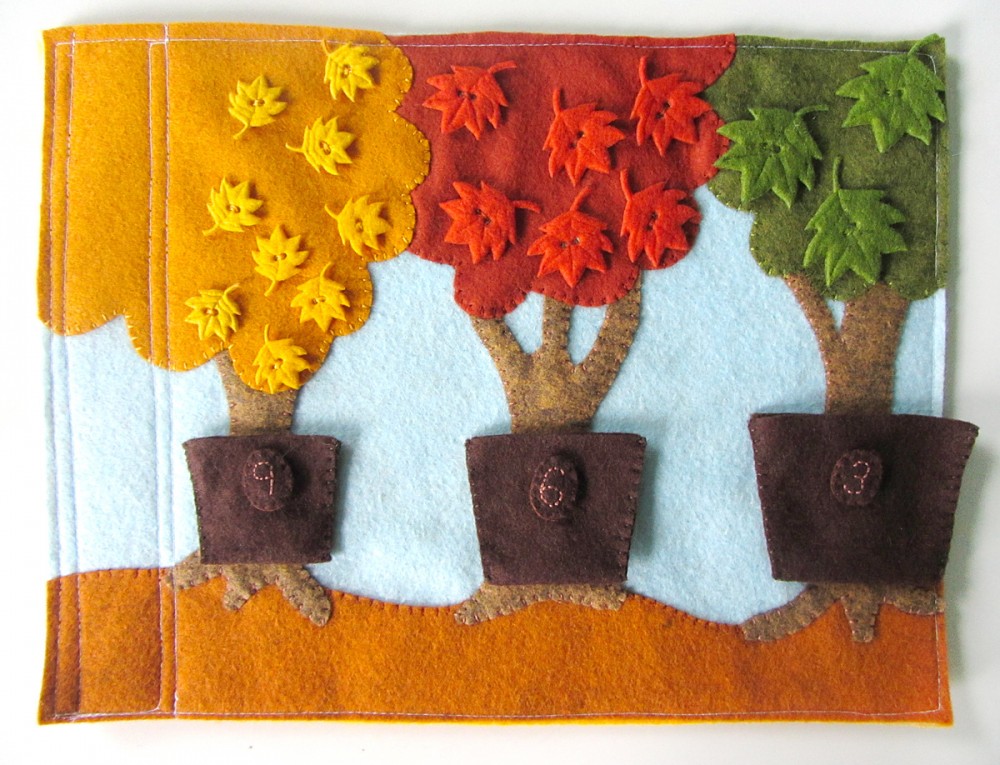
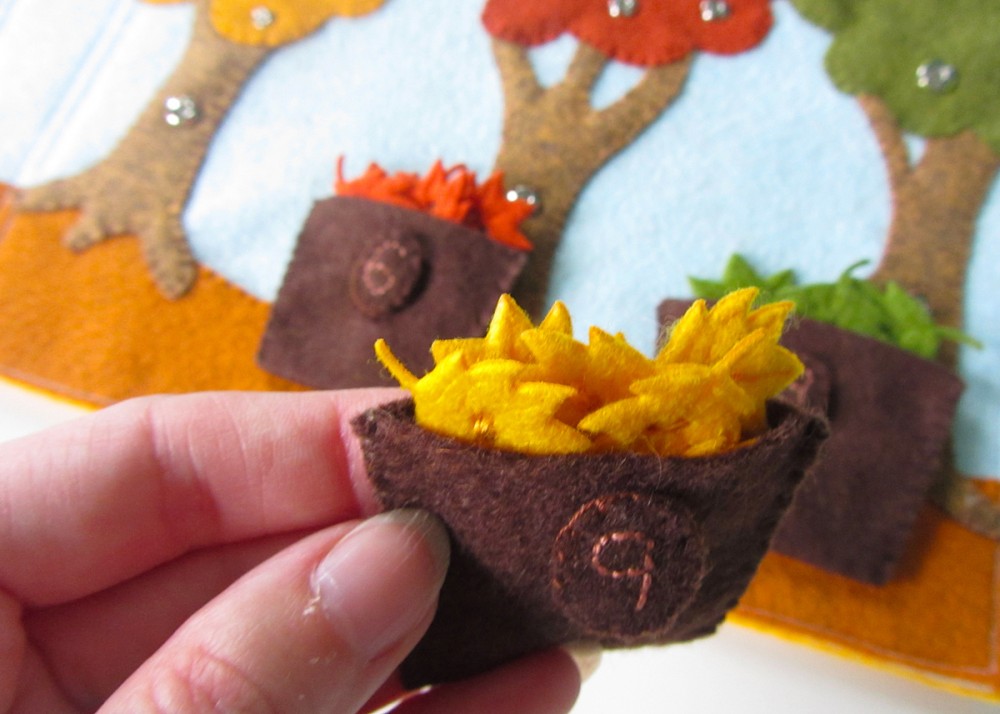
I included three bins with snaps to add number labels. (The labels can also be placed on the trees!) I left it open for Jax to decide how to use the bins. He could potentially put the largest quantity of leaves in the largest bin, or he could put the largest sized leaves in it. This is something you could explore with your child.

Autumn Leaves Quiet Book & Fall Homeschool Unit

When you are finished with the page, you can snap the bins to the trees for storage.

What I Used:

This biggest bummer about this project is that I bought the leaf buttons last year, and now they are no longer made by the manufacturer! When I posted to our Facebook page about it, I linked to the one source I had seen so far. But now all 10 packs are sold out.

Autumn Leaves Quiet Book & Fall Homeschool Unit

Here are a few non-felt button options you could try. I’m not sure how well sewing a snap to a plastic button would work though. There is a pack of 12 buttons that match the colors and sizes I used, but you’d need multiple packs to have the same number as me. Here is a larger listing of those buttons. This is another brand, but the colors and sizes seem more assorted. There are a number of felt die cut leaves on Etsy, but they all seem to be larger. This seller has some that are 25mm. (Last photo below copyright Planeta Costura.)

etsy

You may be better off cutting out your own out of felt. If you want to skip snaps, you could just cut one layer of felt for each leaf (I recommend thicker wool-blend felt), but be aware they are more likely to get damaged or lost. You could take the time to cut 2 layers per leaf and sew them together. It’s so frustrating that they aren’t sold anymore!

Sewing the Page

Background: I started by cutting everything out and pinning it down: first the ground, then the trunks, then the tree tops (green, red, then yellow). I sewed down the tree trunks, then sewed down the tree tops. Then I sewed down the top edge of the ground that was showing between the trees.

Note: This is how I sew my quiet book pages together. Because I sew all the way around the edge while sewing on the backing, I don’t usually bother to sew elements along the edges of the page.

Autumn Leaves Quiet Book & Fall Homeschool Unit

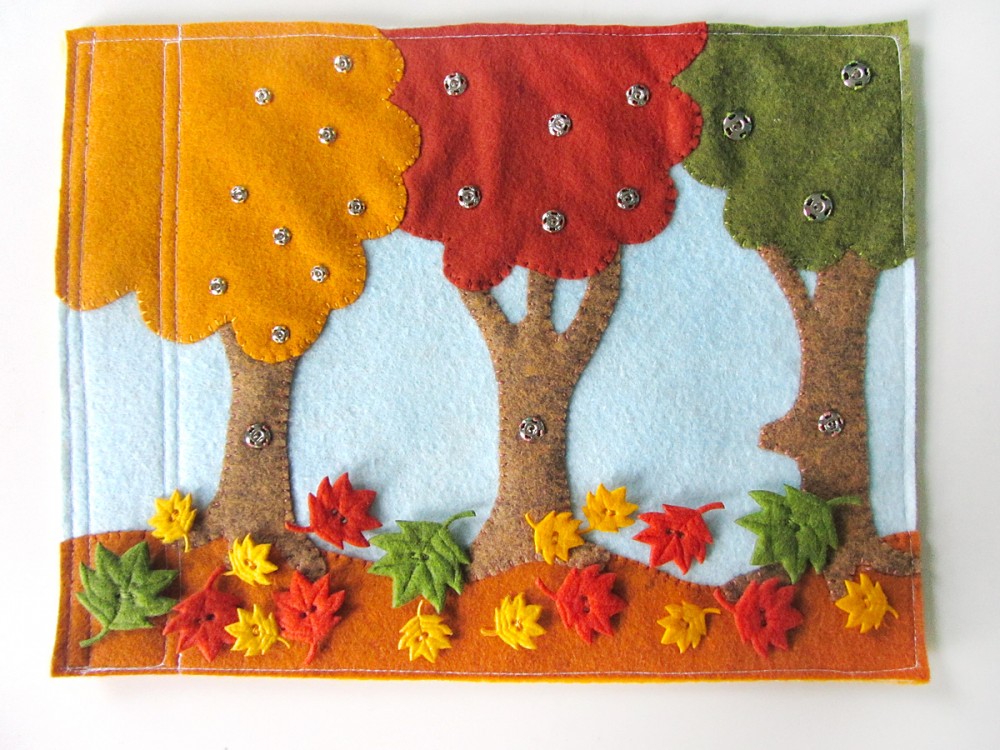
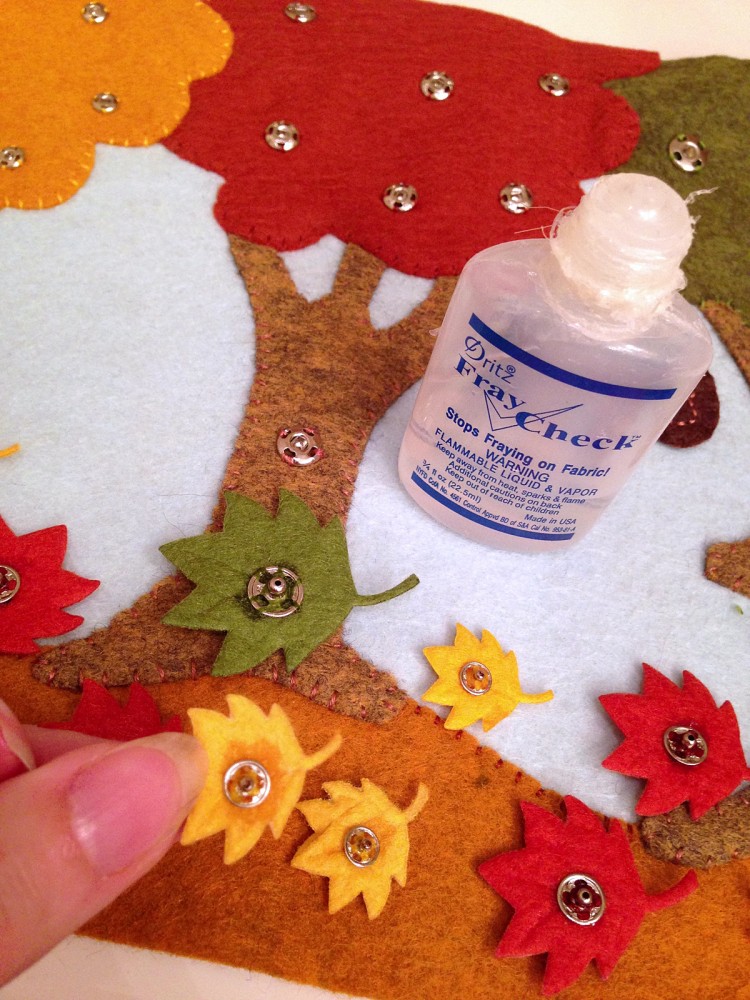
Leaves: For all of the leaf buttons, I used A LOT of stitches to attach snaps to the backs. Then I coated the stitches with Fray Check and let them dry overnight.

Tree Snaps: On the green tree, I sewed down 3 size 1 snaps. I sewed the matching halves to the backs of the green leaf buttons. On the red tree, I sewed 6 size 2/0 snaps on to the tree top and the red leaves. On the yellow tree, I sewed down 9 size 4/0 snaps to the tree top and leaves. Not that I left a 2″ area on the left without snaps to allow for where I sew my binding and add grommets. I have not added grommets yet. I usually do that right before a trip when I need to link pages together.

I added a size 1/0 snap to each tree trunk to hold either the numbers or the bins.

Numbers: I back stitched numbers on the fronts of each number pieces and the other half of those 3 size 1/0 snaps to the backs. Then I sewed them together.

Autumn Leaves Quiet Book & Fall Homeschool Unit

Bins: The bins were just sewn together with an open top. I cut mine on a fold so I didn’t have to sew the bottom. I added a snap to each one – one half of the snap set on each side of a bin. These snaps let you either attach the number label or attach the bins to the trees.

Montessori Use

Autumn Leaves Quiet Book & Fall Homeschool Unit

This page works well as a Montessori activity for our autumn unit. I adore this wooden leaf tray I found at a thrift store! It is perfect for presenting the leaves or other autumn supplies. I’ve also laid it out in a tray with the leaves spread out on the ground just like Jax finds them outside.

Autumn Leaves Quiet Book & Fall Homeschool Unit

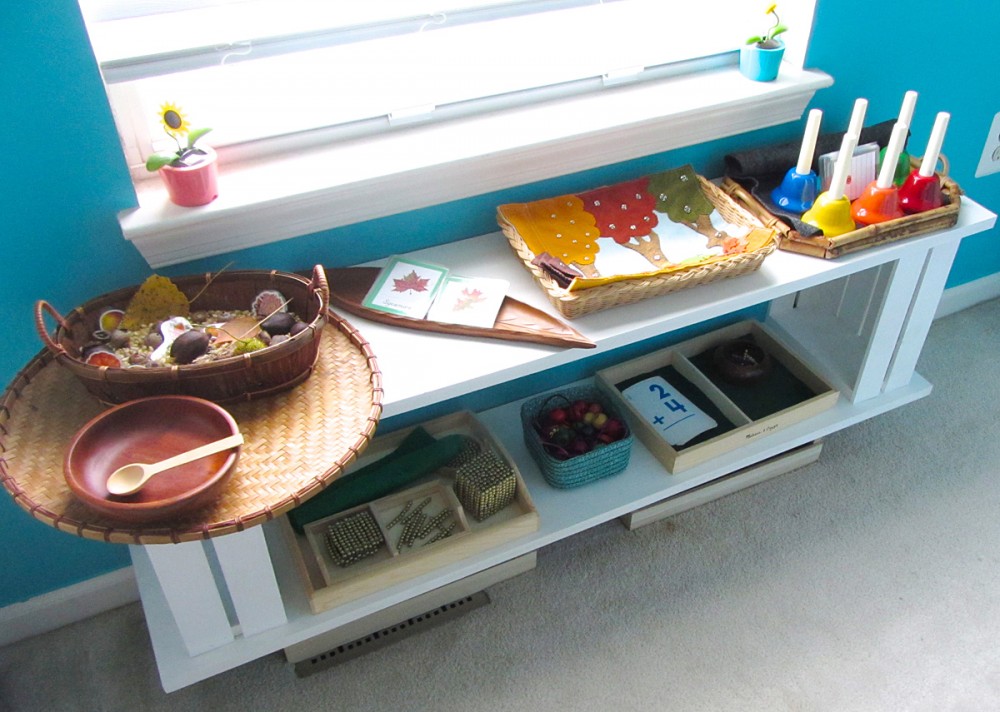
Here is our current main shelf of our homeschool room. The bells will be featured in an upcoming post!

Autumn Leaves 3-Part Cards

Autumn Leaves 3-Part Cards

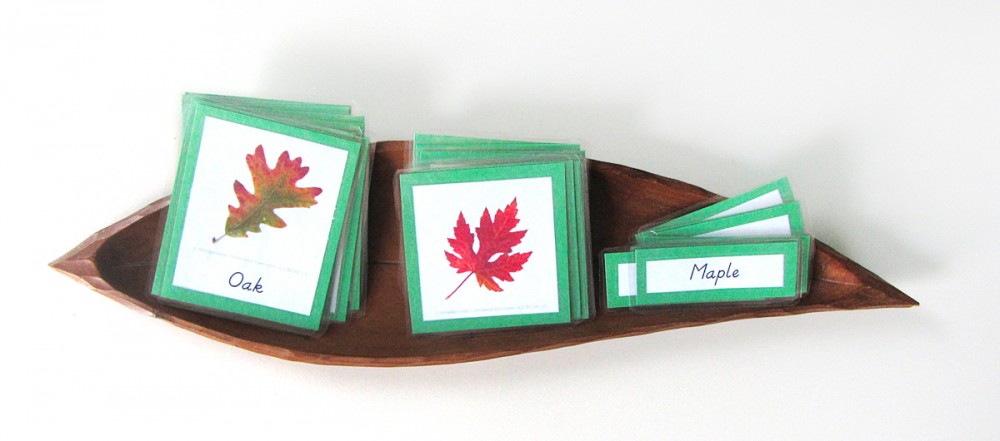
In the Montessori method, 3-part cards are an essential tool that can follow your child through multiple levels of development. They can be used in any subject to aid in adding vocabulary, learning to sort/classify, reading practice and so much more. Three-part cards are made up of two photos – one with a label, one without – as well as a separate label. Younger children start with the labeled card to help them learn the vocabulary. One of the best ways to use them is with small objects that match the photos. Older kids can work with the unlabeled card, matching the correct words or writing their own.

Autumn Leaves 3-Part Cards

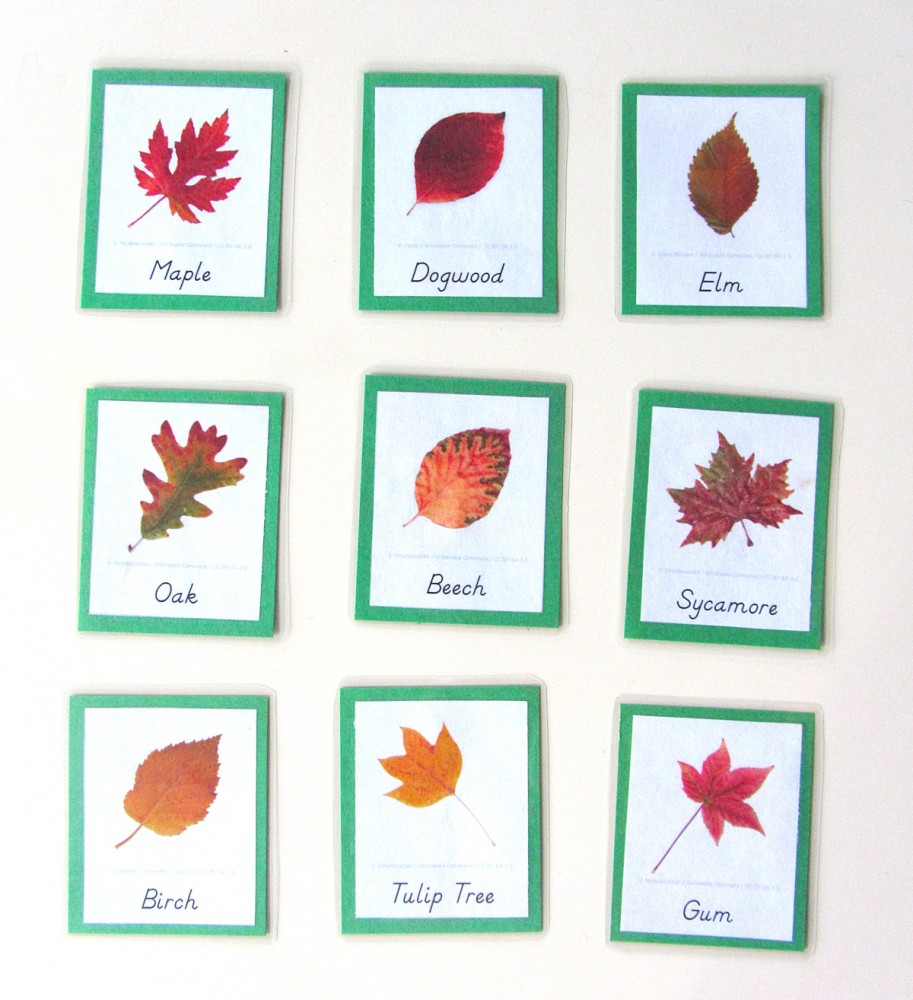
I put together a set of 3-part cards for Jax to learn how to recognize various leaves in our area. I used only trees that can be found in our area, but they are very common ones. You are welcome to use my free pdf to make your own set! I am hoping to take our cards out on a walk once more leaves start changing colors so we can match them up. (Our server caching is causing troubles for some people. Here is an alternate download link!)

Autumn Leaves 3-Part Cards

To make mine, I cut them out, glued them to green card stock (this is simply a color I chose to assign to all my future botany collateral) then laminated them. It makes them shiny and strong. I really love my laminator – as everyone told me I would!

Autumn Leaf Watercolors

Autumn Leaf Watercolors

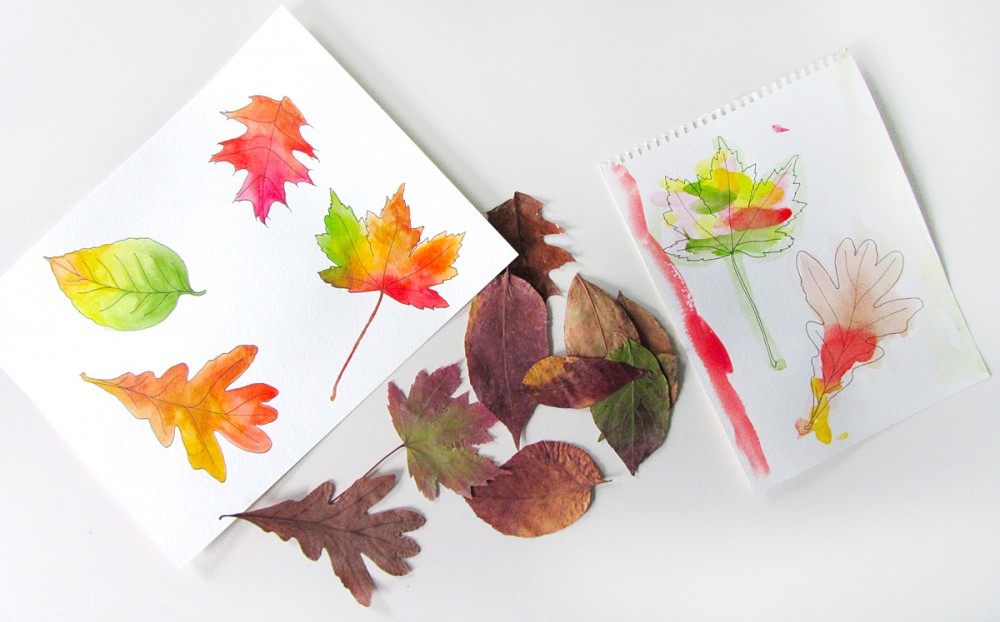
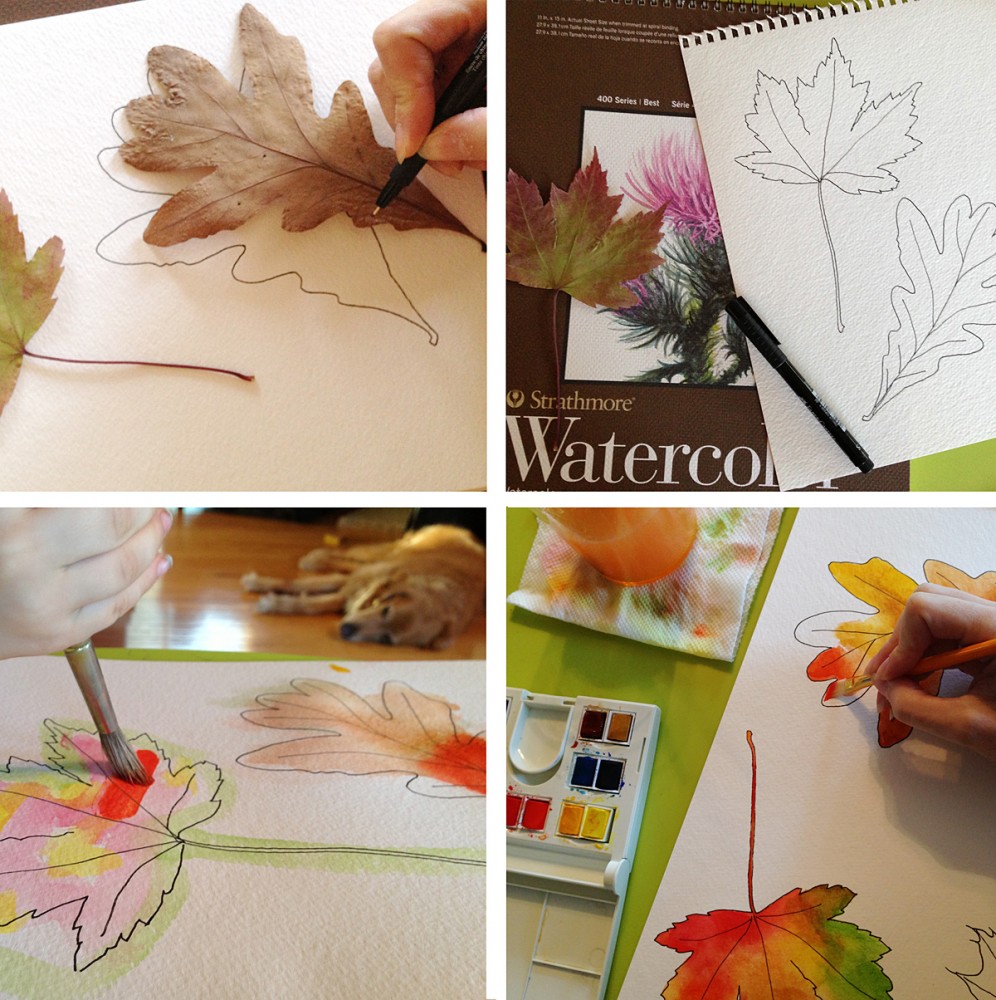
We needed a quick afternoon activity the other day, so I took some watercolor paper and traced some leaves using my artist pen. (For the exact materials and techniques I used, see my recent watercolor post.) Then Jax and I each painted in our leaves with watercolor paints.

Jax was very set on painting his leaves only the proper colors you’d find in nature. He also wanted to add a red sky and green ground (he still does sky and ground as little strips at the edges of the page!)

Autumn Leaf Watercolors

We both ended up with beautiful artwork, worthy of a frame!

For an even quicker activity, print out my free leaf coloring sheet!

Autumn Nature Walk

Autumn Nature Walk

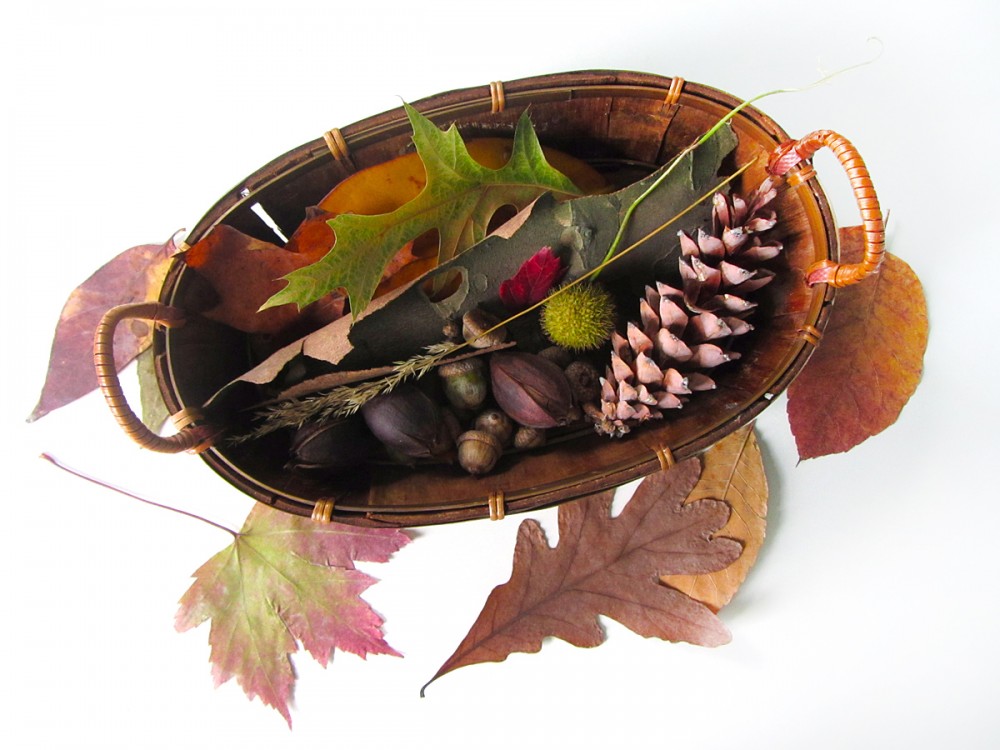
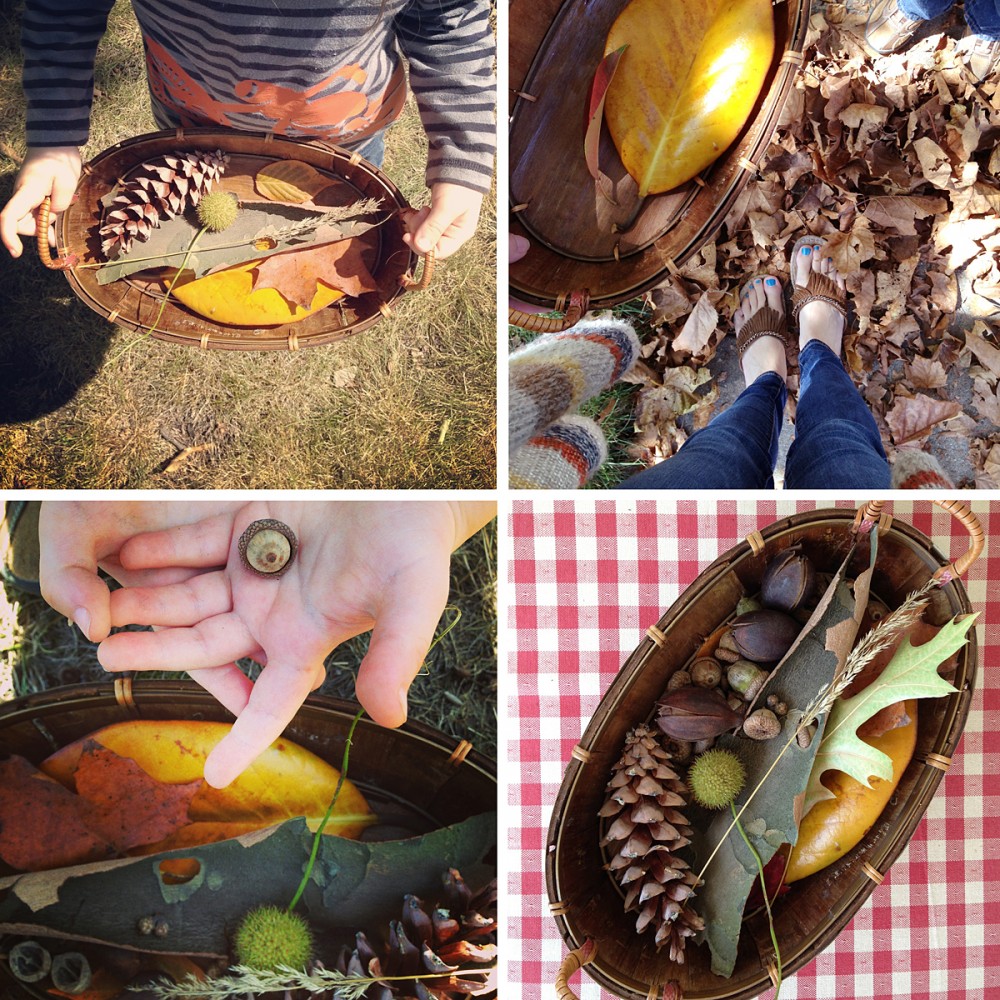
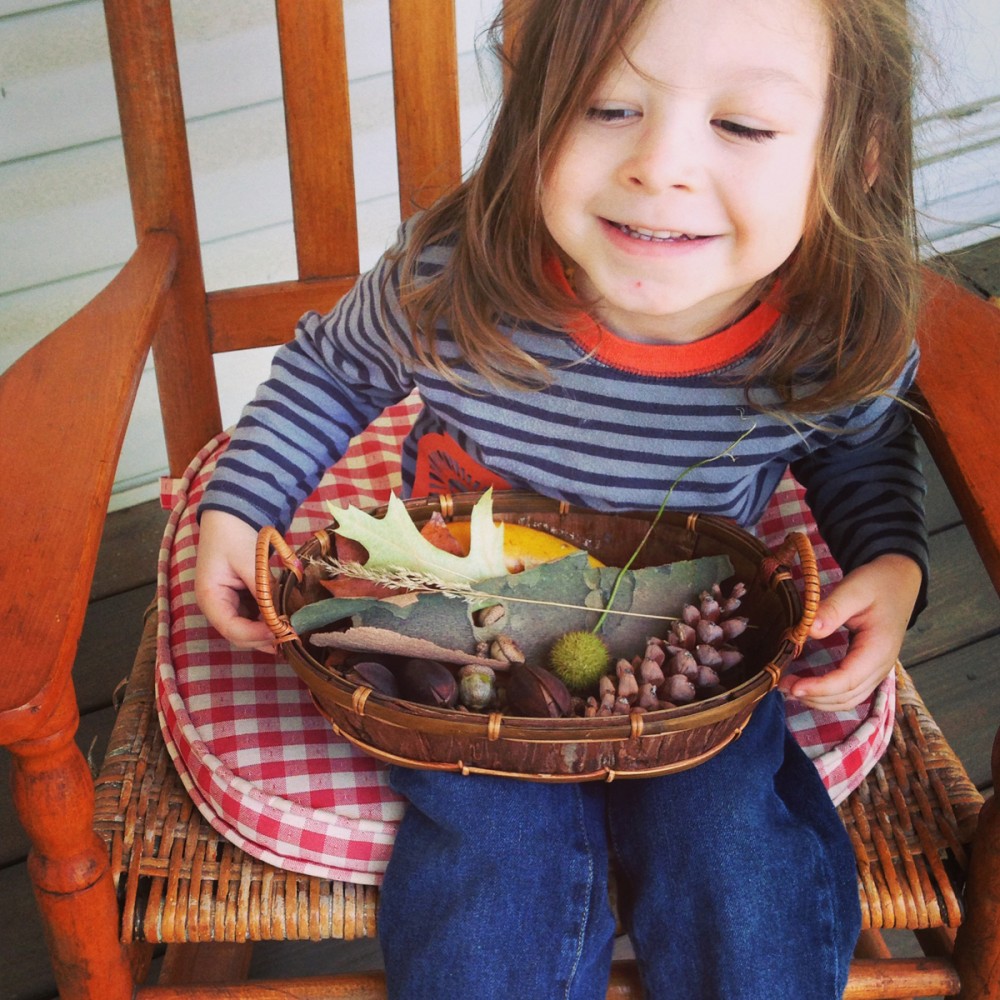
This past weekend was beautiful here in northern Virginia! Jax and I grabbed a basket and set out looking for early autumn treasures. The leaves are just now starting to turn, so we focused mainly on other items.

Autumn Nature Walk

We found all sorts of seeds and acorns, bits of birch bark, leaves and acorns. Jax quickly got into our “treasure hunt” and was very excited to show me each new find!

Autumn Nature Walk

We brought our bounty home to look through and enjoy.

Autumn Sensory BinAutumn Sensory Bin

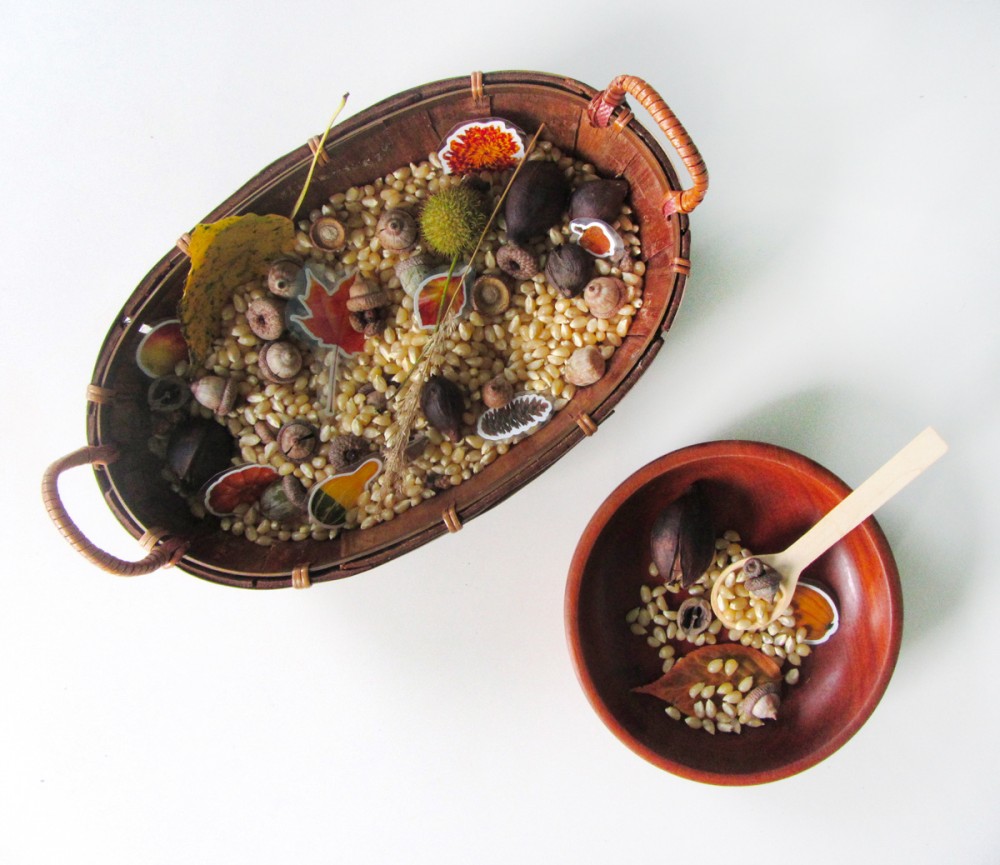
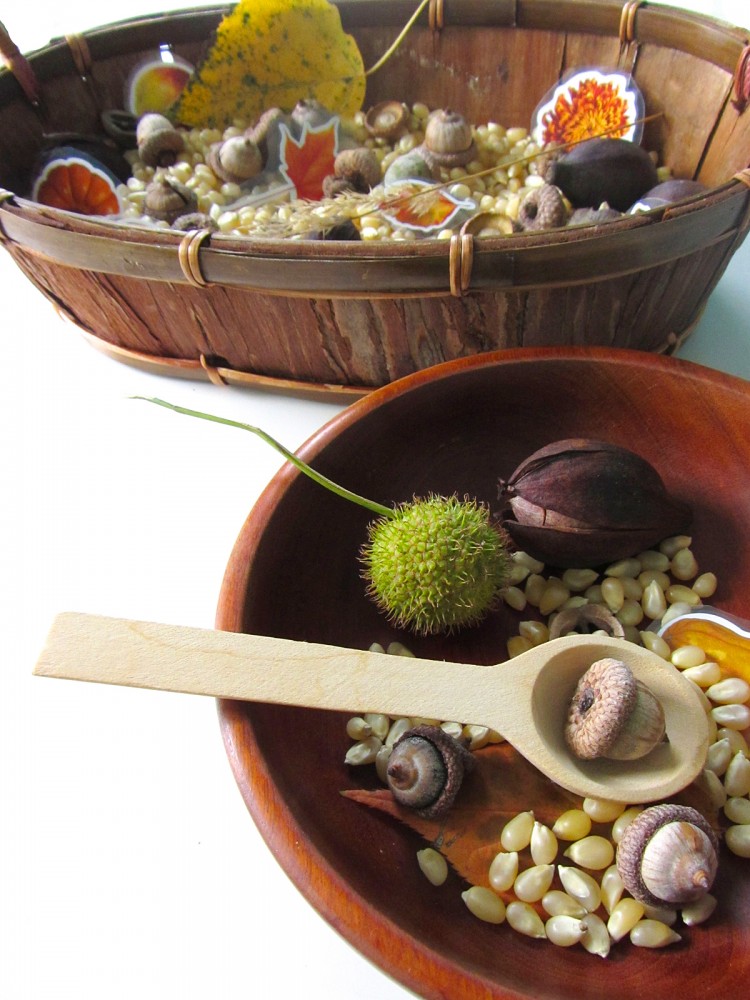
I don’t do many sensory bins, but I should! I pulled together an autumn sensory bin for Jax using our nature walk treasures. I added them to a basket of dried corn, and autumn season stickers I’d laminated and cut out. I provided a wooden bowl from the thrift shop and a little wooden spoon (from an old brown sugar jar.)

Autumn Sensory Bin

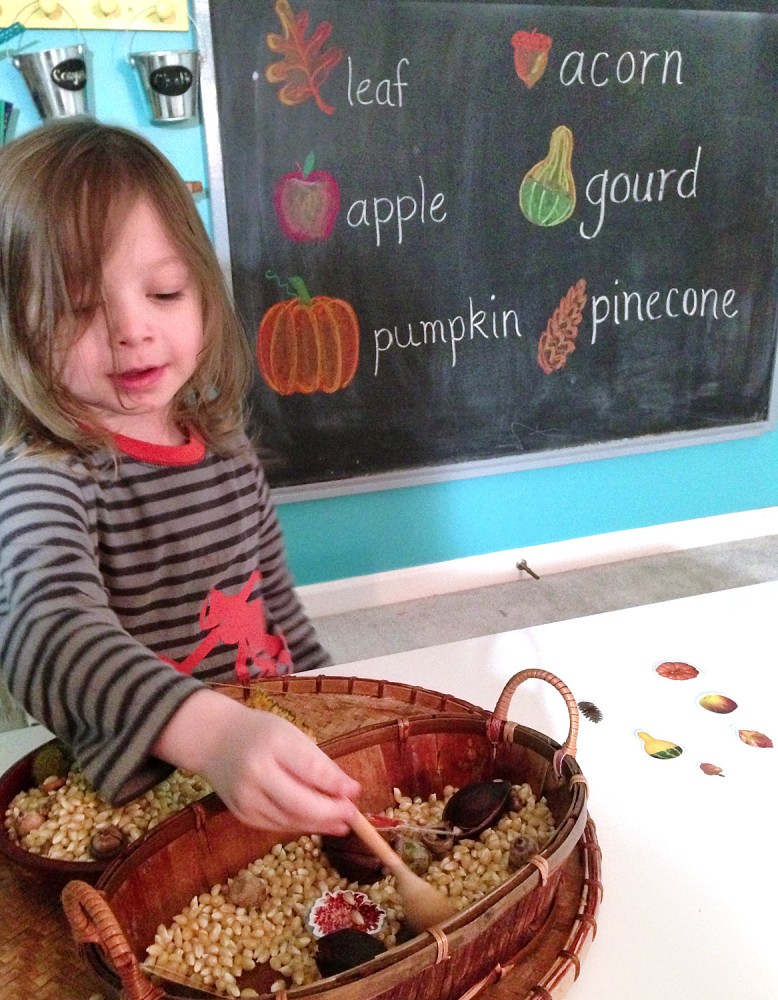
Jax jumped right in and started scooping the contents and exploring the textures. I’d drawn a few autumn items on our schoolroom chalkboard along with writing the words. I had Jax hunt for those three stickers in the sensory bin, then let him choose three more for me to draw. Next time he can hunt for all six.

Autumn Sensory Bin

We plan on doing many more autumn-themed activities throughout the season. Do you have any fun ideas for us? Let me know here, or send me ideas via Pinterest, Twitter, Facebook or Instagram.

Here is a Pinterest-ready photo for you to pin!

Autumn Leaves Quiet Book & Fall Homeschool Unit

I am linking up to the wonderful Montessori Monday! If you do any homeschooling, I urge you to check out the weekly link up for great ideas!

Montessori Monday

Animals of South America for the Montessori Wall Map & Quietbook with Printables

Animals of South America for the Montessori Wall Map & Quietbook with Printables

If you haven’t been introduced to our Montessori wall map and quiet book yet, you can read all about it here. This post is for the continent of South America! Every continent (and the oceans) will have landmarks and animals. Some, like Europe, have more landmarks than animals. South America has all animals, as it has so many great ones to choose from!

Overview and Map PatternsAfricaAntarcticaAsiaEurope North AmericaOceans • South America

All our pieces so far!

All our pieces so far!

A quick note: Do you have a website that fits in with our readers’ interests: sewing, felt, homeschool or Montessori? I am trying out a new sponsor banner system and I have my 125×125 spots open for free swaps! There are currently 3 spots left, so please visit the Sponsor page to read more! Check it out to the left! Thank you for the help!

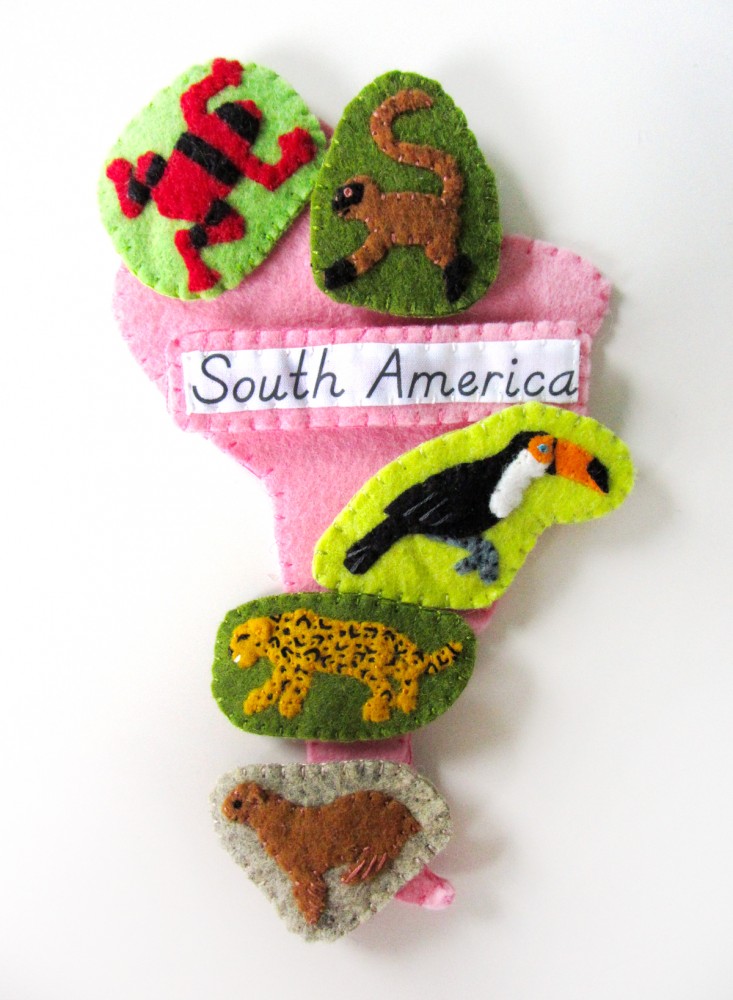
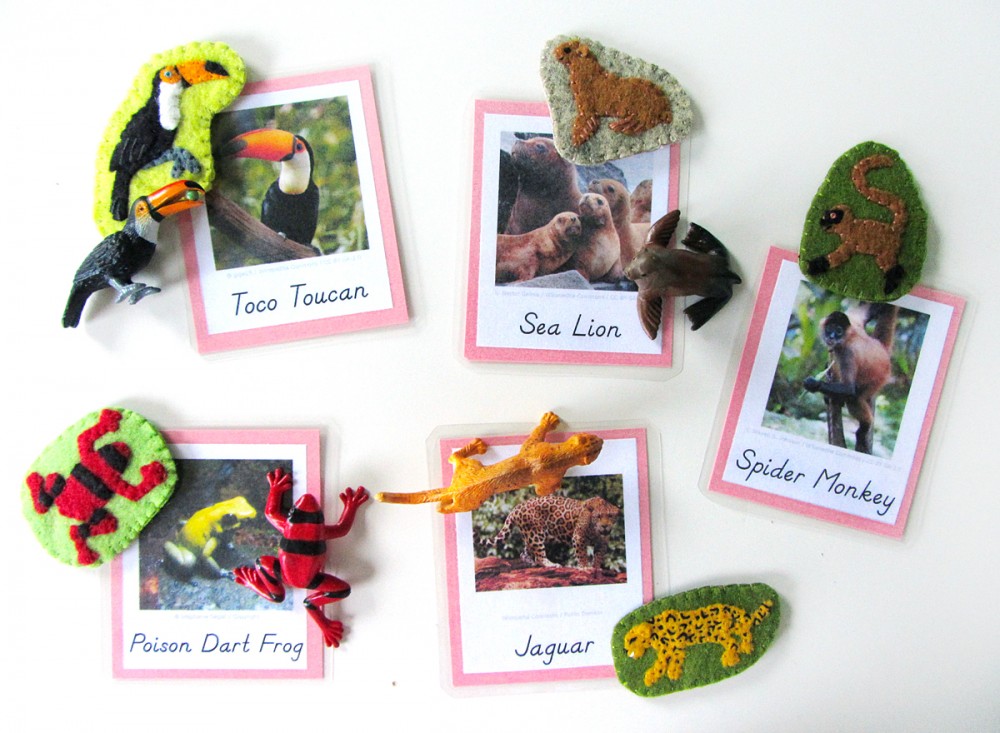
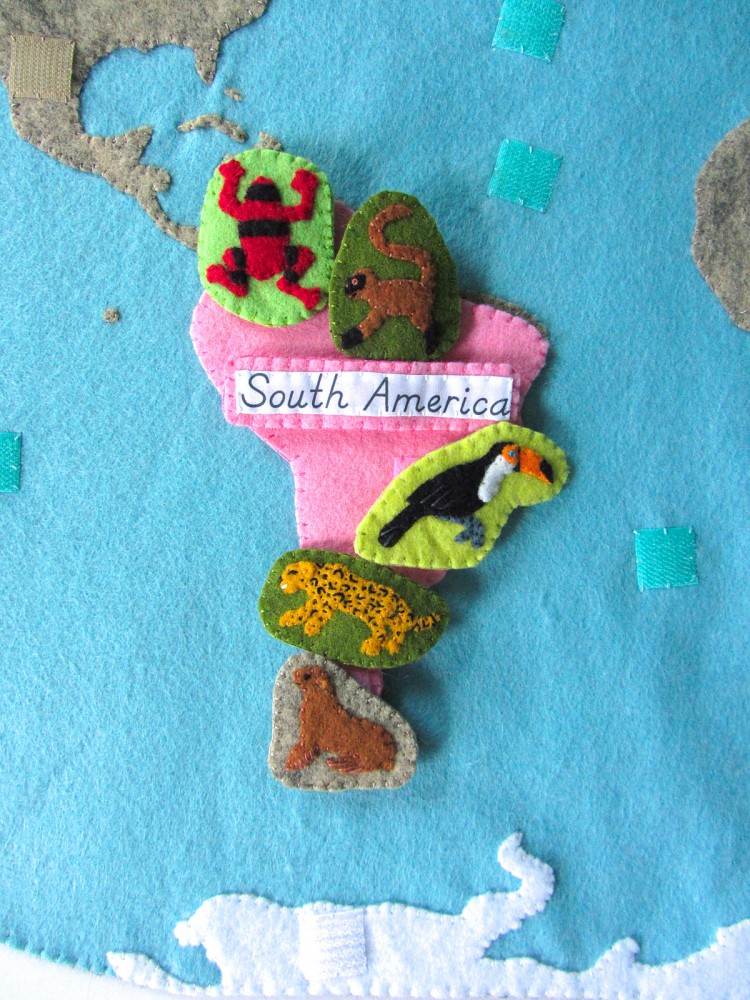
Those of you who follow along on Facebook or Instagram have been seeing all the fun South American animals I’ve sewn. I love that there were some brighter colors, thanks to the rainforest animals! I made: a poison dart frog, a toco toucan, a spider monkey, a jaguar and a sea lion.

Animals of South America for the Montessori Wall Map & Quietbook with Printables

I want to say a quick thank you to Libby A. for the surprise off of Jax’s Amazon wishlist! I use his list to bookmark school and craft items until I am able to get them. I’d added some trims I need for Jax’s robot Halloween costume (which will be featured here!) and they arrived in the mail to us this week! Thank you!! For more ways to contribute to this site, visit my support page.

Animals of South America for the Montessori Wall Map & Quietbook with Printables

Materials I Used

The Pattern (see the first post for the main patterns) Felt from American Felt & Craftbig apple [red], orange juice [orange], gold nugget [gold], limeade [lime green], cilantro [olive green], stone [taupe]  doe [brown] elephant [med gray], white and black. Hook & Loop – I used white snag-free Velcro on the backs of all these pieces and pink hook & loop (loop only) on the front of the South America puzzle piece. My pink hook & loop was store brand at Joann’s but you can find all colors here. Felt glue to tack down the pieces before sewing, printer fabric for the continent label, embroidery floss in colors to match the felt and micro tip scissors.

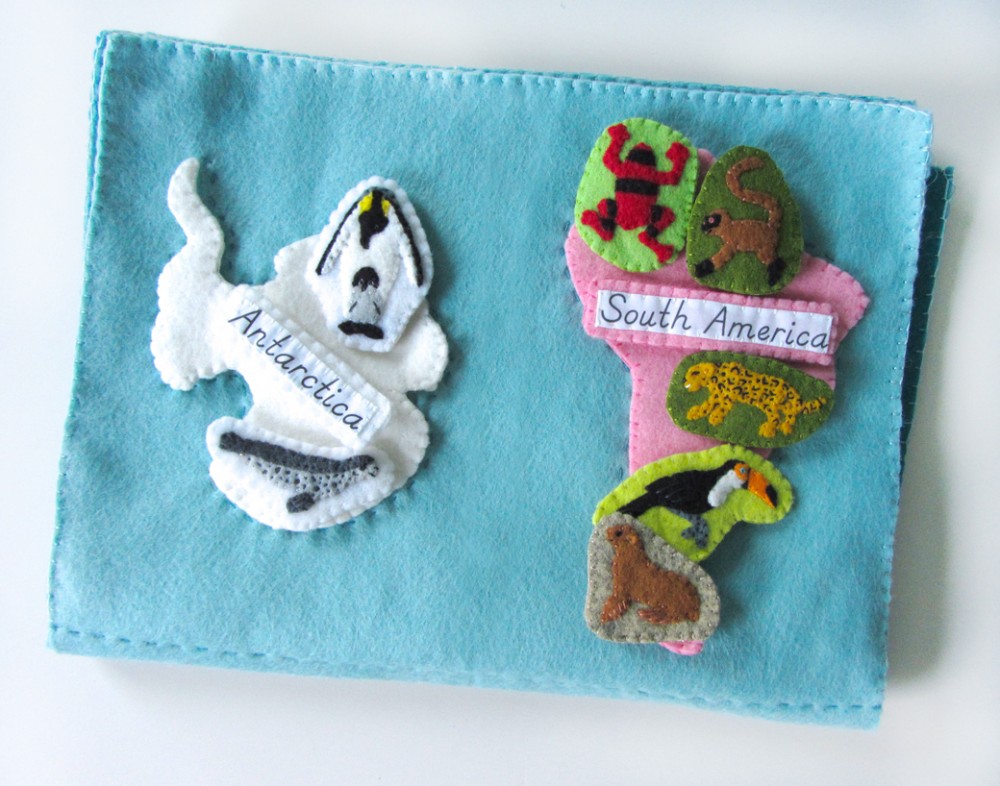
South America shares a page in the quietbook with Antarctica.

South America shares a page in the quietbook with Antarctica.

Sewing the Pieces

South America: (Felt used: bubble gum pink) For the South America continent puzzle piece, I sewed down pieces of pink loop Velcro. On the back, I sewed a strip of white snag-free Velcro to correspond with the Velcro in the quietbook. I finished it by sewing the two sides together around the edge with a blanket stitch. Label: (Felt used: bubble gum pink) For the continent label, I folded under the edges (just a tiny bit to hide the rough edges) and creased it with my nails. The printer fabric held the folds nicely without ironing. Then I stitched the label to some white felt and trimmed it down to be a border. I cut a matching felt rectangle for the back, sewed snag-free Velcro to it and then sewed both sides together.

Animals of South America for the Montessori Wall Map & Quietbook with Printables

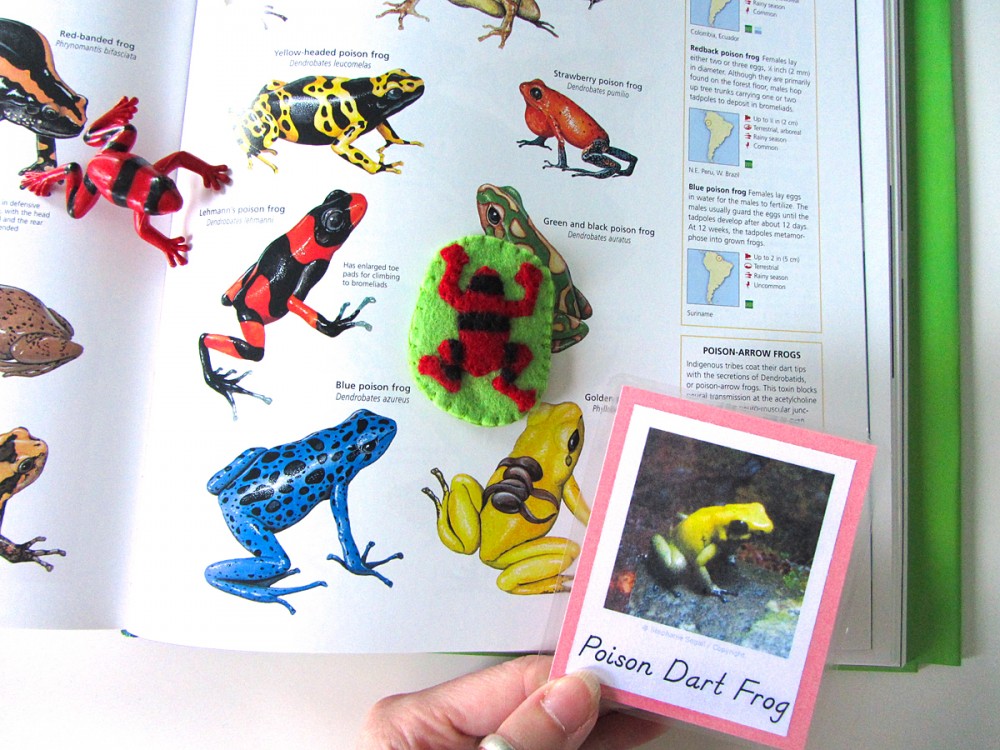
For all of the animals, I started by gluing the pieces down to a scrap of background felt with a very light amount of felt glue. I glue multiple animals at a time to give them time to dry. I sewed them down, trimmed the background and cut a matching backing piece. I sewed snag-free Velcro to the back and sewed both sides together with a blanket stitch. Poison Dart Frog: (Felt used: big apple red for the body, black for body details and limeade lime green for the background) I started by gluing down the red body, then gluing the strips on top. I sewed around all the edges. I matched my frog to the one in the Safari Ltd Rainforest Toob, which our animal encyclopedia says is Lehman’s Poison Dart Frog. You could make yours any color, especially if you have the Frogs and Turtles Toob. (My 3-part card is not a red Lehman’s. I never use photos without permission and I was unable to find a photo I could use of one. But the photo I took of a Golden Poison Dart Frog at the aquarium makes for a fun lesson where we can match them to our book.)

Animals of South America for the Montessori Wall Map & Quietbook with Printables

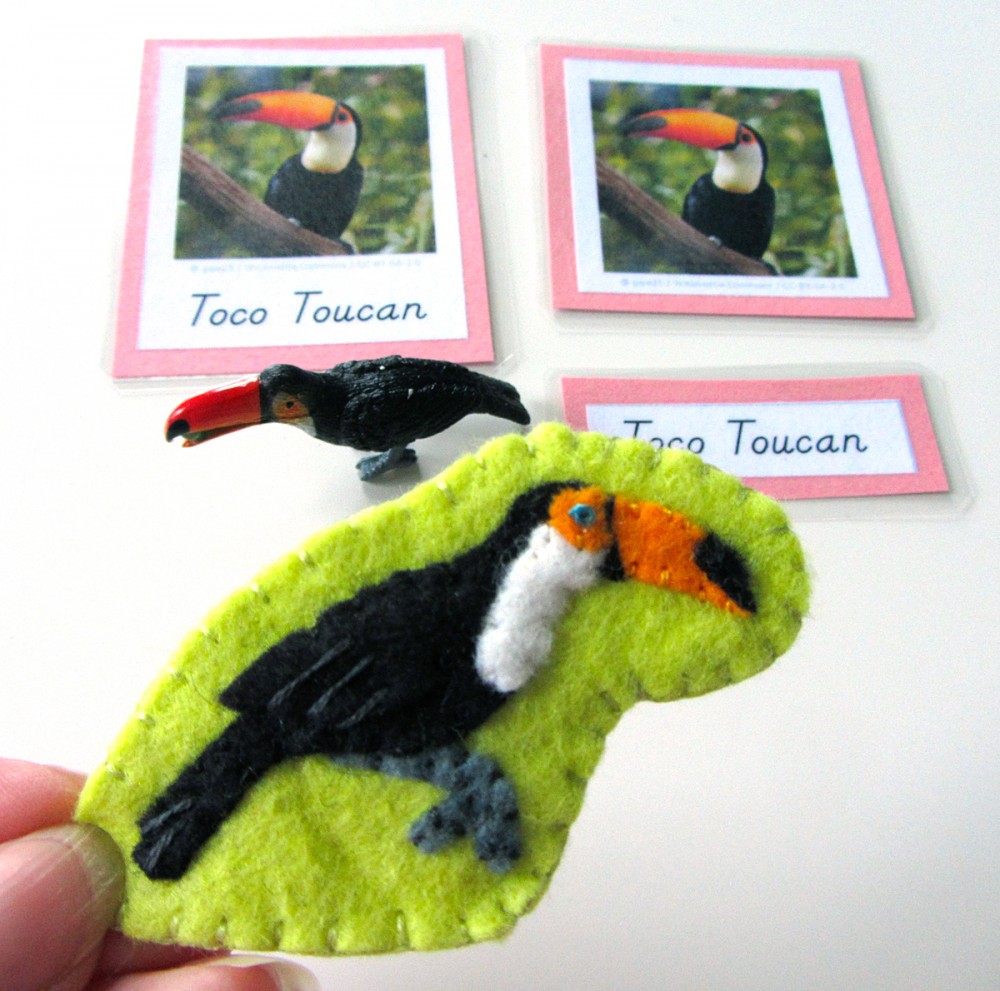
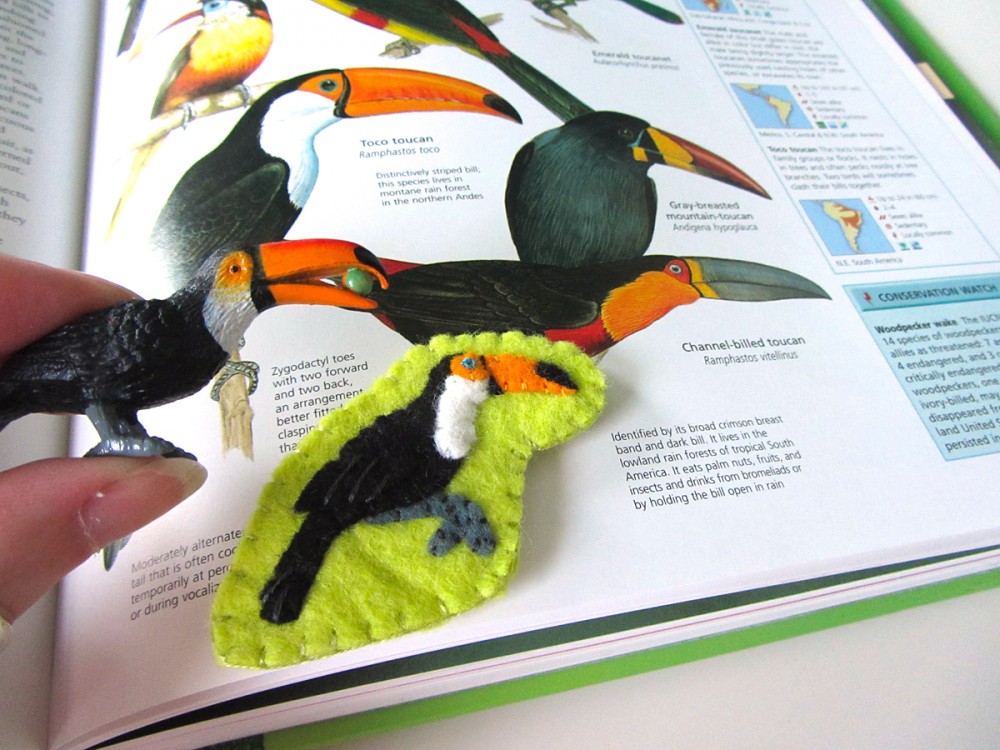
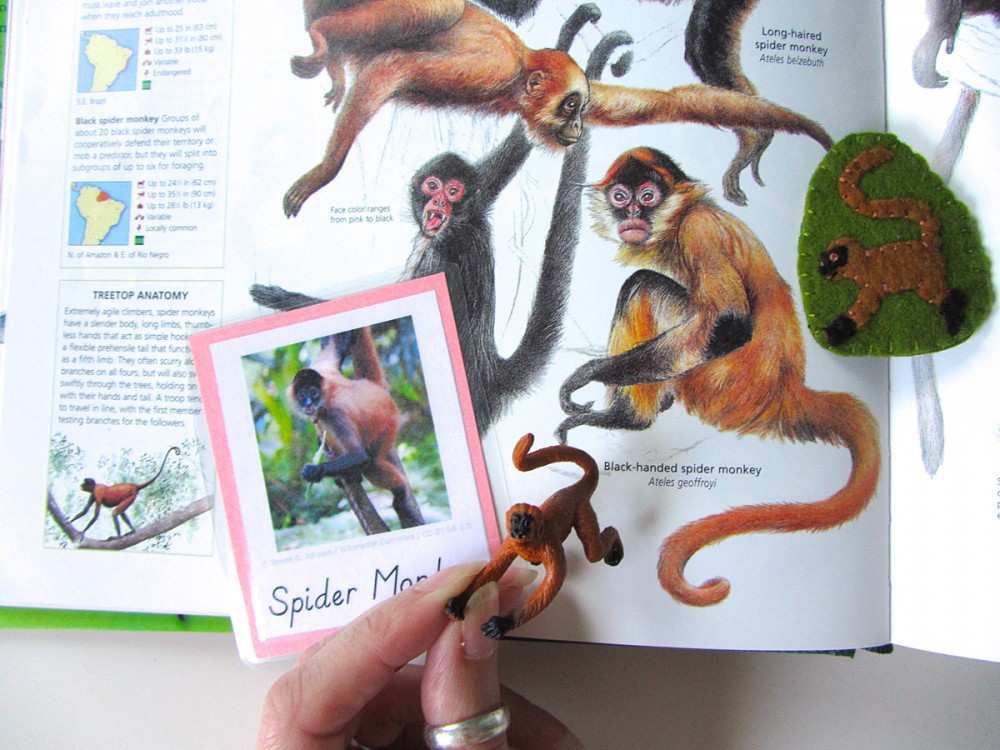
Spider Monkey: (Felt used: doe brown for the body, black for body details and cilantro olive green for the background) I glued the brown body of the spider monkey down first, then his hands, feet and face. I sewed all around the edges. I gave him French knot eyes, a little brown stitch for his nose, and a long black stitch to make an open mouth. Toco Toucan: (Felt used: black for body, orange juice for the beak,  limeade for the background and white) I first glued down her orange beak and gray leg, then her black body and wing. I glued the white chest on top and then the orange eye area. On top of the beak, I added the black felt piece. I sewed around all the edges then I gave her a bright blue French knot eye. (Their eyes are not really blue – that is a ring of blue skin around their black eye.) On her wing and tail, I made long straight stitches to show the feathers.

Animals of South America for the Montessori Wall Map & Quietbook with Printables

Jaguar: (Felt used:gold nugget gold for the body and cilantro olive green for the background) I glued the golden body of the jaguar with his far legs layered underneath. I glued one side of his ear down, then added a stitch to hold it once it was dry. I gave him a French knot eye with little black stitches on either side to make a cat-eye shape. I used white to make a mouth and black to make a small nose. For the spots, I made the larger ones using a similar technique to the lazy daisy stitch (a loop of thread that is pinned down by a small stitch at the peak) but used arch shapes instead of closed loops. The smaller stitches are just tiny stitches – some with a few close together to make medium spots.Animals of South America for the Montessori Wall Map & Quietbook with Printables Sea Lion: (Felt used: doe brown for the body and stone taupe for the background) I glued the brown body of the sea lion, then sewed around the edges. I made long stitches on his flippers to show the webbing. I glued one side of his ear down, then added a stitch to hold it once it was dry. I gave him a French knot eye and a little black mouth.

Animals of South America for the Montessori Wall Map & Quietbook with Printables

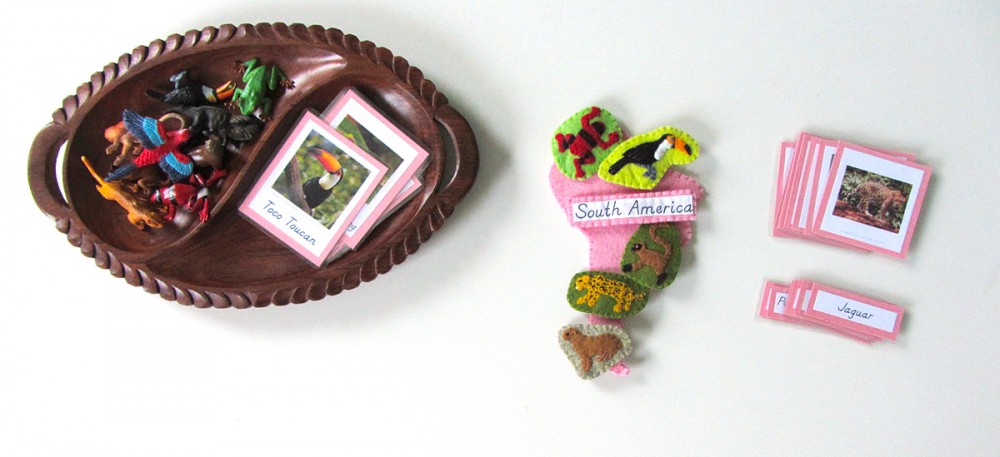
Montessori South American Animals 3-Part Cards

Currently jax is focusing on his world continent 3-part cards, but we’ve done a small session with each of the animal card sets as I’ve made them. He sees me making them and insists! We will study the animals with more depth when we focus on a particular continent.

Animals of South America for the Montessori Wall Map & Quietbook with Printables

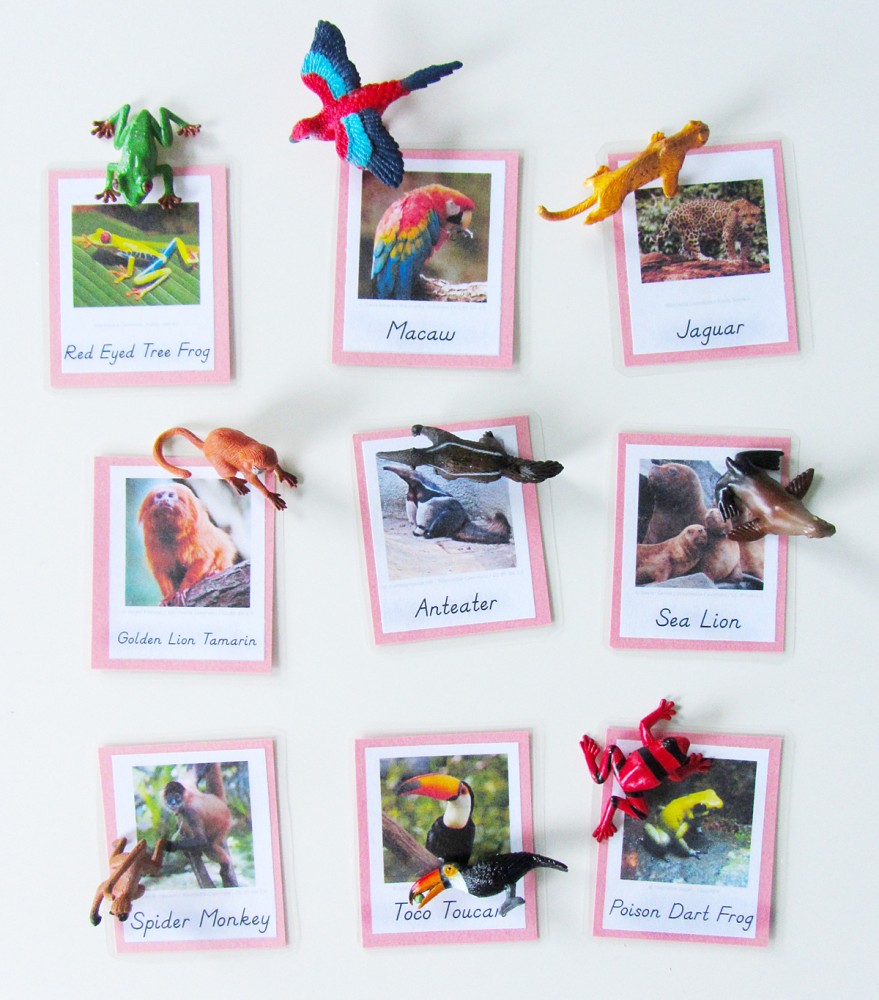
For now, we pull out our SafariLTD’s TOOB figurines and use our 3-part cards to match them whenever he shows interest. We like to watch short videos about an animal, then study some pictures and draw our own.

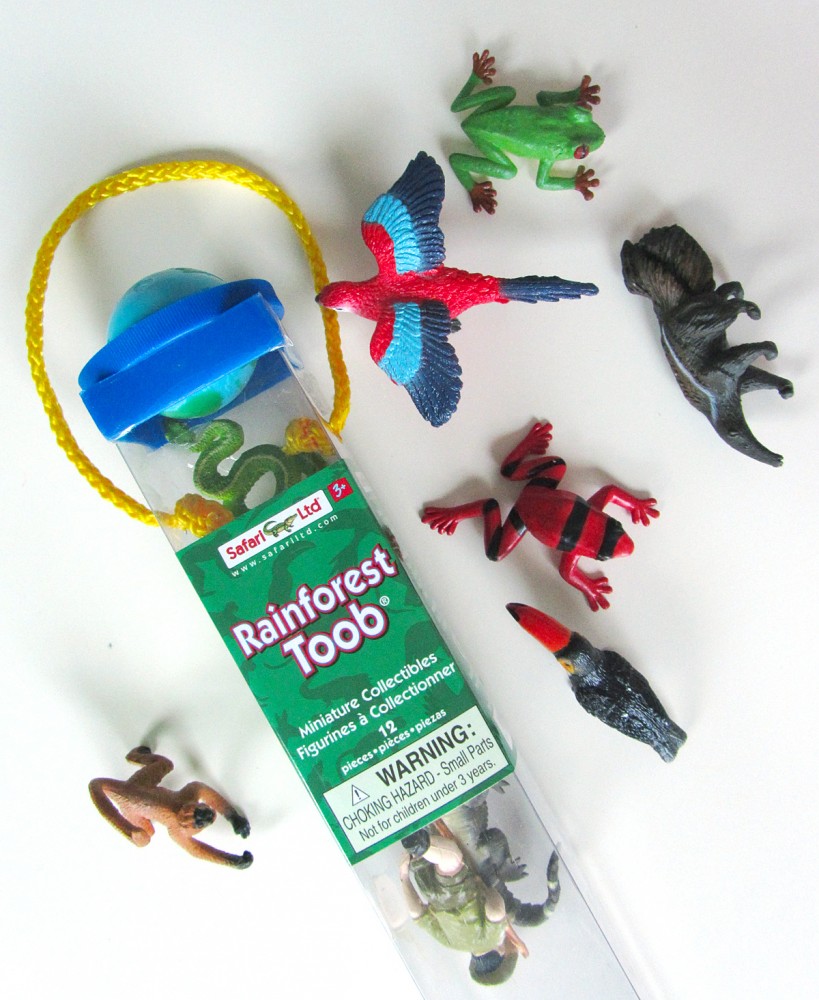
I used the Rainforest Toob for these cards. The sea lion is from the Ocean TOOB.

I used the Rainforest Toob for these cards. The sea lion is from the Ocean TOOB.

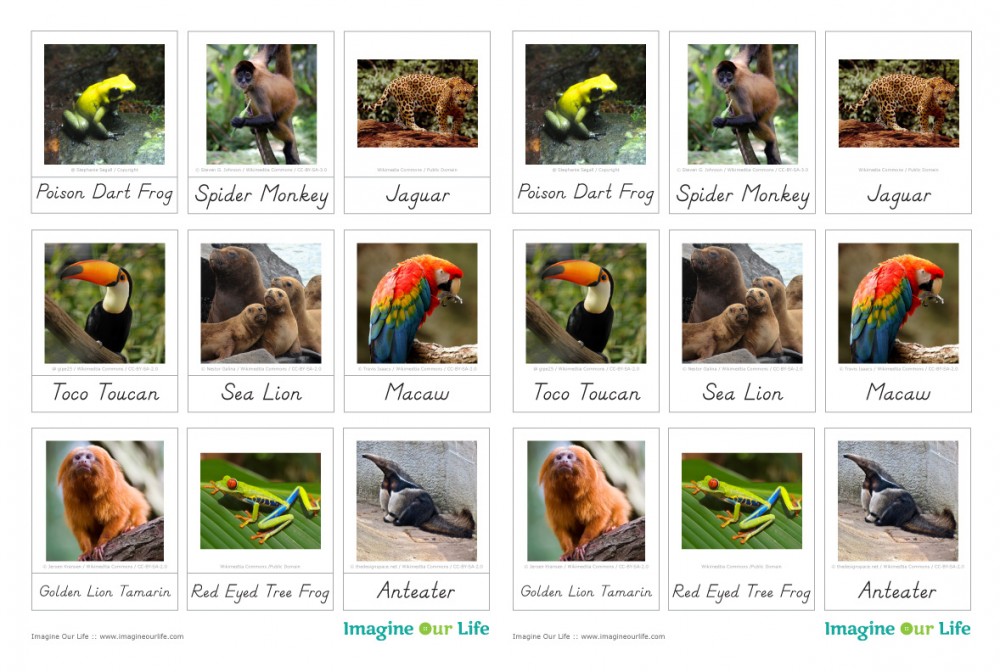
Click here to download my free pdf file to make your own. To make mine, I cut them out, glued them to pink construction paper (to match South America’s Montessori color) then laminated them. I love my new laminator! It makes everything so shiny and strong! I’ve been giving it a workout!

Animals of South America for the Montessori Wall Map & Quietbook with Printables

Exploring South America’s Animals

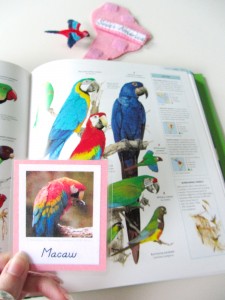
I’m still so happy I found my The Encyclopedia of Animals: A Complete Visual Guide when our basement flooded! (Though I’m less happy that my dining room table is covered in 2′ high piles of books.)

Animals of South America for the Montessori Wall Map & Quietbook with Printables

It has a lot of beautiful photos and useful facts about many different animals. Jax and I will be using it to match up with our 3-part cards and read more about the animals. We also use my iPad and YouTube to watch short video clips.

Animals of South America for the Montessori Wall Map & Quietbook with Printables

Here we used the encyclopedia to identify which kind of spider monkey we had.

Animals of South America for the Montessori Wall Map & Quietbook with Printables  Animals of South America for the Montessori Wall Map & Quietbook with Printables

I know many of you are sewing along (or about to!) If you are, stop by my Instagram @iolstephanie and leave a comment on one of my photos (I can’t see your photo if it you are private, but I can request to follow you temporarily if you leave a comment on mine about it) or share photos on Facebook. You can also email me. I love seeing others’ take on my patterns!

Animals of South America for the Montessori Wall Map & Quietbook with Printables

It’s not even slightly Montessori Monday still, but I hope you’ll check out the other great links!

Montessori Monday

Animals of Antarctica for the Montessori Wall Map & Quietbook with Printables

Animals of Antarctica for the Montessori Wall Map & Quietbook with Printables

If you haven’t been introduced to our Montessori wall map and quiet book yet, you can read all about it here. This post is for the fastest continent to sew for – Antarctica! Every continent (and the oceans) will have landmarks and animals. Some, like Europe, have more landmarks than animals. Antarctica just has two animals featured, as there are mainly just seals, penguins and other birds.

Animals of Antarctica for the Montessori Wall Map & Quietbook with Printables

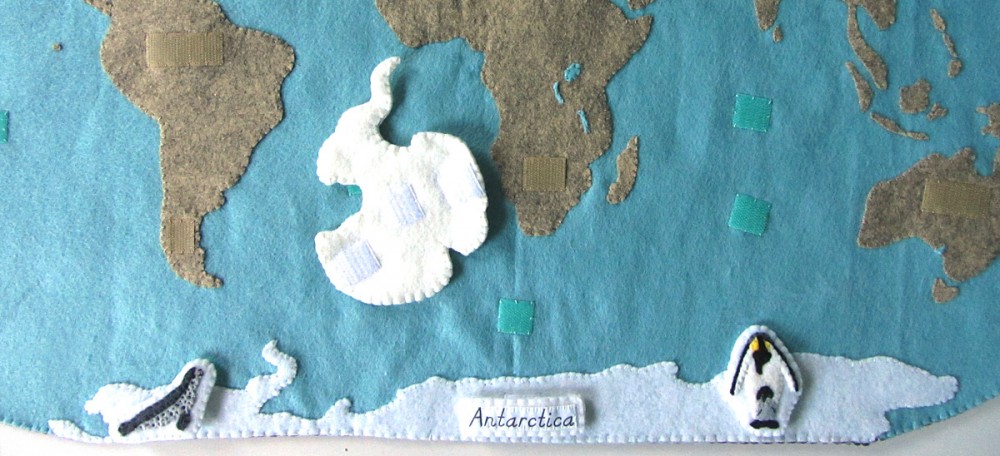
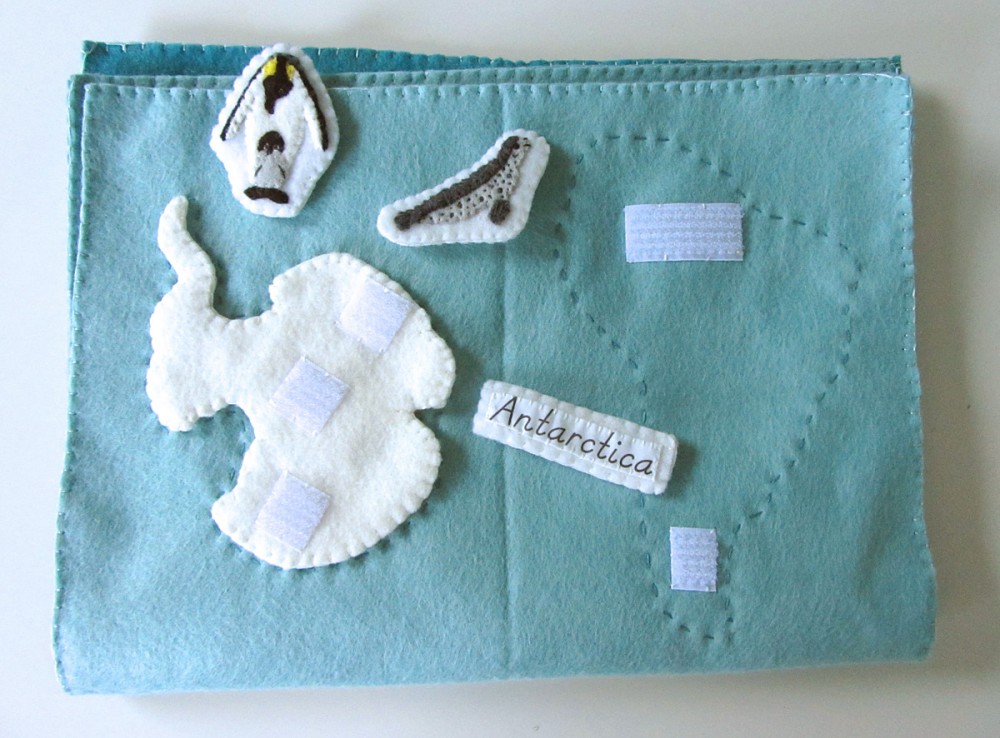
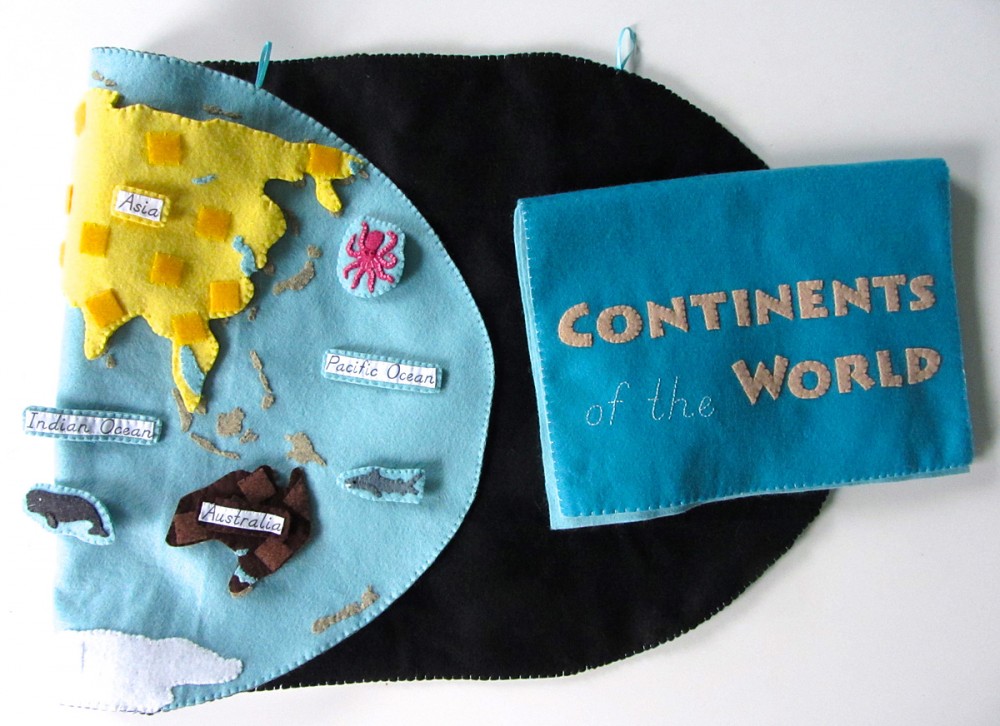
Antarctica was a bit different than the rest in another way: it is the only continent that is hugely affected by the map projection. On the wall map, it is shown as a long, unraveled strip at the bottom. So Antarctica is sewn to the map, but I also made a piece in its actual shape that Jax can compare to it or to his globe.

Overview and Map PatternsAfrica • Antarctica • AsiaEurope
North AmericaOceansSouth America

A quick note: Do you have a website that fits in with our readers’ interests: sewing, felt, homeschool or Montessori? I am trying out a new sponsor banner system and I have my 125×125 spots open for free swaps! There are currently 5 spots left, so please visit the Sponsor page to read more! Check it out to the left! Thank you for the help!

Animals of Antarctica for the Montessori Wall Map & Quietbook with Printables

My pyramids are still missing… Time to sew a new one!

Those of you who follow along on Facebook or Instagram might have seen there was a bit of a mishap in Antarctica. Well, the Antarctica in our house, at least. Our golden retriever got a little too excited about my penguin and ate him! Since I had to sew him a second time, I made him even cuter. He now is a daddy penguin with a little chick!

Regardless of that excitement, I still love working on this project! This will be an amazing resource for Jax throughout his school years. Yes, I am giving you all my patterns and printables for free! If you’d like to contribute, visit my support page. School items off of Jax’s Amazon wishlist always help! Especially because our heating/cooling unit just just freaked out and flooded our basement. We are now $6k poorer, despite insurance help. Yikes. I am currently saving up Amazon credit for the handbells on his wishlist. If I can get those, I’ll share a music unit with you all! but it looks like I won’t have enough until the end of September.

Animals of Antarctica for the Montessori Wall Map & Quietbook with Printables

Materials I Used

The Pattern (see the first post for the main patterns)

Felt from American Felt & Craftwhitesalt & pepper [dark gray], elephant [med gray], black, rubber duckie [yellow] and gray.

Hook & Loop – I used white snag-free Velcro on the backs of all these pieces and on the Antarctica puzzle piece.

Felt glue to tack down the pieces before sewing, printer fabric for the continent label, embroidery floss in colors to match the felt and micro tip scissors.

Animals of Antarctica for the Montessori Wall Map & Quietbook with Printables

Shown here on the quietbook page that Antarctica will share with South America.

Sewing the Pieces

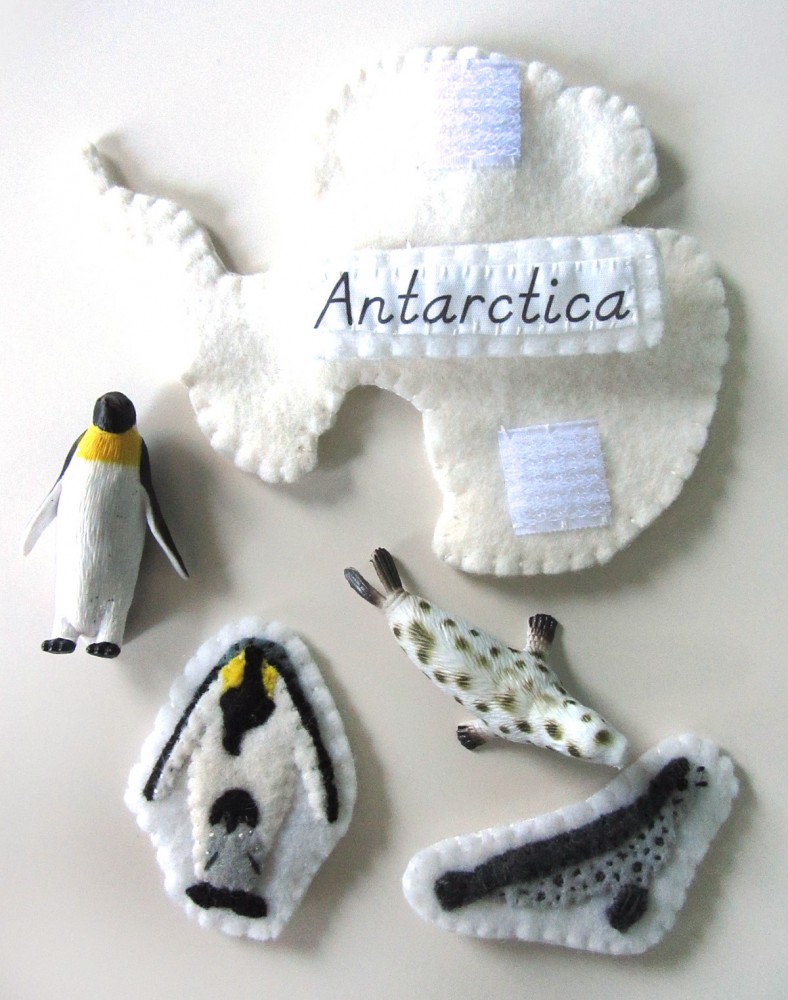
Antarctica: (Felt used:white) For the Antarctic continent puzzle piece, I sewed down pieces of white snag-free Velcro. On the back, I sewed a strip of white snag-free Velcro to correspond with the Velcro in the quietbook. I finished it by sewing the two sides together around the edge with a blanket stitch.

Label: (Felt used: white) For the continent label, I folded under the edges (just a tiny bit to hide the rough edges) and creased it with my nails. The printer fabric held the folds nicely without ironing. Then I stitched the label to some white felt and trimmed it down to be a border. I cut a matching felt rectangle for the back, sewed snag-free Velcro to it and then sewed both sides together.

Animals of Antarctica for the Montessori Wall Map & Quietbook with Printables  Animals of Antarctica for the Montessori Wall Map & Quietbook with Printables

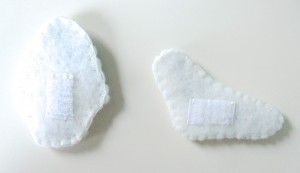
For all of the animals, I started by gluing the pieces down to a scrap of background felt with a very light amount of felt glue. I glue multiple animals at a time to give them time to dry. I sewed them down, trimmed the background and cut a matching backing piece. I sewed snag-free Velcro to the back and sewed both sides together with a blanket stitch.

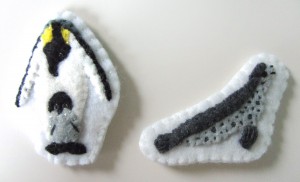
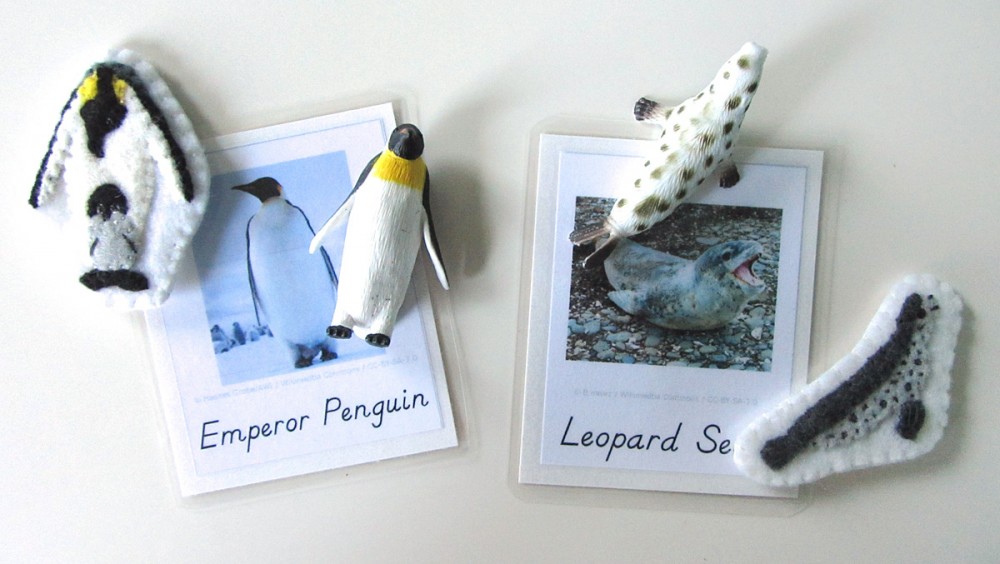
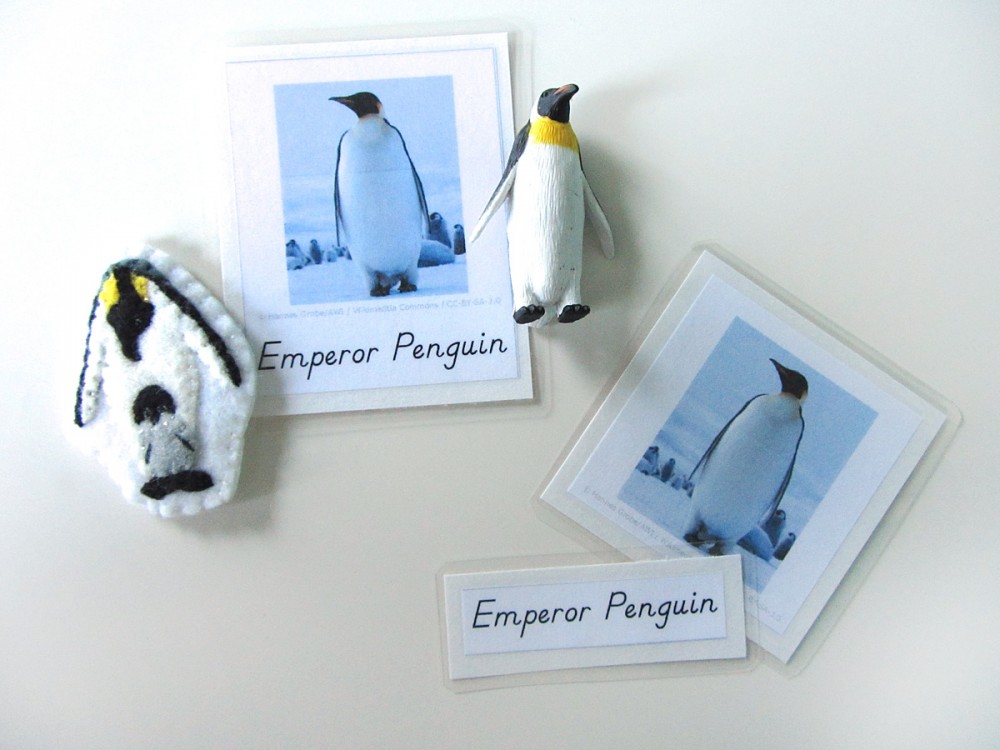
Penguin: (Felt used: white for the body and background, black for body details, elephant for the shoulders, gray for the chick and rubber duckie yellow for the neck) I started by gluing down the shoulders, the gluing the black wings to the back of the white body. I glued the body down over the shoulders, then glued the neck, feet and head. I then glued down the two parts of the baby chick penguin.

I sewed down all the edges with matching thread. For the baby, I sewed two long, dark gray stitches for wing flaps. I made French knot eyes then highlighted them with a ring of white stitches. The daddy penguin got a dark gray French knot eye.

Animals of Antarctica for the Montessori Wall Map & Quietbook with Printables

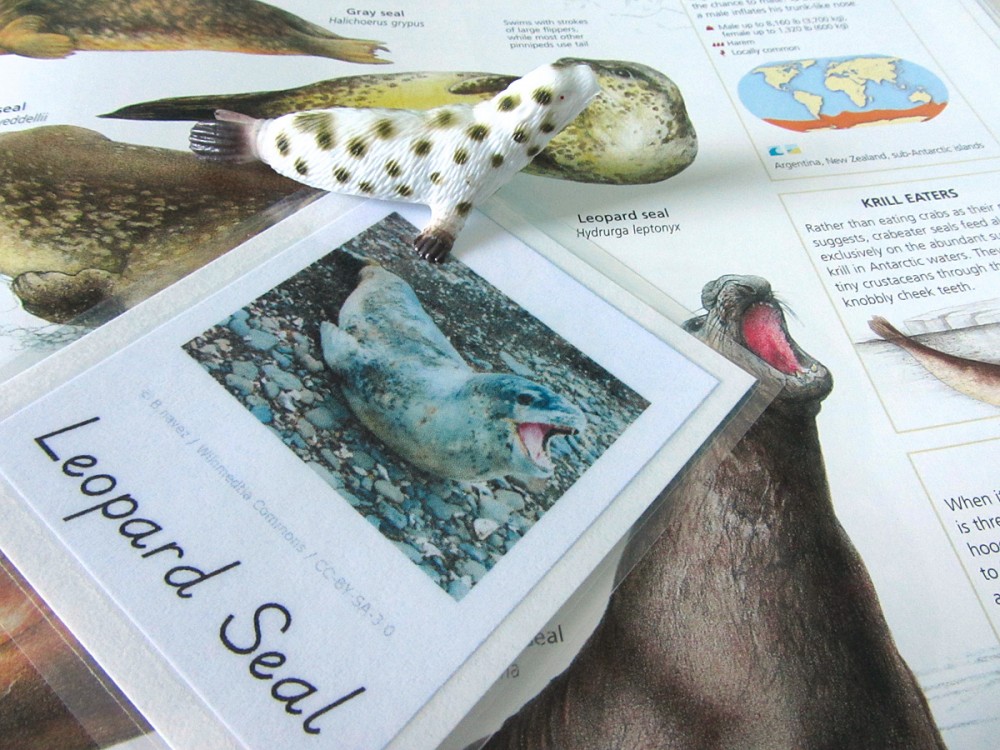
Leopard Seal: (Felt used: white for the background, salt & pepper dark gray for the back and flipper, and gray for the body) I first glued the gray body down, then added the darker back and flipper. To make the spots, I just made lots of little stitches. The tiny spots are just one stitch. The larger ones are a few stitches side-by-side. She has a French knot eye, a little stitch nose and a longer stitch mouth. On the tail and flipper, I made long dark gray parallel stitches.

Animals of Antarctica for the Montessori Wall Map & Quietbook with Printables

Montessori Antarctic Animals 3-Part Cards

Jax is still focusing on his world continent unit with the world continent 3-part cards I made up for him. We are using our Montessori globe and singing the continent song I made up. So far, He can point out the continents I ask for, and he can usually tell me the names of Africa ans Antarctica without prompting. We’ve also started using the ocean cards a lot. For the animals, we haven’t done a lot of formal lessons yet. We will when we focus on a continent. For now, we pull out our SafariLTD’s TOOB figurines and use out 3-part cards to match them whenever he shows interest. We like to watch short videos about an animal, then study some pictures and draw our own.

Animals of Antarctica for the Montessori Wall Map & Quietbook with Printables

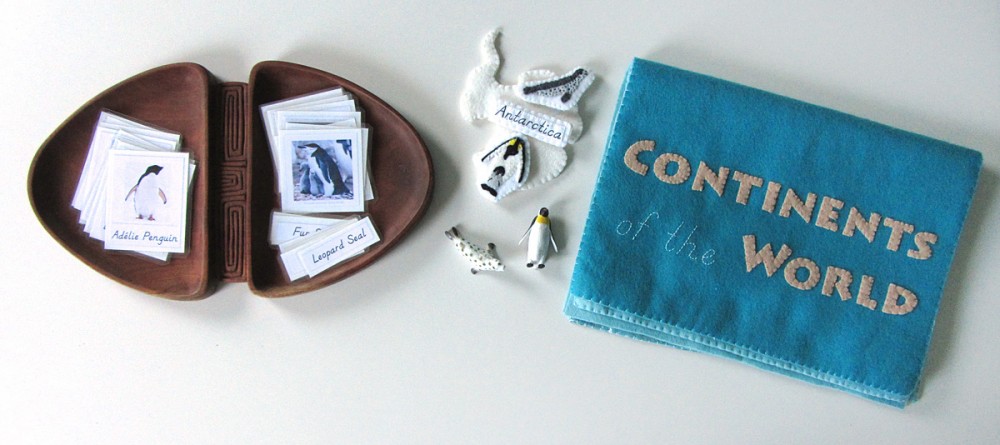
These Antarctica cards don’t really have a good match in figurines. I would LOVE if SafariLTD would create continent-themed TOOBs! (Contact them if you are interested too!) You can match the Penguins Toob to their penguins. They don’t have any antarctic seals. Mine is from the craft store where they sell diorama supplies. I mention it in more detail in my ocean homeschool post.

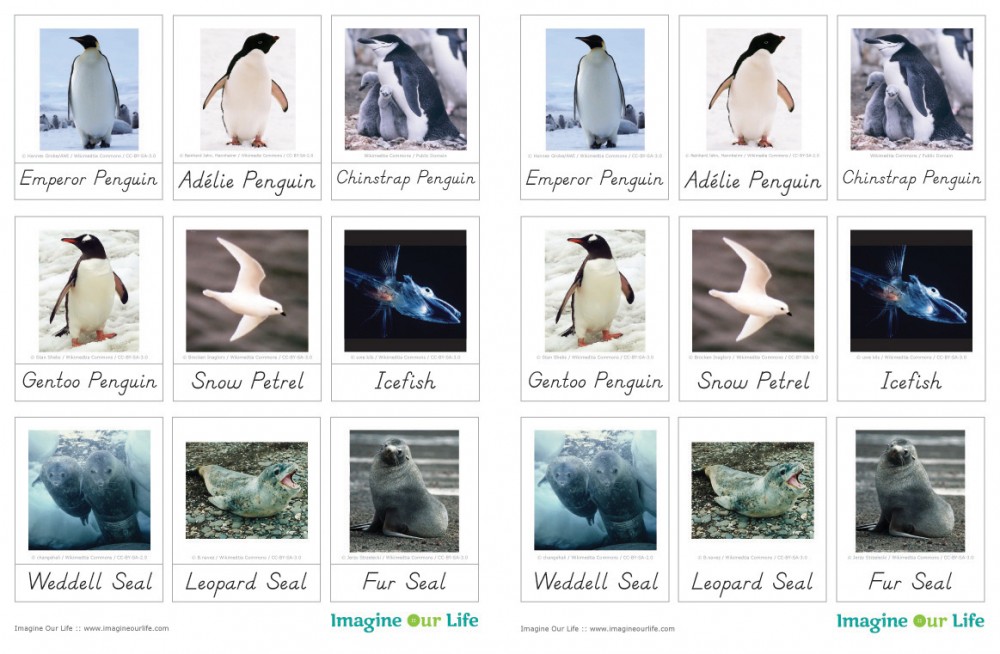
Click here to download my free pdf file to make your own. To make mine, I cut them out, glued them to white construction paper (to match Antarctica’s Montessori color) then laminated them. I love my new laminator! It makes everything so shiny and strong!

Animals of Antarctica for the Montessori Wall Map & Quietbook with Printables

Exploring Antarctica’s Animals

One thing that came of our basement flood – I had to move all our books out of the bookshelves and I found my The Encyclopedia of Animals: A Complete Visual Guide!

Animals of Antarctica for the Montessori Wall Map & Quietbook with Printables

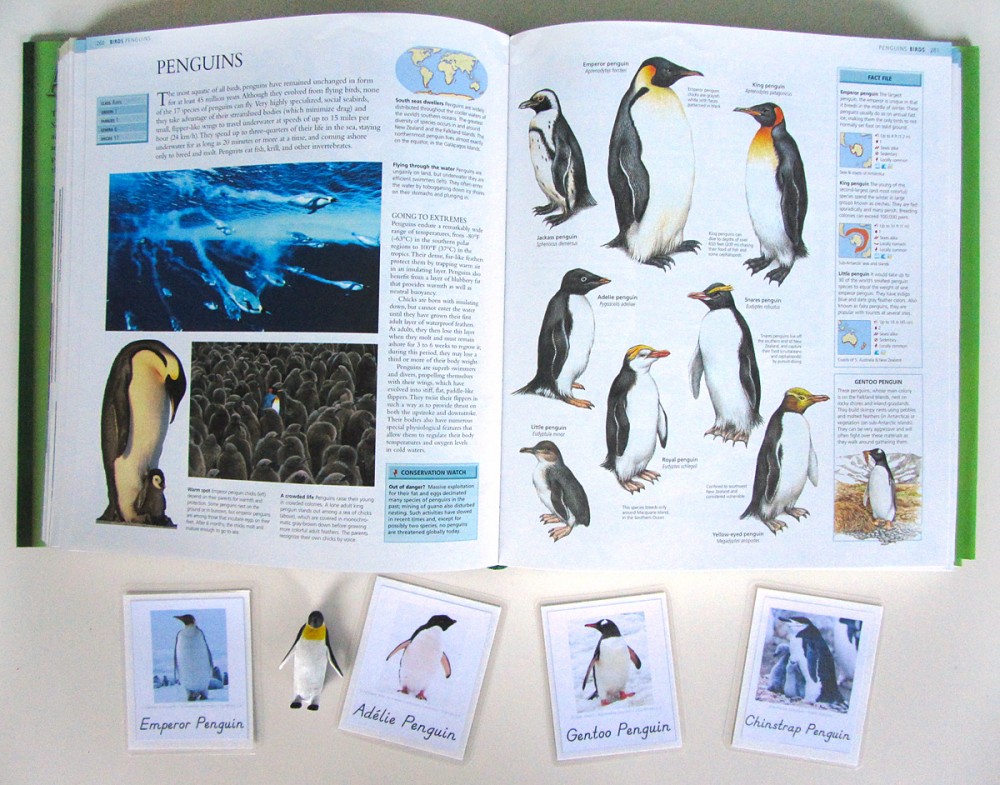
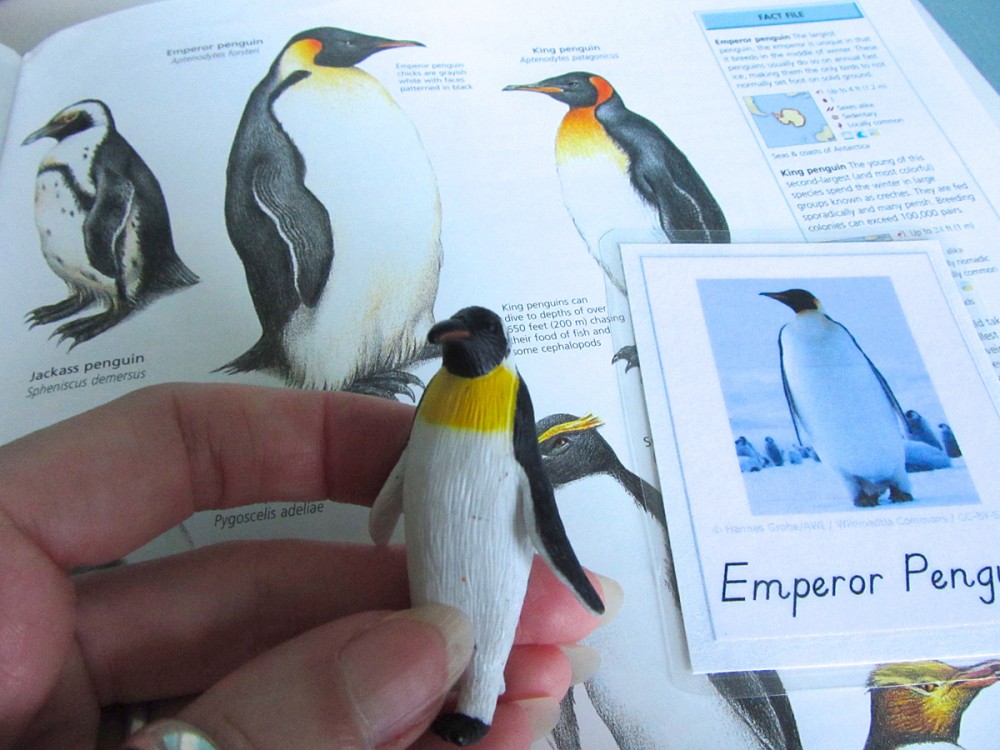
It has a lot of beautiful photos and useful facts about many different animals. Jax and I will be using it to match up with our 3-part cards and read more about the animals.

Animals of Antarctica for the Montessori Wall Map & Quietbook with Printables

I didn’t notice until after I took these pictures that there is a penguin called a “jackass penguin“. Oh my! Poor little penguins!

Screenshot courtesy Google Earth.

Screenshot courtesy Google Earth.

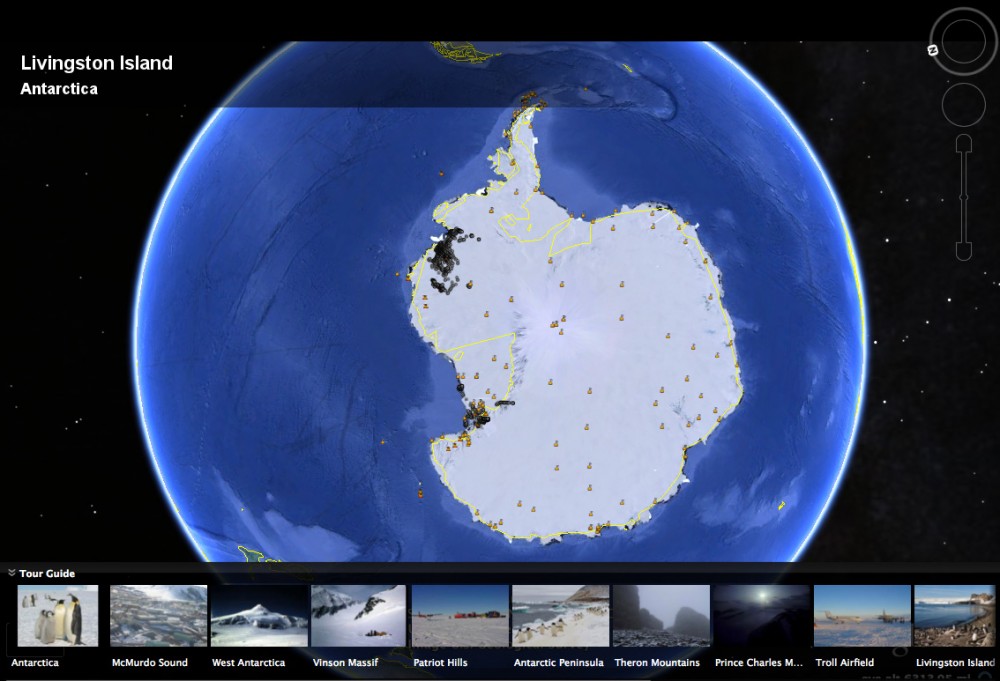
I have Google Earth installed so Jax I I can explore the earth. It is great! If you’d like to load a special Antarctica map with all sorts of points already saved, visit this site. Make sure you have Google Earth installed already!

Animals of Antarctica for the Montessori Wall Map & Quietbook with Printables

I hope you are enjoying this project as much as I am! I’ve gotten see the maps a few of you have started! If you are sewing along, stop by my Instagram @iolstephanie and leave a comment on one of my photos (I can’t see your photo if it you are private, but I can request to follow you temporarily if you leave a comment about it) or share photos on Facebook. You can also email me.

It’s not even slightly Montessori Monday still, but I hope you’ll check out the other great links!

Montessori Monday

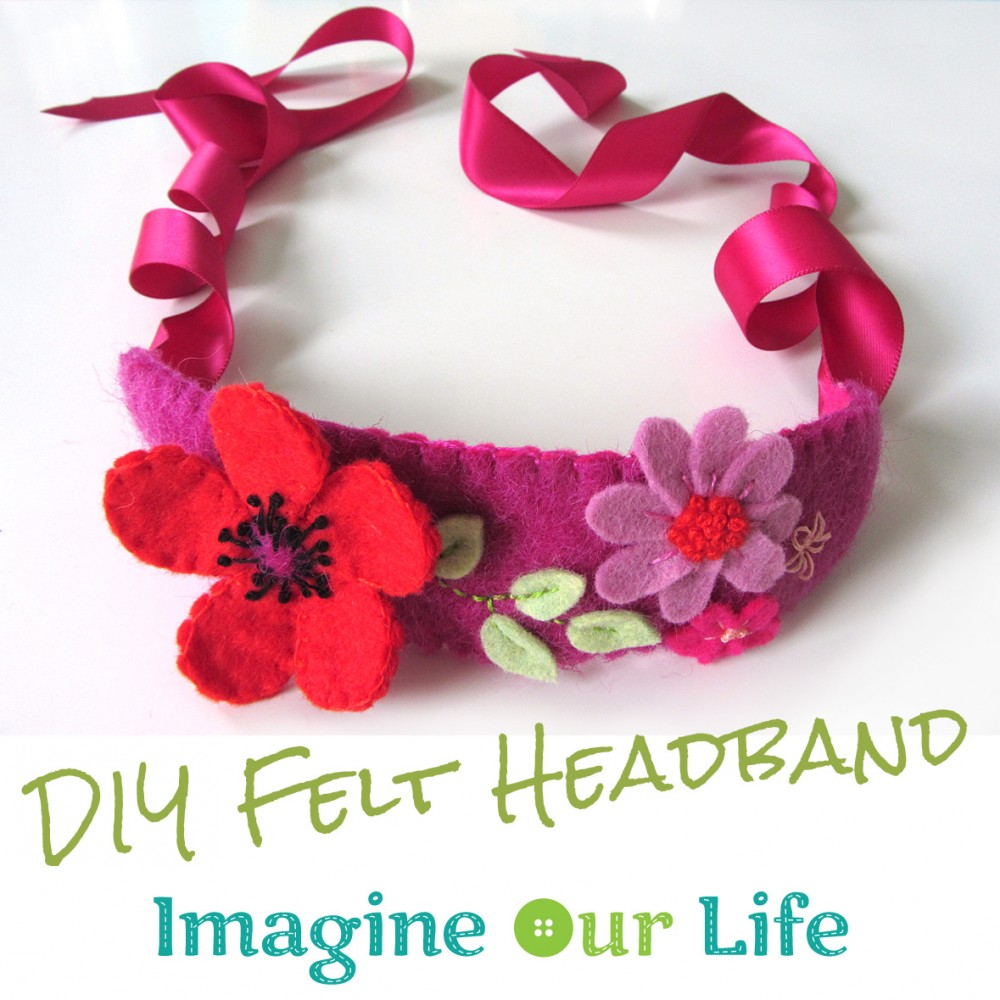
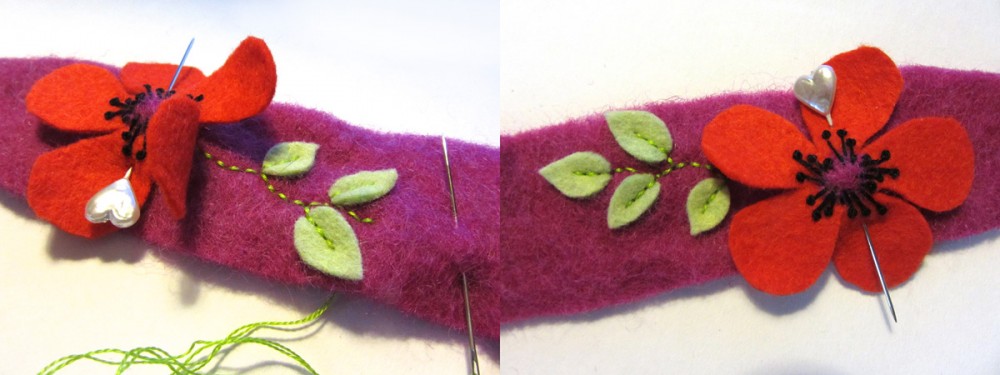
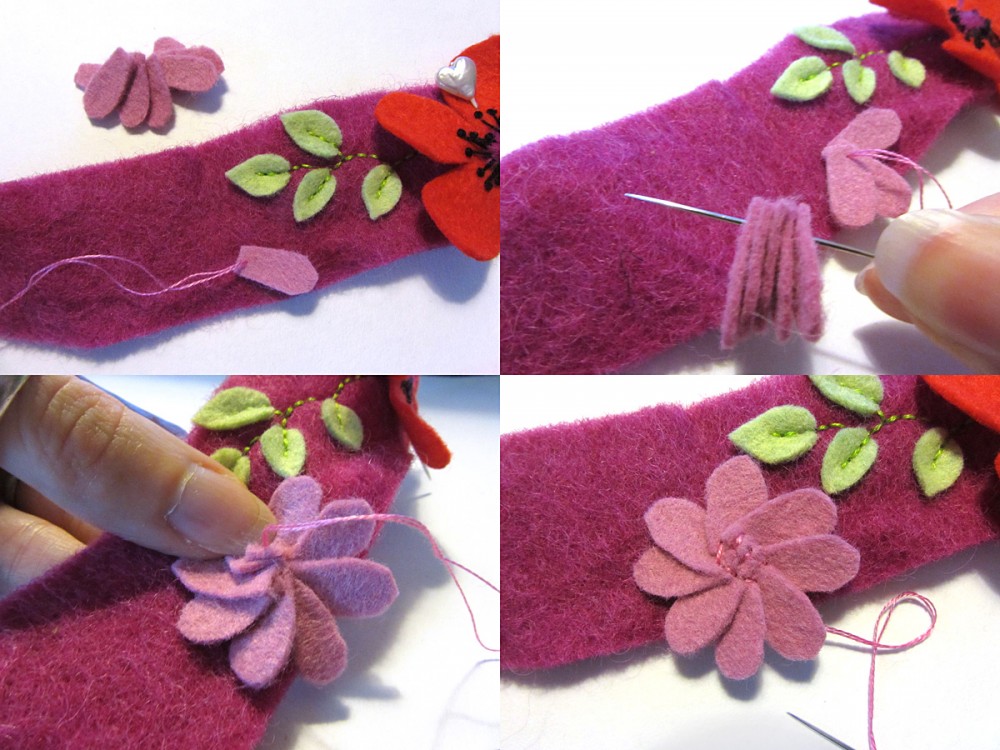
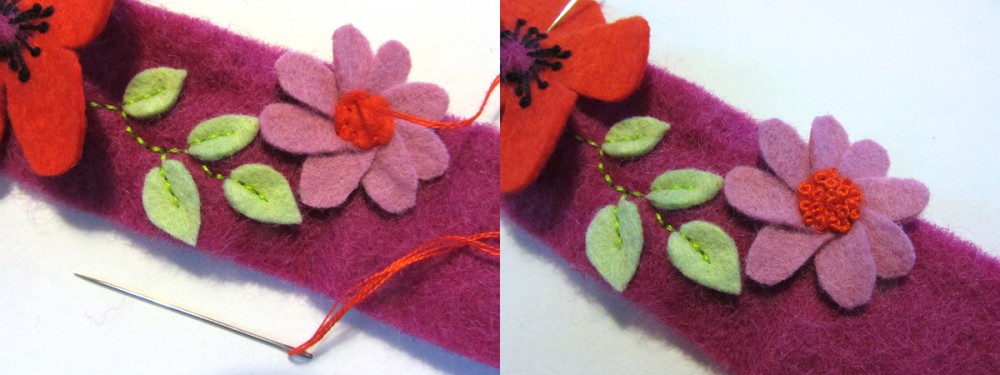
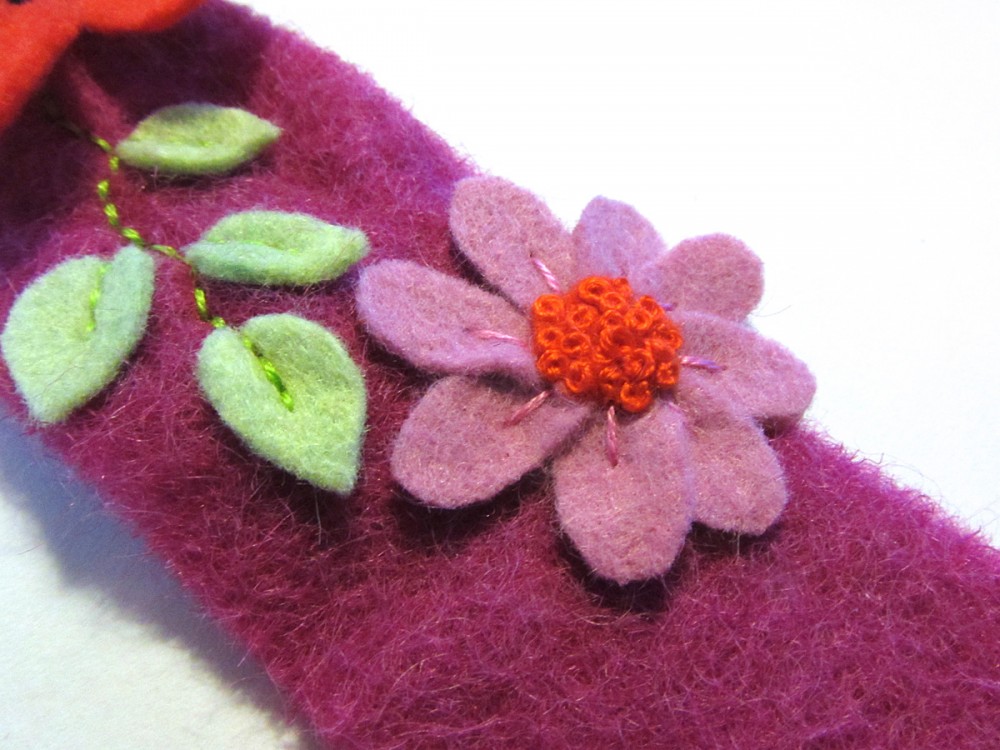
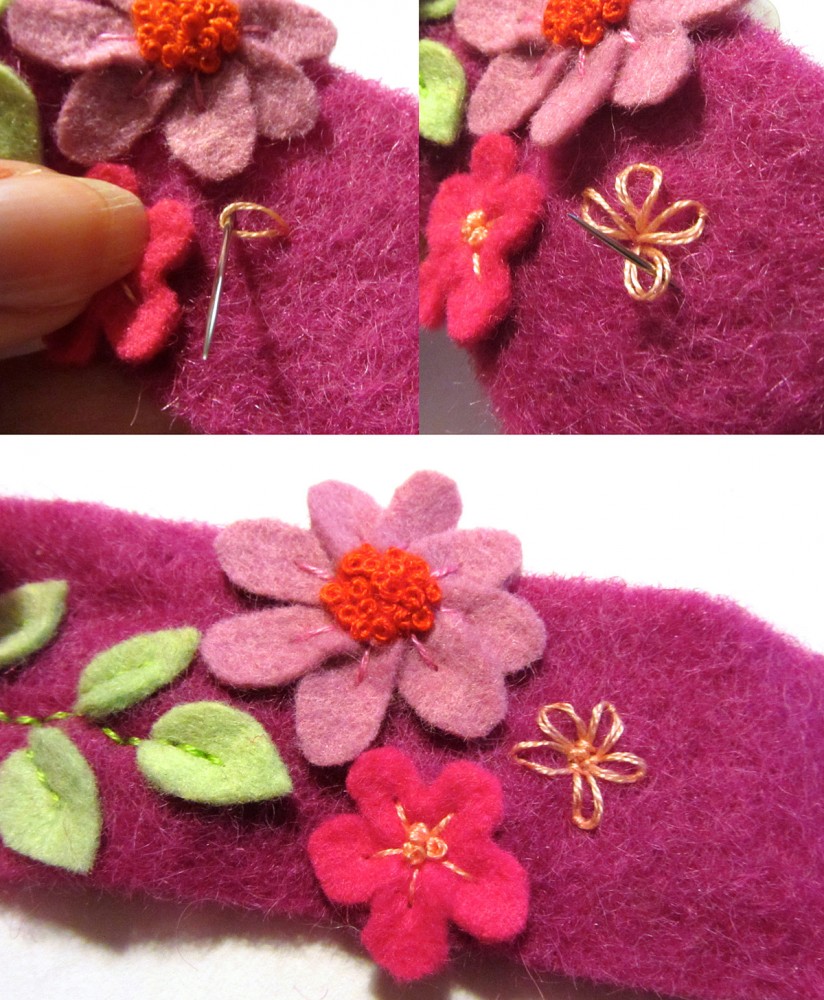
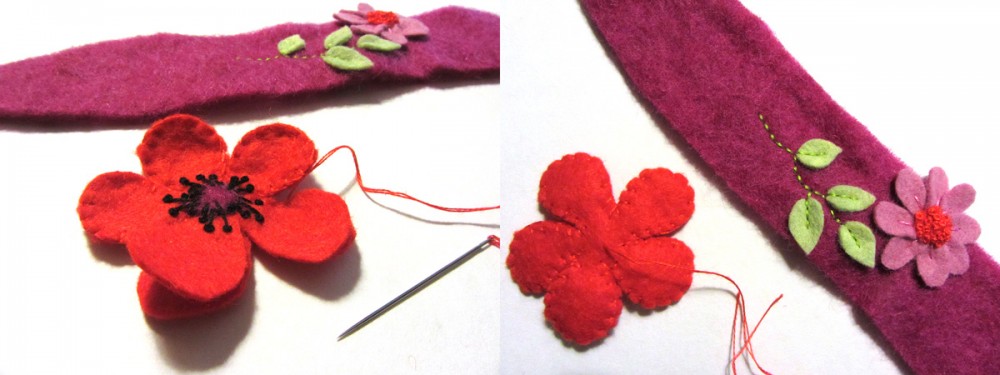
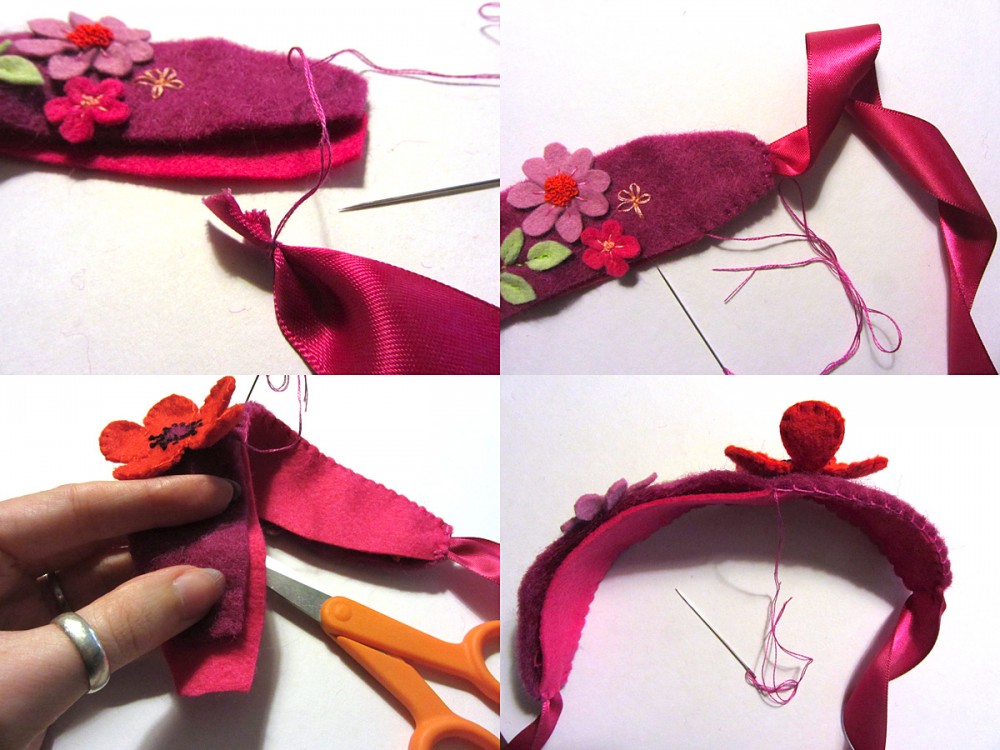
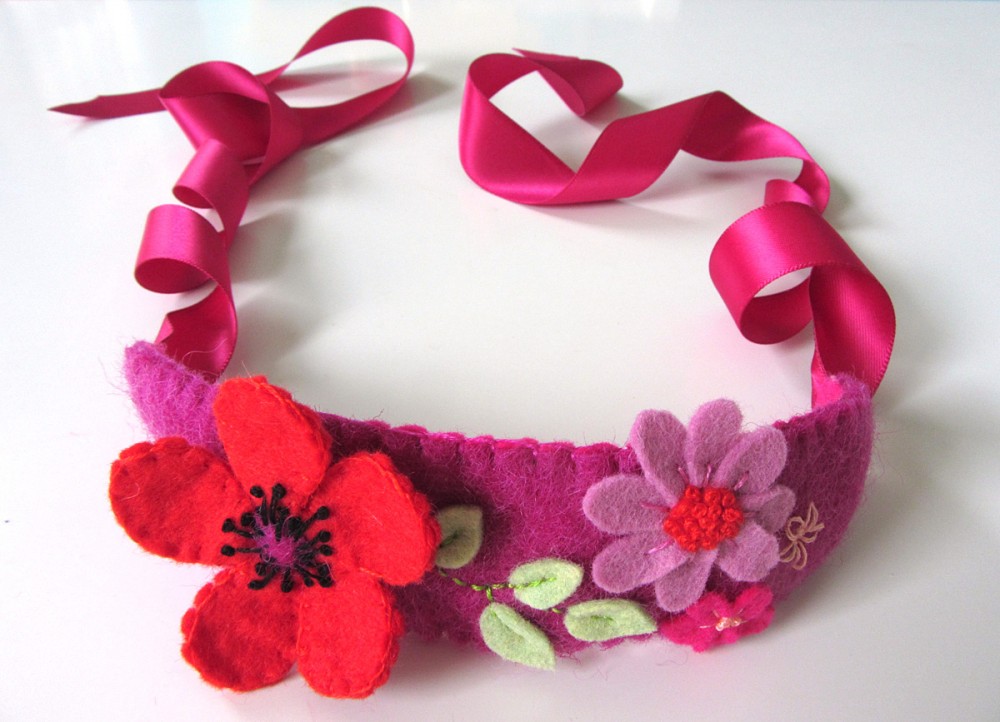
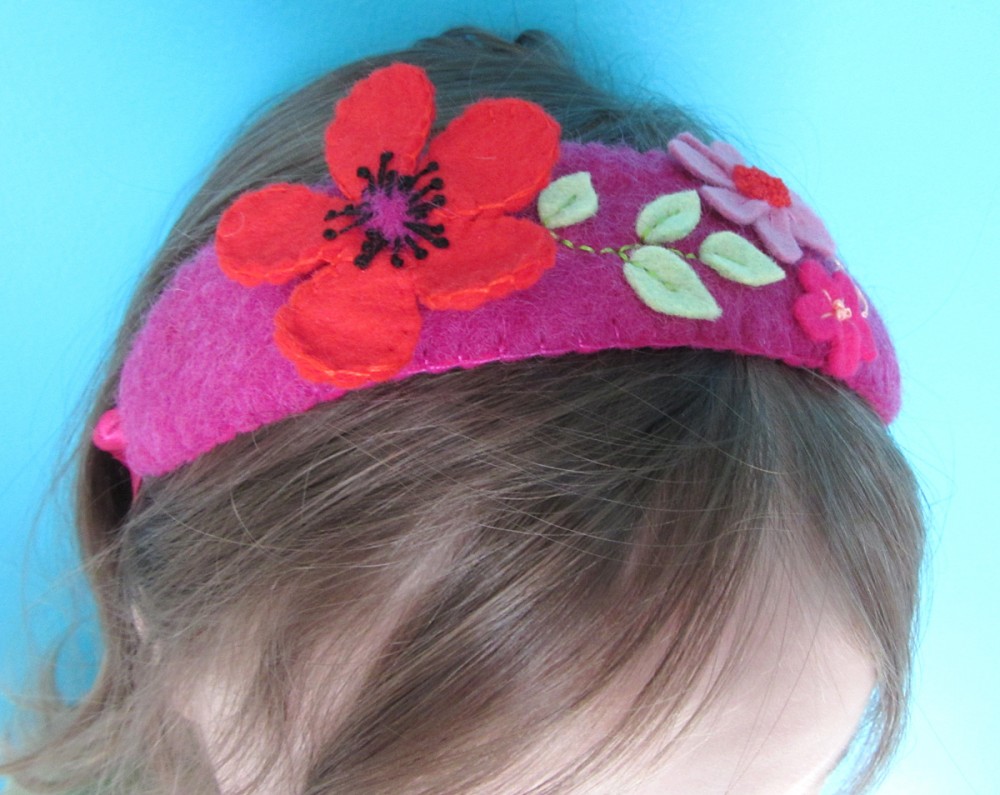
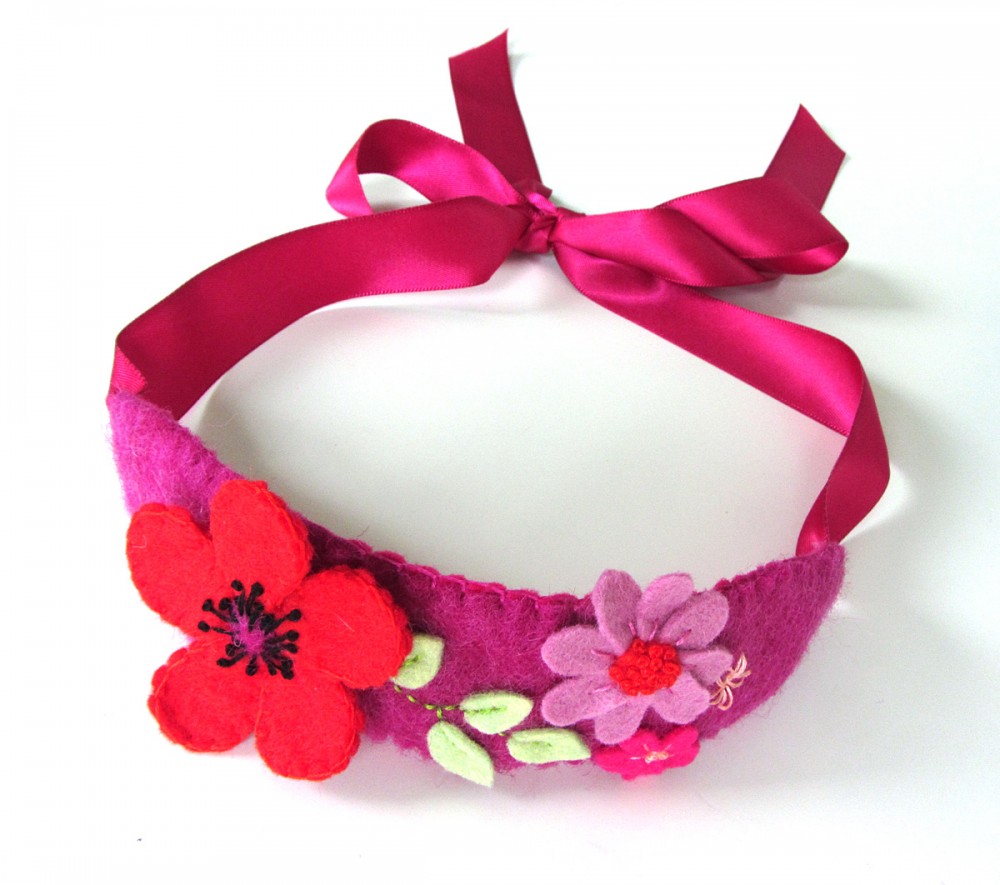
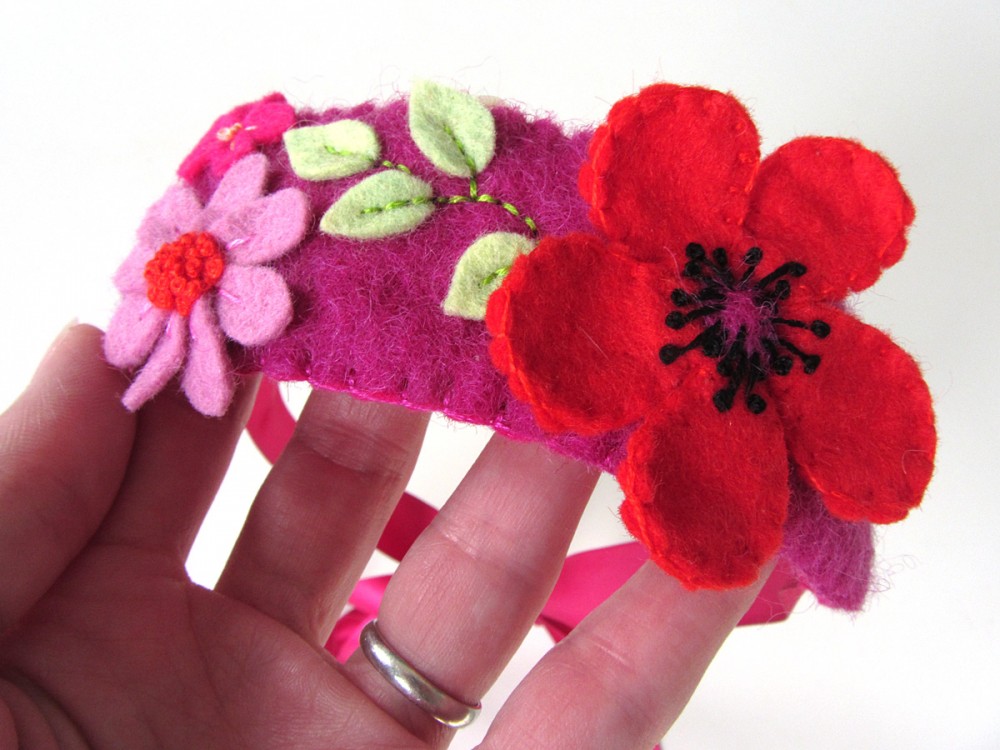
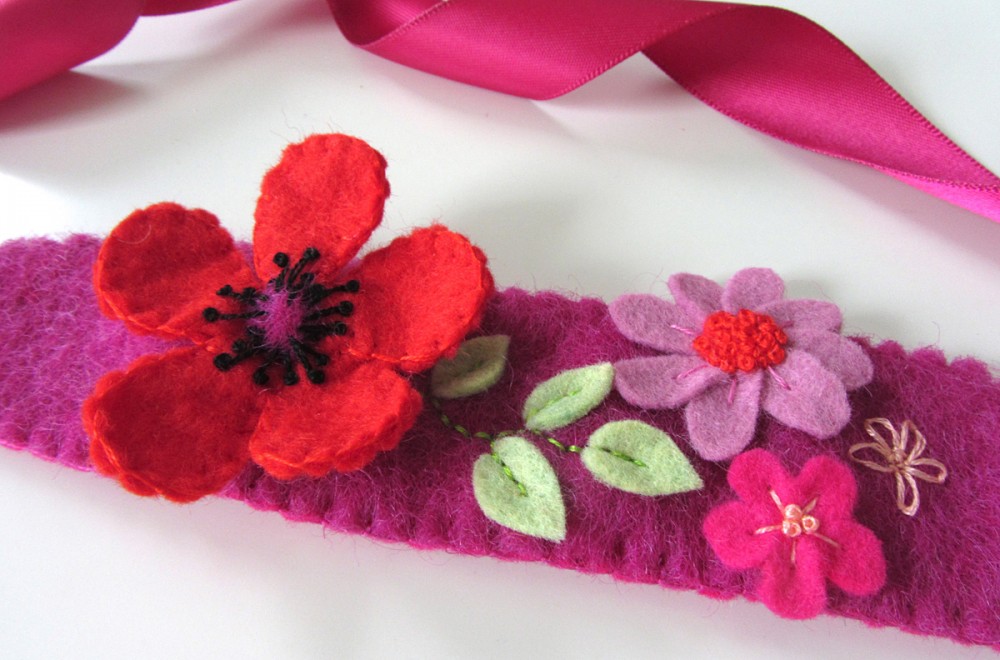
DIY Felt Poppy Headband

DIY Felt Poppy Headband

Jax has a birthday party to go to tomorrow for a sweet 3 year old girl. A girl! You know I couldn’t resist the urge to sew something girlie for her! (We did get her a fun present as well – one of Jax’s current favorite school toys.)

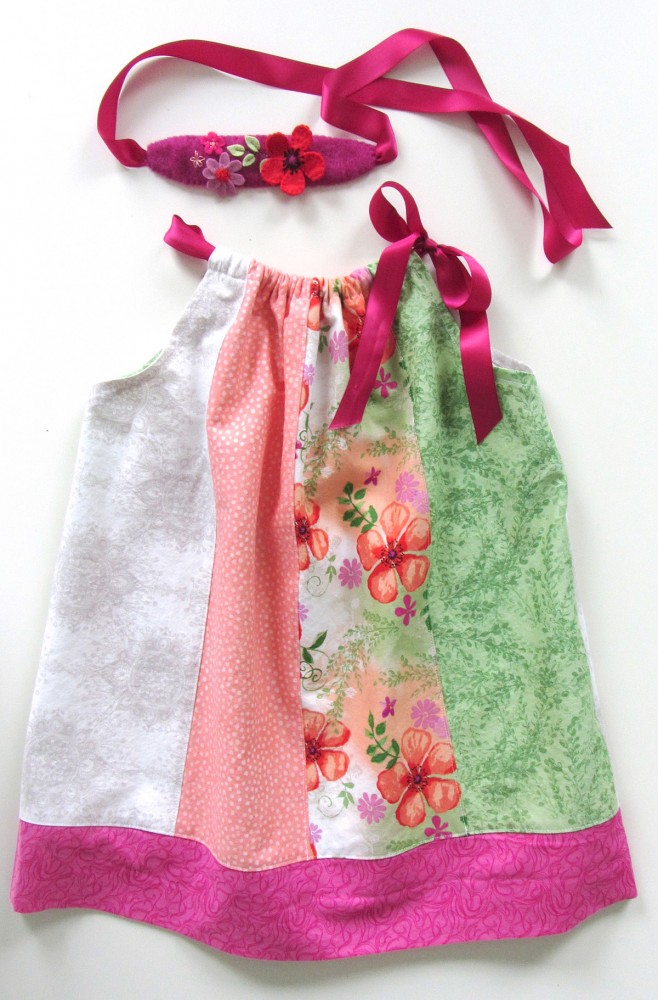
The first thing I made for little E was a fat quarter pillowcase dress. I fell in love with a poppy print bundle of fat quarters when I went in search of something pink. I swapped one of the fabrics for a hot pink, since the fabrics I chose were more peach and coral. The dress was very easy and quick to make! I went with the lined version and used some white cotton leftover from Jax’s quilt. But I needed something to go with it. And of course it needed to be felt!

DIY Felt Poppy Headband

And so, I present the Felt Poppy Headband!

You could easily make a felt flowered headband to suit your own tastes. Change up the colors and flowers! You can take a look at my Bumble Bee Lacing Maze pattern for more felt flower ideas.

DIY Felt Poppy Headband

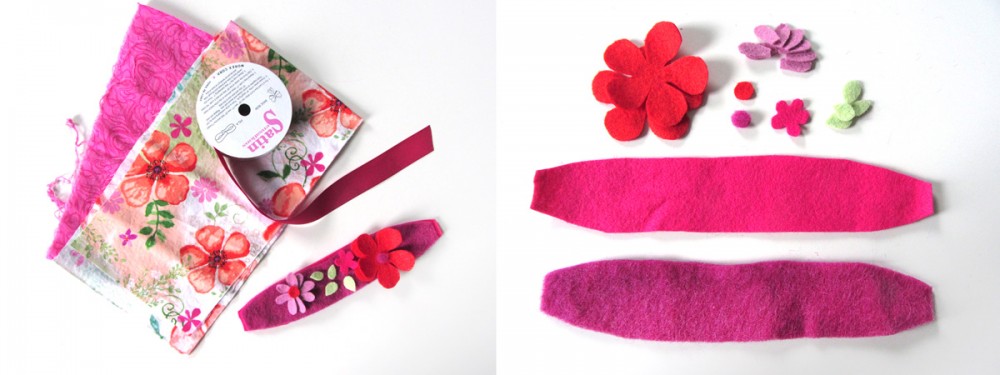
Materials

DIY Felt Poppy Headband

I started by stitching the details on the top piece of the poppy. I stitched the center of the poppy on using black floss, then went around the circle making long stitched of various lengths, topped with French knots.

DIY Felt Poppy Headband

I set my poppy aside to make the leaves and stem next. I pinned it in place for the photos to show the placement. I made the stem with back stitch, attaching the leaves with a few stitches up the centers,

DIY Felt Poppy Headband

For the lilac flower, I made a stitch to anchor my thread to the headband, then ran my needle through the ends of all the petals, then fanned them out into a big swirl. I made a bunch of stitches in the center to secure them down. (I added the long stitches in the center of each petal later, but you should do that now.)

DIY Felt Poppy HeadbandDIY Felt Poppy Headband

I stitched the center onto the flower, then filled it in with French knots.

DIY Felt Poppy Headband

The last design element I added was a lazy daisy stitch. (See diagram 2.) I added some stitches in a circle in the center of my daisy to give it extra hold.

DIY Felt Poppy Headband

I went back to finish my poppy next. I blanket stitched the back of the flower on, pulling a little too tight so that the petals curled up. When I was finished sewing the back on, I ran the needle out the center back and made a bunch of stitches to hold secure the flower onto the headband top.

DIY Felt Poppy Headband

The next step is to assemble the headband. I pleated the end of one of the ribbon lengths and made a few stitches in it to hold the folds. I layered it in between the two layers of the headband and started blanket stitching around the edge.

When I was about 2/3 down one side, I paused to trim the backing to match, as the wool felt shrunk a bit with all the stitching. At the other end, I repeated the steps for adding the ribbon.DIY Felt Poppy Headband

All done! I think it came out beautiful.

Yes, this is Jackson... I didn't have any other models handy!

Yes, this is Jackson… I didn’t have any other models handy!

This headband is fully adjustable, as it is meant to be tied in a bow at the nape of your neck. You could also tie it to one side to make the bow more of a feature. I think it looks so pretty with the pillowcase dress because the ribbons bring the two together.DIY Felt Poppy Headband

I’m sure an adult could wear this same headband, but you could also increase the length of the base to make a larger one. I plan to make one (or many!) for myself. What a great scrap-buster!

DIY Felt Poppy Headband

Thank you to all of you who voted for this tutorial on our Facebook page!

You'll be seeing a tutorial for this soon!

You’ll be seeing a tutorial for this soon!

But to those of you who voted for the other choice – DIY sewing labels – I’ll be posting those for you next week. So everybody wins!

DIY Felt Poppy Headband

Happy sewing!

Animals of the Ocean for the Montessori Wall Map & Quietbook with Printables

Animals of the Ocean for the Montessori Wall Map

If you haven’t been introduced to our Montessori wall map and quiet book yet, you can read all about it here. This post isn’t actually for a continent… It’s for the oceans! Every continent (and the oceans) will have landmarks and animals. Some, like Europe, have more landmarks than animals. The oceans have a lot of labels, 9 animals and one island landmark.

Overview and Map PatternsAfricaAntarcticaAsiaEurope
North America • Oceans • South America

Animals of the Ocean for the Montessori Wall Map & Quietbook with Printables

Those of you who follow along on Facebook or Instagram have been seeing my progress as I’ve worked on the ocean animals. I’m so exciting to be working on this project! This will be an amazing resource for Jax throughout his school years. Yes, I am giving you all my patterns and printables for free! If you’d like to contribute, visit my support page. School items off of Jax’s Amazon wishlist always help!

Animals of the Ocean for the Montessori Wall Map & Quietbook

Materials I Used

The Pattern (see the first post for the main patterns)

Felt from American Felt & Craft – lilac [purple], cilantro [green], stone [beige], pomegranate [pink], whitesalt & pepper [dark gray], elephant [med gray], black and gray. From Benzie Design – swan [blue] for the water.

Animals of the Ocean for the Montessori Wall Map & Quietbook with Printables  Animals of the Ocean for the Montessori Wall Map & Quietbook with Printables

Hook & Loop – I used white snag-free Velcro on the backs of all these pieces. I used aqua blue hook where the animals attach to the ocean.

I updated this 8/6/13 to add one more ocean Velcro piece in the Pacific near Hawaii!

I updated this 8/6/13 to add one more ocean Velcro piece in the Pacific near Hawaii!

Other Things: Felt glue to tack down the pieces before sewing, printer fabric for the continent label, embroidery floss in colors to match the felt and micro tip scissors.

Animals of the Ocean for the Montessori Wall Map & Quietbook with Printables

Sewing the Pieces

For all of the animals & landmarks, I started by gluing the pieces down to a scrap of background felt with a very light amount of felt glue. I glue several animals at a time to give them time to dry. I sewed them down, trimmed the background and cut a matching backing piece. I sewed snag-free Velcro to the back and sewed both sides together with a blanket stitch.

Animals of the Ocean for the Montessori Wall Map

Sea Star: (Felt used: lilac purple for the star and swan blue for the background) I glued down the sea star then sewed all around it. Using long straight stitches, I sewed a starburst in the center.

Killer Whale: (Felt used: black for the body, white for the markings and swan blue for the background) For the killer whale (orca), I glued the black body down first, then the white markings and the fin. I stitched around all the edges.

Sea Turtle: (Felt used: cilantro green for the shell, stone beige for the soft parts and swan blue for the background) For the sea turtle, I glued the soft parts of the turtle down, then glued the shell on top. I sewed around the edges of the soft parts. On the shell, I used a lighter green thread and stitched all around the edge using longer stitches than I usually do. Then I used long stitches to make a shell pattern. View the image full size to use as a guide.

Animals of the Ocean for the Montessori Wall Map & Quietbook with Printables

Tiger Shark: (Felt used: elephant med gray, white for the teeth and swan blue for the background) For the shark, I glued down the teeth first, then the body and fin. I sewed around all the edges, made some long, parallel stitches for gills and a French knot eye. I made some white zig zag stitches over his teeth.

Sperm Whale: (Felt used: salt & pepper dark gray and swan blue for the background) For the sperm whale, I glued down the body and fin. I sewed around all the edges, made a long stitch for his mouth and a French knot eye.

Dolphin: (Felt used: elephant med gray and swan blue for the background) For the dolphin, I glued down the body and fin. I sewed around all the edges, made a long stitch for her mouth and a French knot eye.

Animals of the Ocean for the Montessori Wall Map & Quietbook

Beluga Whale: (Felt used: white for the body and swan blue for the background) For the beluga, I glued down the body and fin. I sewed around all the edges, made a few pink long stitch for her mouth and a French knot eye.

Octopus: (Felt used: pomegranate pink for the body [but I’d recommend a coral or peach if you have it] and swan blue for the background) For the octopus, I glued down the body and eye bugles. I sewed around all the edges and made French knot eyes in black on the bulges.I made a few light pink long stitches in between the tentacles to show the webbing. Then I made ten bazillion French knots! I used two strands of embroidery floss (of the 6 it comes with) and wrapped my needle twice for each knot.

Humpback Whale: (Felt used: elephant med gray for the body, gray for the belly and swan blue for the background) For the Humpback whale, I glued down the body, belly and fin. I sewed around all the edges and added a French knot eye.

SafariLTD provided me with these beautiful World Landmarks and Around the World TOOBs. I am working with them to make this project as amazing as possible. All opinions of these products are honest and my own. We are planning an exciting giveaway for you at the end of this project!

SafariLTD provided me with this beautiful World Landmarks TOOB. I am working with them to make this project as amazing as possible. All opinions of these products are honest and my own. We are planning an exciting giveaway for you at the end of this project!

Sewing the Landmarks

I only did one landmark in the ocean set: the mo’ai statues on Easter Island.

Animals of the Ocean for the Montessori Wall Map & Quietbook

Easter Island: (Felt used: salt & pepper dark gray for the statues, cilantro green for the ground and sparrow blue for the background) I went very simple for this one and just glued and stitched the statues and background down. For all the landmarks, I started by sewing the front piece. Then I cut out a backing felt to match the final shape and added some snag-free Velcro to it. I finished sewed around the whole edge, switching colors where needed.

Animals of the Ocean for the Montessori Wall Map & Quietbook with Printables

Did you notice I sewed the backing on? I used regular craft store polyester felt in black – the large piece that they sell in a package. It was only $3, and I figure I can turn it around and use the back as a felt board. I added two loops of ribbon for hanging. I sewed the backing on with a blanket stitch.

Montessori Ocean Animals 3-Part Cards

Montessori Ocean Animals 3-Part Cards

Montessori-style 3-part cards are great tools to help your young child learn new things. Jax loves them! I like to pair them with nature video clips from BBC and NatGeo that I play on YouTube about each animal. I created these ocean animal cards to be used along with SafariLTD’s TOOB figurines and my felt wall map animals. For the ocean, I used the following TOOBs: the Whales and Dolphins Toob and the Ocean Toob.

Animals of the Ocean for the Montessori Wall Map & Quietbook with Printables

 Click here to download my free pdf file to make your own. To make mine, I cut them out, glued them to orange construction paper (to match North America’s Montessori color) then laminated laminated them. It makes them shiny and strong.

Montessori Ocean 3-Part Cards & Control Chart

Montessori Ocean 3-Part Cards & Control Chart

Jax just started his world continent unit with the world continent 3-part cards I made up for him. He loves his new Montessori globe,  and has his continent song memorized! This ocean set may be a bit advanced for him right now, but who knows – he is always surprising me! Montessori circles back through material, diving deeper into it each time, so it never hurts to introduce something when your child show interest.

Montessori Ocean 3-Part Cards & Control Chart

This set includes 3-part cards for the world’s oceans and a control chart showing the oceans outlined and labeled. You can start with a basic presentation of the oceans on our globe, comparing the globe to the cards. Click here to download my free pdf file to make your own

Montessori Ocean 3-Part Cards & Control Chart

For younger kids, you can have them match the labels to the labels on the control map to help early reading skills. Talk about how the continents look on the cards versus the globe and control chart map projection.

Montessori Ocean 3-Part Cards & Control Chart

For older kids, try a little painter’s tape on the backs of the labels and have them use the control chart to label your globe. Once your child is familiar with the labeled cards and chart, have them start matching the unlabeled cards as well. Eventually you can have them label the cards and the globe on their own.

Animals of the Ocean for the Montessori Wall Map & Quietbook with Printables

Ocean Books

I’ve started collecting some ocean books, so when Jax chooses one in the schoolroom, I can pull out our SafariLTD figurines and 3-part cards to match them. Most of my books are from the thrift store and out of print. These are The Blue Whale, Seashore, John Denver’s Ancient Rhymes: A Dolphin Lullaby (Audio CD Included) (John Denver & Kids Series), Way Down Deep (All Aboard Science Reader) and Baby Beluga (Raffi Songs to Read).

Animals of the Ocean for the Montessori Wall Map & Quietbook with Printables

I hope you are enjoying this project as much as I am! I’ve gotten see the maps a few of you have started! If you are sewing along, tag me on Instagram @iolstephanie and come comment on one of my pictures (I can’t see your photo if it you are private, but I can request to follow you temporarily if you comment on mine) or share photos on Facebook. You can also email me.

Animals of the Ocean for the Montessori Wall Map & Quietbook with Printables

It’s Montessori Monday on Tuesday for me this week, but I hope you’ll check out the other great links!

Montessori Monday