Tag Archives: Patterns

Five Little Monkeys Quiet Book Page

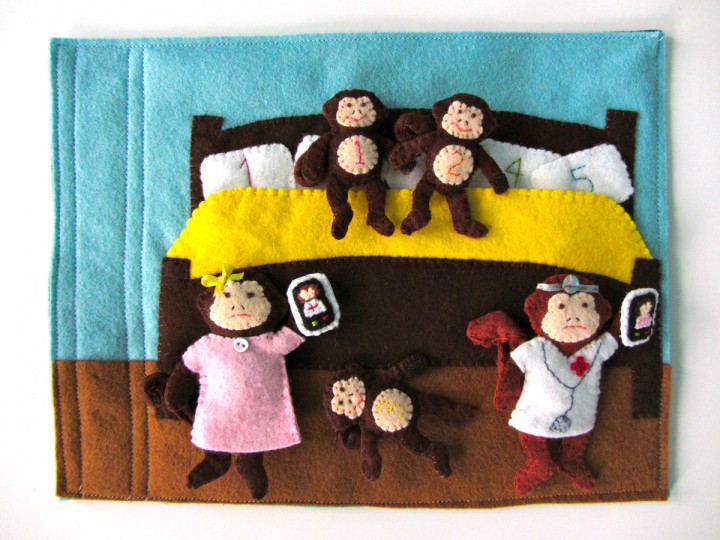
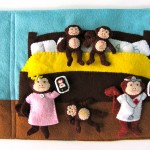
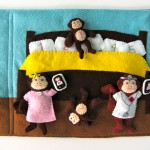
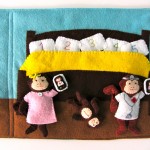
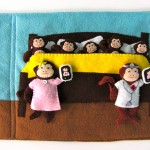
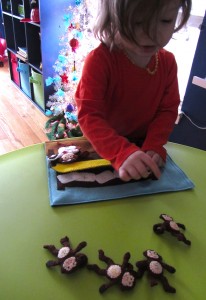
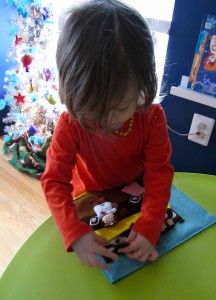
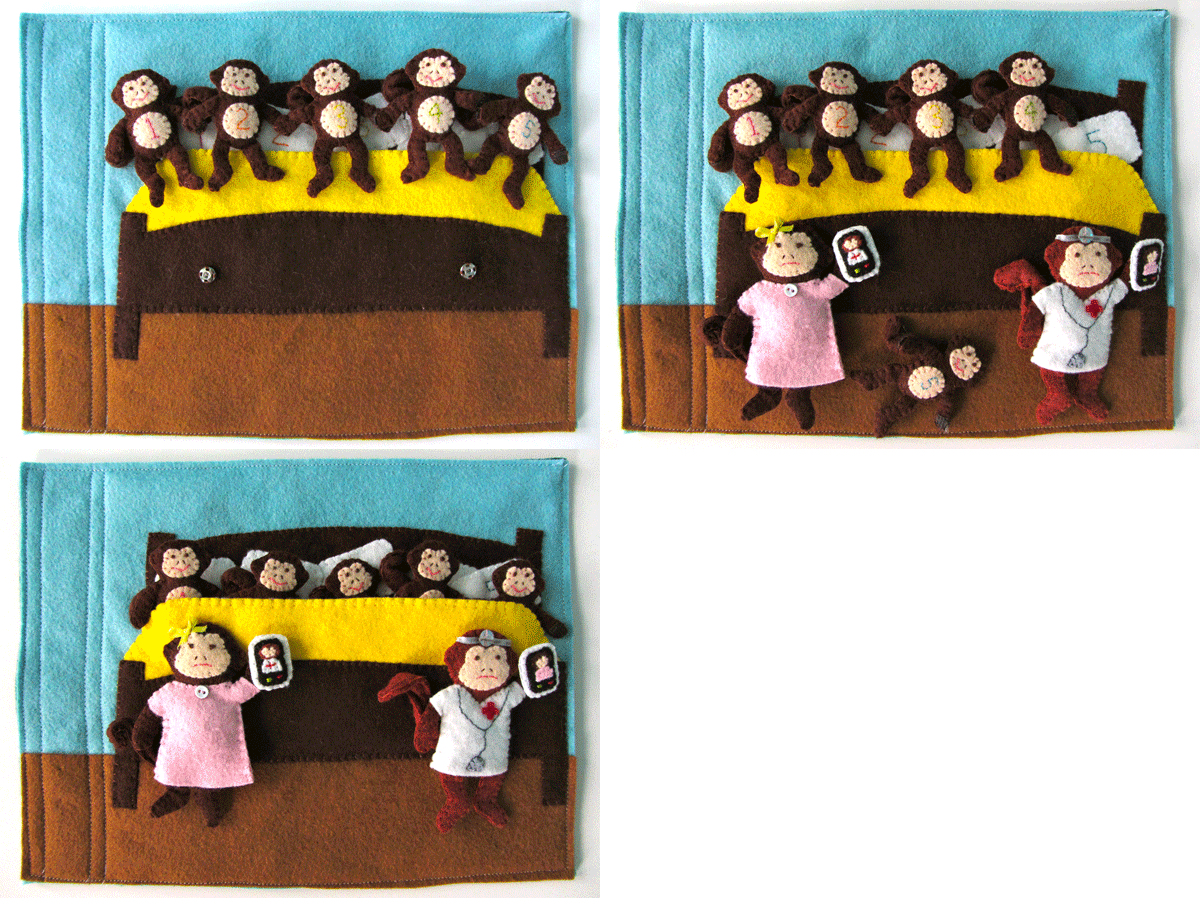
Jackson’s current favorite song, besides the ABC’s, is “No More Monkeys!” He loves all versions of the song, and he is terribly cute singing along. I *had* to design this page, even though I dreaded sewing 7 monkeys. It was worth it! It turned out very cute and has the added bonus of being a counting page.

Five Little Monkeys Quiet Book Page

I made this page using leftovers from my stash of wool blend felt from American Felt and Craft. I pretty much used whichever colors I had enough of to cut the large floor and bed pieces. But, their felt colors are so rich and pretty and it came out great, scraps or not!

What I Used:

 I started by stitching back stitched numbers onto the 5 pillows and 5 monkey bellies. I used rainbow colors of threads and stitched them freehand. I did the bellies while doing the pillows since I already had the right colors threaded on my needle. I set the bellies aside and stitched the pillows onto the headboard in a random arrangement. I pinned the floor on the page then sewed down the headboard.

Five Little Monkeys Quiet Book Page

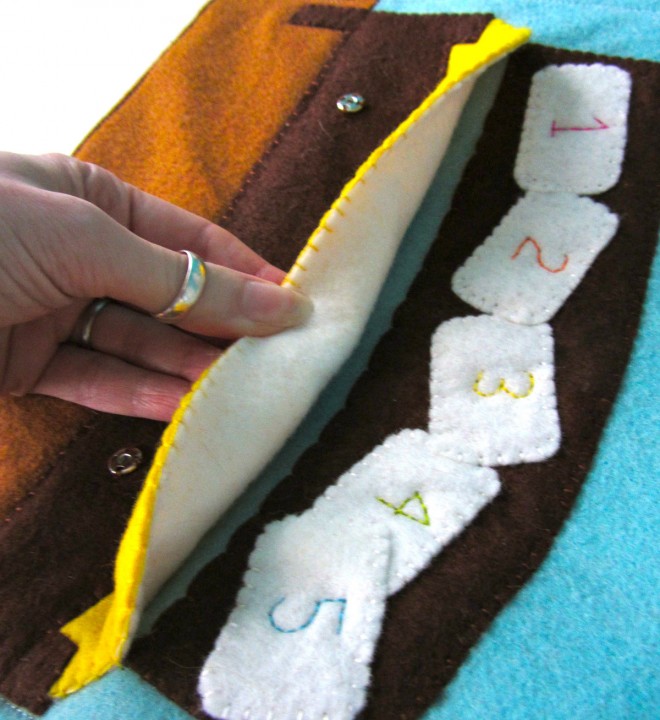
Next I sewed the yellow and white bed spread pieces together along the sides and top. I pinned them behind the foot board on the page, then sewed around the foot board. I went back with yellow thread and stitched the sides of the bed spread down to the page. This made a nice big pocket for the little monkeys to sleep in. I added some snaps to the foot board that are used to hold mama and the doctor to the page.

IMG_1261

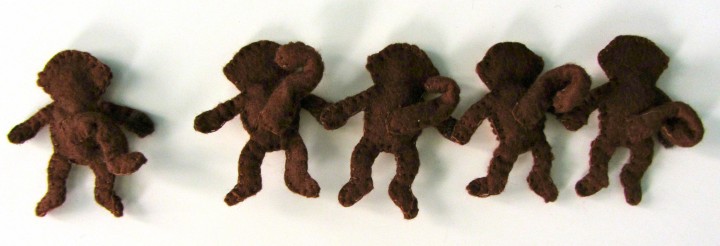
Monkey Assembly Line: I did all 5 monkeys at once, repeating each step 5 times. First I embroidered their faces: French knot eyes, slanted stitches for nostrils and long stitches for mouths. I then sewed the faces and (already numbered) bellies onto the front body pieces.

The monkeys all have brown hook (rough) Velcro on the front of their left paws (on the right in the above photo) and loop (soft) Velcro on the back of their right paws (on the right in the photo below). This lets them link hands and jump on the bed all together. They can also clasp their own hands over their bellies. I sewed my Velcro on while sewed the front and backs together, but you could do it beforehand. I added a little stuffing to their bellies for dimension.

IMG_1262

For the tails, I cut lengths of pipe cleaner and folded over the ends to hide the sharp bits. I sewed tubed of felt around them then stitched them onto their monkey bottoms.

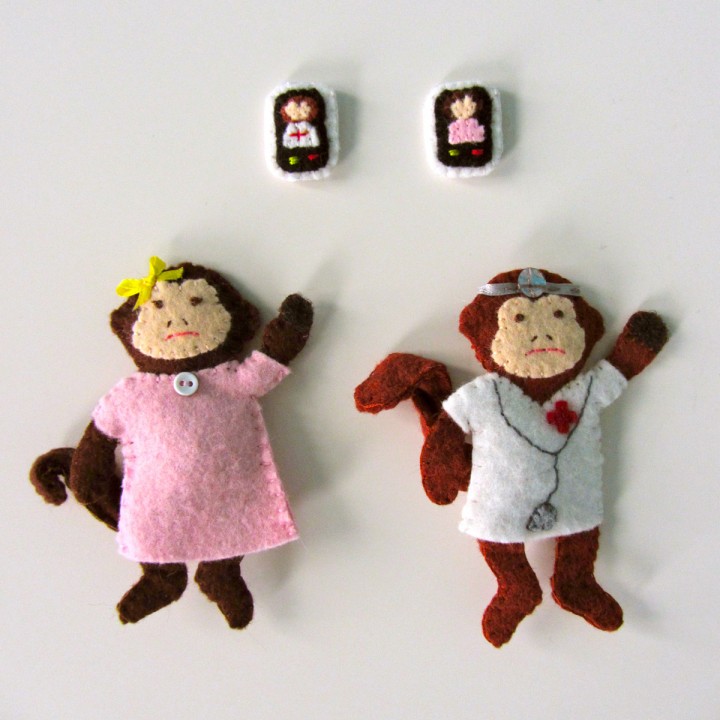
Phones: I went with smart phones! It was just so much easier to make them super cute. Sorry to all of you who would prefer a land line. I sewed tiny portraits of mama and the doctor onto the black screen pieces. There are pink or white semi circle for the torsos, brown ovals for the heads and a peach heart (without the point) for the face. The only detail I added was a red + for the doctor. I made some thick red and green stitches to act as call buttons. I then sewed the black screen on to the white front phone piece.

Instead of sewing felt onto the back, I cut the phone case out of snag-free Velcro and sewed that on as the backing. This lets the phones stick to the monkey paws but not the snag the page.

Five Little Monkeys Quiet Book Page

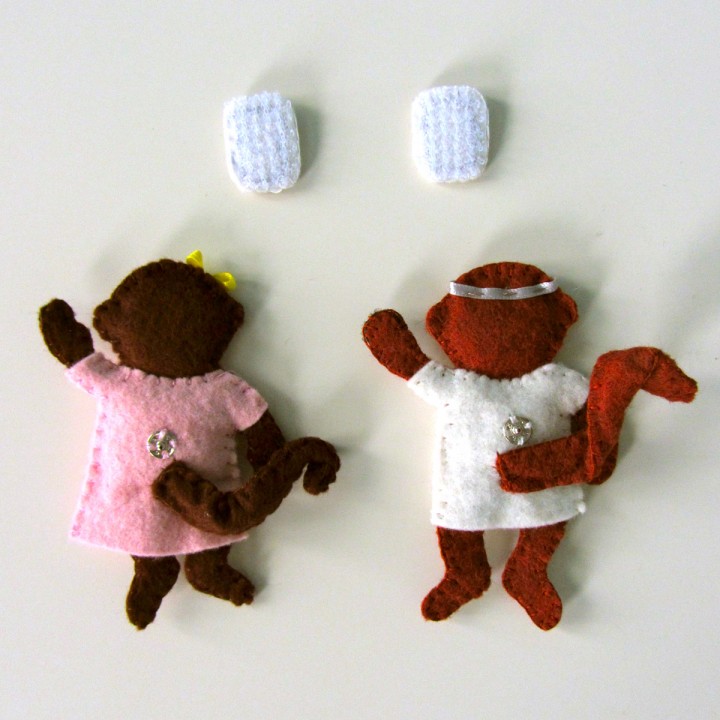
Mama: For mama, I sewed her facial features first. She still have French knot eyes, but I added little stitches for lashes. I made her mouth frowning because mama isn’t down with her babies bumping their heads! I stitched her face on and sewed a little ribbon bow on her head.

When sewing her two sides together (with stuffing in her head and belly), I added loop (soft) Velcro to the front of her left paw. You could probably make the nightie a separate piece that comes off. I sewed mine right onto her body, then stuffed her and sewed her limbs up. Her tail is the same as the little monkeys, just longer and sewn to her dress. I added a decorative button the the front and the other half of one of the snaps to her back.

Five Little Monkeys Quiet Book Page

The Doctor: The doctor was done just like mama, but I decorated the front of his scrubs before sewing him together. I stitched his stethoscope on and added a scrap of gray for the bottom part. I also sewed on his red cross. When he was all done, I stitched some silver ribbon around his head and added a silver sequin.

Five Little Monkeys Quiet Book Page  Five Little Monkeys Quiet Book Page  Five Little Monkeys Quiet Book Page Five Little Monkeys Quiet Book Page
Five Little Monkeys Quiet Book Page Five Little Monkeys Quiet Book Page Five Little Monkeys Quiet Book Page

Over all the page was very simple, but having so many monkeys and so little sewing time over the past tow weeks stretched it out a bit. But I love it as much as Jackson does!

IMG_1265 IMG_1266

Jax’s favorite thing to do with the page is to place the monkeys in bed in the right order, then make calls to the doctor on the phone. And he has “No More Monkeys!” permanently in my head right now. I think we need a Christmas music intervention tomorrow!

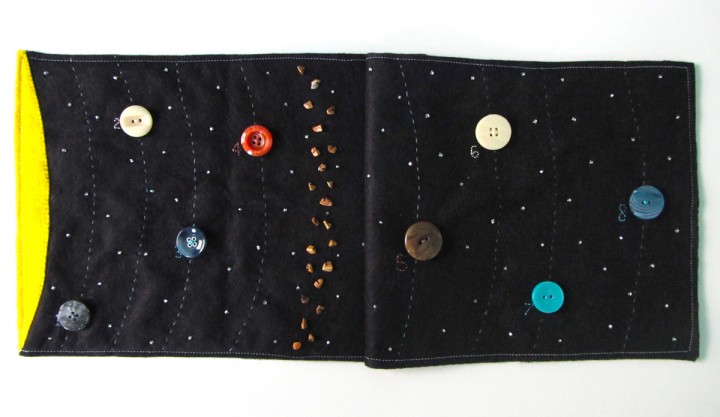
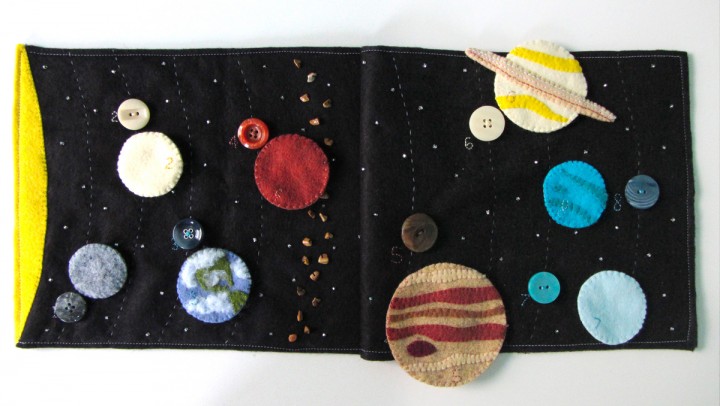
Solar System Quiet Book Page

I’ve had this page started for quite a while, but other projects needed to be completed for me to stay on schedule with my sewing. I know a lot of you were waiting on this one – thanks for being patient!

My inspiration for this page came when I was contacted by Lots of Buttons and offered a $10 code to try their service. As soon as I saw some of their buttons I thought of planets! It took a lot of searching to find buttons that would work for each planet and were all about the same size. I was disappointed to find out may favorite button was sold out after placing my order, but their customer service was very helpful and offered a substitute. I ended up not using the replacement button, as it was a lot muddier looking in person, but I was very happy with the others.

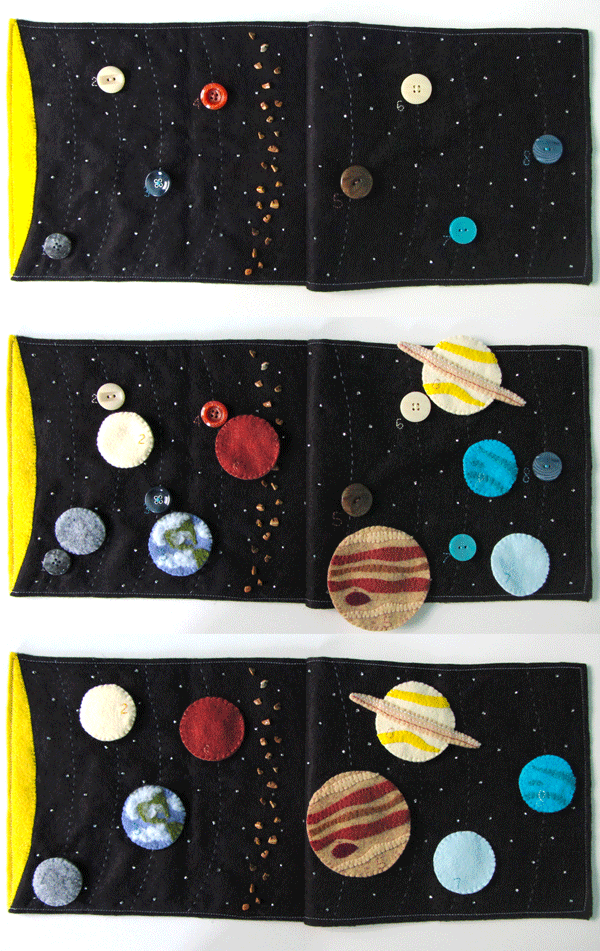
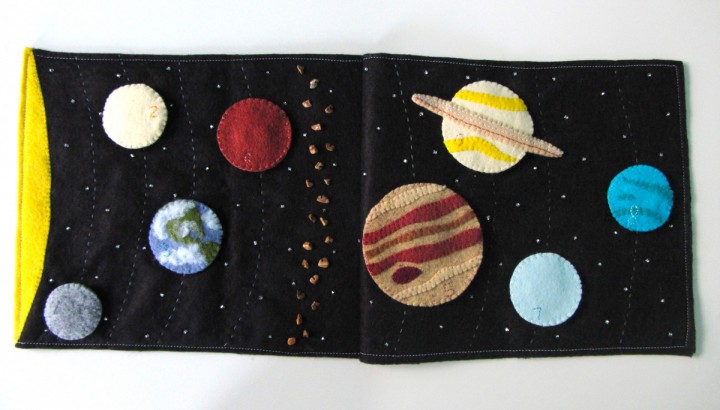
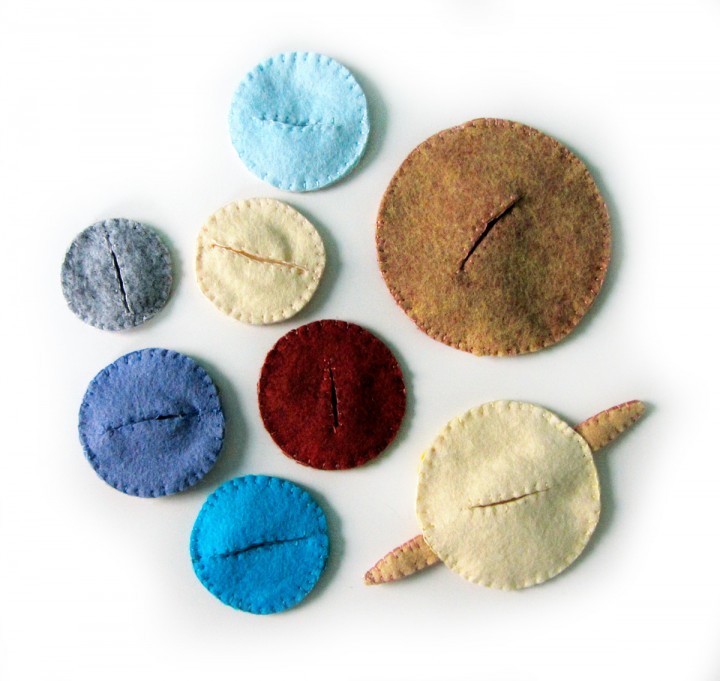
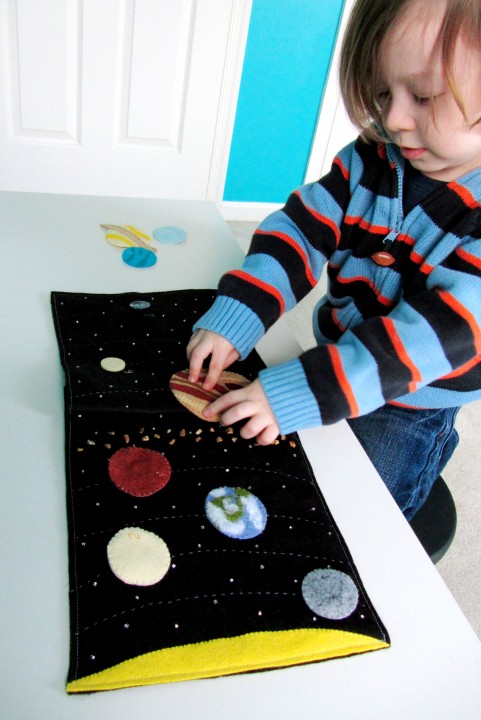
This page is mainly a learning page for Jax and I to use with our school studies, but it is also a little matching game with colors and numbers. The buttons that hold the planets in place match their colors. I also stitched numbers on the page and the planets. My planets are two layers with a button hole in the back layer. If you want to have the page be a buttoning exercise for your child, you could make the button holes go through both layers. You’ll lose some of the look of the planets and might need to use smaller buttons on some of them, though. (My cookie matching page is an example of this.)

For those with little ones who like to put things in their mouths – I did use beads. Jax is really good about things like that at this point. I always stitch through every bead two times for strength, but you can use some alternatives if they make you wary. Try cutting tiny felt scraps to sew on as the asteroids in the belt. Little * stitches would make cute stars.

I was able to use up a lot my scraps of felt from American Felt and Craft. The earthiness of the wool blend felt works so well for the planets.

What I Used:

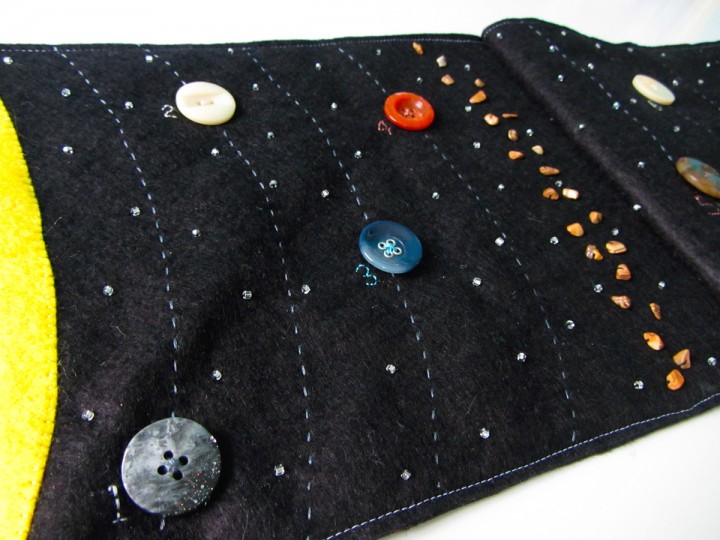
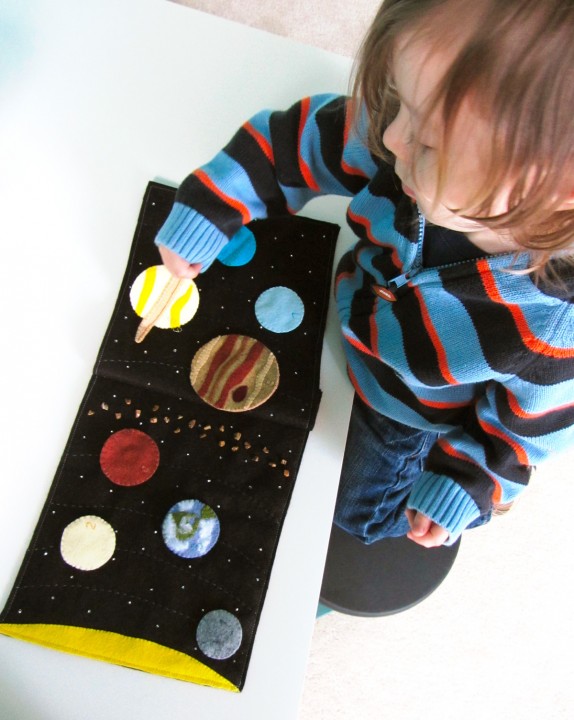
I started on the left hand side of the spread by sewing down the sun. I stitched the orbit lines one at a time while sewing the corresponding planet, so I could be sure there was enough space between each one. The orbit lines are gray thread in a dashed running stitch. The buttons were each sewn down with matching thread, and I used the leftover thread to stitch the number along side. I did them freehand in back stitch.

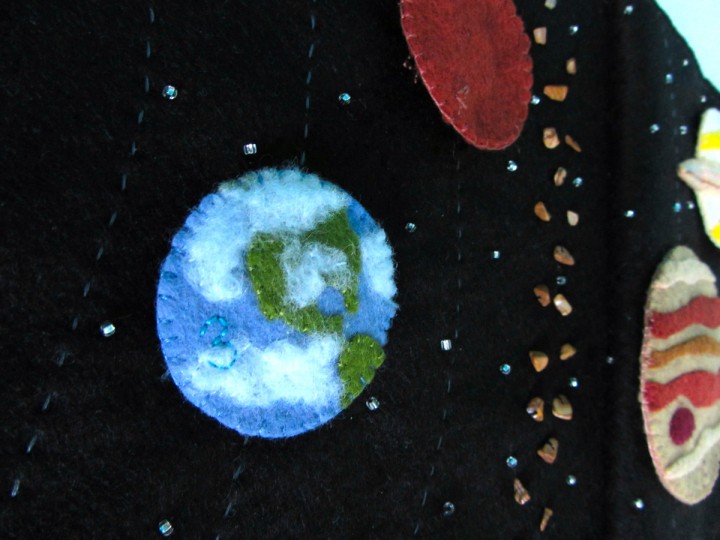
In between the orbit lines, I stitched on seed bead stars. I actually just did a vertical zigzag between each and that gave me a random-looking, but evenly spread star scape. After Mars, I stitched the asteroid belt using the same stone chip beads I used as nuts on my sundae page.

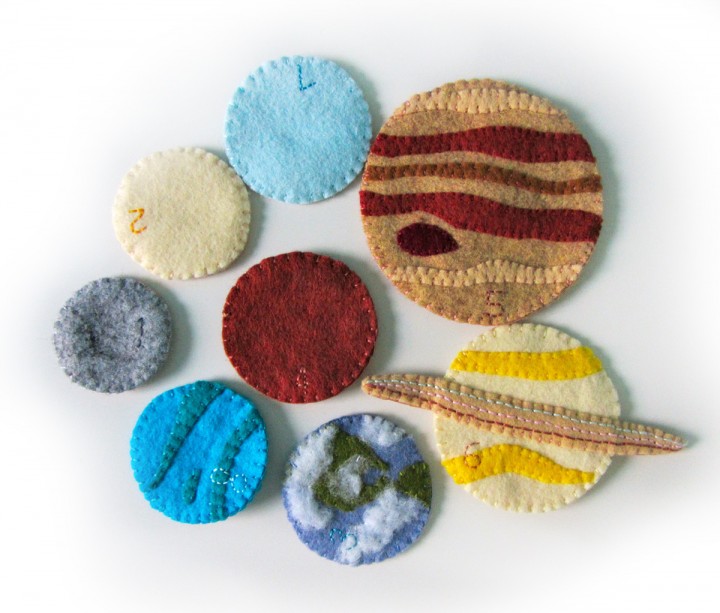
For each planet, I stitched all the details and a number on to the front piece. On the back piece, I cut a slit large enough for the button. I then did a blanket stitch around the slit to fortify the edges.

Planets: For Mercury, Venus, Mars and Uranus, I only stitched the number on the front before  making the button hole and sewing the fronts and backs together.

Sorry, Pluto… You were demoted and I’m out of room!

Earth: I started by sewing down the land mass shape. Then I took a very thin layer of batting that I had peeled apart, and ripped it into cloud shapes. I used white thread and stitched it down, then added a number 3 in blue thread. I added a button hole to the back, then stitched the front and back together.

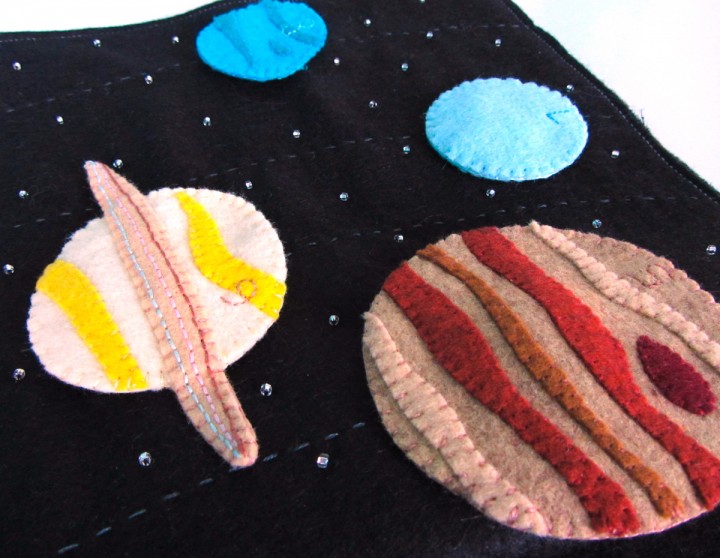
Jupiter: Jupiter has various stripes sewn on, as well as the red spot. I sewed a 5 on it in brown thread. I added a button hole to the back and sewed the two sides together.

Saturn: I started by stitching the two yellow stripes onto the planet front. Then I stitched some lines on to the front ring piece using back stitch in pale blue, pale pink and brown. I layered the front planet piece in between the front and back ring pieces and sewed all the way around the ring. I sewed the number 6 on in tan. I then added the button hole to the back and stitched it to the front. The back ring piece is mostly hidden inside the planet and adds stability.

Neptune: Neptune was simple with some swirls and a number 8 decorating the front before I added the button hole and sewed the two sides together.

Like our new white “school table”? $7 thrift store coffee table!

I think this is the page that Jax has asked “Is it ready yet??” the most of all the ones he’s seen me sewing. He keeps calling the planets “moons” so his interest is a good opportunity to introduce him to astronomy. I’m going to look into some handouts and worksheets we can do together to start going over the planet names. Perhaps a nice book?

I hope you enjoy this free pattern! I’d love to see your finish version. Email me a photo or post it to our Facebook page.

Felt Bird Nest Ornament

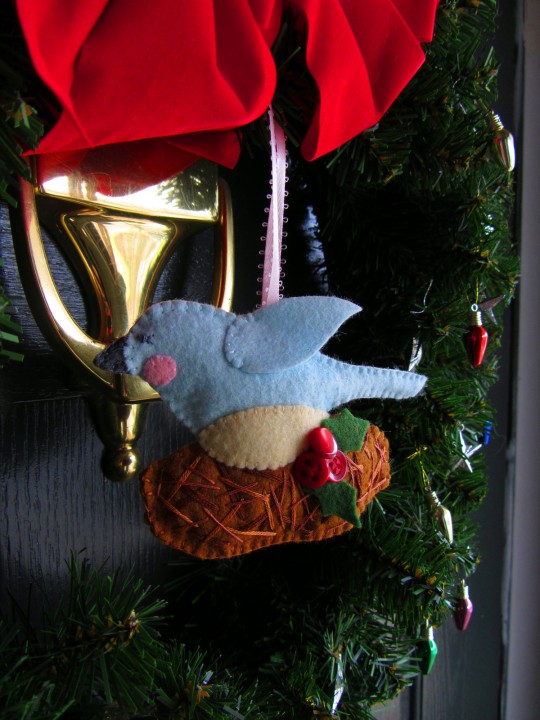
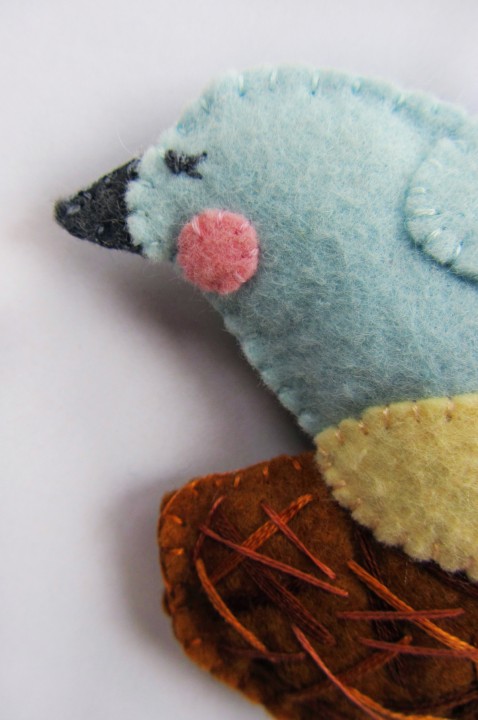
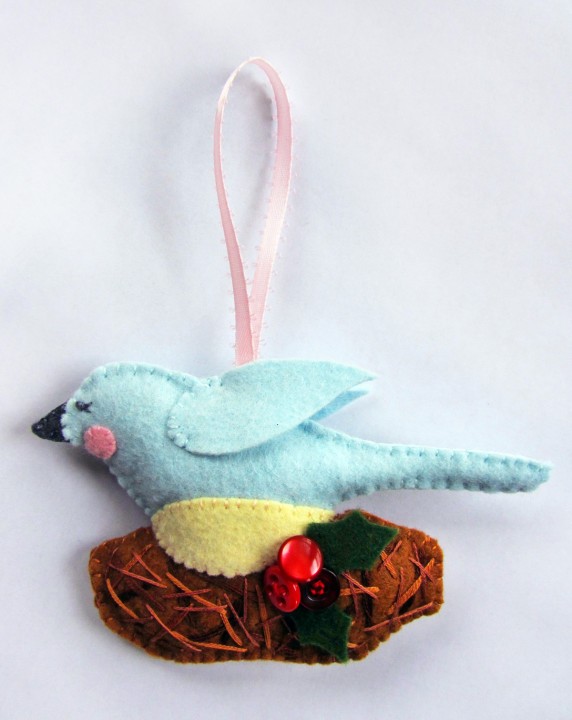
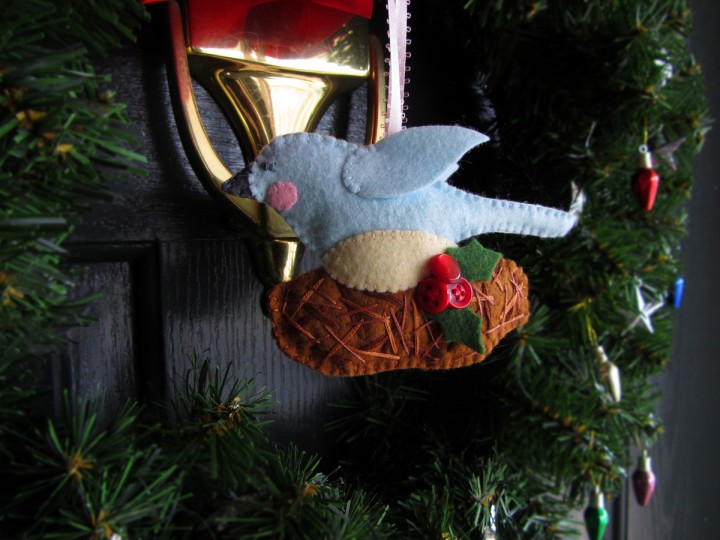
This little bird is an ornament I wanted to make once I saw the sparrow felt from American Felt & Craft. I just could resist! This ornament is two sided, but still sews up very quickly.

I’m trying to decide if I will design any more ornaments this season. Do you have any requests?

What I Used:

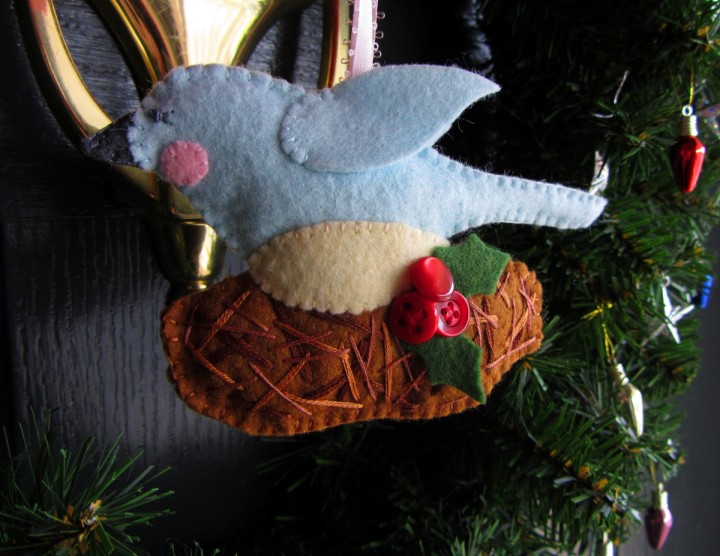
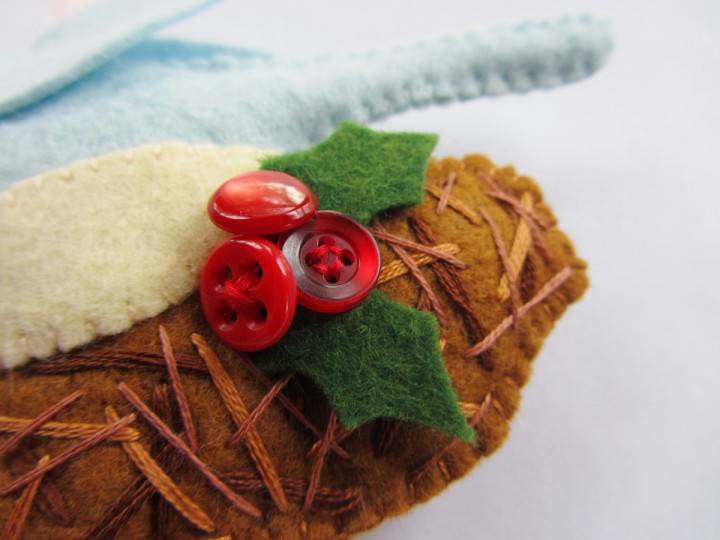
To start the ornament, I threaded 4 strands of a darker brown embroidery floss on my needle and made long stitches to look like the twigs in the nest. Then I threaded 3 strands of medium brown and repeated. I repeated one last time with 2 strands of light brown.

I sewed the belly pieces to each side of the bird’s body. I also sewed on the rosy cheeks. To make the eyes, I used a French knot and two little stitches for eyelashes. I pinned the wings in place, but only stitched around the shoulder (see photos.)

I sewed the two beak pieces together so it would be ready when I stitched around the bird.

I pinned each side of the bird on to a side of the nest, then sewed it down along the outer edge of the belly. I sewed three vintage red buttons onto the nest with the holly leaves layered underneath. I chose all different buttons on purpose.

I cut batting to fit inside the whole ornament (I twisted a thin strip to fit inside the tail) then pinned it between the two sides of the ornament. I sewed all the way around the ornament, using colors that matched each part. I made sure to add a loop of pink ribbon at the top and the beak on his face.

I think I’ll be making a new bird every Christmas – just choosing different colors each time! I hope you enjoy using the pattern.

{ This pattern is free for personal use only. If you would like to purchase a $25 license to sell the finished project in your shop, please email me. }

Felt Holiday Train Ornament

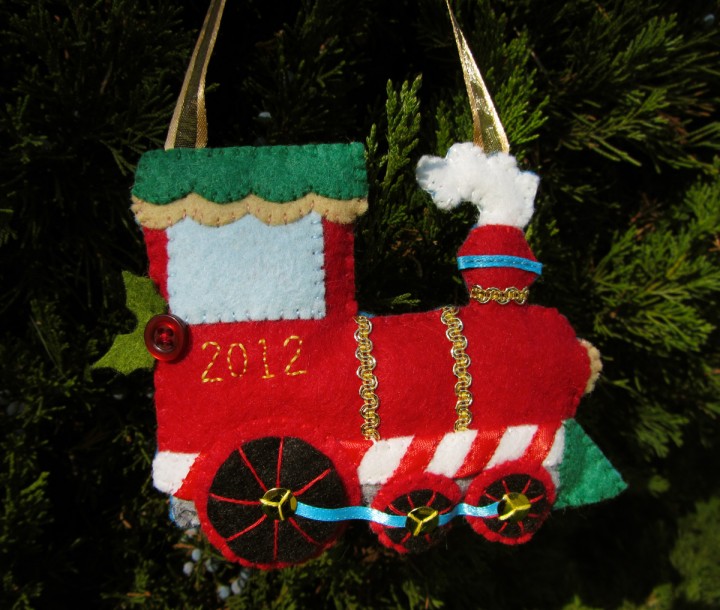
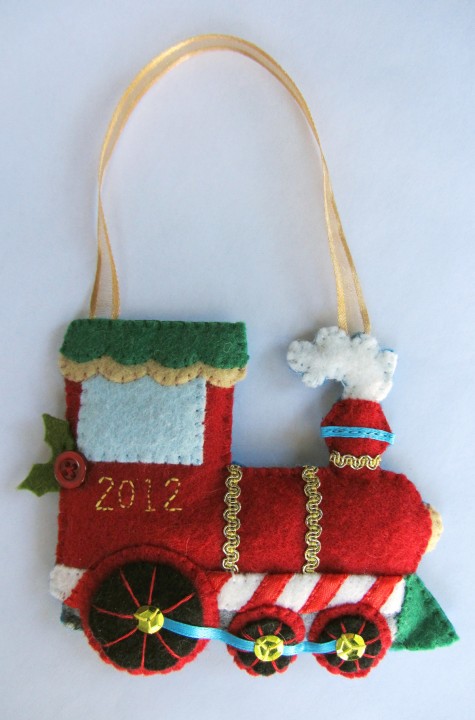
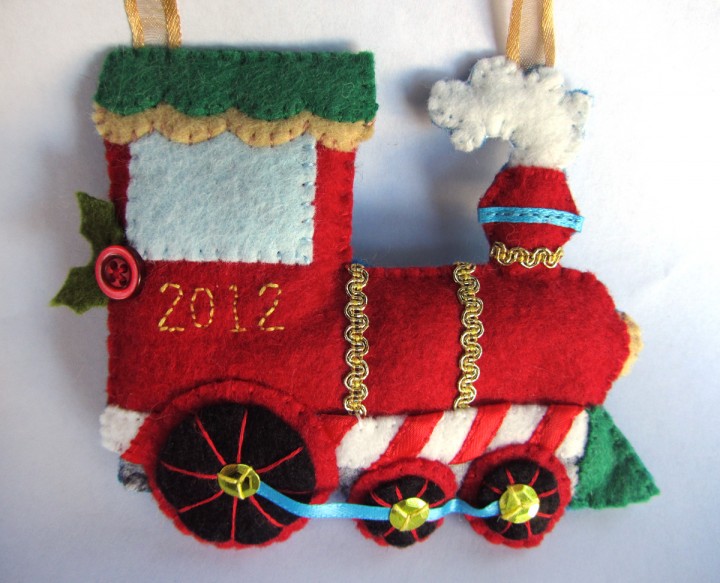
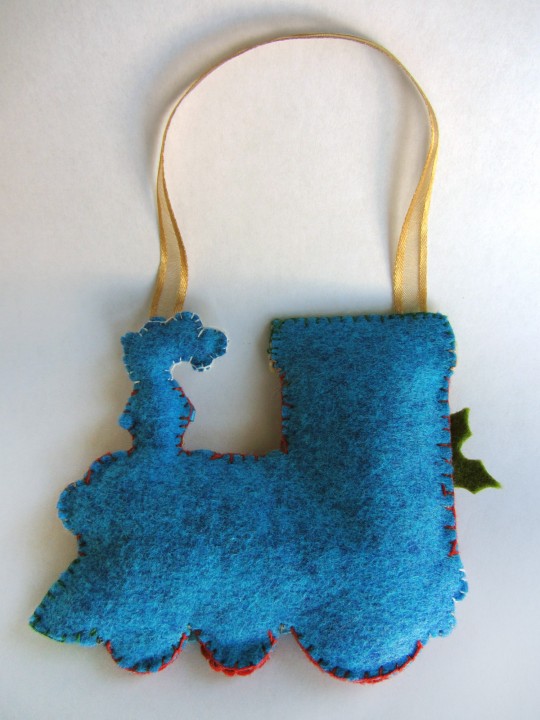
This is a new felt ornament I designed especially for my train-loving little guy. I added the year to this one, so hopefully I can make it a yearly tradition to sew him a special new ornament. He loves it and thinks it’s a toy! He played with it for 10 minutes before bed and handed it back wet and covered in dog hair. Haha! I tried my best to de-hair it for photos.

What I Used:

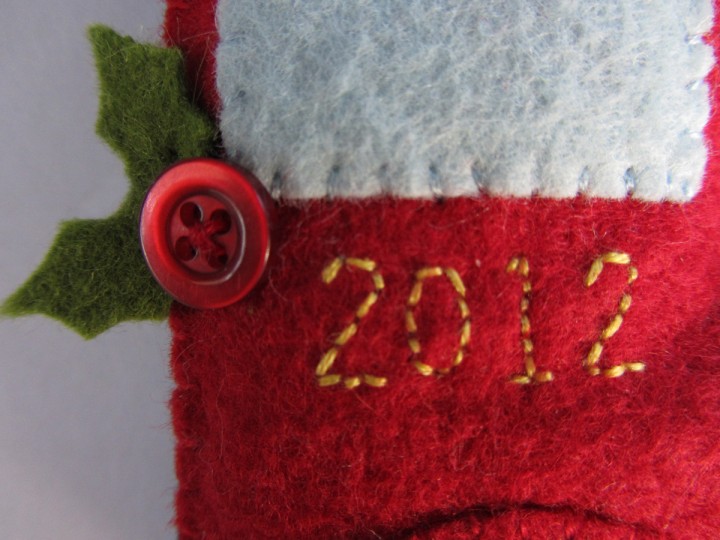
To start, I embroidered the year onto the train. I actually sewed right through the pattern paper, then cut away the paper very carefully. (Here is an example from another project.) I sewed the window on, lining its top with the top of the red train piece. I took some gold trim (the same stuff I used on my treasure page) and thin blue ribbon and sewed it on to the train.

I took some red ribbon and wrapped it diagonally around the white trim piece, stitching the edges down as I went. You could use red felt strips or even 3/8″ candy cane striped ribbon. I sewed the striped trim down onto the bottom of the train. I sewed the gray undercarriage strip below that, then sewed on the front bumper thingy. (What *is* that thing called??)

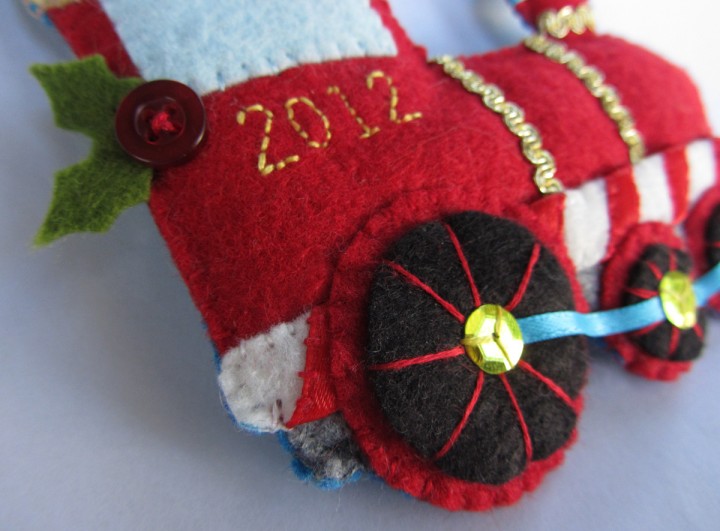
For the wheels, I layered the black centers over the red circles then crisscrossed thread to make spokes. I made a little * shaped stitch in the center where they crossed to hold the threads in place. I sewed the wheels down onto the train around the edges that overlapped. I cut a strip of thin blue ribbon and laid it across the centers of the wheels before sewing gold sequins over each.

To sew the roof on, I first sewed down the gold piece, then the green piece. For the headlight and the steam, I pinned them behind the train and stitched them on with thread that matched the train body.

To add a back to my ornament, I laid the finished front piece down on my blue felt and cut out around it. I’ve drawn a backing piece for the pattern, but you need to make sure every lines up just right if you use it. I added some gold ribbon while sewing the front and back together.

The last thing I did was stitch a red vintage button and holly leaves onto the front.

I really like how it turned out, and it is so perfect for Jackson. What do you think?

If you make one of these ornaments, I’d love to see yours! Post a photo in our Facebook page or email me.

Snowman Quiet Book Page

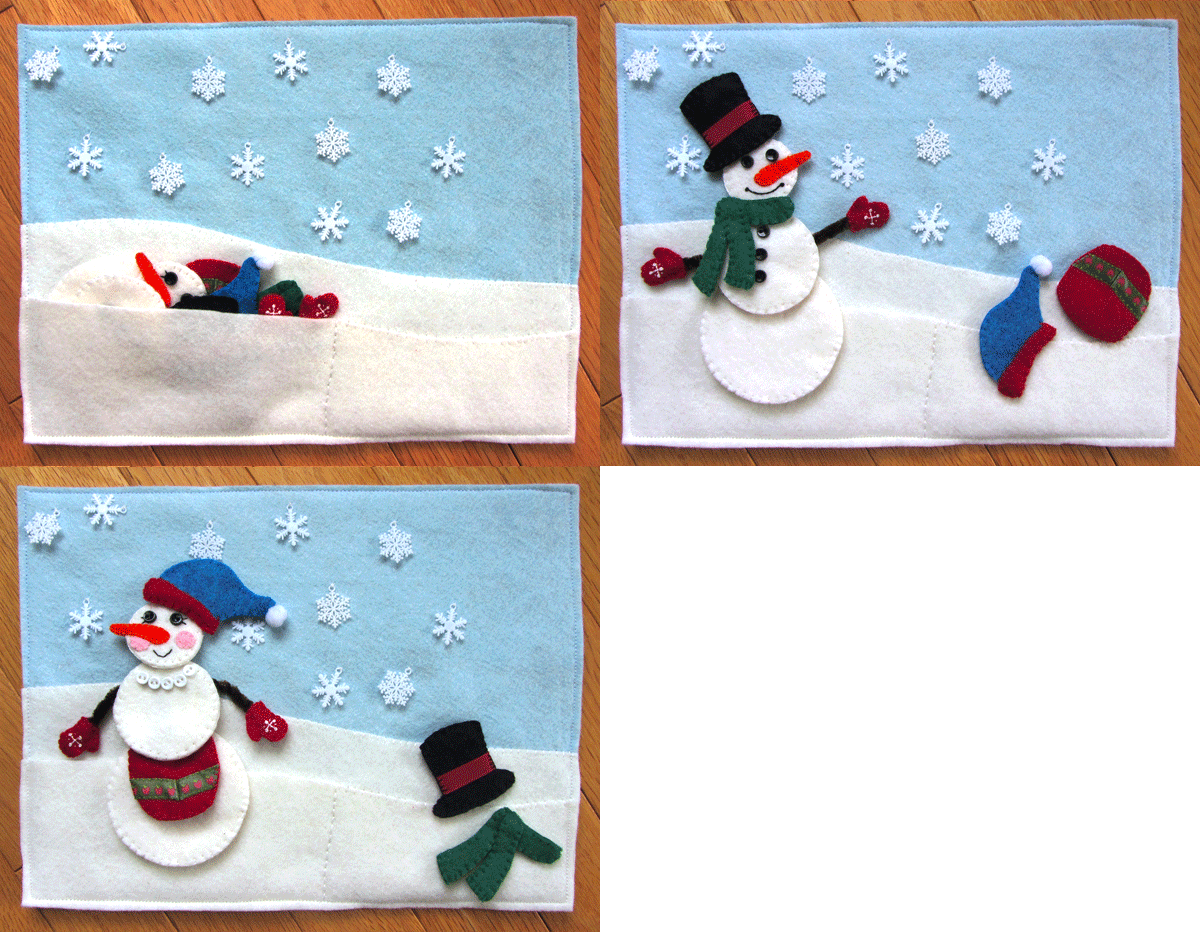
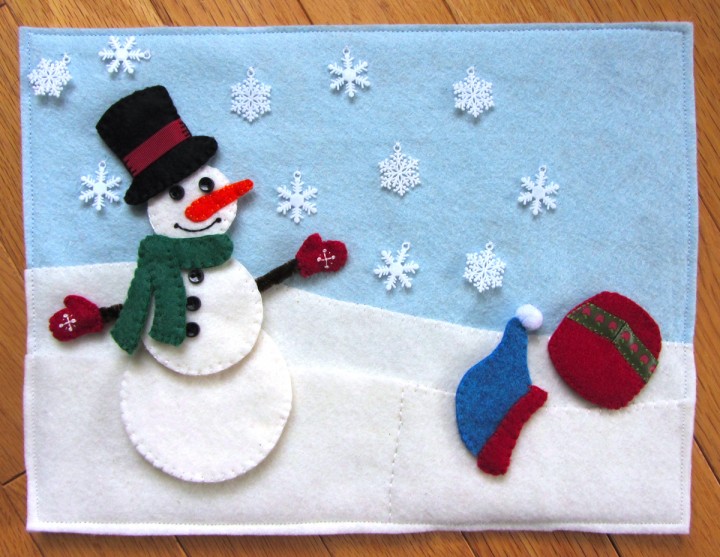
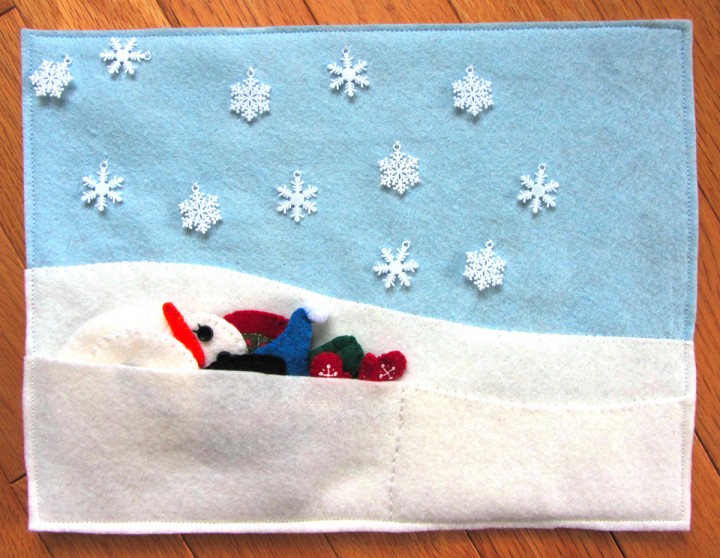
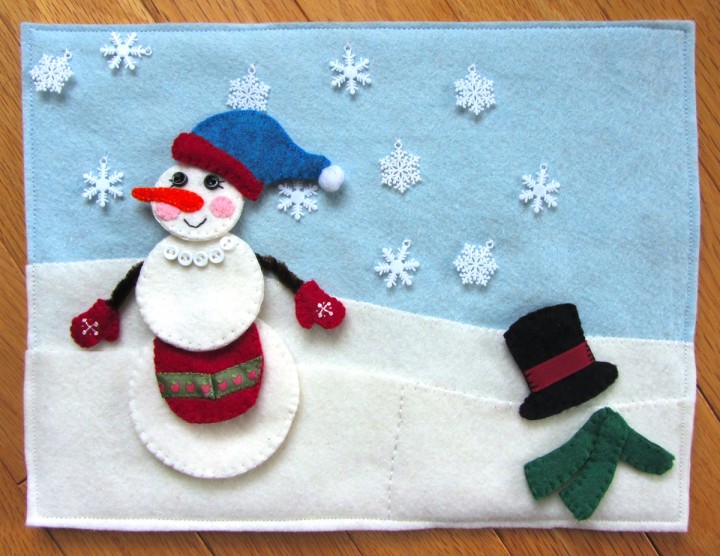
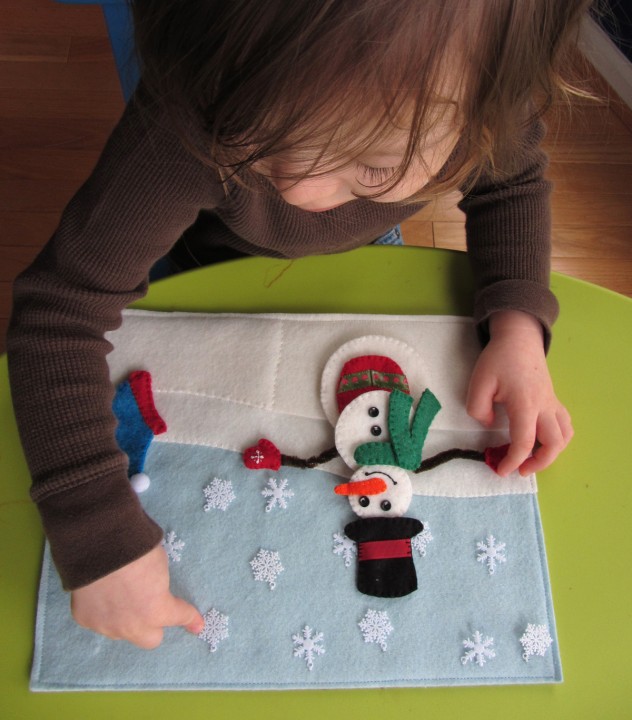
This cute snowman (and woman!) is a part of my seasons quiet book series. This page is designed to be the left-hand page for my winter spread. The holiday house will be sewn to the right. I’ve left space on the side of the page so I can sew together the binding. There is a pocket in the snowy hill to store all the parts, plus little snowflakes you can count.

The felt for this page was provided by American Felt and Craft. It is their beautiful wool blend felt that is available in about a zillion colors! I chose Christmas colors that matched the holiday house page, but you could easily customize it with your own color choices.

What I used:

Background: I started by cutting out two rows of snowy hills for my blue background. The larger hill was fully sewn down, the smaller one was layered on top and only sewn on the left side. I also sewed a straight line down to make my pocket a little smaller so it would gape. I cut off the strings of the snowflake ornaments and sewed them to the page. If I hadn’t found the ornaments, I would have ordered these buttons.

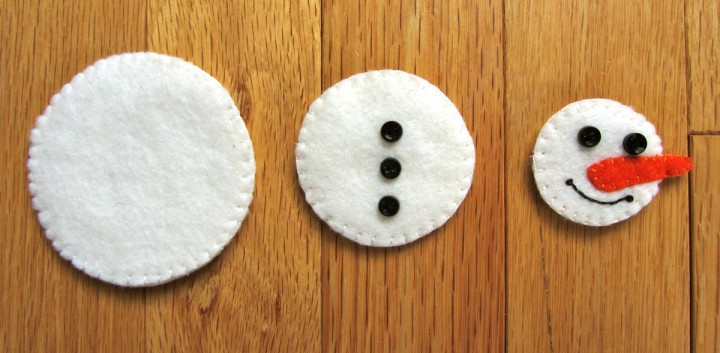
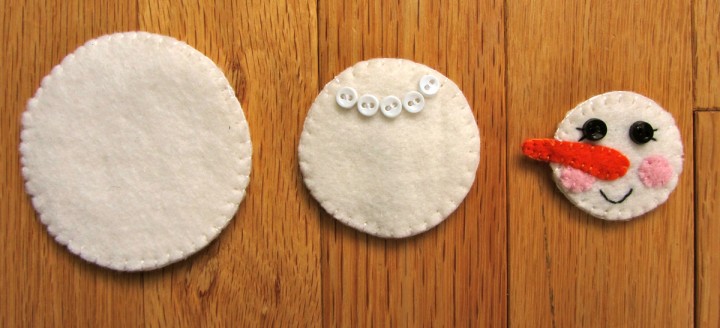
Snowman: I made the snowman/woman double sided to have less loose pieces. If you want more option, you can sew them each as their own pieces. The biggest circle is just two sides sewn together. For the middle circle, I sewed three black buttons on one side, then a curved line of white buttons on the other. Then I sewed the sides together.

On the male side of the head circle, I sewed two button eyes, the carrot nose, and a back stitch smile with French knot dimples at each end. For the female side, I positioned the nose pointing the opposite way so both sides line up. I sewed on two button eyes with little stitched eyelashes, pink cheeks, a back stitch smile and a carrot nose. When both sides were done, I sewed them together.

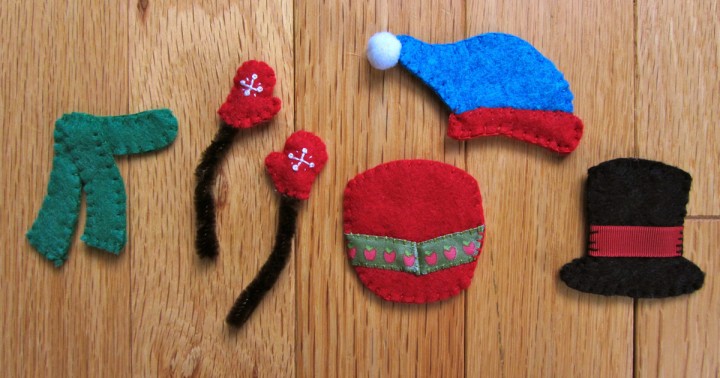
Accessories: For the top hat, I sewed scraps of red ribbon onto each side, then sewed the two sides together.

For the stocking hat, I sewed the two blue pieces together, then sewed the red brim pieces on around the bottom of the hat. I ran my needle through the center of a mini pompom and stitched it onto the tip of the hat. I ran the needle through the center again and made a couple more stitches before tying off the thread.

The apron had a scrap of ribbon sewn to the front piece before the sides were sewn together.

To make an arm, I embroidered a little snowflake onto the mitten front. It is a plus with French knots at the tips and some tiny stitches in between. I cut a piece of brown pipe cleaner twice as long as I needed and folded it in half. I twisted it together, the folded over the sharp tip. I sewed the two sides of the mitten together on the folded-over end of the pipe cleaner, making sure to have some stitches go between the pipe cleaner wires so the mitten couldn’t be pulled off.

For the scarf, I sewed the main front and back pieces together. I sewed the front pieces together, then stitched it in place on the front of the scarf.

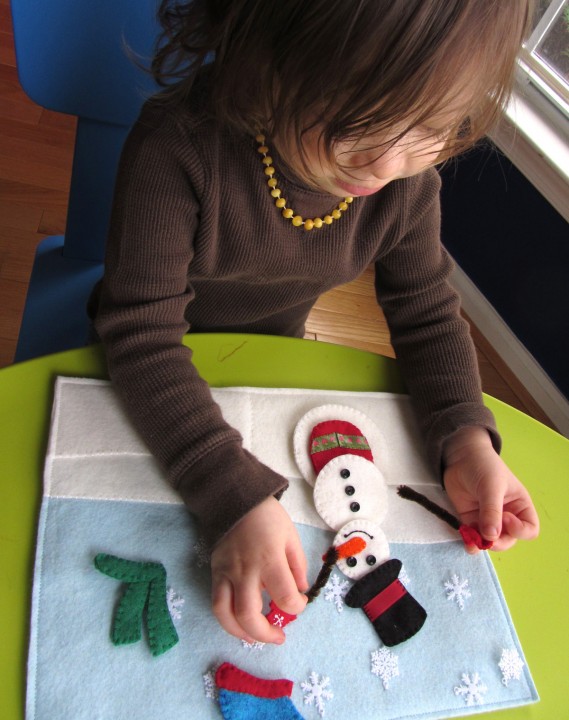
Jax enjoyed building his snowman and has asked me several times to pull it out since I showed it to him. I likes to count the snowflakes, too! His favorite activity is putting the circles in size order – something we are practicing in homeschool right now.

If you do this quiet book page, I’d love to see your version! Email me a photo or post it to our Facebook page.

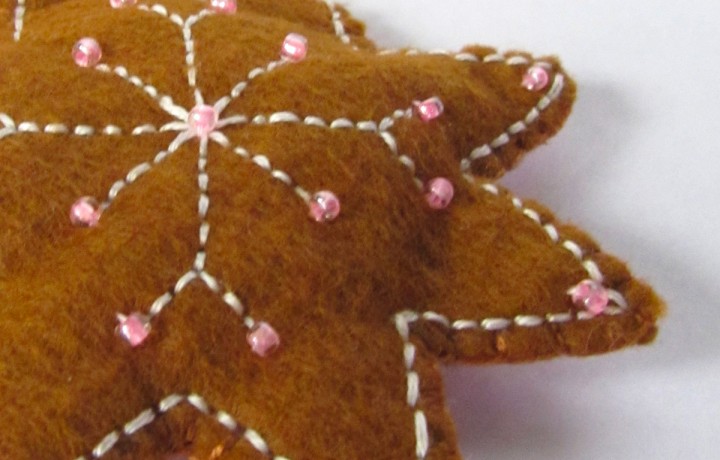
Felt Gingerbread Star Cookie Ornament

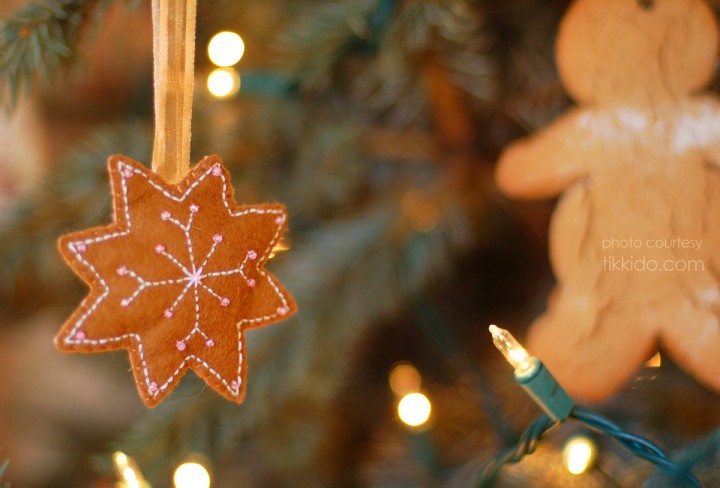
Photo Courtesy Tikkido/tikkido.com

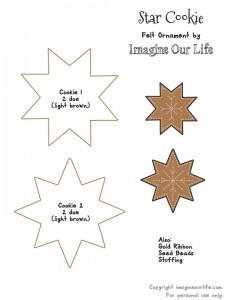
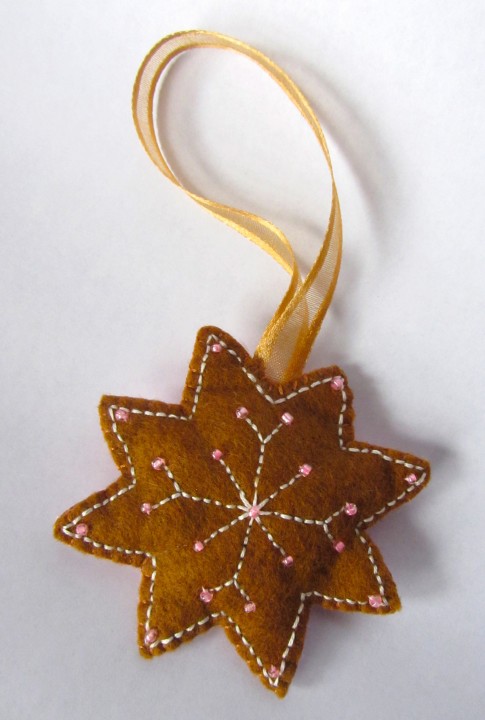
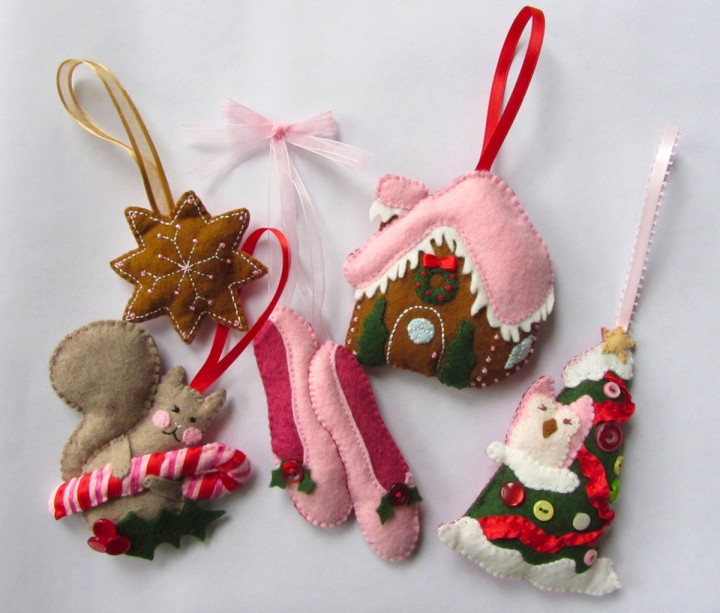
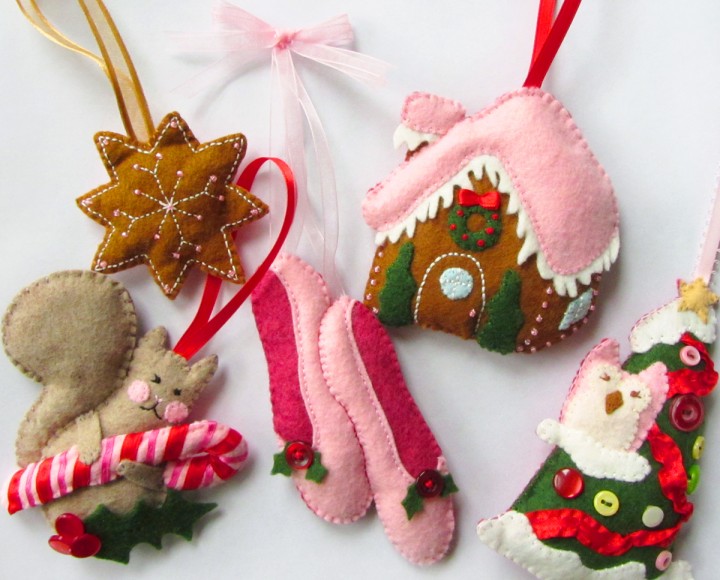
Here is the fifth ornament in the series of five I make for Nikki of Tikkido.com. Her beautiful Christmas Cottage ideas were featured in the newly released Bird’s Party magazine. This is a very simple ornament. Though I’ve only had a chance to make one, I’ve included 2 versions of the cookie on the pattern.

What I Used:

There isn’t really many steps to making these, and you could easily make your own variations.

You start by embroidering the snowflake designs onto the front (or both) sides of the ornaments. I used two strands of white embroidery floss to stitch mine. Switch to one strand of floss and a beading needle to sew on the beads. I made two passes through each bead for strength. To finish, add some batting and a ribbon and sew the two sides together.

To view all of the ornaments I’ve designed (with more to come) look here. Ornaments have been a fun break in between quiet book pages. If you have a request, let me know here or on the Facebook page, and I just might get a chance to design one!

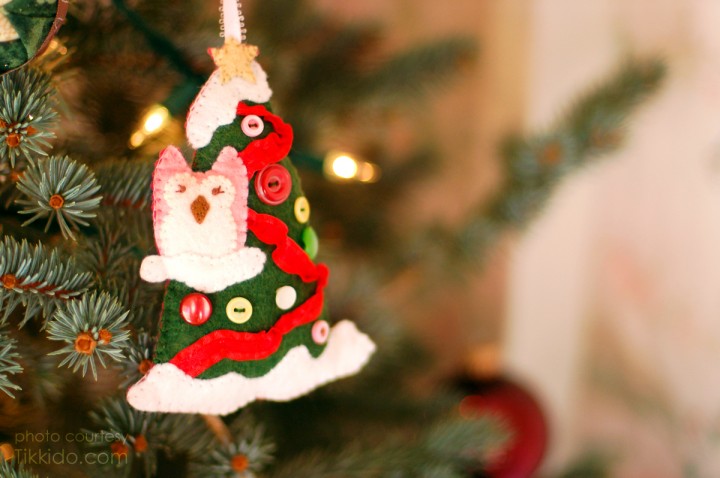
Felt Owl & Tree Ornament

Photo Courtesy Tikkido/Tikkido.com

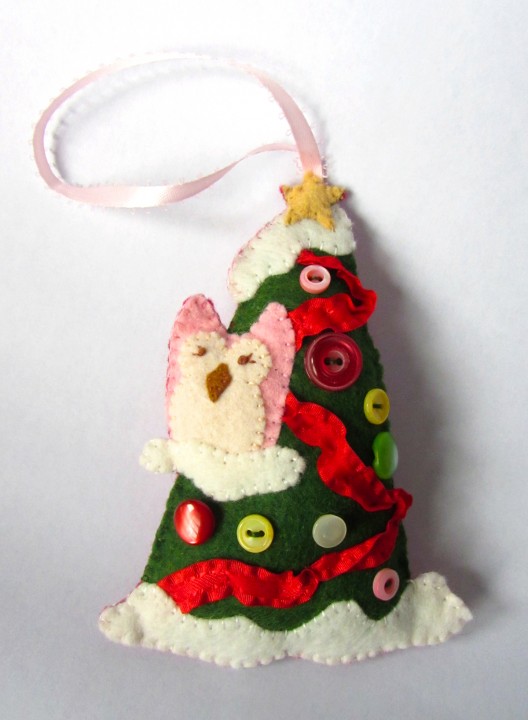
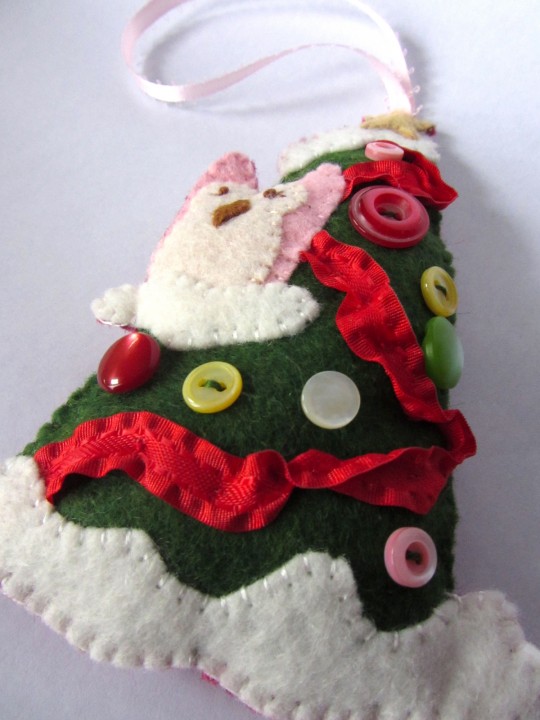
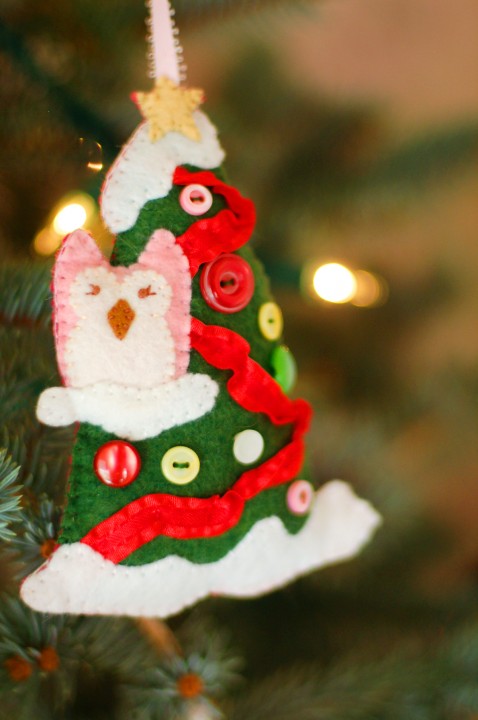
Here is my next felt ornament pattern. A little pink owl in a Christmas tree. I love that owls have made a comeback from the 70’s! (Of course, even I get a little tired of them sometimes.) Snowy owls go well with winter holidays. I wanted to make mine pink. Why not! I did a little tree so she’d have a home and I’d have an excuse to use some of my vintage buttons.

This little owl is the fourth felt holiday ornament pattern in the series of five I designed this year. (You can grab the first three: here and here and here.) The candy candy stripes turned out to be very simple to do, so he really doesn’t take long to sew.

What I Used:

I started by sewing the red ruffled ribbon on to the tree in a zigzag, twisting and bunching it as I went. Then I sewed down the snow ground and on the top of the tree. I sewed the star on to the top.

To make the owl, I sewed the beak onto the cream colored piece. Her eyes are French knots with little stitches to make eyelashes. I sewed the cream part onto the pink, then sewed her onto the tree. I sewed the branch snow over top.

I chose an assortment of cute vintage buttons and sewed them onto the tree as ornaments. I laid my ornament down onto the backing felt and cut around it to make the backing. I also drew a version of the pattern, but you will need to make sure you line everything up if you use that. I added some batting to the ornament before sewing it closed. I used thread colors that matched all the pieces of the front, to keep the front looking nice.

You could use any number of colors to change this ornament’s look. If you make one, I’d love to see! Share a photo on our Facebook page or email me. I have one more ornament to post tomorrow from my original series, but I just drew up two more! It’s hard to stop, they are so fun. I have a winter quiet book page to post very soon as well.

Photo Courtesy Tikkido/Tikkido.com

{ This pattern is free for personal use only. If you would like to purchase a $25 license to sell the finished project in your shop, please email me. }

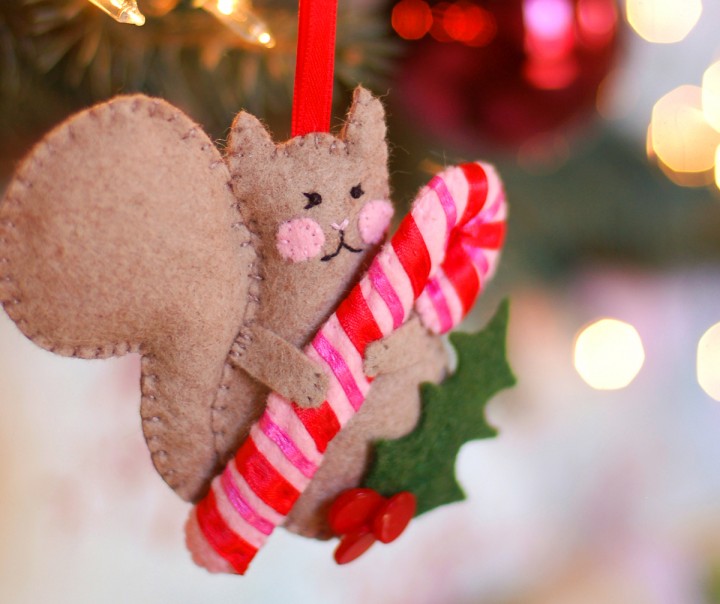
Felt Squirrel Holiday Ornament


Photo Courtesy Tikkido/Tikkido.com

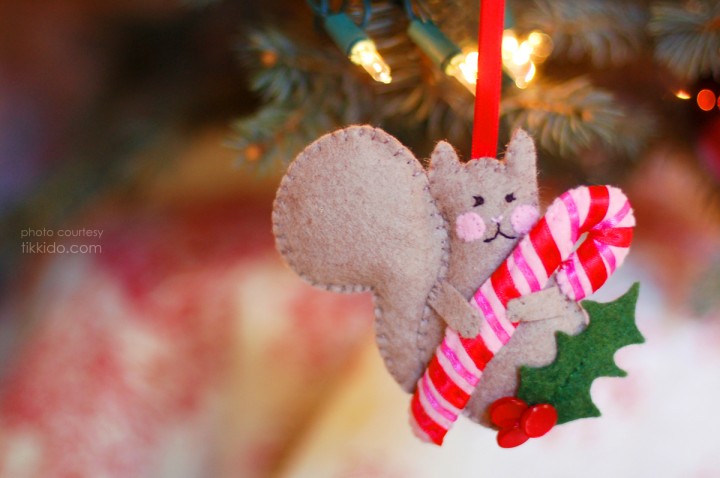
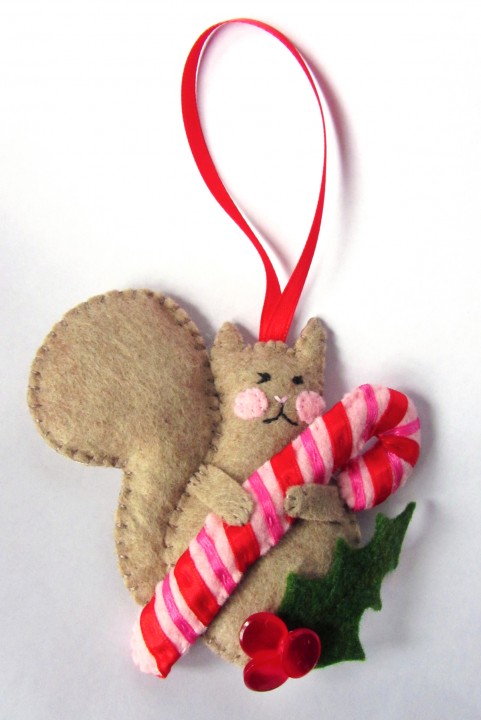
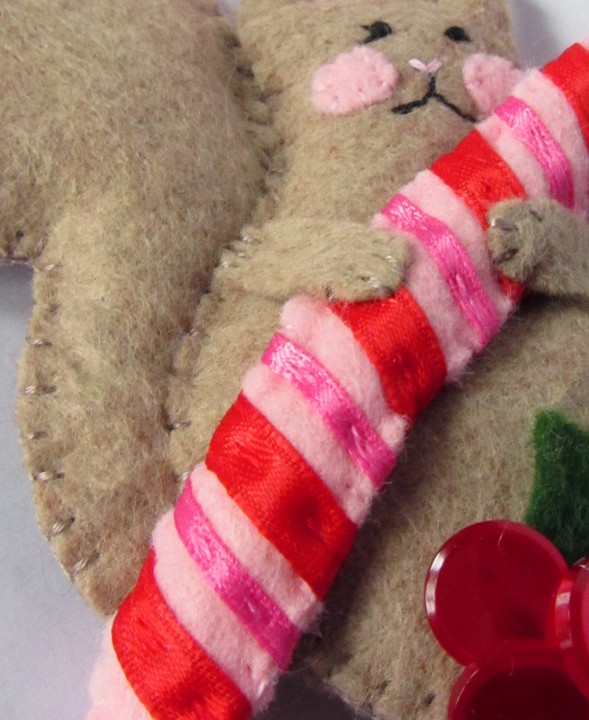
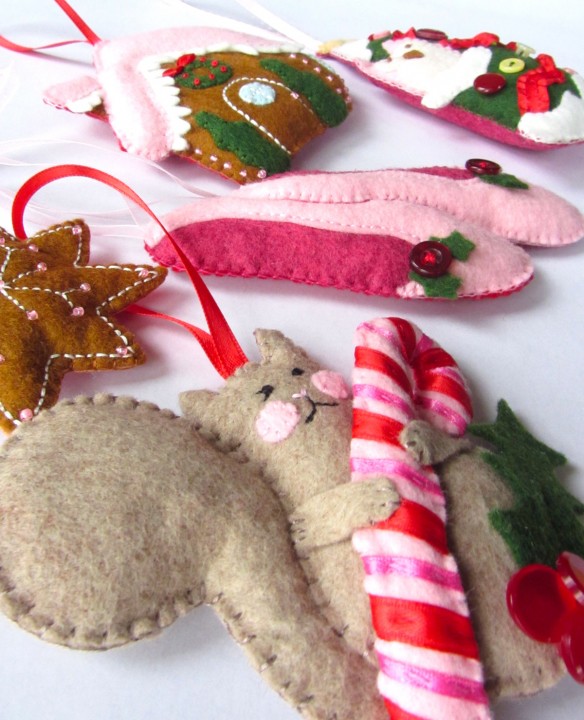
I’m not 100% sure which of the ornaments in the series is my favorite, but it just might be this guy! If squirrels ate candy canes I think they’d look just like this.

Mr Squirrel is the third felt holiday ornament pattern in the series of five I designed this year. (You can grab the first two: here and here.) The candy candy stripes turned out to be very simple to do, so he really doesn’t take long to sew.

What I Used:

Photo Courtesy Tikkido/Tikkido.com

I started by sewing the two sides of his tail together with some batting in between. I didn’t bother sewing all the way around, since his tail would be placed between the body pieces.

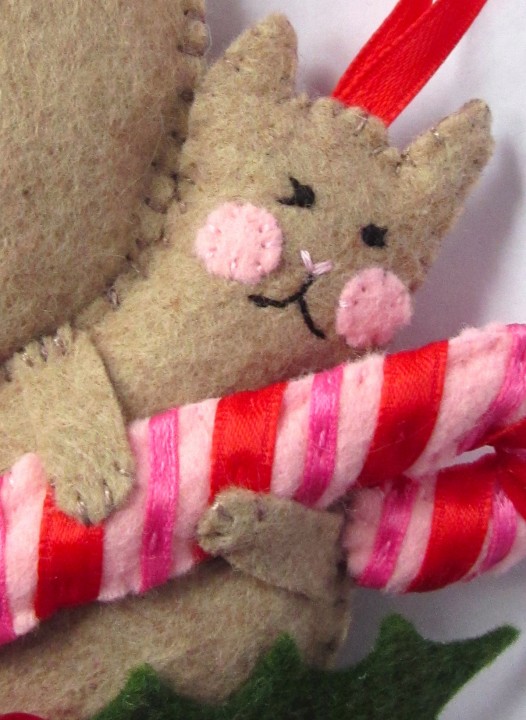
I then embroidered the squirrel’s face. I stitched on the felt cheeks, then made his mouth with a black back stitch. His nose is a little V in pink thread. His eyes are French knots with little sideways Vs for eyelashes.

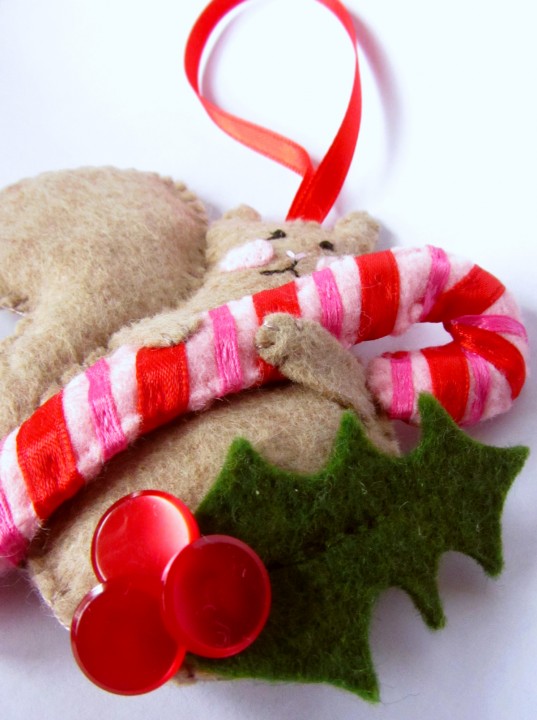
I then pinned the tail in place between the body front and back, along with some batting for the body, and sewing all the way around. To add the holly leaf, I did a line of back stitch (through only the front layer of the squirrel) partway up the center of the leaf. Then I sewed on 3 vintage buttons form my mother’s stash. You could sew the leaf and buttons on before sewing the body together if that is easier for you.

To make the candy cane, I sewed the two sides together with a length of batting twisted up into a long tube inside. Starting with the red ribbon, I folded the end over and made a stitch to secure it to the bottom back of the candy cane. I wrapped it around the cane, doing a basting stitch through the middle of the ribbon in matching thread. When I got to the top, I folded the end under and stitched it to the back. I repeated the process for the pink ribbon.

His arms are very simple. I sewed each on to a side of his body, then made 4 little stitches on the paw od each one to attach it to the front layer of the candy cane. They look like little squirrel toenails.

Photo Courtesy Tikkido/Tikkido.com

You could definitely make him less girly by changing the candy cane and ribbon colors. He could even hold something different – acorns or a mug of hot cocoa! If you make this or any of the other ornaments, I’d love to see yours! Post them on our Facebook page or email me a photo.

{ This pattern is free for personal use only. If you would like to purchase a $25 license to sell the finished project in your shop, please email me. }

Felt Ballet Slippers Ornament

Would you like to make and sell items from this pattern? Commercial licenses are available!

photo courtesy Tikkido/Tikkido.com

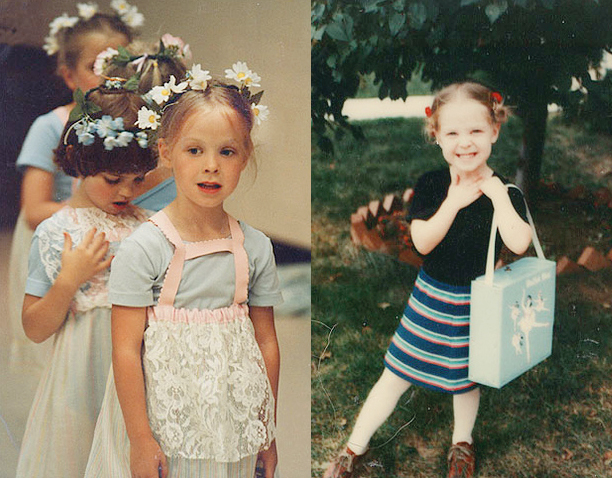
I grew up taking weekly ballet classes form a dear family friend. They were more for fun, and she often let me be the free spirit I tend to be when it comes to creative things. As I got older, my classmates outgrew ballet. The classes shrunk until I only had one or two other girls with me. I adored my classes – they were the highlight of my week! I still have my pointe shoes, and I’m planning on hanging them up in my new craft room.

Little Me

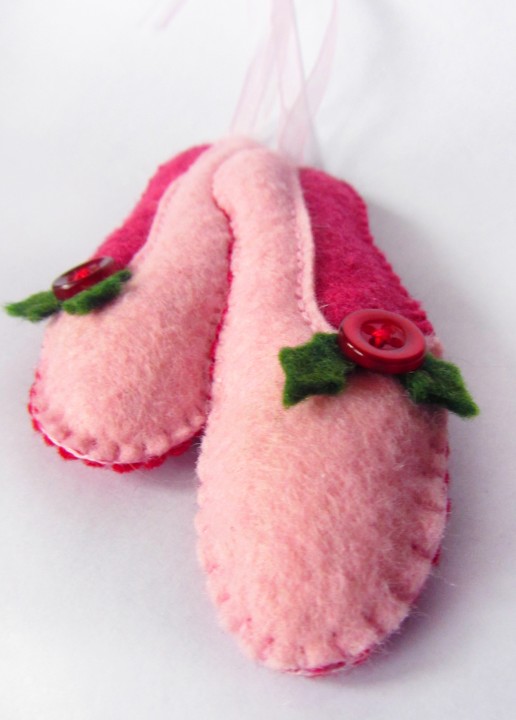
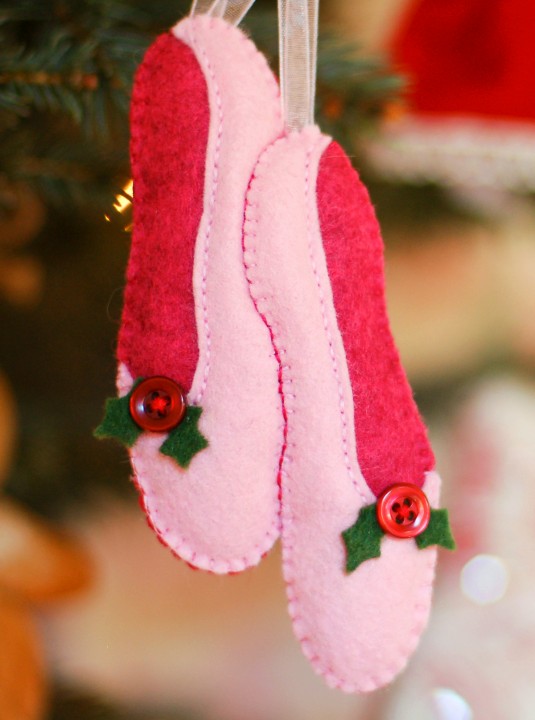
These pink ballet slippers are the second felt holiday ornament pattern in the series of five I designed this year. (You can grab the free pattern for my first, a gingerbread house, here.) This is a project that works up very quickly, but turns out so sweet!

What I used:

I started by sewing the two pink slippers down to the pomegranate pink inner shoe piece using a back stitch along the foot opening (see photo). I also did an applique stitch along the two shoe soles. I didn’t worry about sewing down the outer edges yet, as they would be sewn down as I sewed the ornament back on. Once I sewed down the two slippers, I used hot pink thread and did a back stitch to show where the two slippers overlapped.

I cut out the two sets of holly leaves and sewed each one down with a red vintage button from my late mother’s sewing stash.

I cut two pink ribbons for each slipper, to look like the double ribbons used to tie on point shoes. When I sewed the red backing on, I added some batting for dimension and I made sure the ribbons were caught in the top of each slipper. I fanned them out a bit so you can easily see both ribbons for each shoe. When the ornament was all sewn together, I tied the ribbons into a bow and placed a few stitches in the knot to hold it together.

Photo courtesy Tikkido/tikkido.com

This is another ornament that could easily be customized by using different colors of felt and new embellishments. If you make this or any of the other ornaments, I’d love to see yours! Post them on our Facebook page or email me a photo.

Stop by tomorrow for the next ornament. Which should I post?

{ This pattern is free for personal use only. If you would like to purchase a $25 license to sell the finished project in your shop, please email me. }

Felt Gingerbread House Ornament

Would you like to make and sell items from this pattern? Commercial licenses are available!

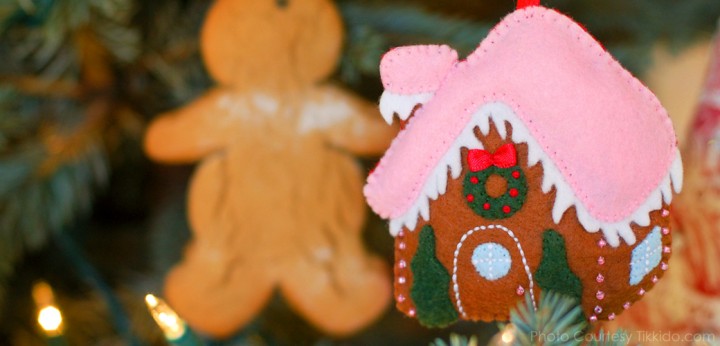
Photo courtesy Tikkido/tikkido.com

Do you have the holiday season on your mind already like I do? You almost have to when you are a crafter, as projects take time to complete.

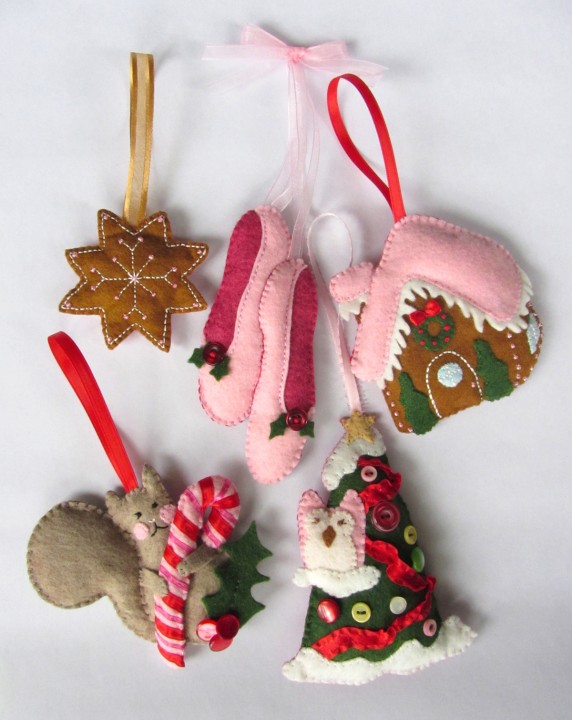
A while back, I was asked by Nikki of Tikkido to contribute some felt ornaments to an upcoming Christmas e-zine feature. Her theme was very sweet and girly, so I jumped at the chance! Too many of my projects are for boys or gender-neutral. It’s nice to use pink every now and then! I’ve designed 5 hand-sewn felt ornament patterns and I’ll be sharing them with you over the next few days.

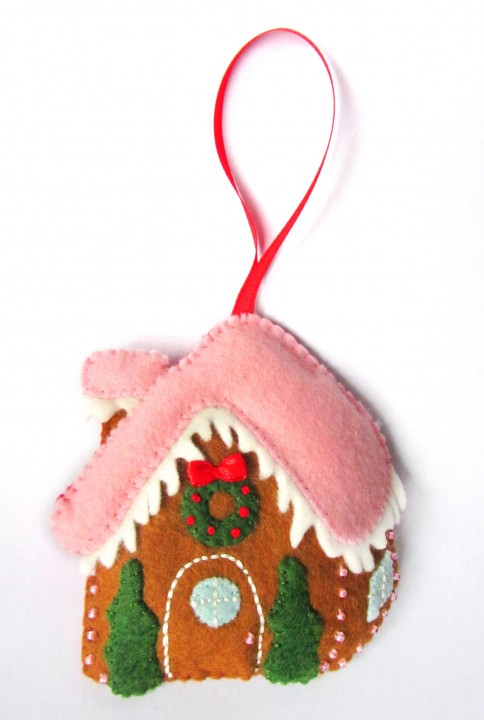
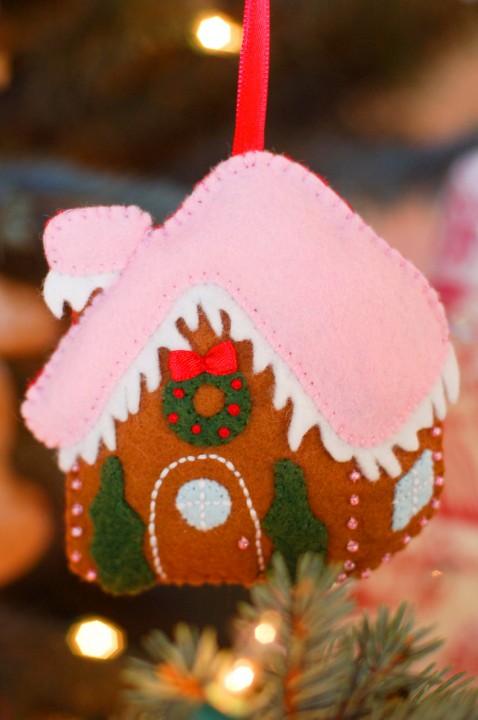
Today’s pattern is a sweet pink gingerbread house. I adore how it turn out! You could very easily change the colors and embellishments to customize this pattern for your tree.

What I used:

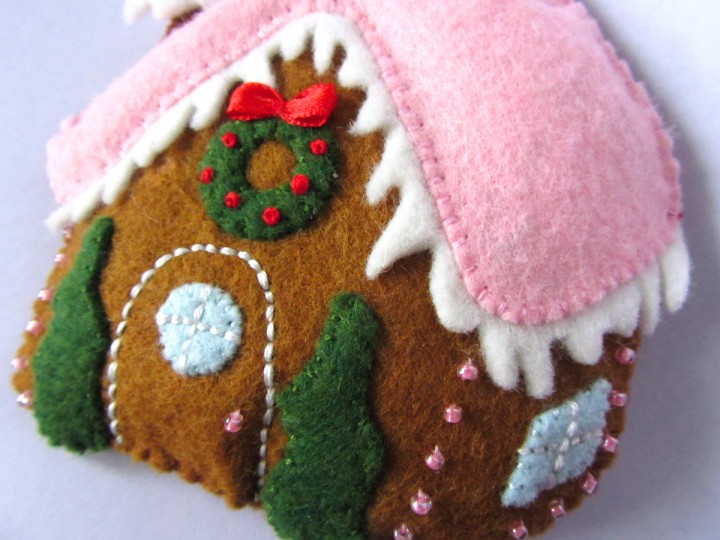
I started by laying the icicles in place on the house front under the roof and chimney top pieces. Then I sewed the roof and chimney top down, leaving the icicles hanging loose.

I normally use two strands of embroidery floss while sewing with felt, but I used four strands of white to make a back-stitched arch to form the door. I sewed down the two windows and again used 4 strands of white to back stitch the window panes.

I sewed down the two trees and the wreath next. I used four strands of red floss to make French knot berries on the wreath. You could also use seed beads. I took a little scrap of red ribbon and folded both ends in to the center to make a bow shape. I made a stitch to hold it together then flipped it over and placed it on the wreath. I sewed it down at the center while cinching the middle of the bow.

Using a beading needle and one strand of thread, I sewed on lines of seed beads (going twice through each bead for strength.)

Photo courtesy Tikkido/tikkido.com

Once the front of the ornament was decorated, I cut out a matching back in red felt and started sewing the sides together. I added a loop of ribbon as I sewed across the top. When I was halfway around, I added some batting to the ornament to give it dimension. Once I sewed it closed, it was ready to hang! (For tips on sewing around felt edges, see my blanket stitch tutoral.)

Visit often this week to collect all five of my holiday felt ornament patterns! Which is your favorite?

{ This pattern is free for personal use only. If you would like to purchase a $25 license to sell the finished project in your shop, please email me. }

LED Holiday House Puzzle Quiet Book Page

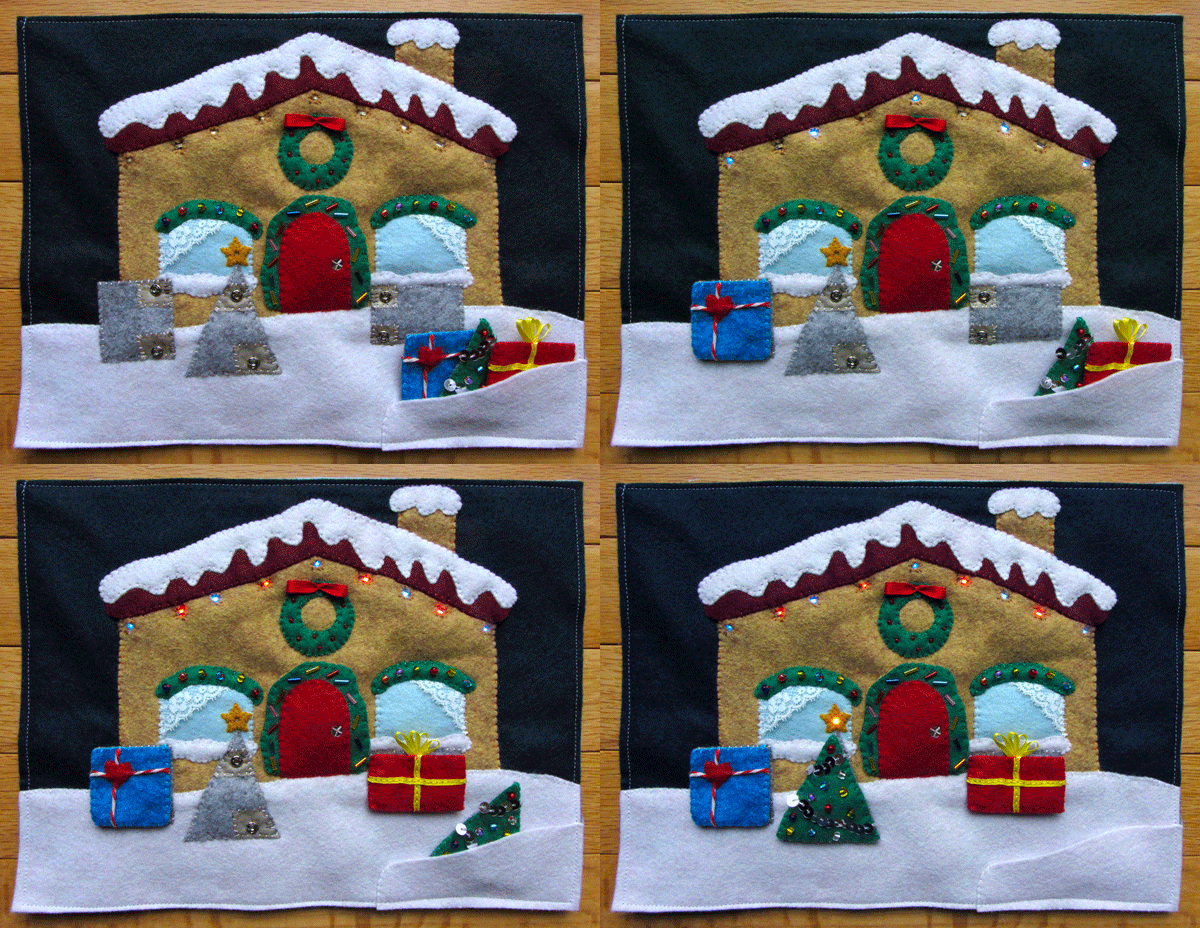
This quiet book page was quite the project! It is an interactive puzzle – you match the shapes to light up the LEDs. It is the second page in a series of pages I am doing for all 4 seasons. I’ll be doing one regular page and one LED holiday page for each season. The first was my Halloween Jack-o-Lantern page.

The planning of the circuits was a bit confusing to work out, but I really feel like I’m starting to get the hang of e-textiles. I admit, I went through two revisions of how I sewed the circuits before settling on the third. But, that is one of the things that makes e-sewing so forgiving. You aren’t soldering anything together… Not happy with it? Clip the threads and start again! But, don’t be scared. You can do it! Try the Halloween page first, or something similar using that wiring plan as a guide. You’ll get the hang of it!

This page can be made without the LEDs. Just skip that part and make it a regular shape puzzle. You could add a few more shapes if you wanted. You could still have the door open, but maybe put a photo or surprise behind it instead of the battery.
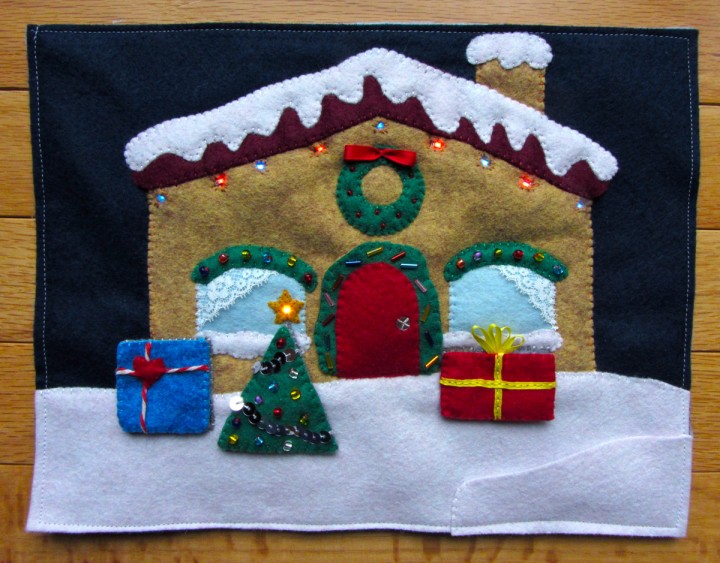
All of my e-textile supplies are courtesy of SparkFun. Their LilyPad line makes adding interactive circuitry to soft projects as easy as possible. They carry everything you need, from the conductive thread and fabric to snaps and needles. The lovely wool blend felt was provided by American Felt and Craft. I think the look and feel of wool felt is a match made in heaven for a Christmas themed page. The rich colors and soft, warm feel are just perfect!

What I Used:

This tutorial is going to be a little crazy! But, stay with me…
Red & Blue LEDs: Start by cutting some scrap felt into two strips that follow the roof line. On the first strip, stitch down the red LEDs: using conductive thread, make several stitches through the + hole of the first LED then use a running stitch across to the next. Make several stitches in that LED’s + hole and continue until you’ve linked all four positive (+) holes. Start a new conductive thread and repeat the process along the negative (-) holes. Don’t let the + and – threads touch. The strip holding the red LEDs will need to be layered behind the blue strip, so the running stitches need to be covered. I cut scrap felt and basted it down between the LEDs.


My strip of felt for the blue LEDs is thicker because the two circuits need to go over the red LEDs while still letting the blue LEDs line up. Stitch the positive (+) line of the blue LEDs the same way you did the red, but stitch along the edge to leave room for the negative line (see photos). Lay the blue over the red and cut out holes to let the red LEDs show through as shown. Then sew the blue LED’s negative line as shown.

At this point I tested both circuits and set them aside. To test: put a battery in the battery holder and cut two scraps of conductive thread. Lay the ends of one scrap on the + hole of the battery holder and the + hole of the last LED. Lay the other thread on the – hole of the battery holder and the – of the last LED. They should light up.
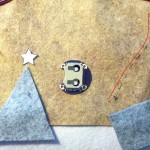
     

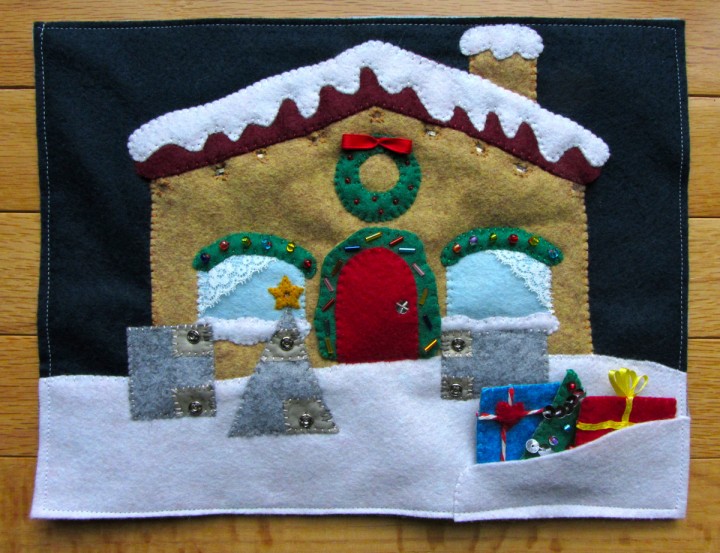
Main Circuitry: Pin the roof piece to one of the house shapes so you have an idea of where the LEDs will be. Cut a scrap of felt to go under the snow. Mine was about 8″ wide by 2″ high I suggest going 3″ high so you have more wiggle room. Cut out one set of the gray shapes and decide where they will be positioned on the house. Place the battery holder so the positive (+) holes are at the right.

Red: I started with the red circuit first. Sew a few stitches where the upper left corner of the rectangle will be. Do a running stitch up to just below where the far right red LED will go. Tie it off. (We will link it up to the LEDs later.) Start another thread by making several stitches in the upper right (+) hole of the battery holder. Go out and down (staying out of the way of the negative hole), then go right under where the rectangle will be. Go up and end near where you ended the first (negative) line. Now we stitch the other half of the negative line (broken by where the squares of conductive fabric will be.) Start a thread and make several stitches in the upper left negative (-) hole of the battery holder. Go out and down (staying out of the way of the negative hole), then stitch down and around the triangle as shown. You need to leave plenty of room over the triangle for the yellow LED circuit. End with several stitches under where the lower left corner of the rectangle will be.

You can test your red circuit by laying the red LED strip in place and running scraps of conductive thread from the – and + holes of the last one to the corresponding thread lines in the upper right corner of the house. Then place a scrap of conductive thread or fabric (I saved the selvage to use as test strips) to complete the gap where the rectangle will be. (See photo below of me testing the yellow.)

Yellow: Next is the yellow LED circuit. start a thread and make several stitches in the upper right (+) hole of the batter holder and go up and over (staying out of the way of the negative hole) to the triangle as shown. Position the LED just above the point of the triangle (with the positive hole on the left) and make sever stitches in the (+) hole.
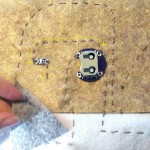
     

The negative line of for the yellow LED is a quick one. Make several stitches in the negative hole of the LED then a couple stitches down to under where the triangle tip will be. Start a new thread and stitch several times in the upper left negative hole of the battery holder. make a line of stitching going out and down (don’t touch the blue line!) and end it under where the lower right corner of the triangle will me. You can test this circuit by placing a scrap of conductive thread across the gap in the circuit.

Blue: To start the blue circuit, make several stitches under where the upper right corner of the square will be. Running stitch up to just below where the blue LEDs will be as shown.


To sew the other half of the blue LED’s negative line, make several stitches in the lower left negative hole of the batter holder, then stitch down and under the triangle, just below the red line you made earlier. My lines were close, which is why I suggest using a slightly longer scrap of felt down there. Make sure you leave room below the line you are stitching. There will be one more line down there. Continue your stitching up to where the lower right corner of the square will be and make several stitches.

Make the positive blue line by starting with several stitches in the lower right positive hole of the battery holder. Stitch down and over to the left (it will be the third line running under the triangle) as shown. Stitch over and up to the roof, ending beside the negative line. You can test your circuit the same way you tested the red earlier.

Conductive Shapes: Cut out a second house piece and use the door pattern piece to cut out a hole for access to the battery holder. Pin the roof piece on to it and sew it down (I was not sewing things down to a background at that point. The light blue was just a layer to insulate my laptop from the exposed circuits while I photographed steps.) I also sewed down the windows and window snow, as they are overlapped by the shapes. Cut out your star felt piece and cut a hole in it so the yellow LED can show through. I stitched around the hole for strength and also stitched it down around the narrow width of the LED so the hole doesn’t move. Stitch down the star.

Big Note: You don’t need the snaps I added to my puzzle! In fact, they almost make the conductive fabric unnecessary… But I was a little disappointed to find that (unlike the conductive thread) you needed some pressure when laying the two layers of conductive fabric together in order to power the LEDs. The finished puzzle pieces did not have enough weight to do this on their own once you let go. Since Jax is not old enough to understand he needs to press down on the pieces to get them to light, I went back and added snaps to hold the pieces down against the puzzle. I also used conductive thread when sewing them on to add conductivity.

Cut scraps of conductive fabric and sew them to the triangle as shown. Cut out a piece of felt to be your snowy ground for the page (mine is “soap sud” – a blueish white) and lay it over the bottom of the house. Sew the triangle down. Using conductive thread, make several stitches through all layers to link the two “broken” ends of the yellow negative line to the two scraps of conductive fabric. Each scrap should be connected to its corresponding line of conductive stitching. Test the puzzle piece by pressing a scrap of conductive fabric across the triangle. (See photo below.)

Do the same for the square and rectangle, adding scraps of conductive fabric (and snaps if preferred) as shown and sewing them down. Be sure to link the conductive fabric to the circuits with conductive thread. (See the last photo below. You can see my 3 dark stitches in the side of each square of conductive fabric.)


When designing this puzzle, I worked hard to find a balance between making the project easy to explain and having a design that was easy to product with minimal user errors (such as stitching circuits too close to each other and shorting it out.) In this third revision of the design, I knew this would be the most difficult part to explain. It really isn’t that bad, though! Stay with me…

Take your strip of blue LEDs and pin them in place between the house layers. The second photo above shows the top layer of the house pulled back. I hadn’t moved the roof piece up to the front house piece yet for that photo. Simply put, you need to connect your negative line from the house to the negative hole of the first LED and connect the positive line from the house to the positive hole of the same LED, WITHOUT touching! Touching the lines together will “short” the circuit and the LEDs will not light. To do this, I added an additional scrap of felt between the bottom house piece and the blue LED strip piece. I was able to directly link up the negative line from the house to the negative hole by just stitching up the house and then straight through the scrap of felt into the hole. For the positive line, I went up the house and then through to the scrap of felt, where I continued up and around the LED to get to the positive hole. I hope the sketches on my photos help explain!

You can new test and light up your blue LEDs with a strip of conductive thread. I kept mine pinned in place so the LEDs glowed while I cut tiny holes for them out of the front house piece. I stitched around the hole and stitched them down around the LEDs same as with the yellow star. You are done the blue! Phew!

   

To attache the red LEDs, lay them so they line up with the holes you made in the blue strip, as shown in the first photo below. It was easy to connect the negative and positive lines from the house to the corresponding holes on the LED. Just follow the house lines and check the LED holes to make sure you are connecting the right ones. The positive line will go up beisde the LED to where the positive hole is at the top of the LED. Keep your stitches in the hole you cut out of the blue strip to avoid crossing and shorting circuits. Test it out with a strip of conductive fabric across the rectangle puzzle. You finished all the circuits! I knew you could do it!
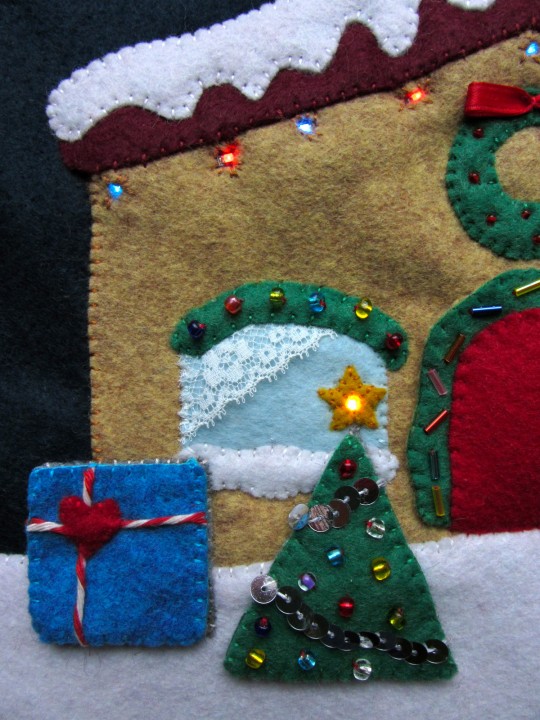
Decorating the House: At this point, after thoroughly testing all the circuits, I sewed the house and snowy ground down to the page. Before sewing the snow to the roof, I layered the chimney behind it. I also stitched down the opening of the door.

If you aren’t using LEDs, you can add a photo window or little surprise behind the door in place of the battery… Santa? A loved one? Whatever you’d like!
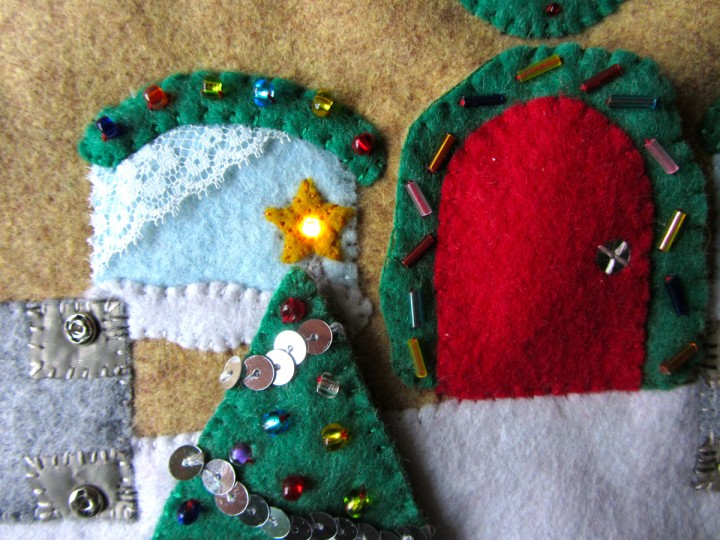
For the windows, I cut scraps of vintage lace as curtains, and stitched them down along the outside of the windows. Then I decorated the window garlands with beads and sewed the, down over top.

For the wreath, I decorated it with red seed beads before sewing it to the house. I folded a scrap of red ribbon into a bow shape and stitched it down at the top of the wreath.

If you are not doing LEDs, You can stitch beads or sequins down in place of the LEDs to be the string of lights.
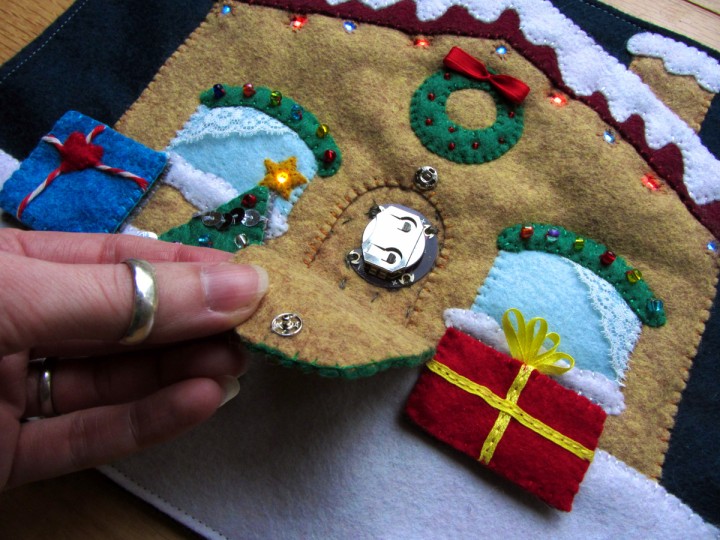
Making the Door: Sew a snap to the house just above the door hole. Sew the matching half of the snap to the back of the tan door garland backing piece. Sew the door to the garland piece and decorate the garland with beads. I also added a sequin doorknob. Sew the front and back pieces of the door flap together and sew it in place. I sewed mine along the bottom instead of the left as it is not there to function as a regular door and that felt more secure. If you are not using LEDs, a regular door would work well, and you might not even need a snap.
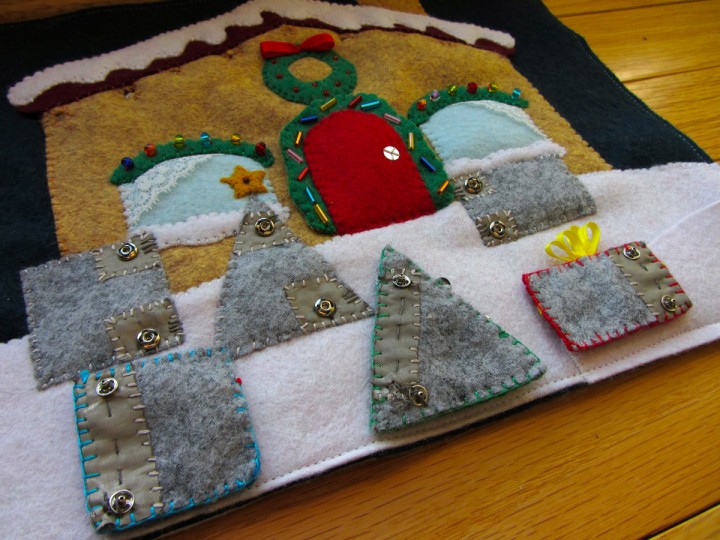
Puzzle Pieces: To start each puzzle piece, you need to make the gray backing that will complete the broken circuits when laid in the correct place. To do this, sew strips of conductive fabric onto the gray backings so that they line up with the conductive scraps on the page AND span the gap. I also added the optional snaps to hold the pieces against the page.

Decorate the fronts of the puzzle pieces however you like! On my tree, I used sequin trim to make a garland and beads as ornaments. On the square and rectangle, note that you will need to show which side is the top of the shape (so the conductive fabric lines up.) I added a bow to the top of my rectangle, and cut out a quick heart shape to Jax would realize which end was up on the square. Sew the fronts and backs together.

Before sewing your page to its backing, add a felt “snow drift” pocket to the corner to hold the shapes while not in use. You don’t want to store them on the puzzle unless you upgrade your battery holder to the one with a power switch.

All done! Not so bad, right? I admit, it was tricky at times. Electrical wiring is not something I learned while pursuing my fine art degree in college, But I am sure proud of myself for figuring it all out! Mad props to my programmer brother for patiently checking all my circuitry drawings for errors!
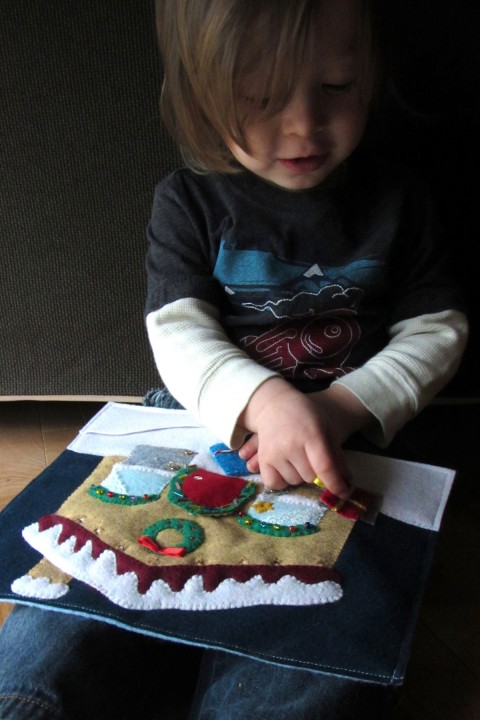
Jax knew exactly what this page was for before I even had all three of the puzzle pieces sewn. He kept asking if the shapes were all done so he could play with it. He can’t do little snaps yet, but this page will help him practice. I close the snaps for him after he solves each piece.
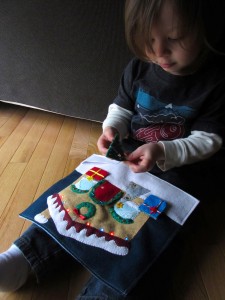
  

If you make this page, send me a photo! You can email it or post it on the Facebook page. I’d love to see both versions with and without LEDs. Happy sewing!
LED Halloween Jack-o-Lantern Quiet Book Page

I’m so excited to be working with e-textiles again! (The robot page was my first effort.) Quiet books and LEDs can really be a perfect pairing. I really like to include a lot of interaction into my page designs, and what better to add than working lights?
This is a very simple e-sewing project – a perfect one to start with if you want to get the hang of it. And better yet? SparkFun has provided me with 3 $50 gift certificates so you can load up on supplies and create some LED projects of your own! Head to the bottom of the post to enter.

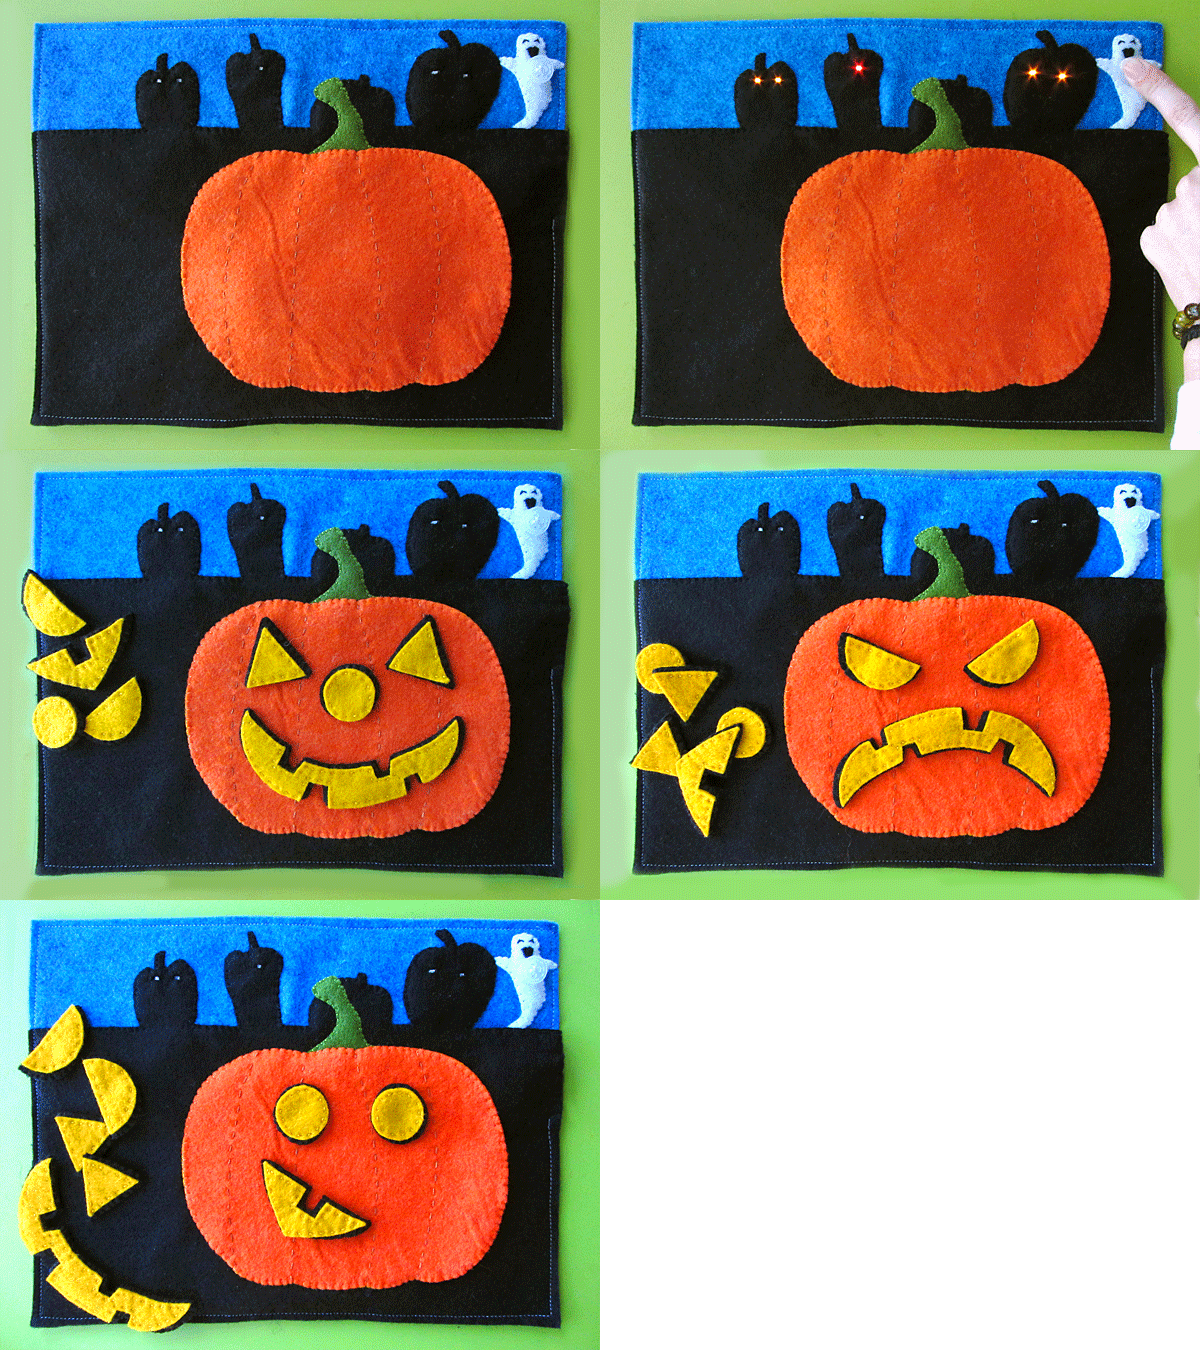
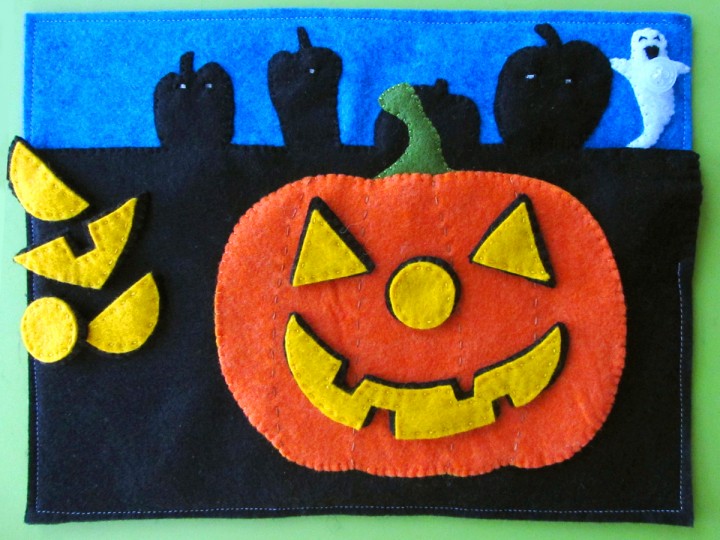
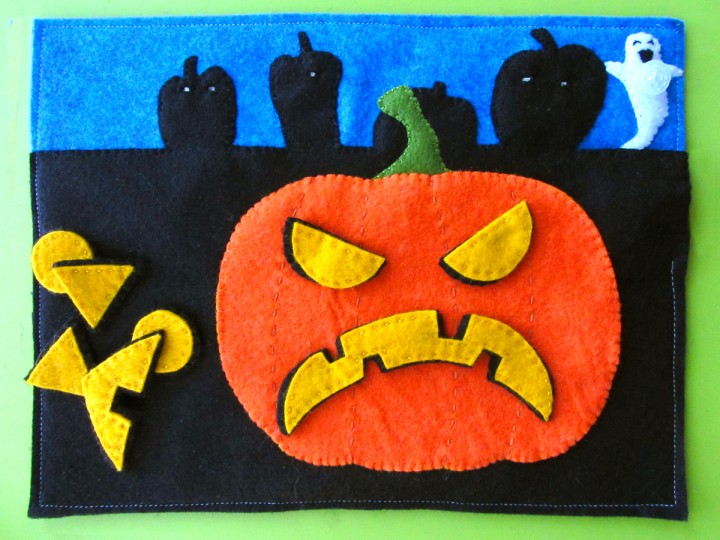
If you aren’t feeling up to the LEDs. this page works great without them. The main activity is a create-your-own jack-o-lantern face with pieces that hide inside the pumpkin.

This is the first in a series of pages I am doing for all 4 seasons. I’ll be doing one regular page and one holiday page for each season.

The beautiful felt for this page is provided by American Felt and Craft. See that beautiful aqua blue with swirls of cobalt it it? When I received samples of their newest colors, I HAD to change my background for this page to Pool Party. It is the perfect twilight sky color. It reminds me of when the sun has just barely set on Halloween night and you go out on the porch to light the candles in your jack-o-lanterns. Perfect. AF&C is having a giveaway on their Facebook page. Hurry and check it out!

What I used:

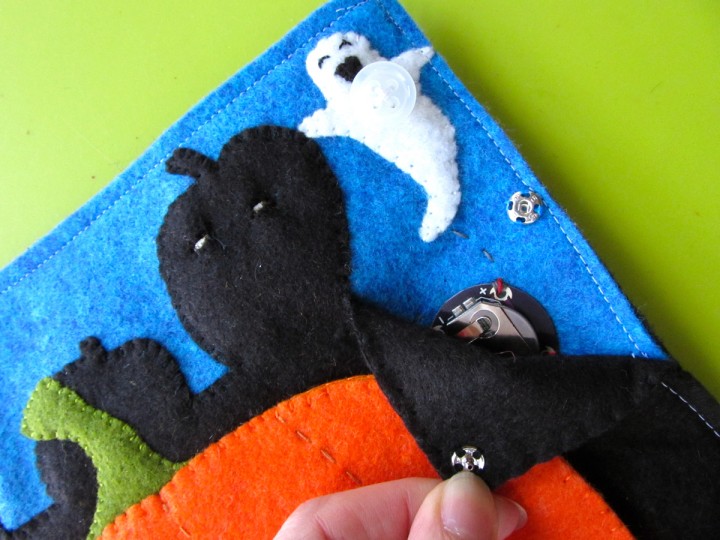
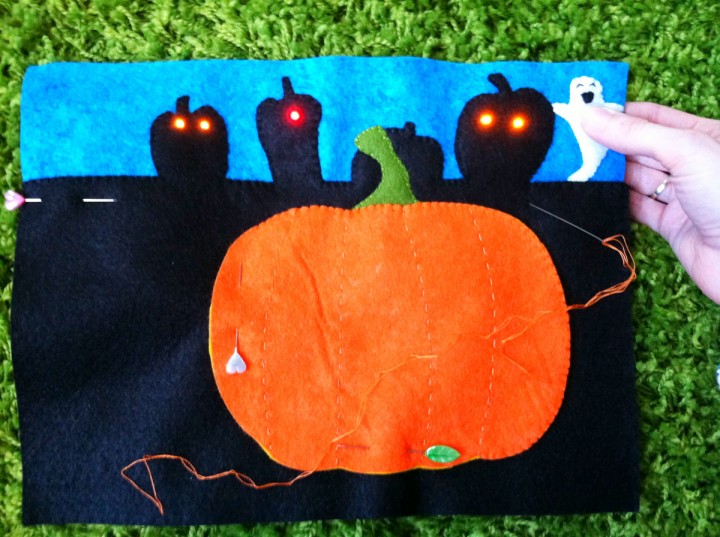
Start by cutting everything out. Lay the pumpkin silhouettes at the top of a full black sheet of felt and cut away the negative space above them. (See photos.) Pin it on to the blue background, leaving the top loose so you can flip it down if you are adding the wiring and LEDs.

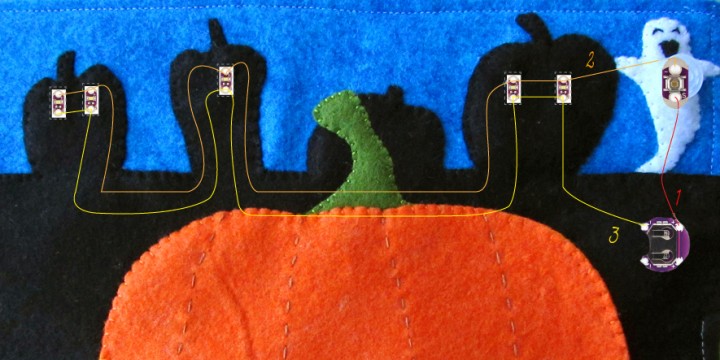
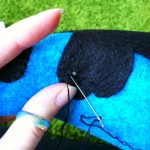
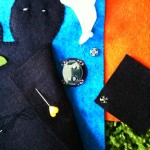
E-Sewing: Start by basting your battery holder in place as shown under the black felt near the edge of your page. Thread your needle with conductive thread and tie a knot in the end. 1. Come up through the top + (positive) hole and make several strong stitches through it. Using the white ghost shape as a guide, do a running stitch up to where the button will be (so that the stitches will hide under the ghost.) Stitch several times through the button board as shown. Tie off  your thread with a knot, making sure the tail is short and can’t touch other threads. 2. Start a new conductive thread and make several stitches through the other hole of the button board. Stitch a running stitch over to the + hole of the first LED and make several stitches in the hole. Continue the + (positive) thread as shown until you’ve gone through all the + holes in a chain. Tie off with a knot and trim the tail. 3. Start a new conductive thread and make several stitch in the top –  (negative) hole of the battery holder. Running stitch over to the negative hole of the first LED and make several stitches. Continue the – (negative) thread as shown until you’ve gone through all the + holes in a chain. Tie off with a knot and trim the tail. 4. Insert a battery into the holder and test the button.

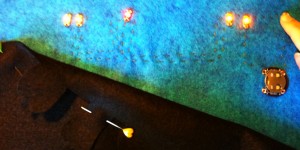
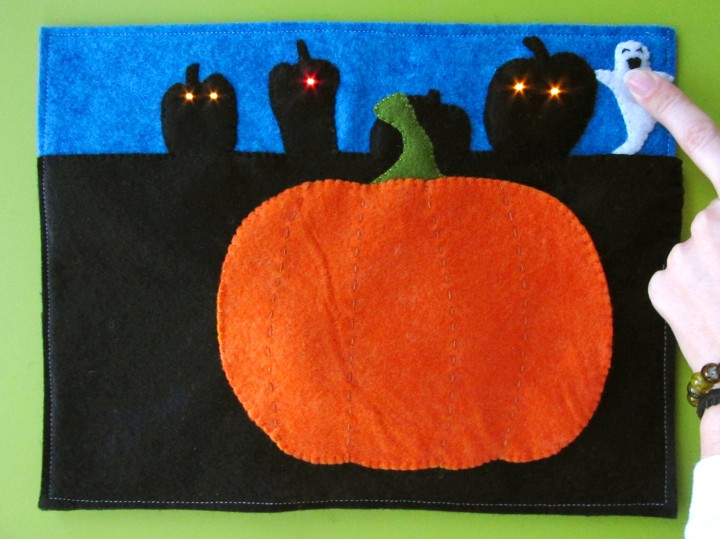
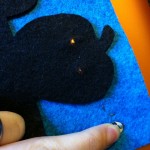
Pumpkin Silhouettes: Lay the black pumpkin shapes down over the LEDs and press the button to see where they are. Cut tiny rectangles for the LEDs to shine through. Stitch around the holes to fortify them, and stitch the short sides of the hole down to the page so the holes don’t move out of place. Stitch around all the pumpkins, but leave the straight section between the far right pumpkin and the edge of the page unstitched.


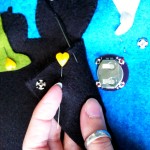
Cut a square of felt to be the lining of the little flap you left unstitched over the battery holder. Add half of  snap to the edge of the page (leave room for the edge seam) and add the other half to the lining. Sew the lining in using a blanket stitch on the two exposed edges and baste along the other two. (I basted by making long stitches on the inside of the flap and tiny stitches on the visible side.)

Ghost Button: Sew a scrap of black felt on to be your ghost’s mouth. I made mine a happy ghost. For his eyes, I made curved stitches. Find a white button with a convex back (so that the back curves out like the bottom of a bowl.) Test placing the button on top of the LilyPad button board and pressing lightly. If it turns on the lights, you have a winner. Sew the button in place on the ghost so it lines up with the button board, then sew around the ghost to secure him the the page.

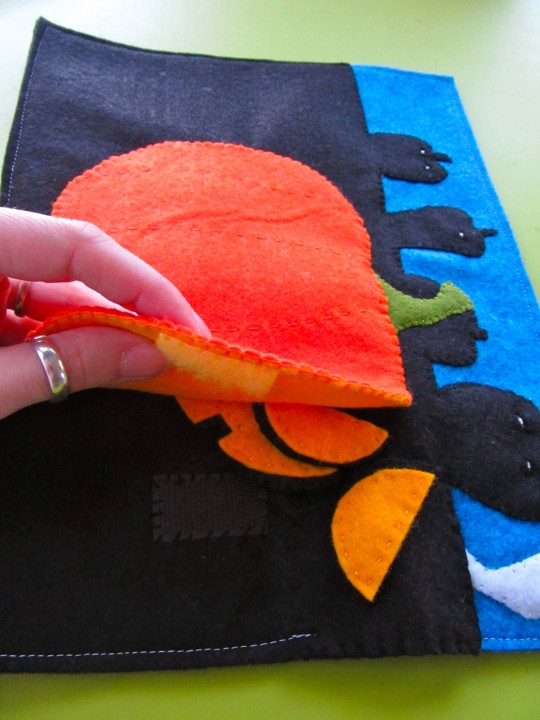
Pumpkin: Sew the stem down to the page. I didn’t bother sewing the base of the stem, as it gets hidden under the pumpkin. Take your orange pumpkin piece and sew a running stitch to indicate all the folds in its shape. I used an orange-brown thread. Sew some yellow hook & loop tape to the inner yellow pumpkin piece (see the pocket photo below.) Pin the two layers together and sew a blanket stitch along the outside of the far right segment of pumpkin. (You’ll be sewing the opening of the pocket. Mine went from the bottom of the far-right fold line to the top of it. Pin the pieces to the page and sew around the rest attaching it to the page as a pocket. Sew some black hook & loop tape down to the page so it lines up with the yellow.

Jack-O-Lantern Pieces: For each jack-o-lantern piece, I sewed the yellow shape down to some black felt using a running stitch. Cut out around the shape so that the black is a bit wider than the yellow. Cut another piece of black felt to match and sew it on as a backing.


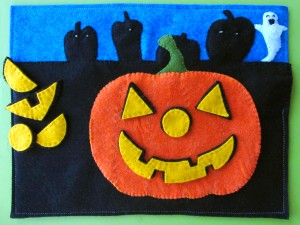
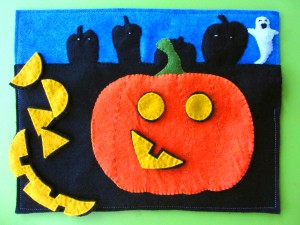
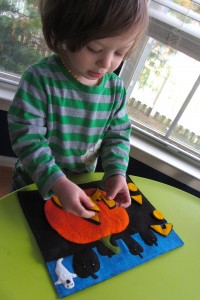
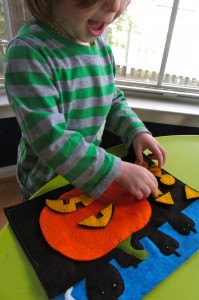
Jax adores this page and really loves making different emotions with the face shapes. He spent a whole bedtime routine the first night saying “He’s mad!!” and laughing hysterically over his memory of the smile turned upside down. You could add shapes of your own. There is plenty of room in the pocket!


The Good Stuff

I’m excited to announce a really great giveaway! I reached out to SparkFun recently because I think e-textiles are a really great match for quiet books. My next page will be very interactive and provide feedback to the child while they play. SparkFun has generously offered up three $50 gift certificates to their online store. (You will need to have at least $50 pre-tax and pre-shipping in your cart for the code to work.)

To enter, leave a comment on the blog post below. Make sure you include your email address in the right field so I can contact you if you win.

The Boring Stuff: NO PURCHASE NECESSARY. Sweepstake is open to those age 18 and older. Entries must be received between 12:01am 10/24/2012 and 12:01 10/31/2012. Three (3) winners will be chosen on 10/31/2012 and will each win one (1) $50 code for sparkfun.com. The codes require that you have at least $50 pre-tax and pre-shipping in your cart to work. International shipping charges and fees may apply. See the SparkFun website for details. The number of eligible entries received determines the odds of winning. If a potential winner forfeits or does not claim the prize, the prize will be re-awarded, at the sweepstake host’s sole discretion. All prizes will be awarded. Neither Imagine Our Life, prize sponsor SparkFun nor their affiliates will have any liability whatsoever for any injuries, losses or damages of any kind caused by any prize or resulting from acceptance, possession, use and/or misuse of any prize or participation in this promotion. Acceptance of a prize shall be construed as the winners’ consent to having their first name and last initial posted on the sponsor’s site following the contest duration. VOID WHERE PROHIBITED BY LAW.

Good luck! If you sew this page, with or without the LEDs, please send a photo or post it on the Facebook page. I’d love to see it!