Tag Archives: Patterns

Dollhouse Quiet Book – Cover & Assembly

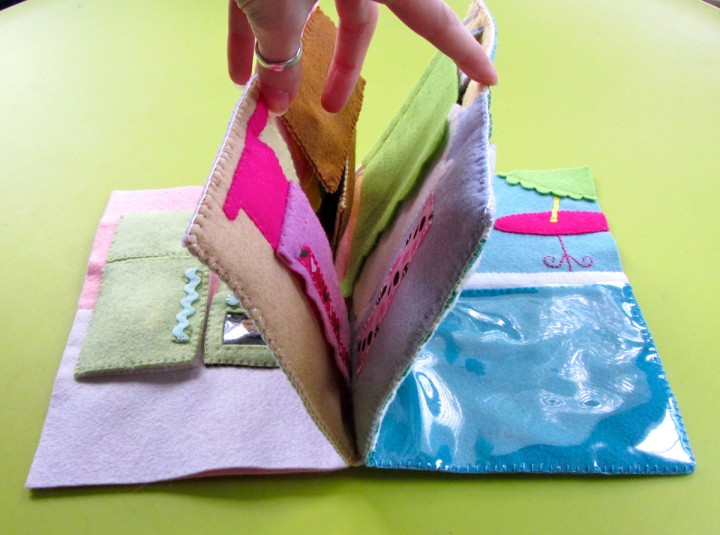
My dollhouse quiet book is complete! It turned out so sweet and cute. I really enjoyed doing a girlie project! Click an link below to go to the other pages of the book for patterns and instructions.

There is no pattern for the cover, but I will go over everything I did. Leave a comment here or on the Facebook page if you have any questions!

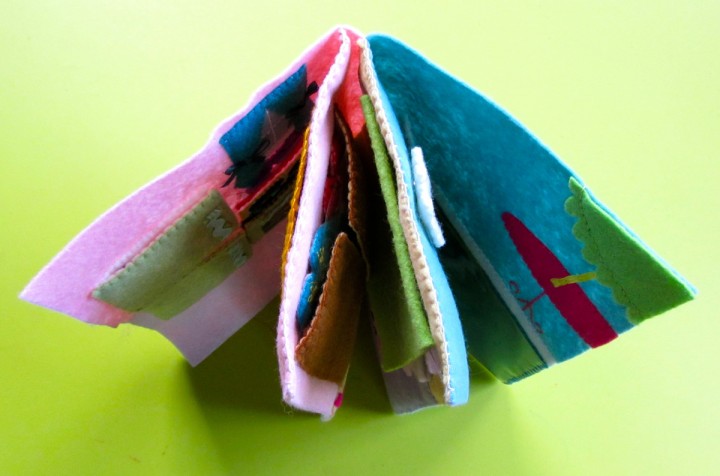
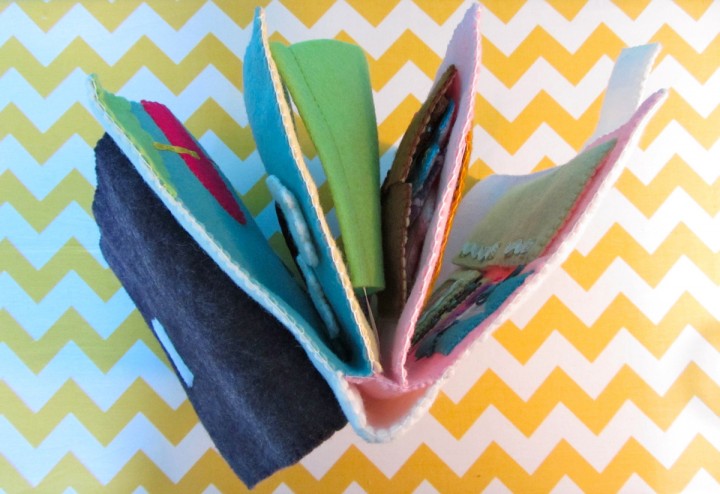
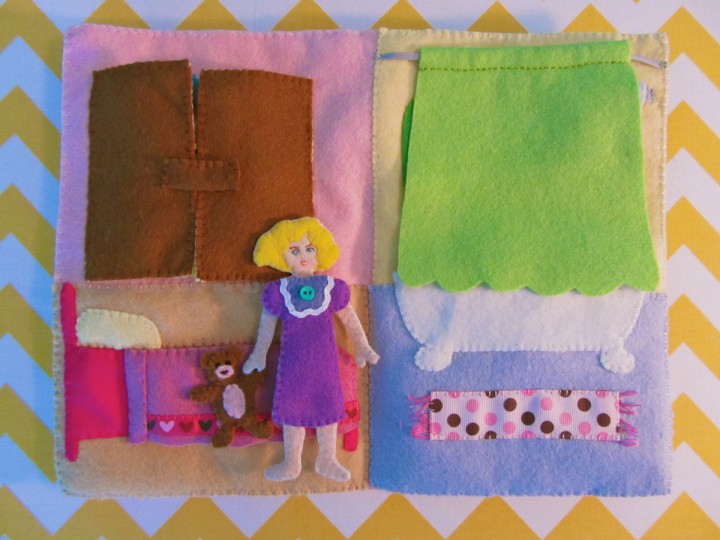
Stack the three folded pages like a book. I did mine: kitchen, bed/bath, then the backyard.

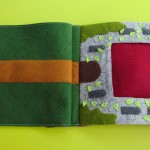
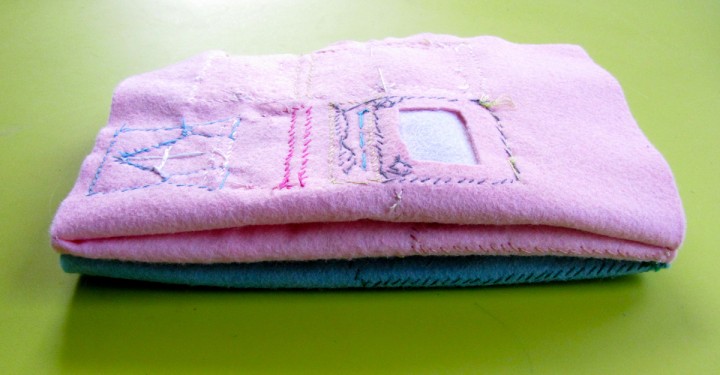
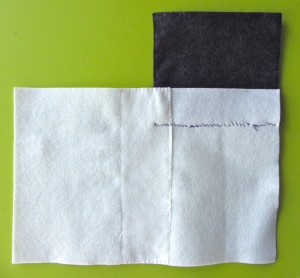
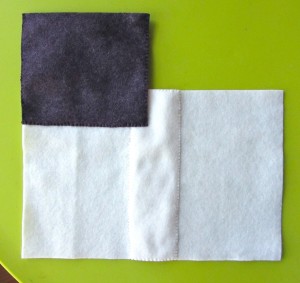
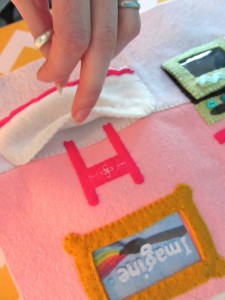
Sew together the two center pages along three sides (top edge of book, outer edge and bottom edge.) Don’t go all the way to the center of the middle page with your stitching (see photo above), but leave a gap so the book can easily fold closed.

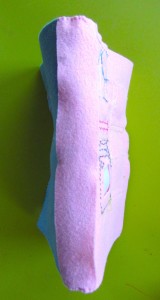
Another view of the center pages sewn.

Do one last step to prepare your pages to be covered. Cut a strip of felt to cover the spine of your book. I used pink, since many of my pages use that color.


Sew the spine along the top and bottom edges. I also added a couple stitches on either side of the spine in the center to hold it in place.


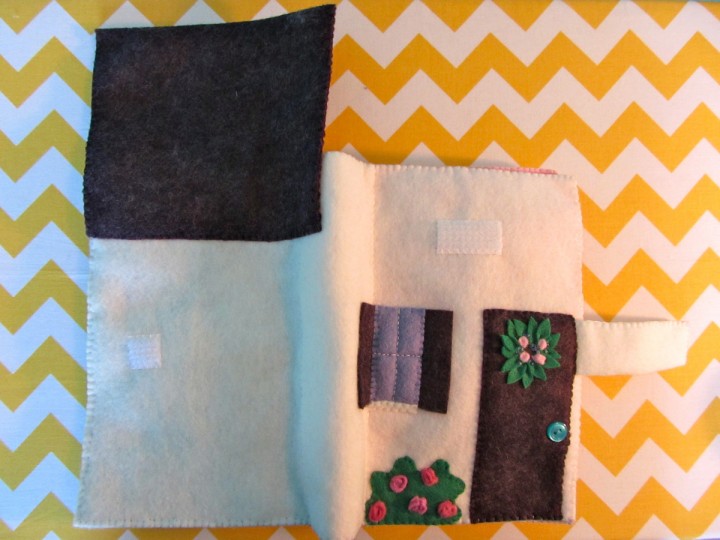
inside of cover – outside of cover

Cut two 8.5″ wide x 9″ high pieces of felt in your cover color. Overlap them so they fit perfect around your closed book. I pinned one to the front and one to the back, then overlapped them and pinned. Sew both sides of the overlap. I had the front side of my stitching on the outside of the cover, even though one of the overlaps is on the inside.

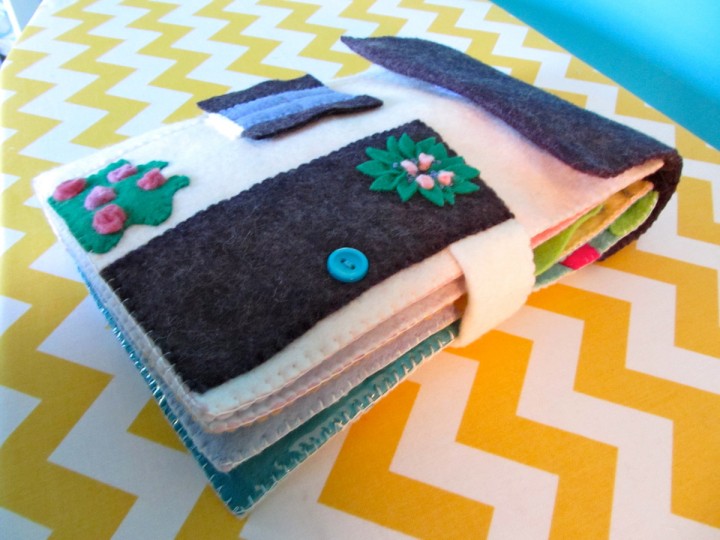
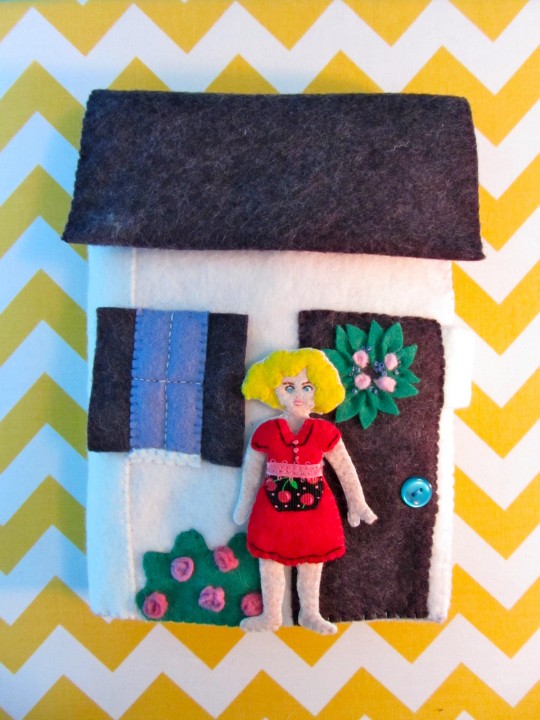
Take a 12″ x 6.5″ piece of felt in your roof color and fold it in half (to 6″ x 6.5″) The fold will be the part of the roof that hangs down over the door when folded over the top of the book. I sewed my Velcro on last, careful to go through one layer of felt, but you can do it before sewing the roof. Sew the sides of the roof closed and sew the third side down to the cover as shown above.

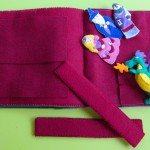
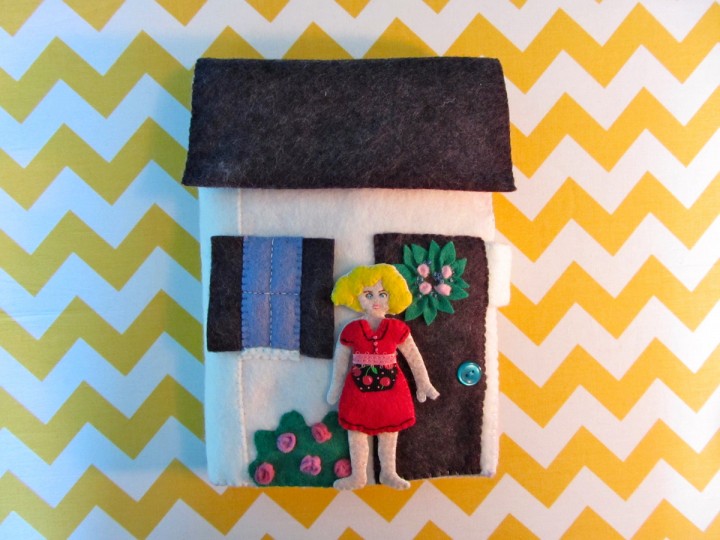
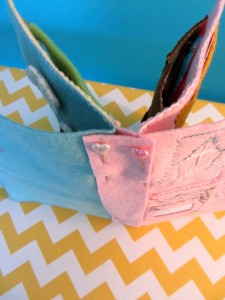
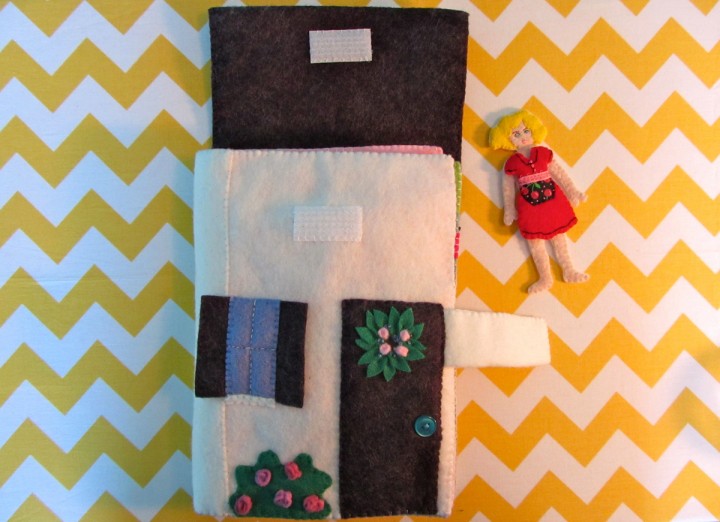
I added another closure – a little strap in my cover color  (2 layers of felt with Vecro) that wraps around the open pages and Velcros closed. Normally this kind of strap is attached to the back, but I didn’t want to have a square of Velcro on the front of my book. I pinned mine in place then sewed a door down over top of it. My door was 2.25″ wide x 5.5″ high to be the right scale for the doll. A vintage button works great as a door knob.

I made a wreath on the door by cutting little leaf shapes and sewing them down in a circle. I cut tiny pink trapezoids then folded the points in and sewed them down into rose buds. I added some periwinkle French knots.

To make a shuttered window, cut your window shape, then cut the shutter color twice as wide. Center the window on the shutter felt and sew through both to attach it to the cover. The shutters hang free. I back stitched the window panes and added a strip of white for the window sill.

I added a green blob to make a rose bush. Cut 1″ strips of felt about 1/4″  thick and tapered at both ends to make the roses. Stitch the point at one end down, then fold and twist it into a spiraling circle shape, stitching it down as you go.

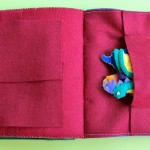
Sew the cover to the first and last page similar to how you sewed the inner pages. Stop sewing along the top and bottom when you get to the spine. The cover will bubble out when the book is open, but fit snug when folded closed.

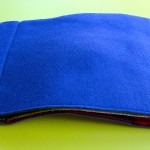
You could probably add a handle along the center of the roof piece if you wanted to. The cover turns the whole book into a sweet little house and holds the book snug and closed.

Welcome!

This quiet book is a lot of work (aren’t the all??) but SO worth it! You end up with hours of adorable, girly fun. I admit to having fun with it! A lot of the pieces are tiny, so this is for the 3 and up crowd, but it is a homemade treasure that will stay in the family for years.

I hand sewed this entire book with wool blend felt provided by American Felt and Craft. One a project like this that you want to stand up to many, many hours of playtime, it is absolutely worth the extra expense of wool felt. The colors I used for this cover are: white, wild blueberry, jade, forget me not, pink tutu, orchid and sweet pea. AF & C has some brand new delicious looking colors of felt in that I can’t wait to try!

If you sew this quiet book, I’d love to see photos! Email me or post them to our Facebook page. Happy sewing!

Quiet Book Dollhouse – Bed & Bath Page


This page is a part of my Dollhouse mini quiet book. You can find the instructions for the doll and the kitchen page here, and the backyard page here. In the next couple of days I will post the cover! The book is designed on 12″ w x 9″ h felt sheets that will fold in half to 6″ w x 9″ h when closed.

All the felt for this mini book has been provided by American Felt and Craft. I am using their wool blend felt, which cuts like butter and has been holding up so much better than the craft store recycled felt I’d been using. If it is in your budget, it is absolutely worth upgrading for a long-lasting handmade item such as a quiet book. They have some new colors of felt in, and I can’t wait to try them!

What I Used: The pattern, felt (in pink tutu/pink, rainy day/blue-gray, toffee/tan, sunshine/light yellow, soap sud/pale gray, hot pink, whitelimeade/lime green, doe/brown, royal purple/purple, buttercream/pale yellow, sweet pea/pinkish-purple, gray flannel/gray and bisque/flesh), felt scraps (I used rubber ducky/yellow and orange juice/orange for the duck, and forget me not/periwinkle for the front of her nightie.), clear vinyl, white snag-free Velcro, size 1 sew-on snap, 3 small buttons (red and blue for the taps, a mini aqua one for the nightie.), ribbon scraps (many blues for the water, wide polka dot for the mat, hearts for the bed spread, silver for the curtain rod, pink for the towel and robe and white ric-rac for her nightie.), sequins, white snag-free Velcro and a child-safe mirror.

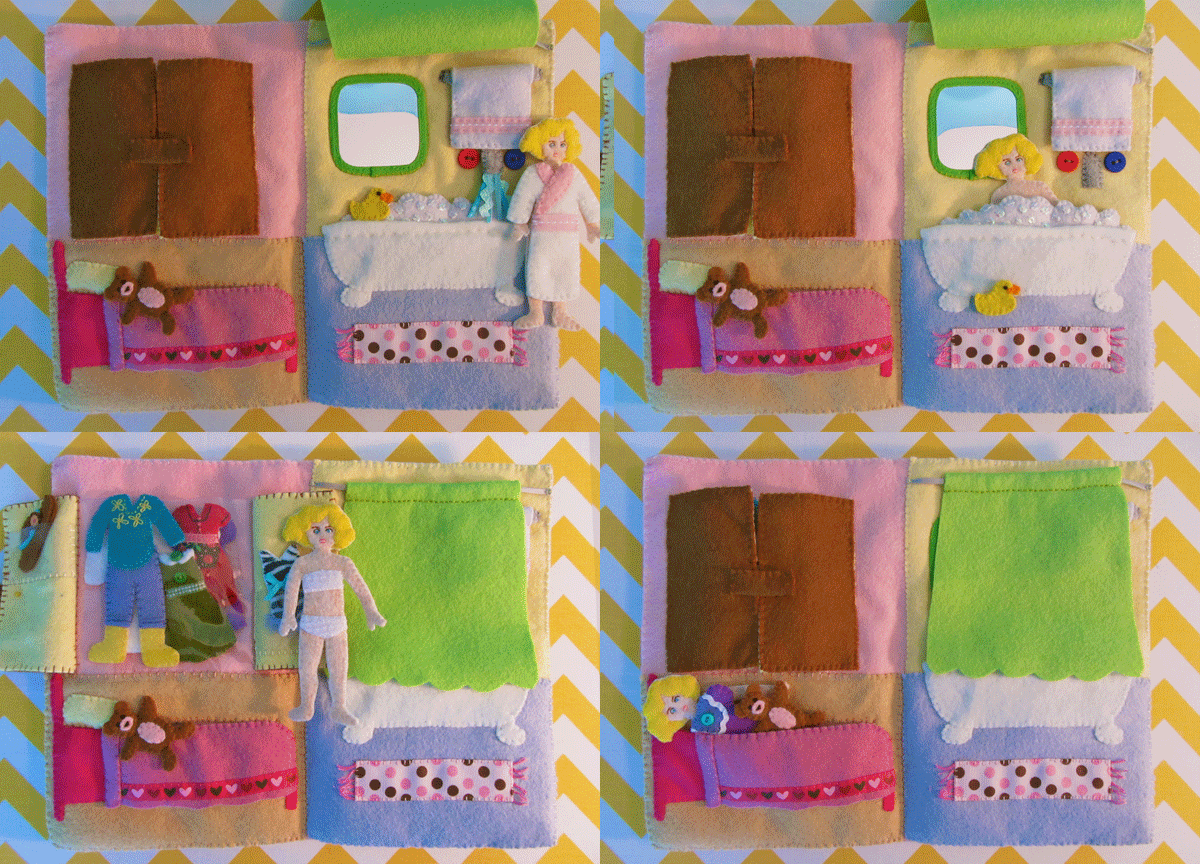
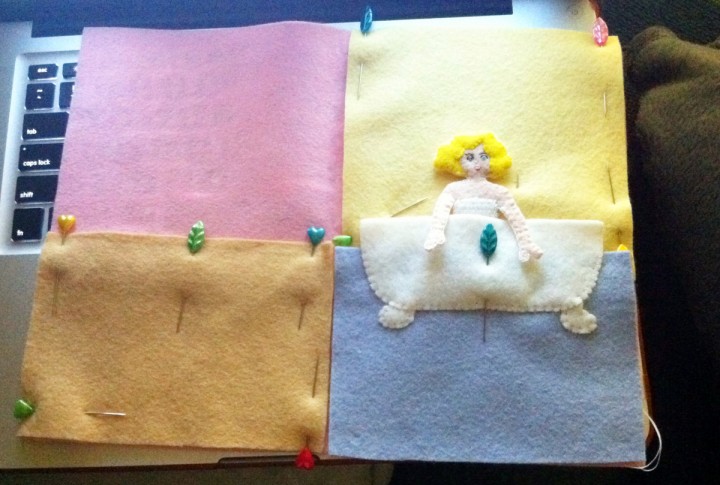
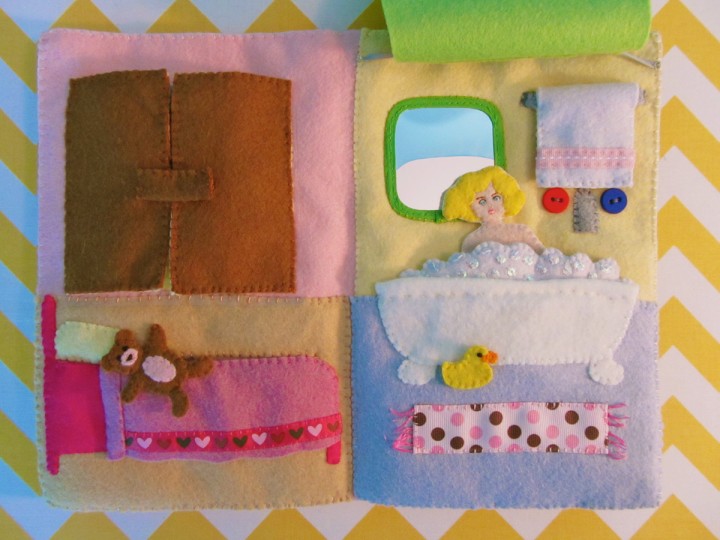
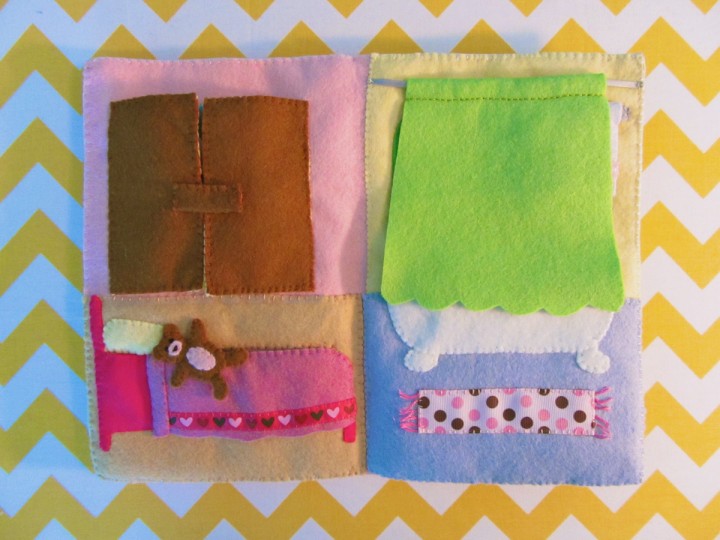
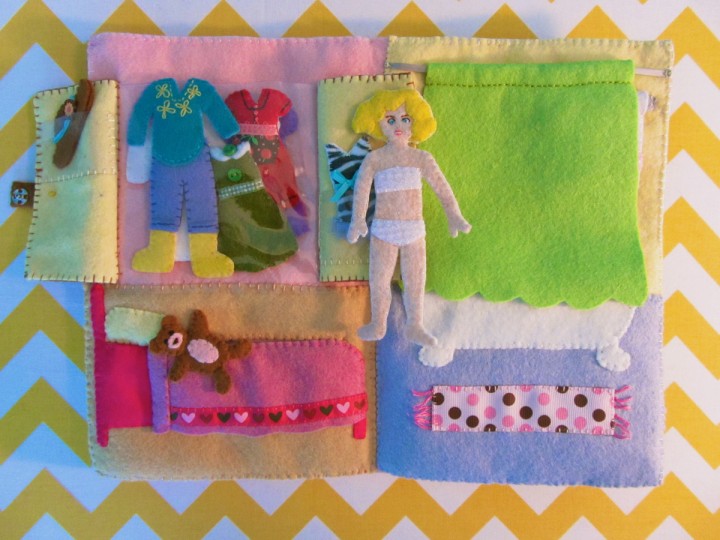
Backgrounds: The background of the whole 2-page spread is a full sheet of pink felt. I cut two rectangles of felt to be the floors (one tan and one blue.) I also cut some light yellow to give the bathroom side a different wall color. On the bathroom floor piece, I sewed the tub and tub feet down so there was some overlap (as shown above.) I didn’t sew it down to the background yet, though. I sewed down the yellow wall and just pinned everything else in place. While sewing the yellow wall, I sewed in a length of silver ribbon about a half inch down from the top. This will be for the shower curtain later. Leave it loose so just the ends are sewn into the sides of the yellow background piece.

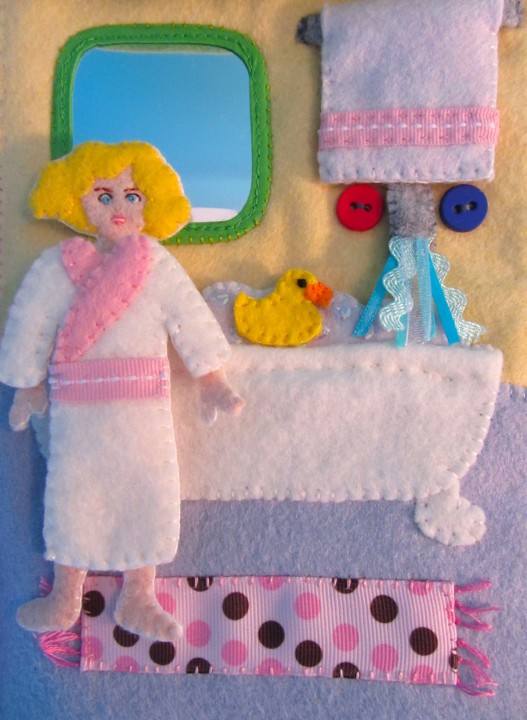
Bath Tub: To finish the bath tub, I cut out the two sides of the bubbles and sewed sequins on to the front. Mine were Darice “Crystal Iridescent” that I bought at the fabric store. I sewed both sides of the bubbles together and layered it behind the tub. Using the dashed line on the tub pattern piece as a guide, I folded the extra tub fabric backwards to make a rounded lip. Then I sewed through the tub, the tub fold and both layers of the bubbles to attach them all together.

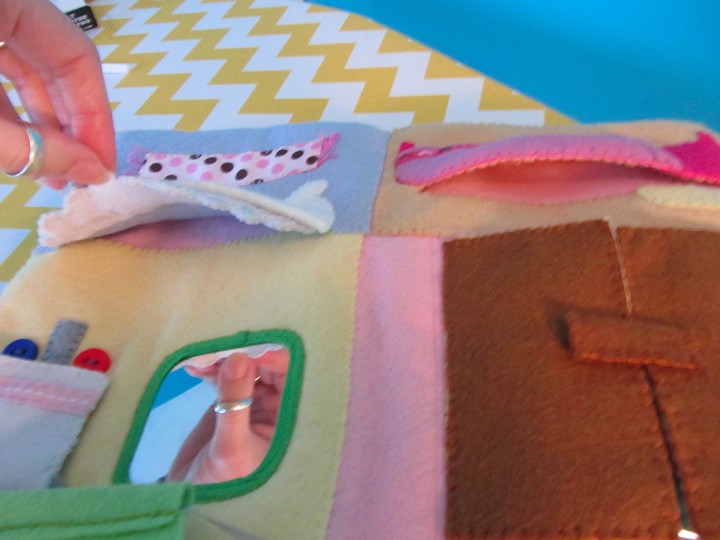
Showing the floor pockets

Once that was done, I sewed down a ribbon as a bathmat and sewed the floor down to the background along the sides and bottom (also sew the little bits of floor seen to the left and right of the tub). This turns the tub and floor into a big pocket so the doll can fit in her bath.

Bath Fixtures: Sew one of the faucet pieces to the wall, and sew the two buttons on a taps. With the other two faucet pieces, sew them together with different scraps of blue ribbons sticking out one end to look like water. Lay the faucet with water over-top of the one on the page, and stitch it down just at the top so it can flip up out of the way. It will be hidden under the towel while not in use.

Sew the towel bar by folding it and sewing the open edges together. Decorate the two towel pieces with some ribbon and sew the front and back together. Wrap the top of the towel around the bar and sew it on. Position the towel/bar on the page so that it covers the second faucet and water stream and sew the sides of the towel bar down.

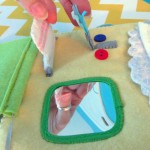
What really adds a lot is the little mirror. I hunted the thrift stores for fabric baby books and snagged the mirror out of the one I found. I left the green fabric edging on mine and chose my shower curtain fabric to match. However, you can make your own mirror. Here is a tutorial about it.

The shower curtain is one layer of felt that is folded at the top and sewn around the silver ribbon. Because felt is thick, the curtain doesn’t slide/bunch on the ribbon like a normal curtain. It just flips up like a peek-a-boo panel. You could hem some regular fabric to use as a curtain if you wanted yours to slide.


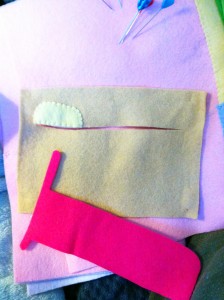
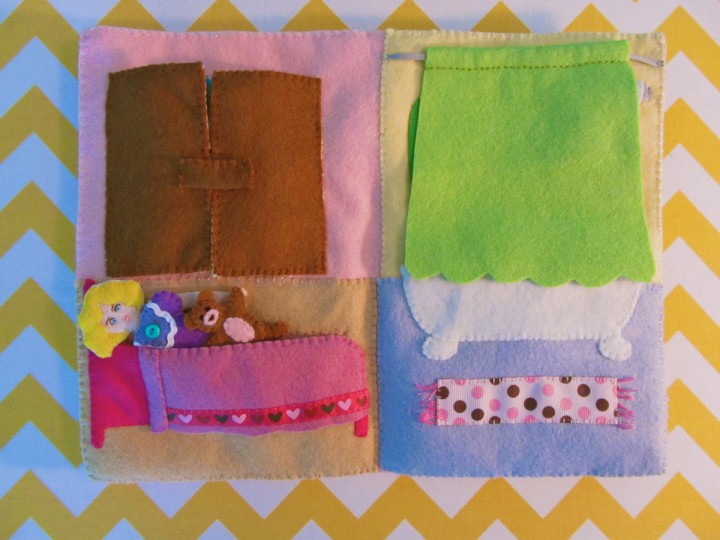
Bed: I cut a slit in the tan floor piece to match the length of the top of the bed (stopping at where the bed curves at the foot.) I sewed the pillow on to the upper left of the slit (see the above photo.) The bed gets sewn down below the slit (I pinned mine at first so I could sew through both the bed and the blanket at the same time.) I decorated the bed spread with a ribbon and sewed the left side into a fold. I sewed the blanket on to the bed, leave the wavy bottom hanging open. When the bed was all sewn to the floor, I sewed the floor down to the background. The open slit makes a pocket for the doll to go in when she lies in bed.

Shown with clothes from the other pages

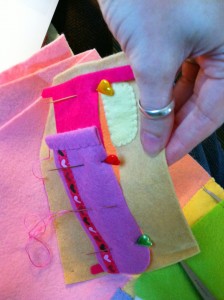
Wardrobe: For the wardrobe, I cut two pieces of felt for each door (I used brown on the outside and pale yellow inside.) I also cut some clear vinyl about half the size of each door and sewed them into small pockets to hold the doll’s hat and toys. On one door, I sewed on a folded strip of felt with a snap. On the other, I sewed the other half of the snap. This holds the doors closed.

To assemble the wardrobe, I cut a large square of clear vinyl (the size of the two doors closed) and sewed it down to the page as a pocket. Then I sewed the doors on to each side.

Extras & Clothing:

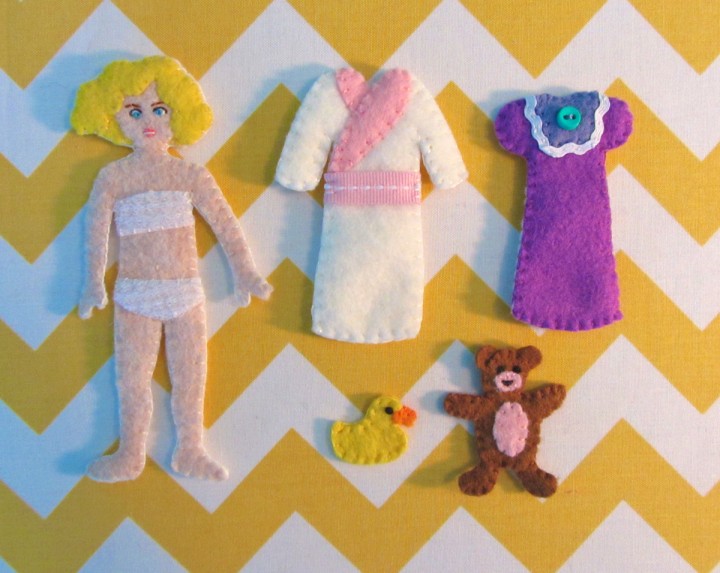
On the back side of the robe, I sewed two bits of snag-free Velcro where it would match up with her underclothes. On the front, I sewed down the two collar pieces and pinned on a ribbon belt. When I sewed the front and back together, I made sure to catch the ends of the ribbon belt in the seams.

For her nightie, I decorated the front with the contrasting felt, then added ric-rac trim and a mini button. I sewed Velcro on the backing piece and then sewed the two halves together.

The rubber ducky has French knot eyes. I sewed the body pieces together, then sewed the beak on.

The teddy bear has pink ovals sewn on for his muzzle and tummy. I added a satin stitched nose and two French knot eyes. The ears are each one thickness of felt that I sandwiched between the two sides of his head while sewing him together.

I can’t decide which “room” in this dollhouse is my favorite! I love them all…

Night Night!

If you sew the dollhouse quiet book, I’d love to see it! email me photos or post them on the Facebook page!

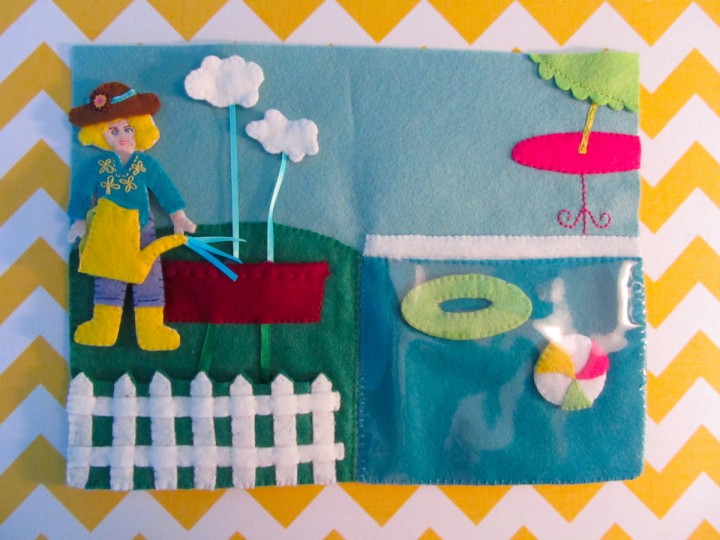
Quiet Book Dollhouse – Backyard Page

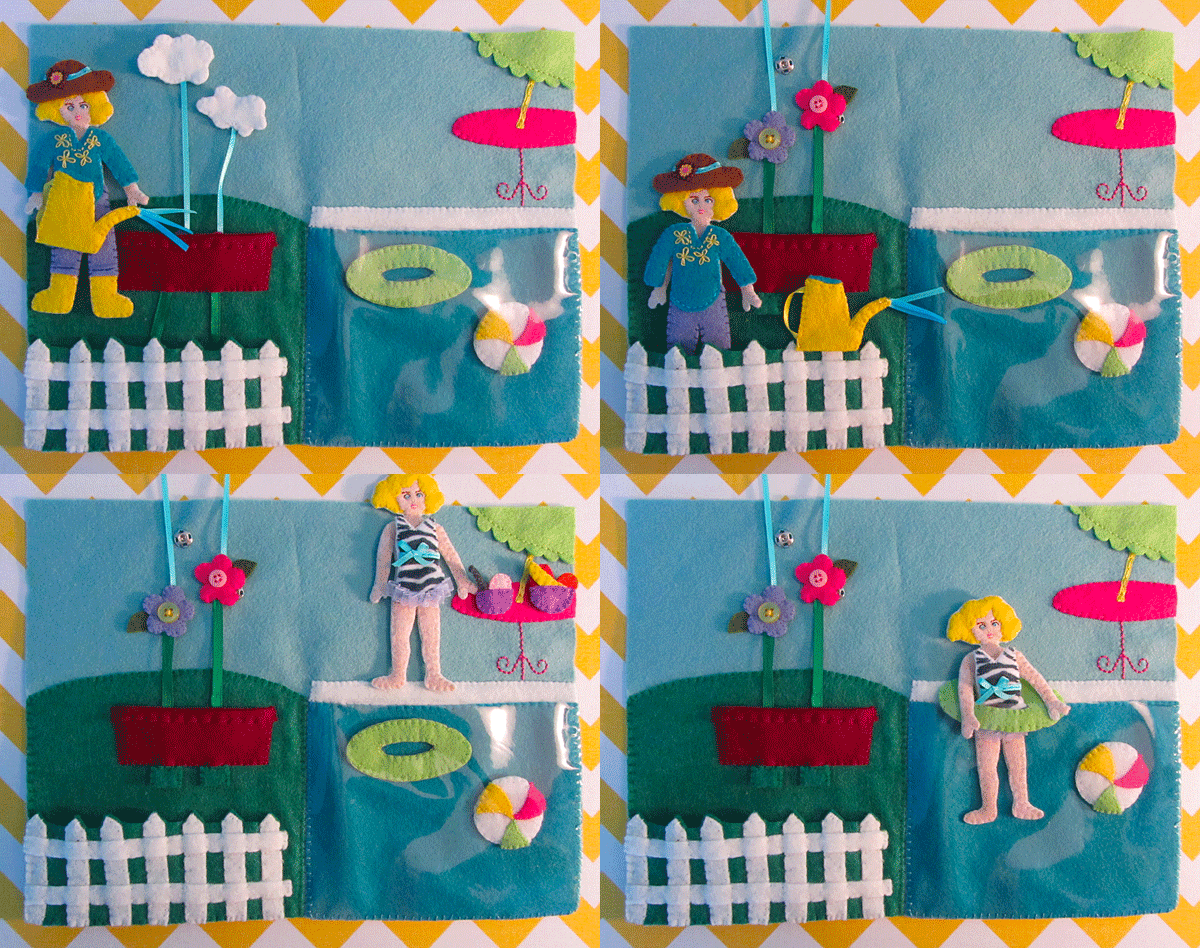
This page is a part of my Dollhouse mini quiet book. You can find the instructions for the doll and the kitchen page here. Still to come are the bedroom, bathroom and the cover/construction. The book is designed on 12″ w x 9″ h felt sheets that will fold in half to 6″ w x 9″ h when closed.

All the felt for this mini book has been provided by American Felt and Craft. I am using their wool blend felt, which cuts like butter and has been holding up so much better than the craft store recycled felt I’d been using. If it is in your budget, it is absolutely worth upgrading for a long-lasting handmade item such as a quiet book.

Shown with food from the kitchen page.

What I Used: The pattern, felt (in ice/light blue, soap sud/pale gray, jade/green, peacock/aqua, hot pink, white, rubber ducky/yellow, limeade/lime green, doe/brown, forget me not/periwinkle, beet/dark red and bisque/flesh), felt scraps (I used a zebra print craft felt for the swimsuit and cilantro/olive for the leaves), clear vinyl, white snag-free Velcro, size 1 sew-on snaps, 2 small buttons, thin blue and green ribbon, white snag-free Velcro and ribbon scraps.

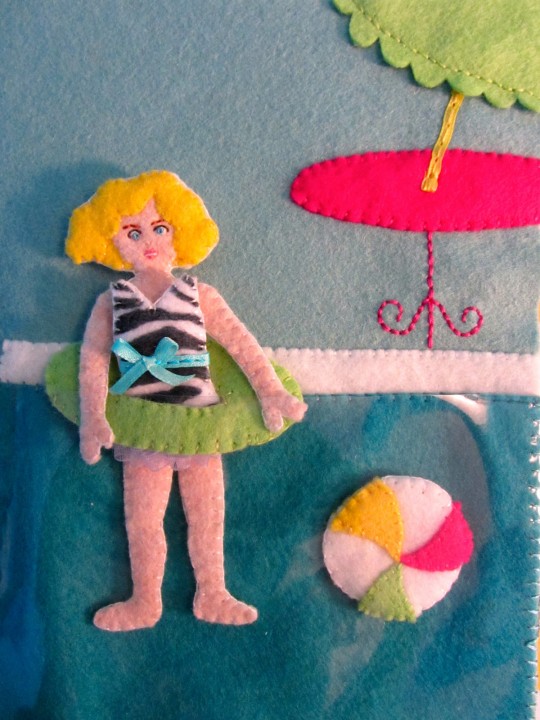
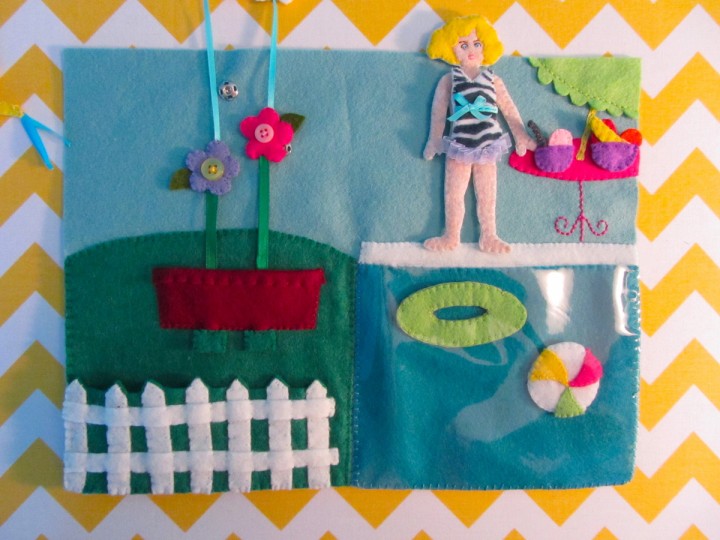
Pool Background: I started by cutting a strip of white and sewing it down along the top to make the edge of the pool. I took a large rectangle of peacock blue and sewed it down along its top edge, overlapping the white. I cut a piece of clear vinyl the same size as the blue pool water and sewed it down along the sides and bottom, going through all three layers (vinyl, blue felt and background felt), making a clear pocket.

Patio Table: I sewed the hot pink table top down, then used a back stitch to sew the legs. I took a scrap of thin, yellow ribbon and sewed it down to make a pole for the umbrella. The umbrella was sewn down along the bottom curve, letting the scallops hang free.

Pool Toys: The inner tube is just sewn back to front. For the beach ball, I sewed the colored segments to each side, then sewed the two sides together.

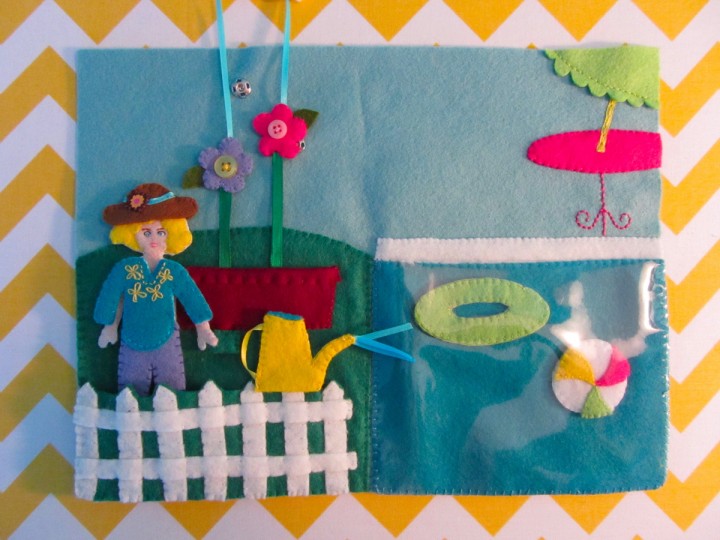
Garden Background: I cut some jade green felt into a hill and sewed it down to the left side of the page to make the ground. I sewed the fence pieces down to a rectangle of green felt, then trimmed the green from between the pointed tops of the fence posts, as shown above. I sewed the fence into a pocket on the bottom of the page. The doll can stand behind the fence, or you can store the page pieces there.

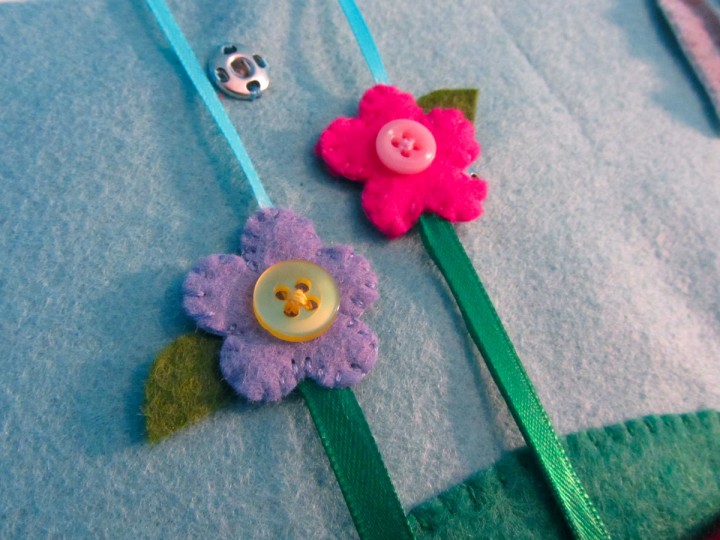
Flowers: For each flower, I started by sewing a button to the front piece and a leaf to the back piece. I cut two lengths of ribbon – one blue and one green – and had them sticking out of the flower (as shown above) when I sewed the fronts to the backs. At the end of the green ribbons, I sewed on folded rectangles of jade green felt.

Planter: I folded the top of the planter down (towards the front) and sewed it down to make a lip. I positioned the flowers and their green ribbons where they needed to be on the page, and pinned down the planet over top. I sewed along the sides and bottom of the planter, but made sure to leave holes where the ribbons stuck through the bottom. This is so you can pull the green felt tabs to pull the flowers back into the planter.

Clouds: The clouds have snaps sewn to the back pieces. I pinned the tops of the blue ribbons in between the cloud pieces before sewing fronts to backs. I pulled the flowers all the way into the planter then marked where the other halves of the snaps needed to be to hold the clouds in place. I sewed them down to finish the clouds.

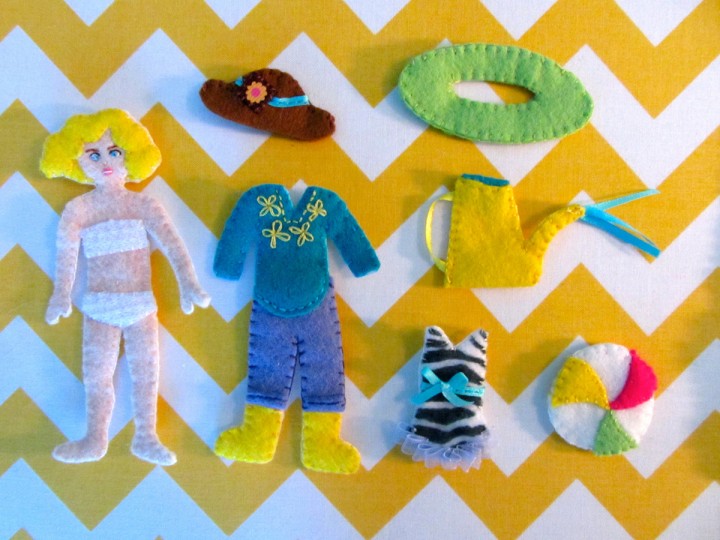
Watering Can: The watering can is made by sewing the fronts and backs together with the following things sticking out: A bit of yellow ribbon to make a handle, three bits of blue ribbon coming out of the spout and a scrap of blue felt in the top to make the water.

Find directions for the doll on the kitchen page

Swimsuit: The swimsuit  has a ribbon and bow sewn to the waist of the front piece to make a belt. At the bottom, I took a length of ribbon and sewed it down in loops to make a ruffle. I switched the direction of the the loops halfway through. I sewed bits of snag-free Velcro to the white back piece then sewed the front and back together.

Garden Outfit: I started by sewing bits of Velcro to the back of the white back piece. I then sewed the yellow boots to front of it. I sewed down the pants, folding up the cuffs and sewing them in place. I decorated the shirt with some back stitch and daisy stitches before sewing it down.

Garden Hat: I sewed thin blue ribbon across the brim of each side of the hat. I took a scrap of flower ribbon and folded the ends under to make a little square with one flower motif on it. I sewed one of those down on to each side. I sewed the hat together, leave the bottom open so you can slide it on the doll’s head.

Hope you’ve been enjoying my free quiet book patterns! I love seeing what you’ve done with them. Email me your photos, or leave them on our Facebook page. Stop by tomorrow for a toddler iPad app review and a giveaway of two free app codes!

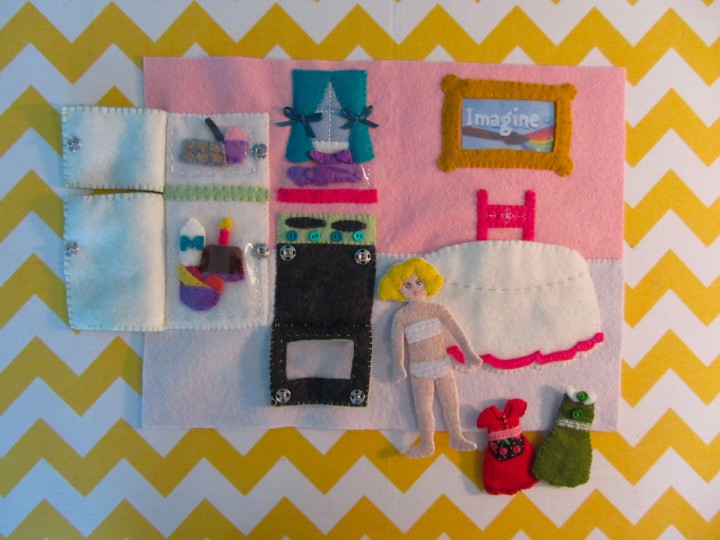
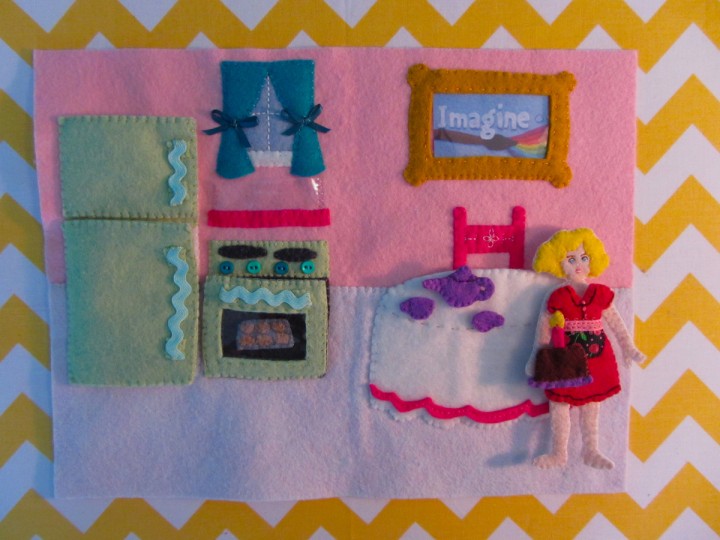
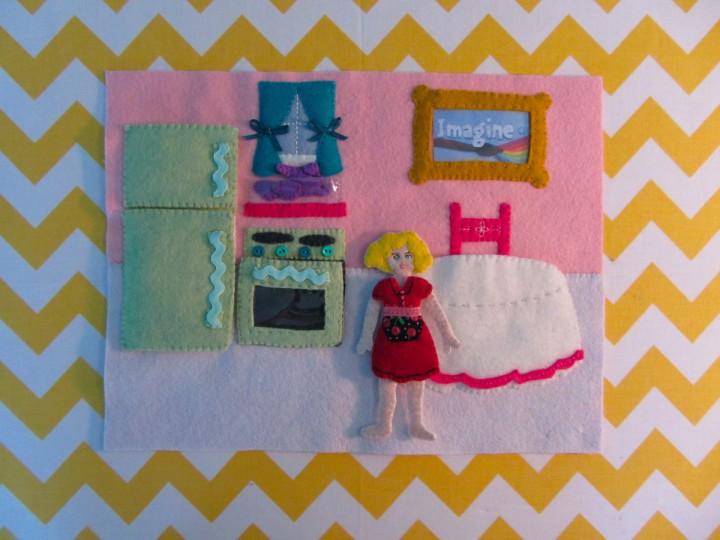
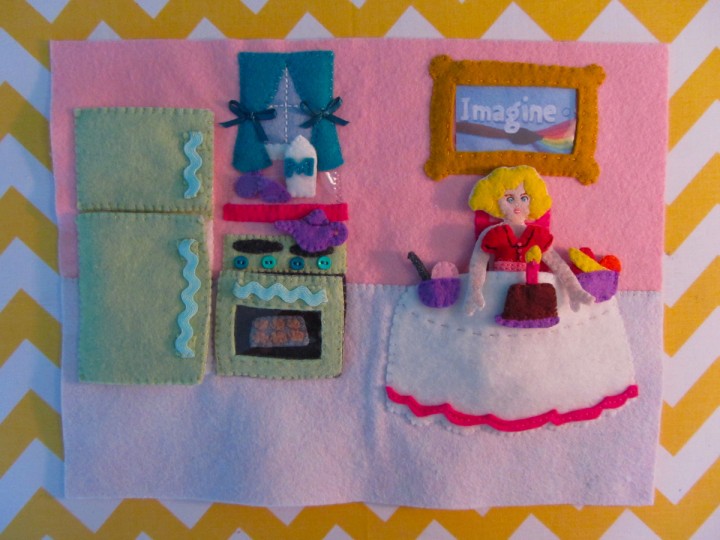
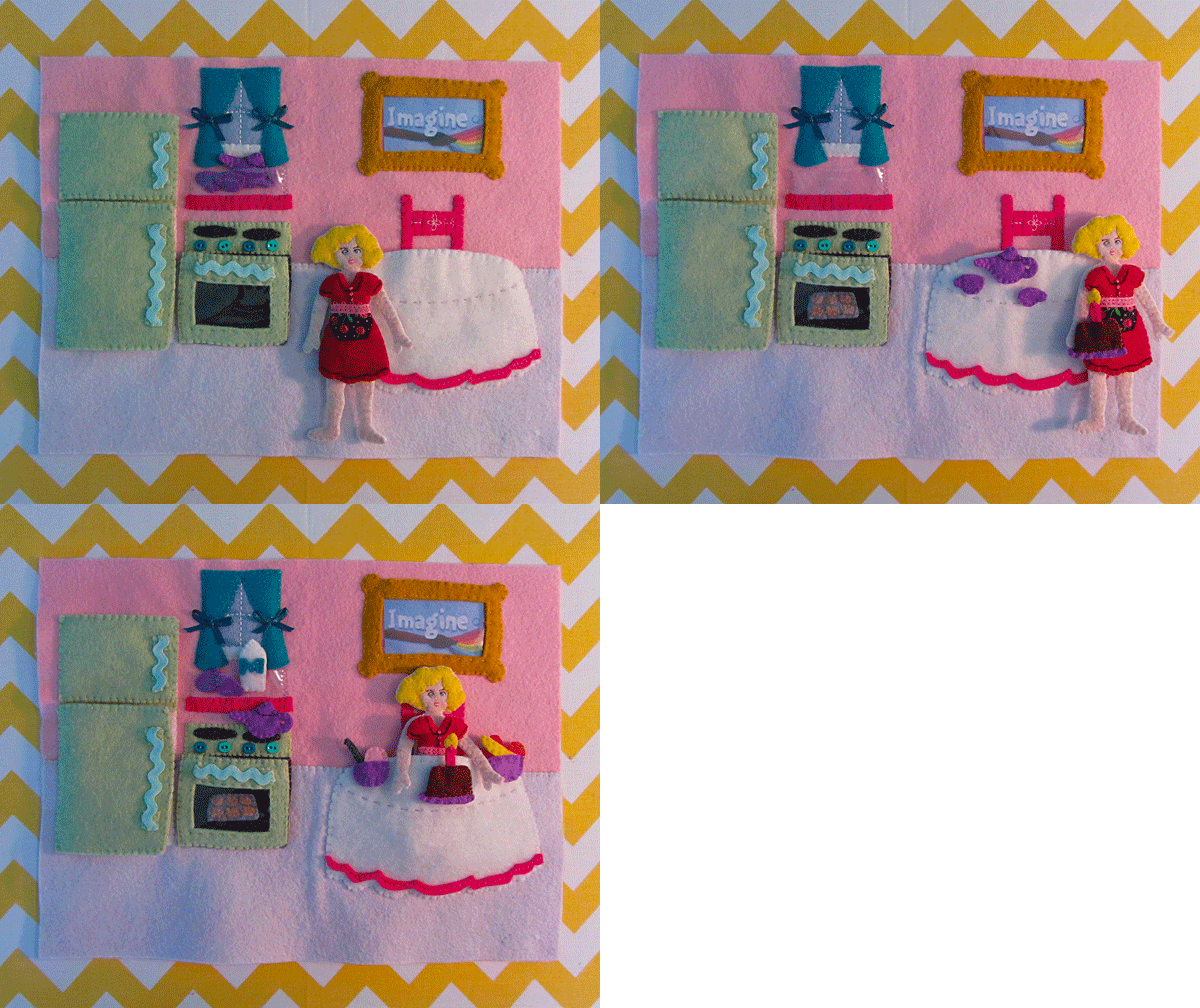
Quiet Book Dollhouse – Kitchen Page

Having a little boy, I don’t often get to do super girly sewing projects. I really wanted to design a dollhouse quiet book, so I decided to go for it!

This page is sponsored by American Felt and Craft, who provided the beautiful wool blend felt. It is such a delight to work with! The feel of it really doesn’t compare to craft felt. If you can afford to spend a little more, I really recommend using wool blend felt. It has been holding up so much better than the acrylic.

You’ll notice from the photos that this page is laid out different than my others – there is no blank area on the side to allow for the binding/grommets. This is because I plan to fold the pages in the center and sew them together as a mini book that is 6″ wide x 9″ high when closed. I will be posting each double page separately, then showing how I bind it all together. You could use the elements from this page to design a regular quiet book page, but you’ll need to rearrange and shrink some things.


The book will contain one felt doll (or possibly two) with Velcro underthings. I plan to make two outfits per double page. They will be stored on the bedroom page, but there will be places to put them on each spread. Here the table is a pocket. This page also contains many little food items that were a great way to use up felt scraps! Because they are tiny, I’d recommend this page for a 4 year old unless you are supervising. The colors I used are all totally changeable, so just think of them as suggestions. I was in love with that green “honeydew” color and wanted to pay homage to the avocado appliances I grew up with.

What I Used: The pattern, felt (in pink tutu/pink, soap sud/pale gray, white, honeydew/spring green, hot pink, salt & pepper/dark charcoal and bisque/flesh), felt scraps (in lilac, gold nugget/gold, peacock/aqua, rainy day/light blue, big apple/red, cilantro/olive green, rubber ducky/yellow, orange juice/orange, chocolate/brown, banana nut muffin/tan and gray flannel/gray), clear vinyl, white snag-free Velcro, size 1 sew-on snaps, 7mm mini buttons, ric-rac and ribbon scraps.

I sewed this entire page by hand, but you could certainly machine stitch some or all of it.

Background Elements: I started by sewing a strip of felt down for the floor. I used “soap sud” which is a white with a pale tint of pink and blue to it.

For the frame hanging above the table, I cut a rectangle of clear vinyl to fit the opening, then straight stitched it onto the back. I sewed the frame to the wall, leaving the top open so you can slide in a photo. (I stitched across the top of the frame just so it would would match the other sides – but it isn’t sewn to the background.)

For the window, I cut a rectangle of light blue and sewed it down with a + shape of white back stitch. I sewed a strip of white to the bottom for the sill, then sewed the curtains on, leaving the bottoms open for volume. I made two little aqua blue bows and sewed them on as curtain ties. I stitched through the knots so they won’t untie.

I added a shelf under the window to hold the tea set. It is just a strip of hot pink felt sewn down over a small pocket of clear vinyl. The vinyl holds the tea set in place while it looks like it is just sitting on the shelf.

Oven: I sewed down the inside of the oven with snaps in the upper corners, then sewed down the stove top above it. I added 4 7mm buttons (from the craft store) as dials and two felt burners. I made the door by sewing the matching snap halves to the upper corners of the inner door felt and sewing some ric-rac to the door front as the handle (I added squares of felt over the ends of the ric-rac to hide where it was sewn on and prevent fraying.) I then sandwiched clear vinyl between both door sides and sewed them all together. I sewed the oven door to the oven along the bottom, making sure the snaps lined up.

Refrigerator: I started by sewing down a white rectangle the size of both doors. I also sewed a strip of the door color down to separate the freezer from the fridge. I cut scraps of clear vinyl and sewed them down into pockets to hold the food. I added one snap for each door. To make the doors, I sewed ric-rac handles to the front pieces the same way I did it on the oven. I sewed the matching snap halves to the white inner door pieces, then sewed the two sides of each together. I sewed the doors down along the left sides, making sure the snaps lined up.

Table & Chair: I started with the chair (half a chair, really.) The table is sewn as a pocket so the doll can “sit” at the table. I added the top portion of a chair to make it look like she’s sitting. I did some decorative stitching, including a daisy stitch in the center. I sewed it down so the bottom would be hidden behind the table. To make the table, I sewed the hot pink trim to the bottom of the tablecloth. I added an extra layer of white felt to the back of the table top (the oval shape) so the bright chair wouldn’t show through. I also added a line of stitching in gray to show the edge of the table. I sewed the table down along the sides and bottom to make a pocket.

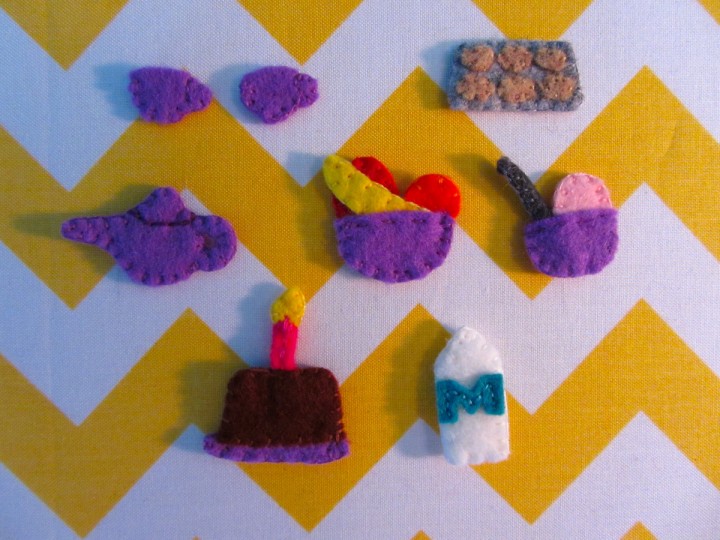
Tea Party Items: For the tea set, I cut a front and back piece for each item (one tea pot and two cups) and sewed them together. With the cups, I left the tops open.

The cookie sheet is made with tan ovals sewn to the top layer of the cookie sheet, then the front and backs are sewn together.

For the fruit bowl, I sewed together two layers for each fruit, then sewed the bowl around them, so they are stitched in place and can’t get lost.

I did the same with the ice cream bowl. (I didn’t have extra pink, since I used the full sheet for the background. I ended up cutting a square of felt out of the back of the page behind the oven and using that for the strawberry ice cream!)

For the cake, I started with the flame, sewing the back and front together. I then sewed the two sides of the candle stick together around the base of the flame. I sewed the two layers of the plate together. I sandwiched the end of the candle between the two cake pieces and sewed it down around the top of the plate.

The milk has two identical sides – each with an M sewn on. Then, the two sides are sewn together.

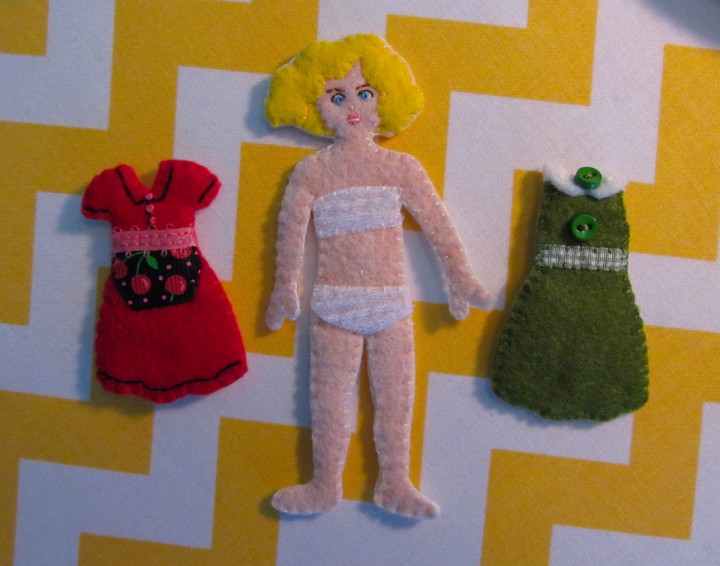
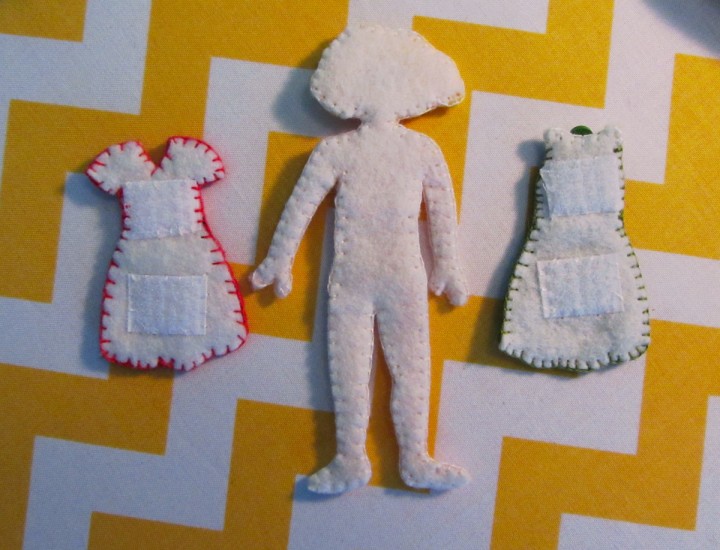
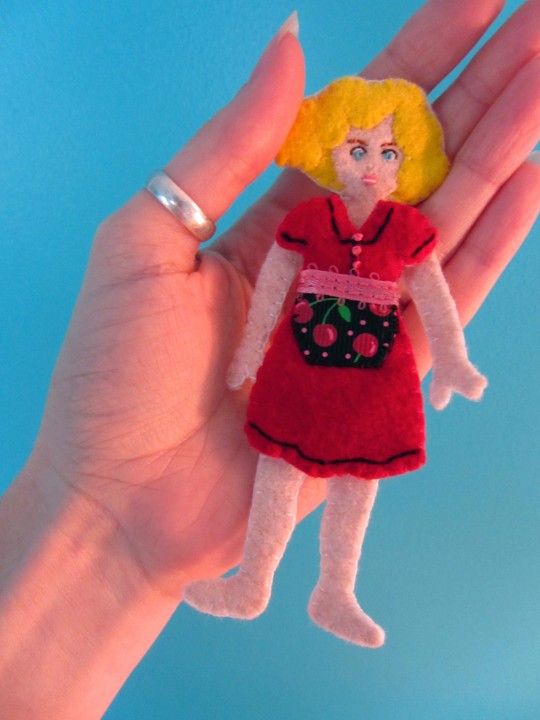
Doll: The doll is made with colored felt on the front and plain white on the back. I started by sewing the hair on to the body piece around her face. I then embroidered her features on. For the mouth, I used the same technique that I used one my princess finger puppet, but I added a stitch of white for teeth between her lips. Her nose is a dashed stitch that is tilted up a bit. I started the eyes by stitching the almond/eye-shape with white thread. I made a French knot in the center, and made a tiny stitch from the edge of the knot through the center to really hold it in place. I outlined the tops and outer corners of the eyes with brown thread, then back stitched eyebrows. Her under clothes are cut out of snag-free Velcro to hold her outfits on. I sewed them down the same way I would sew felt. I sewed a tiny belly button, but it’s hard to see. Once she was decorated, I sewed her backing on.

Clothes: Her red dress was decorated with black back stitch at the cuffs, collar and hem. The buttons are pink French knots. Her apron is a cherry ribbon I found at Dollar Tree. I folded the bottom under into a curve as I sewed it on. I made her apron belt with a scrap of pink ribbon. I sewed Velcro to the back piece, lining it up with her body, then sewed the front and back together.

The green dress has a gingham ribbon scrap sewn on as a belt. I sewed on a white collar and added two 7mm mini buttons. I sewed the Velcro on to the back then sewed both sides together.

Stay tuned for two more double pages for this dollhouse book, followed by the exterior of the house and book construction! I am posting progress photos on the Facebook page as I go. I am also working on a solar system page, so photos of that may pop up too.

Do you have a blog or online business that fits in well with the theme of Image Our Life? For as little as $5 a month, you can have your banner in the sidebar. I am also interested in swapping banner space with other blogs. Drop me a line or check out the sponsor page!

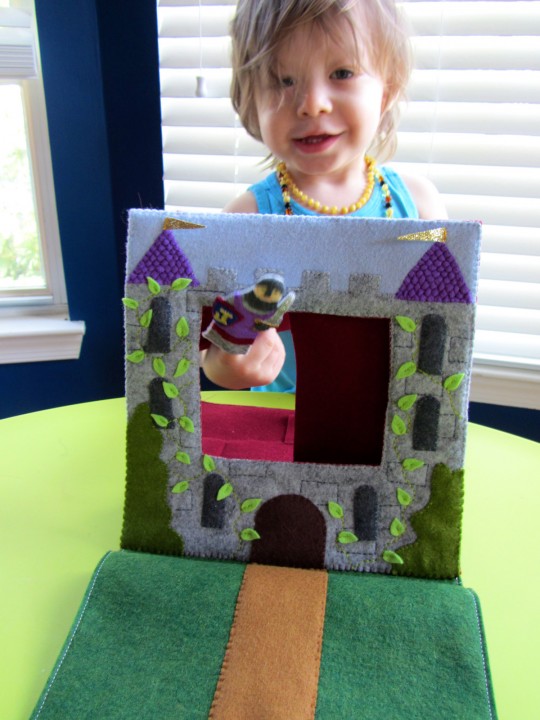
Castle Puppet Theater Quiet Book Page

It’s a quiet book page! It’s a puppet theater! It’s both!

This page was inspired by the rich colors of wool blend felt carried by American Felt and Craft, who provided the felt for this project. (Visit AFC’s Facebook page for sales and giveaways.) There are so many beautiful shades of green, gorgeous grays that look like stone and bright jewel tones. And the fact that the wool felt is stronger and thicker than craft felt helped to make this page work well.

This page doesn’t use anything special other than some plastic canvas, I used glitter ribbon for some of the tiny pieces, like the crown and the sword, but you could swap that for felt. I also used many shades of green because I had leftovers from other pages. The ground (“fresh cut grass”) and the dragon (“jade”) are the most important greens. the leaves (“limeade”) and shrubs (“cilantro”) could be swapped for one of those.

What I Used: The pattern, wool blend felt from American Felt & Craft (in fresh cut grass, beet x 3, powder blue, white, gray flannel, salt & pepper, cilantro, limeade, royal purple, doe, orchid, rubber duckie, peaches & cream, indigo, jade, orange juice), plastic canvas (I got mine at the craft store), glitter ribbon in gold and silver (I got mine at the craft store) and sew-on gems.


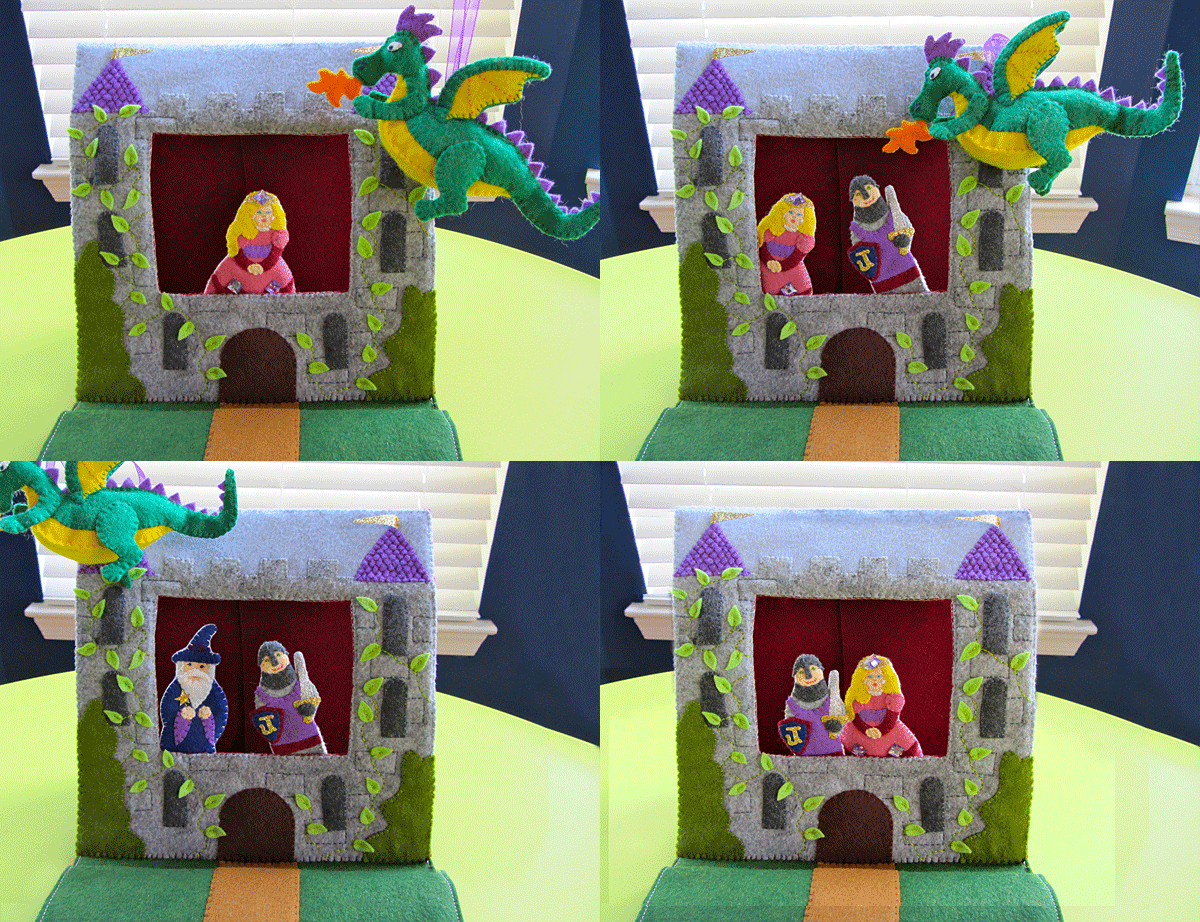
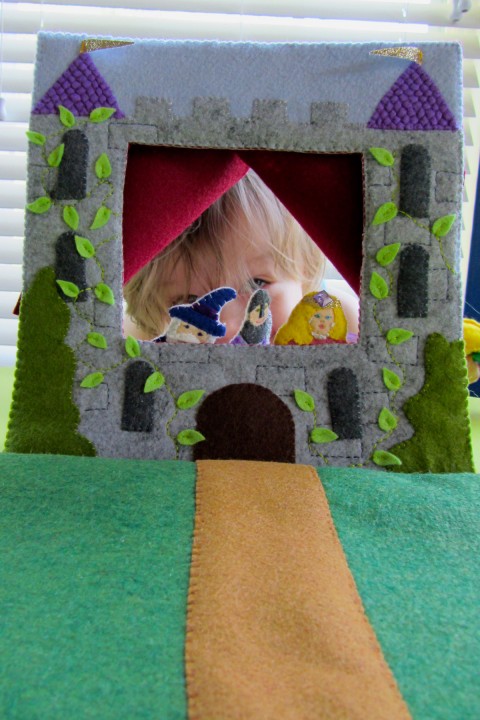
This page fits into my normal quiet books, yet unfolds into a working finger puppet theater. There is a pocket to store the three puppets, a wizard, a princess and a knight, plus a stuffed dragon that flies on a loop of ribbon. There are two supports that can be stored in a loop of felt when the page is closed. The supports slip into little pockets to prop the stage open.
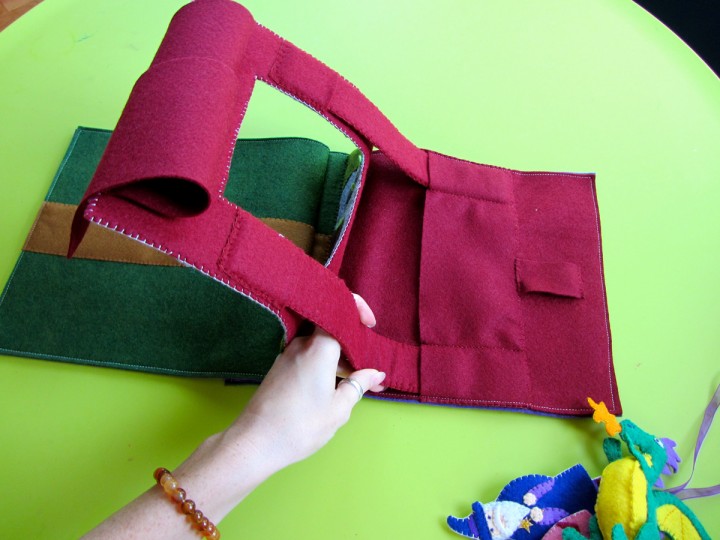
Supports: Sew two layers of plastic canvas inside the felt strips to make two supports. I cut my plastic canvas slightly smaller than the felt.
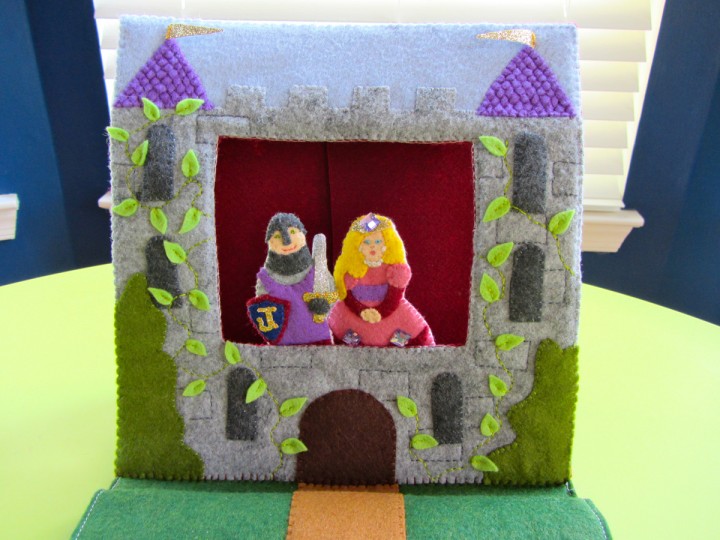
Castle Facade: Start with a 9″ square of gray felt and cut away the roof line using the sky pattern. Layer a strip of light blue behind the castle piece to make a 9″ square again and sew them together. Cut out the puppet theater hole. Sew on the windows and door, then sew on the shrubs. I cut out a bunch of little leave and stitched a wandering back stitch vine up each side of the castle. I used two back stitches to attach each leaf. Sew on the two purple tower roofs. Cut bits of ribbon or felt into triangle flags and sew them to the roof peaks. (My ribbon was non-fraying, so I was able to easily cut it into shapes.)

I embellished my roofs with embroidery to look like tiles. To do that, start with a long horizontal stitch, but don’t pull it tight. Come back up through the felt down at the point where you want your tile to end, making sure to put the needle through the stitch. Go back down through the felt making a tiny vertical stitch that holds your first long stitch down into a scallop shape. Repeat, staggering the scallops as shown.
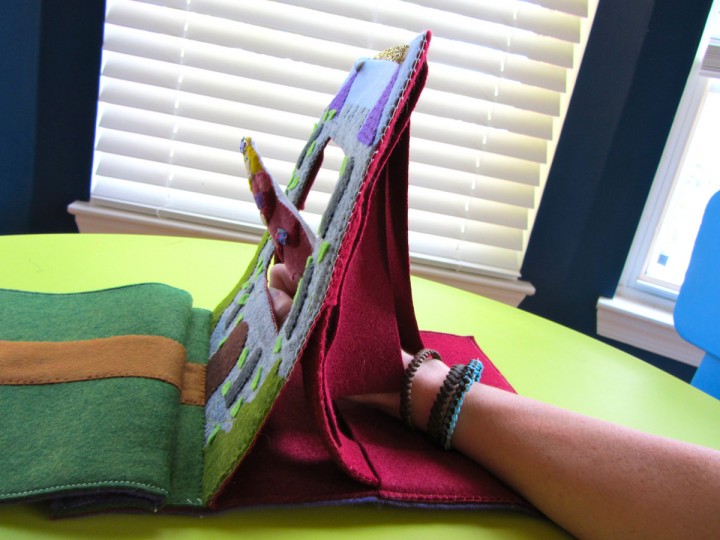
Backstage: Cut out the burgundy felt into the 9″ square with a matching hole cut out. Sew it to the back of the castle facade with plastic canvas in the middle. Take the two curtain pieces and overlap them slightly in the middle. Sew them to the top back of the theater piece.

The castle theater gets sewn to the right hand side of the two-page spread. Line the top of the castle up with the far right side of a full 9″ x 12″ sheet of burgundy felt and sew it down along the bottom. On the left side, decorate the few inches that are in front of the castle with grass and a road. I matched my road with the width of the door.
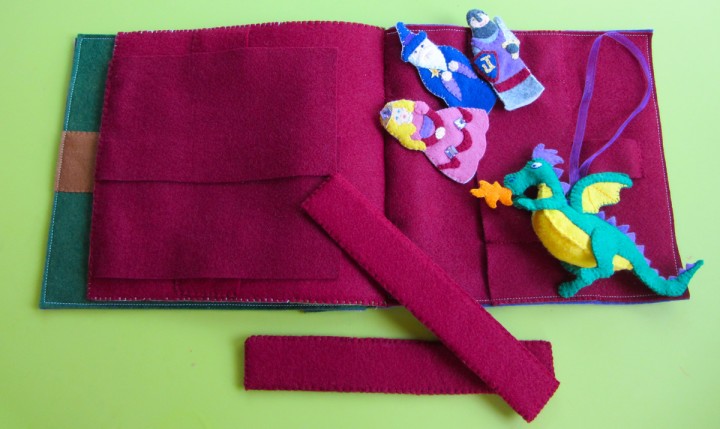
Cut out the storage pocket felt piece and sew it to the page under the castle as shown on the pattern and the photos. the skinny side pockets are where you insert the bottom of the supports. Sew the smaller pockets to the back of the castle after pinning them to see what angle works best. Sew the pockets upside-down so the top of the supports can slip up into them.

Front Lawn: That side of the two-page spread is super easy. I just sewed more road down to the grass color. You could embellish yours with flowers, a fountain or a hedge maze… Whatever you can imagine!

To construct my page, I sewed purple felt (I just used craft felt) to the back of each side of the spread. You have to start and stop your seam to get around where the castle is attached on that side of the page. I then lined the pages up facing each other (as they will be when the page is closed, and sewed my usual seams.

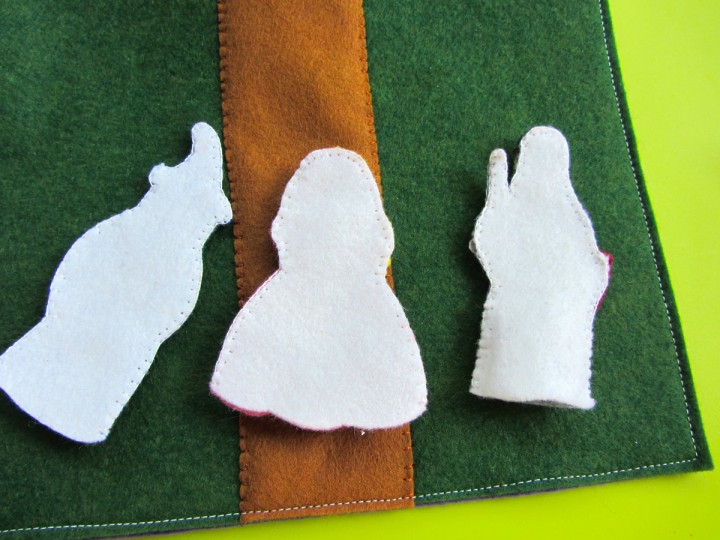
Puppets: All three of my finger puppets have plain white felt backs. If you wanted to have yours be two-sided, you’d need to work out how they would look from behind.
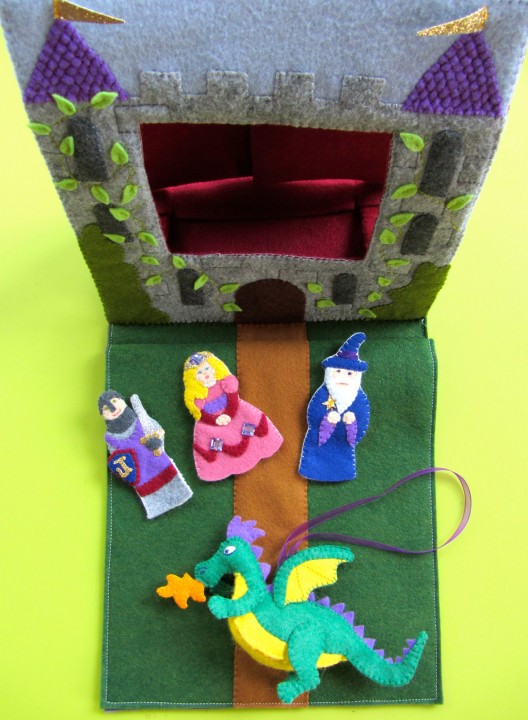
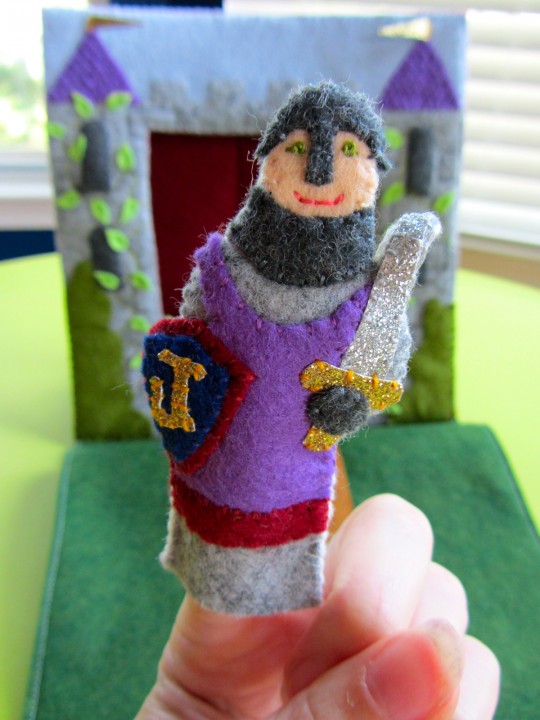
Knight: For Sir Knight, I started with his basic shape cut out of gray. I laid his face in place and sewed the helmet and neck pieces over top. I sewed his eyes with French knots and a tiny horizontal stitch going from the center of each knot out to the corner of his eyes. This makes sure the knot doesn’t wiggle loose. His mouth is just back stitch. I sewed down his tunic and the trim next. For his shield, I cut some glitter ribbon into a J for Jax. You could do a cross or another letter or symbol. I sewed the J to the inner shield piece, then sewed that and the outer shield piece down. I cut the sword blade and hilt out of more glitter ribbon and sewed them down, adding the glove over top.

To make his backing, I cut out white felt to the same shape as his body, but added an extra 1/4″ to each side from the bottom down. The knight is fairly skinny, so adding width to the backing gives room for bigger adult finger to play too. The photo to the right shows one side sewn and the other side read to be sewn. Once you’ve sewn the back on (leaving the bottom open for your finger), trim the bottom edge so it is flush with the front.
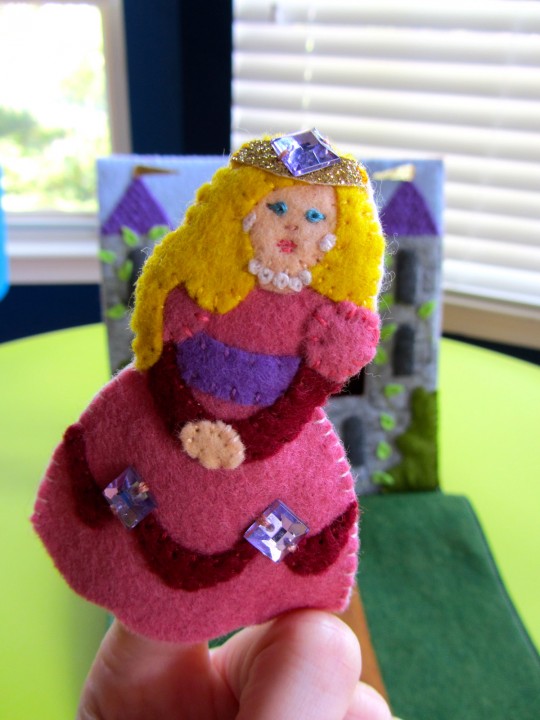
Princess: The princess was fun for me! I don’t get to do many girlie sewing projects. You can personalize her by changing up her colors.

I started with her shape cut out in pink. I sewed down her belt, arms, hands and puffy sleeves. I sewed on her sash and added some sew-on gems. I laid her face piece in place and sewed her hair down over top. I added some stitches to her face to make her chin, then made a French knot pearl necklace and earrings. I made tiny stitches in the knots as before to secure them. Her eyes are the same as the knight’s, and her nose is a little stitch. Her mouth has two stitches for the lower lip (the bottom stitch a little smaller), then a longer stitch with a little “v” stitched over top to make the bow of her lips. See the drawing to get the idea.

The finishing touch was her crown, made out of glitter ribbon with a sew-on gem.
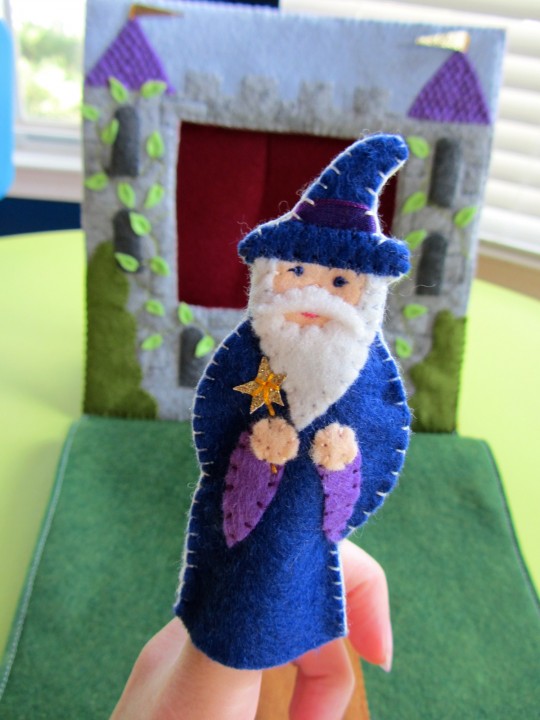
Wizard: The wizard is pretty simple, but very cute! Start with his shape cut out of indigo felt. Lay his face in place and sew the beard down on top of it. Lay a scrap of ribbon (mine was purple) on his hat, and sew the hat brim in place. Cut a scrap of felt in a mustache shape and sew it down along the top side. His eyes were made the same as the others’ and his mouth is made like the princess’s lower lip (the two dashes.) Sew down his sleeves and hands, then sewn on a star and stitch the wand with back stitch.

For both the princess and the wizard, I cut their finished shape out of white felt and sewed the back on (with the bottom open) to make them into finger puppets.
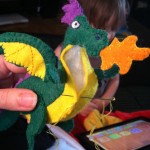
Stuffed Dragon: The dragon is the hardest part, as I made him into a full stuffed animal. I wanted him to be able to fly in to the castle from any angle.
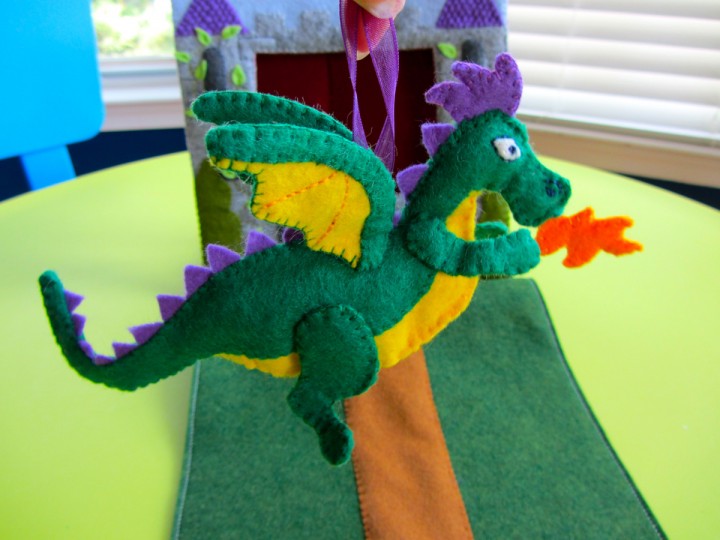
The dragon has two sides that are the same, but mirrored, so do everything twice for him. I started with the wings. I stitched two curved back stitch lines to show the veins/folds int he yellow part. Then I sewed each wing together with the yellow layered between the green backing and the green outer edge. Remember you need a wing for each side, so they have to point opposite directions. Sew the green body pieces to the yellow body pieces and then sew a wing onto each (picture 1 below.)

For his face, I stitched on the white eye, then made a French knot with a reinforcing stitch for the iris. I back stitched an outline around it. I satin stitched a sideways tear shape for his nostrils and back stitched an arc over each one. I sewed the two sides of his purple crest together and the two sides of the flames together. I cut out a bunch of back scales (including a few smaller ones for the end of his tail.) Have a loop of ribbon ready for his back. I sewed the two sides of the dragon together from under his chin, around his nose (with the flames in his mouth) over his head (with the crest in place) and then down his back, adding scales and the ribbon loop between his wings (see photo 2 below.) Sew all the way around his tail, but stop when the green ends.

Sew all the legs together, and sew them in place on each side. Add a little stuffing or batting – not too much or he’ll be too fat to store int he page. Take the chest piece and stitch it to the edges on the yellow as shown below. Trim the piece as needed to get it ti fit just right.
   

Jax didn’t know what a puppet show was until I started sewing this, but he got so excited when he figured it out. His current favorite thing to do is steal the puppets off my hand mid-show. He told me the knight puppet is “Jackson”, the princess is “mama” and the wizard is “dada”. Hah! (No, my husband doesn’t have a long white beard and a wand.)
You don’t have to sew this into a quiet book page. You could add a Velcro closure and felt handles to turn it into a portable puppet theater case!

Enjoy! Stop by the Facebook page to see progress photos from my next two pages. they are fun ones!
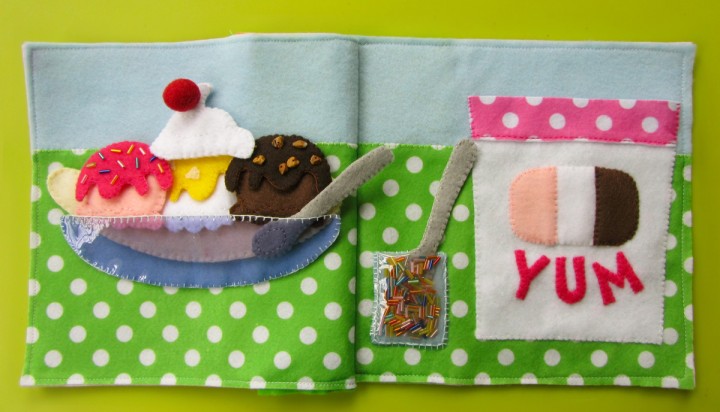
Banana Split Quiet Book Page

First, a quick announcement – the winners of the camping quiet book page felt and supply give away! The two winners of mini LED lights are Renee R. and Jean J. The grand prize winner of felt, crinkle material, a mini LED light and some clear vinyl is Ashley S. Congrats! I’ll be emailing you for you mailing addresses. (Renee, email me. I don’t have your email address!)

Just before my birthday weekend, I realized we were going out of town on an 8 hour round trip in the car to the beach and I wouldn’t have the supplies for my next page yet. I dug around in my stash to see what I could make from my stash of scraps. I was inspired when I looked at some of the samples sent to me by American Felt and Craft. Sprinkle beads, nut beads and a felt cherry? Sounds like an ice cream sundae to me!

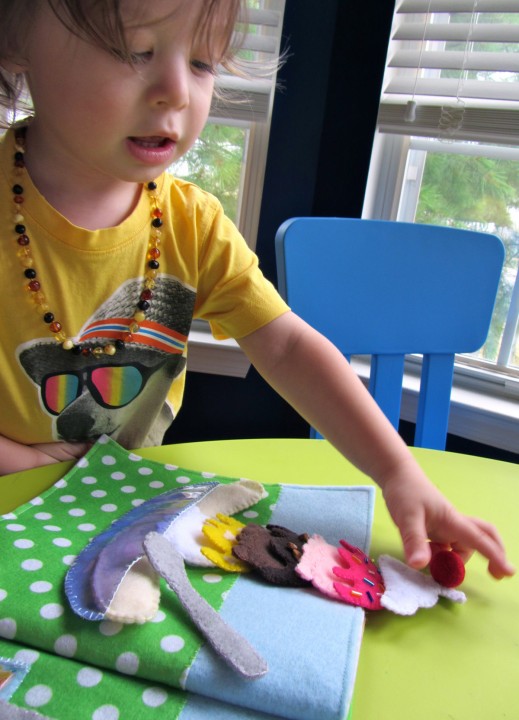
I went with a banana split and had just enough of the green dot felt I used in the ice cream parlor page to make them coordinate. I actually had to sew an extra seam to make the pages smaller because I didn’t have enough light blue and green dot to cover the whole 9″ x 12″.

What I used: The patternsprinkle beads, nut beads, red felt ball, felt (in green dot, pink dot, light blue, white, pink, hot pink, brown, dark brown, yellow cream and gray), clear vinyl, blue-tinted vinyl (you can use more clear instead) and 3 sew-on snaps.

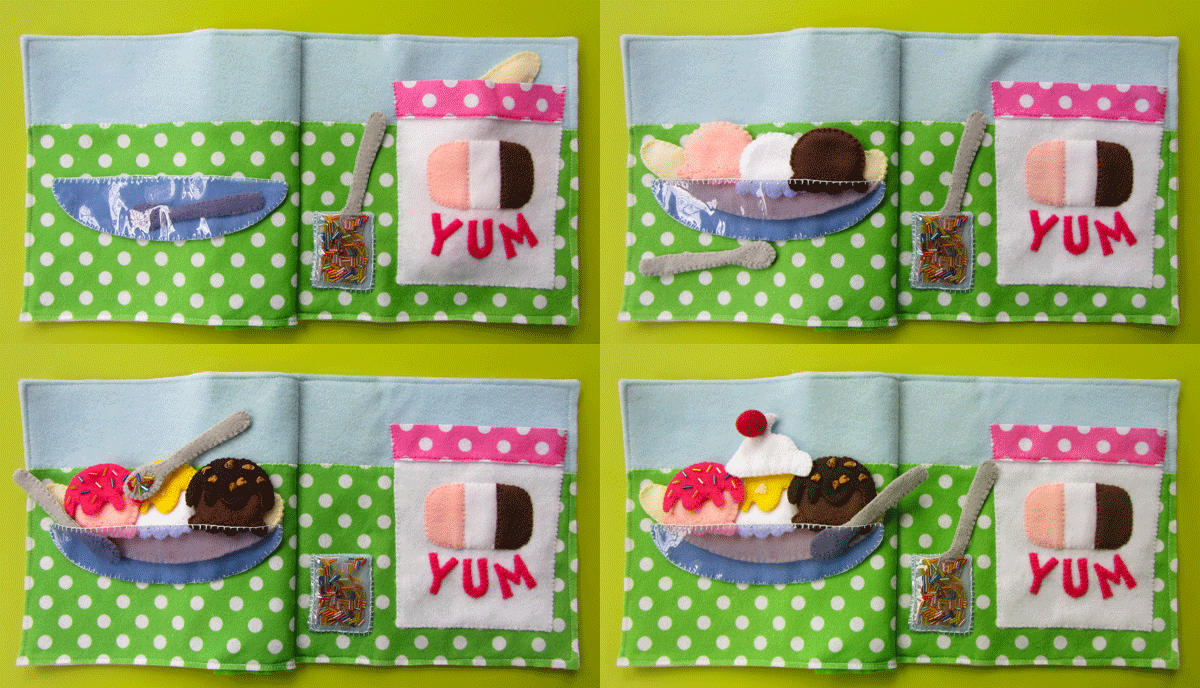
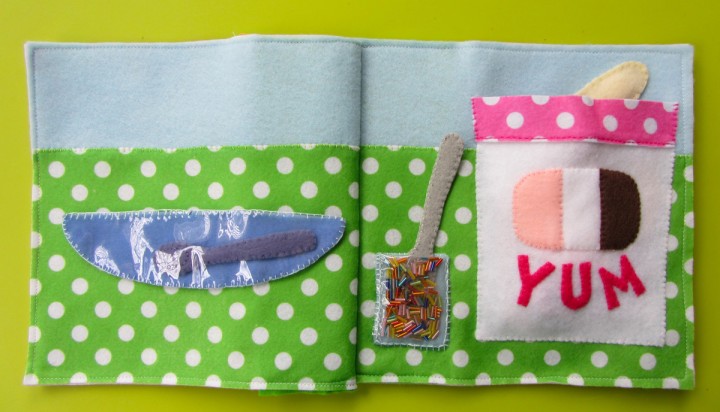
The Background: Very simple… just sew a table onto your background felt! Later, you can add snaps to attach the sundae dish.

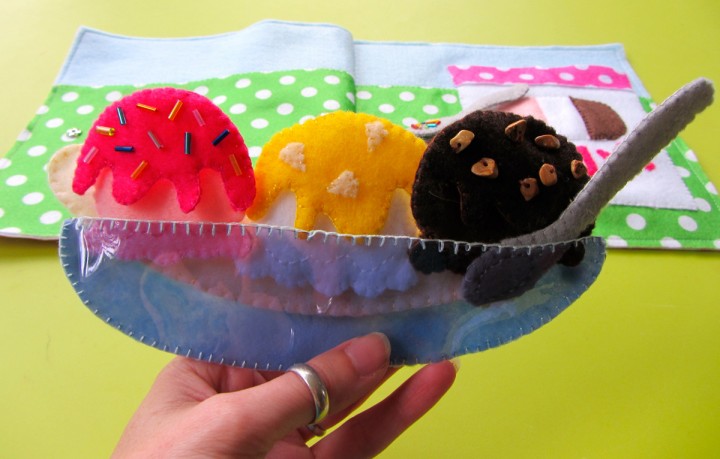
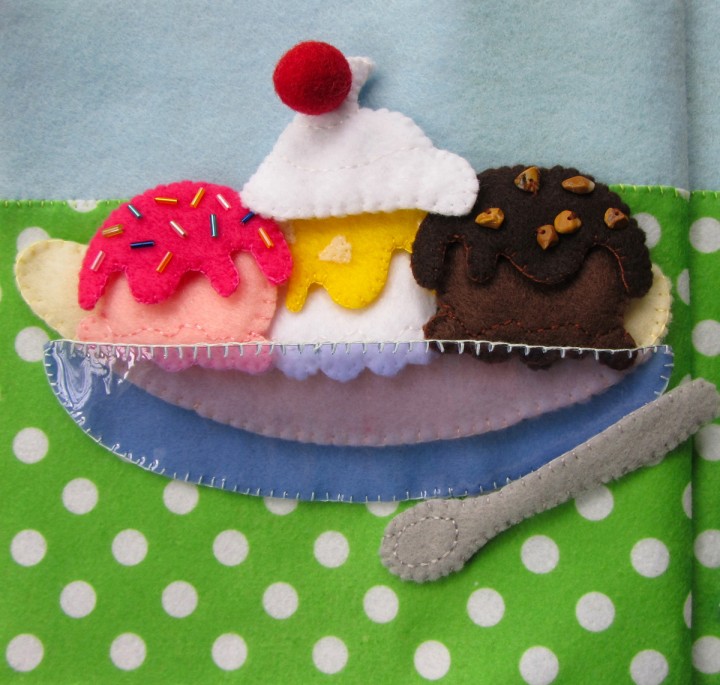
Sundae Dish: I sewed light blue felt and blue tinted vinyl together along the curve of the bowl to make a pocket, then I sewed across the top of the vinyl to make that edge match the others (and make it feel less sharp.) I sewed three snaps along the back so the bowl can come off, but you could just sew it to the page.

Ice Cream Scoops: I sewed the two sides of each scoop together with some scrap felt in the middle to give it some thickness. You could use batting, but I was in the car and that was what I had!

Sundae Toppings: I sewed the toppings the same way that I sewed the ice cream scoops, except I decorated the front pieces first.

Strawberry: I sewed the sprinkle bugle beads to the strawberry topping.

Pineapple: I sewed down little pie wedge shapes of cream felt to make pineapple chunks.

Chocolate: I sewed the nut beads to the chocolate sauce.

Whipped Cream: I sewed the cherry felt ball on to one side of the whipped cream, making sure I really secured it down with a bunch of stitches. You could use a circle of felt stuffed with some batting instead of the felted ball. I then sewed the two sides together.

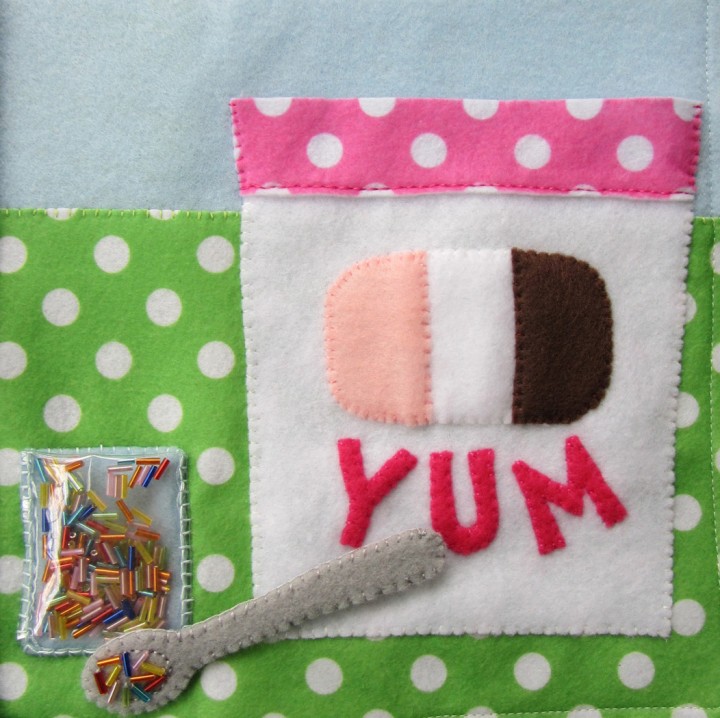
Ice Cream Tub: I sewed the pink top piece to the main white tub piece, overlapping them a bit. I sewed on the lettering and the oval ice cream colors. (Sew the white of the oval on first, then layer the pink and brown over it so they line up.) I then sewed the ice cream tub on the the page along the sides and bottom to make a pocket to hold everything.

Sprinkle Jar: The sprinkle jar is a pocket for the spoon to go into. The front of the pocket is made of two layers of clear vinyl with sprinkle beads sewn inside. I started by sewing the light blue background to the page. Then I folded my vinyl in half and started sewing around the edges. With one side still unsewn, I filled the vinyl pouch with beads then sewed it shut. I placed it over the blue background with the smooth folded edge up, and sewed the sides and bottom down, making the pocket.

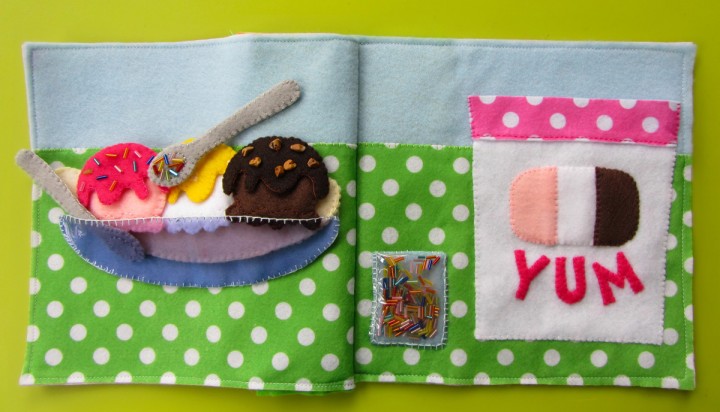
Spoons: The spoons are just two layers of felt sewn together with some decorative back stitching on the bowl to give it depth. I also sewed on the sprinkle beads to the spoon that goes in the sprinkle jar.

This page sewed up very quickly! It was a good project for the car, though I did all the beading in the hotel and at home so I wouldn’t spill. You could definitely mix and match the elements from the ice cream parlor page and this one. I just scaled the ice cream a bit larger for this page.

Jax enjoys it, but I knew he would – all of the food pages are big hits for him! The first thing he did was take all the parts and put them in and out of the ice cream tub. Then it was time for a tower of ice cream! And, don’t try to separate him from that sprinkle spoon! It is a prized possession!


Enjoy! If you make one of my pages, I’d love to see… Email me a photo or post it on the Facebook page.

Camping Quiet Book Page

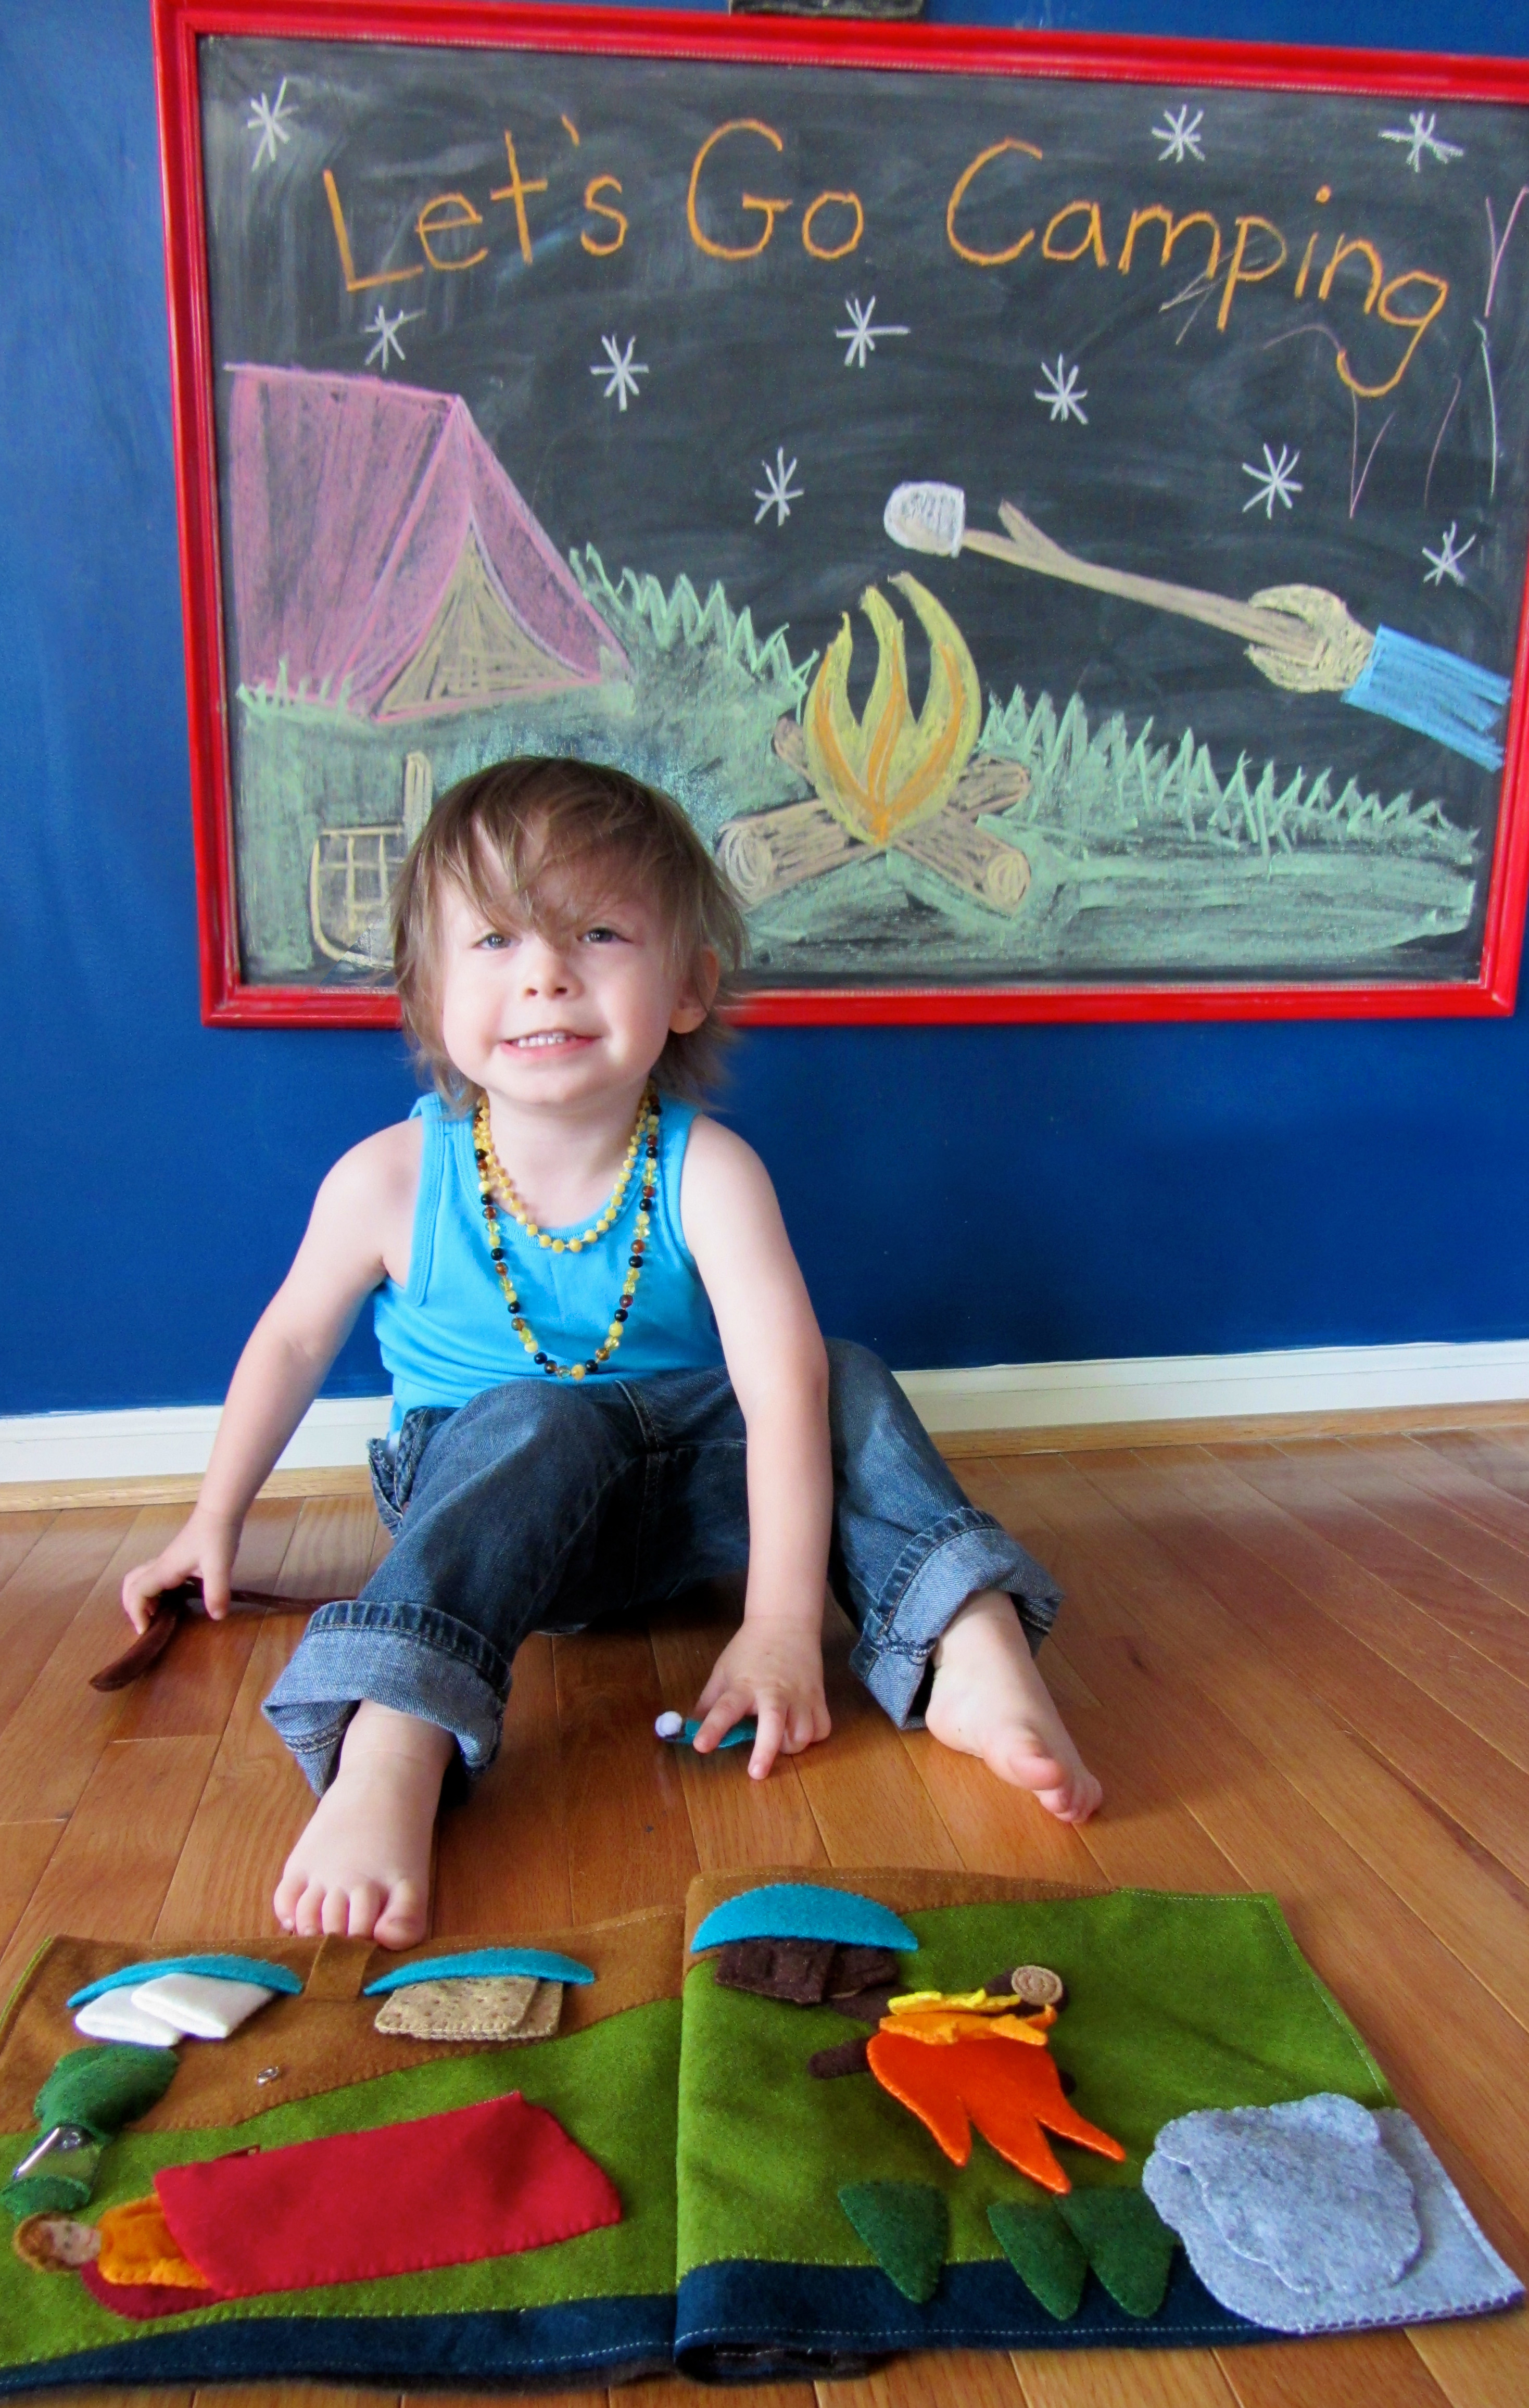
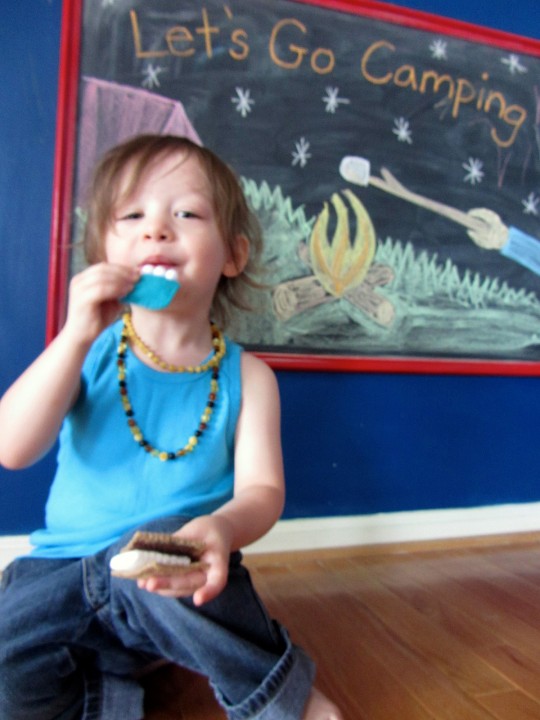
Camping! S’mores! Lanterns!

This page is sponsored by American Felt and Craft, who provided the felt and crinkle material. When AF&C reached out to me about providing felt for some of my designs, I knew it was meant to be… The next page I had planned to make was a camping one, and the gorgeous earthy colors available in wool blend felt were so perfect for it. And crinkle fabric to make my camp fire crackle? Yes, please! Read more about American Felt and Craft here. Read more about my thoughts on wool blend felt here.)

.

Let’s Go Camping!

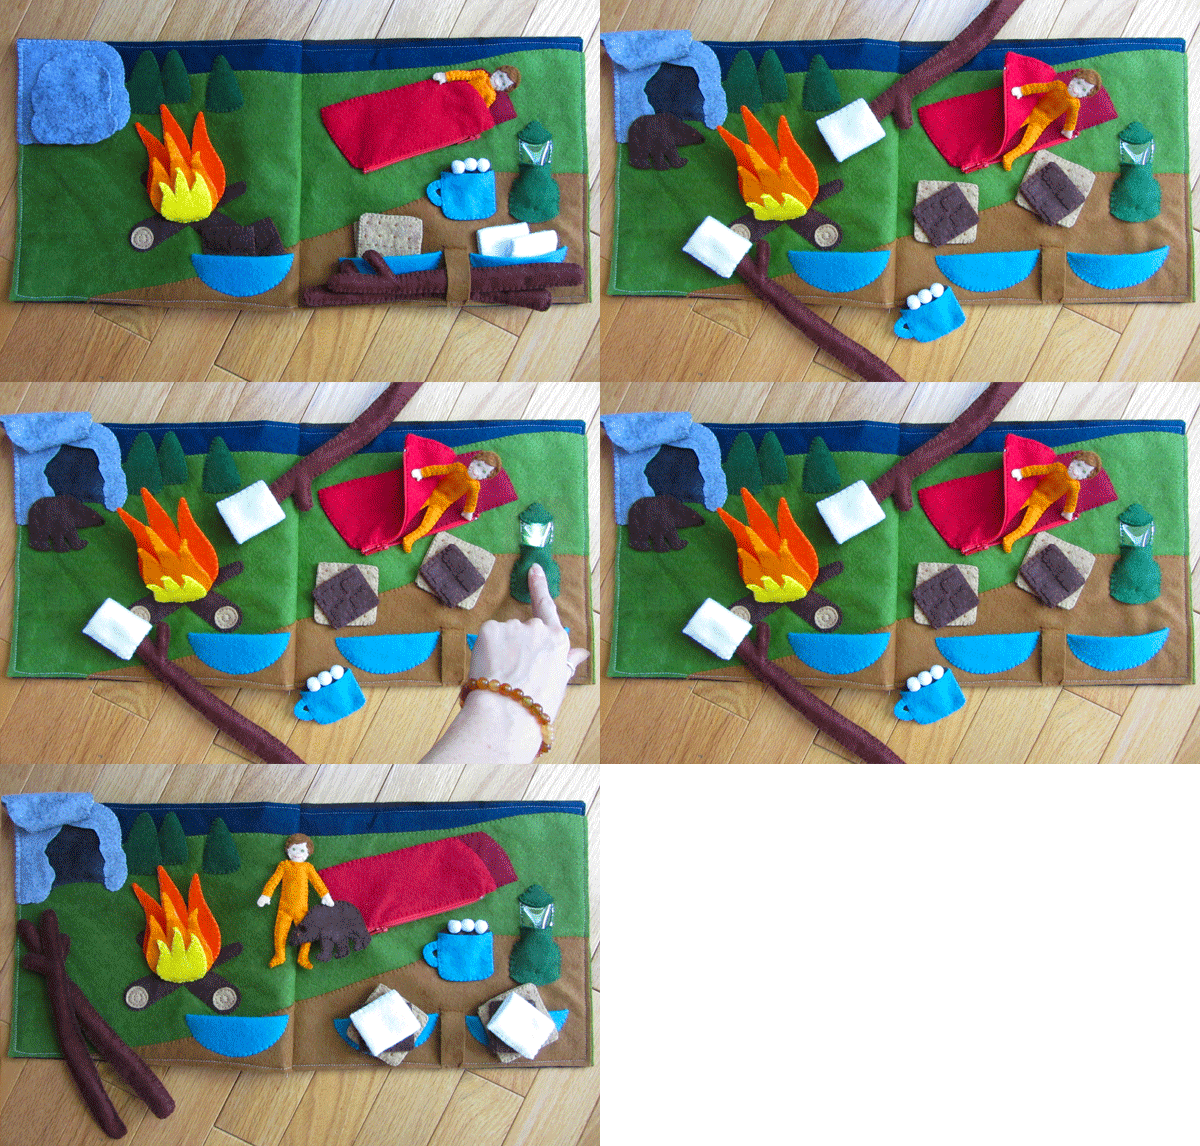
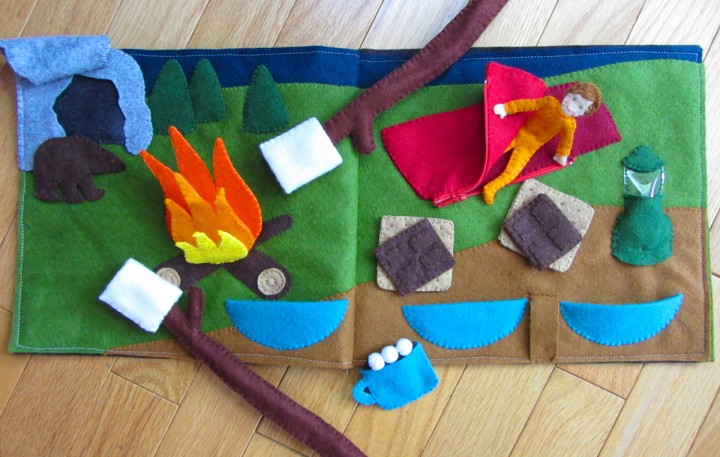
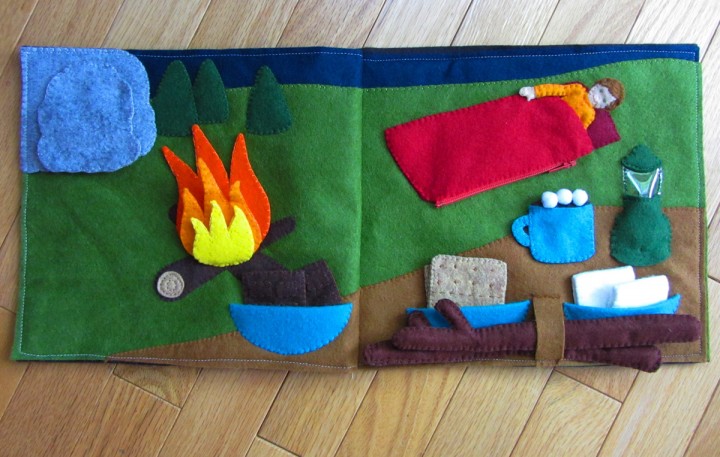
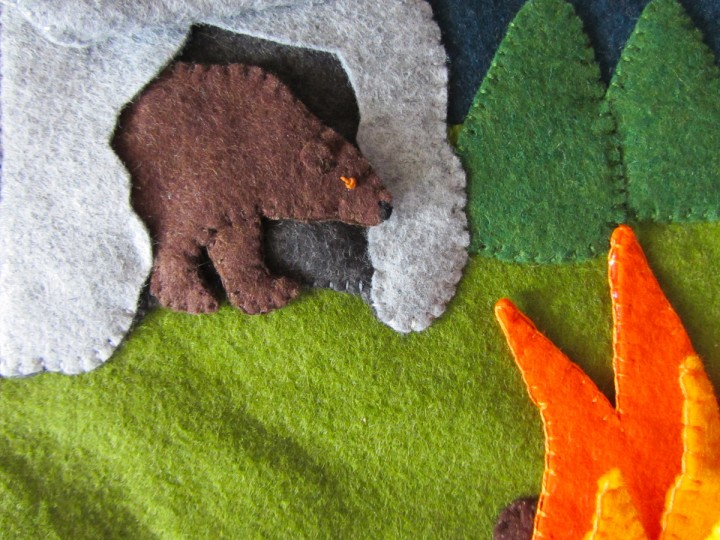
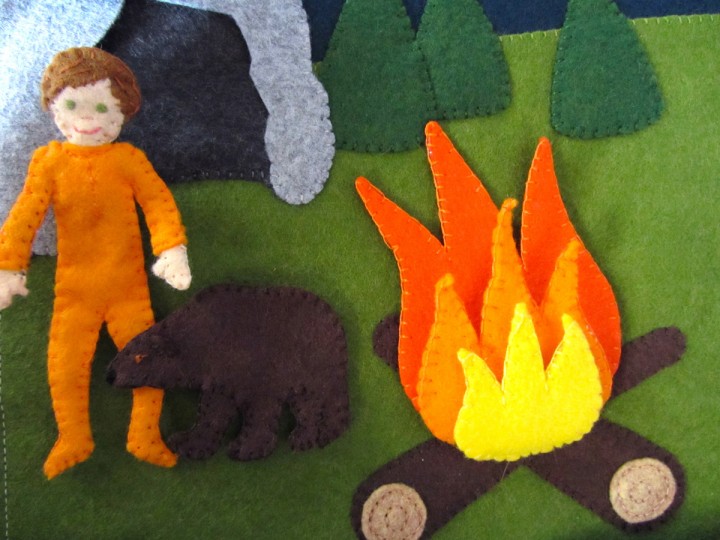
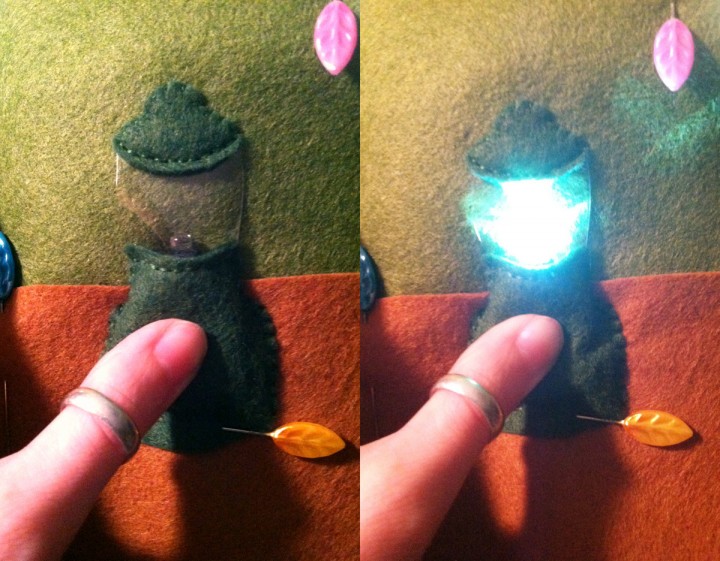
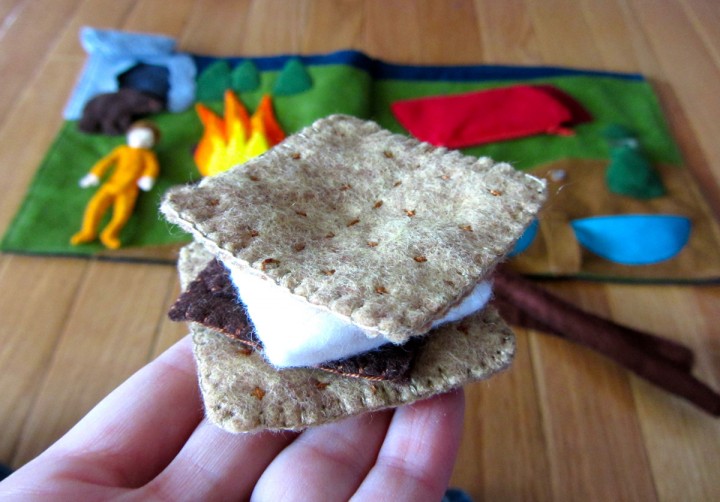
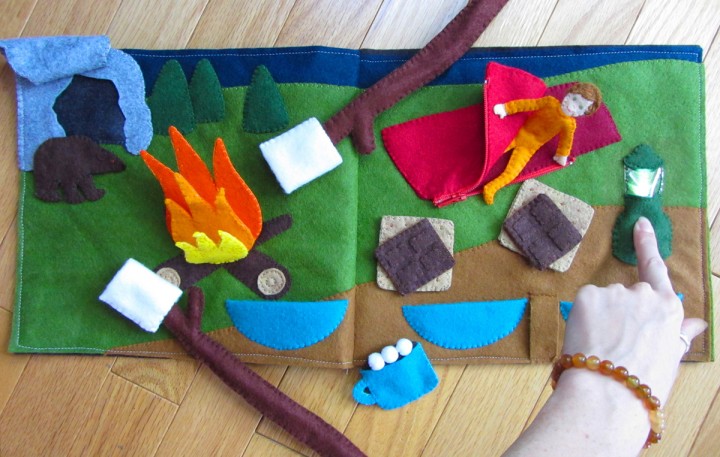
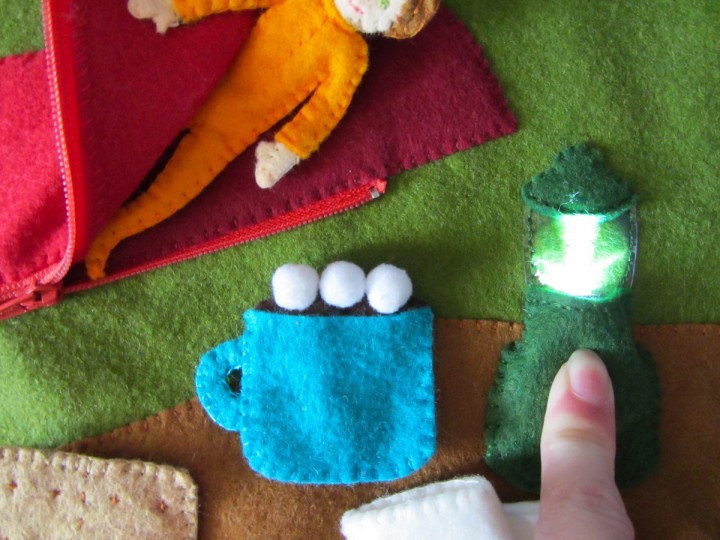
This page is a lot of fun to play with! There is a zipper on the sleeping bag – something Jax needs to practice. Inside is a little bendable mini-Jax to play with! There is a cave hiding a cute baby bear, a lantern that lights up when you press on it, hot cocoa with marshmallows, a crackling camp fire and all the fixings to make s’mores.

What I used:

The Background: I started with two sheets of cilantro felt and cut them away at the top to make the hills. You need to make sure the two sides line up where they will be sewn together at the center seam. I placed strips of wild blueberry felt behind the cilantro to make the night sky. I sewed the hills to the sky. I then sewed the table pieces to each page, making sure they lined up where the center page seam will be as well. I sewed the three pine trees down before starting on the cave.

The Cave: I sewed the cave interior down in the corner of the page, then sewed down the cave front, leaving the arch of the cave entrance open (see above photo.) I made the cave door by sewing the two door pieces together, then sewed it down into a flap along the top.

The Baby Bear: I first sewed the two sides of each far leg together, then pinned them between the two sides of the main bear body. I sewed a French knot eye with a little stitch in the corner on each side of the bear’s face. I stitched the bear together around the outside, then satin stitched his nose.

The Sleeping Bag: I pinned down the sleeping bag interior piece on top of one side of the upside-down zipper, folding the extra zipper tape under. I stitched along the edge of the felt, securing that side of the zipper. I then sandwiched the two outer sleeping bag pieces around the other side of the zipper (as shown above) and sewed along the zipper. To finish the sleeping bag, I sewed the two outer pieces together where the above photo is marked yellow, then sewed the outer pieces to the interior pieces (and the actual page) where the photo is marked green.

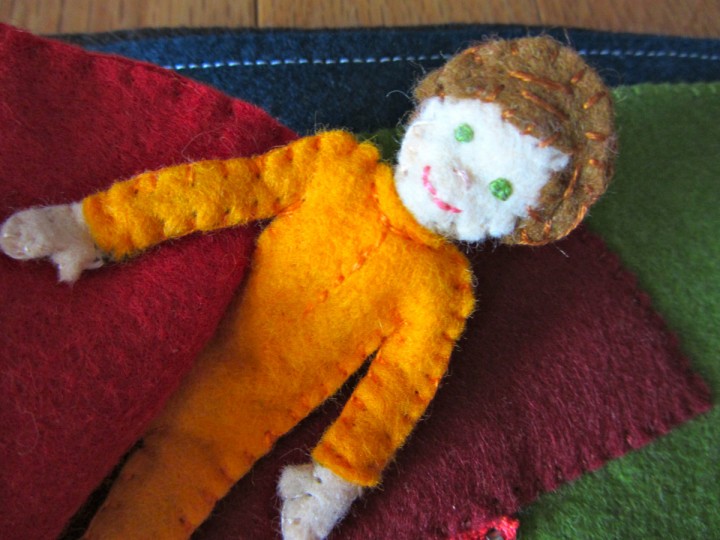
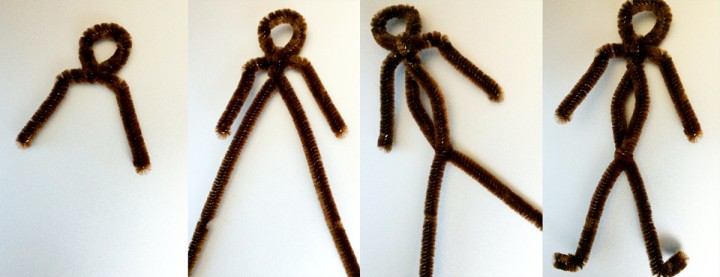
The Child: I made my child a mini Jax. I’ve included a drawing of girl hair in my pattern. I started by making an armature out of pipe cleaners. See the below photos for how I did mine. I laid the pipe cleaners on top of the pattern as I made it to be sure it would fit. (when working with the pipe cleaners, always fold over the ends so there aren’t any sharp pokies to hurt your little one!)

I started sewing the felt with his head. I embroidered his face (French knot eyes, a small stitch for the nose and a back stitch smile) then sewed the front and back head pieces on to the armature. I then sewed the front and back hair pieces on and added some stitches to show the hair. I sewed the hands on, then sewed the pajamas on. I added back stitching to the neck and chest.

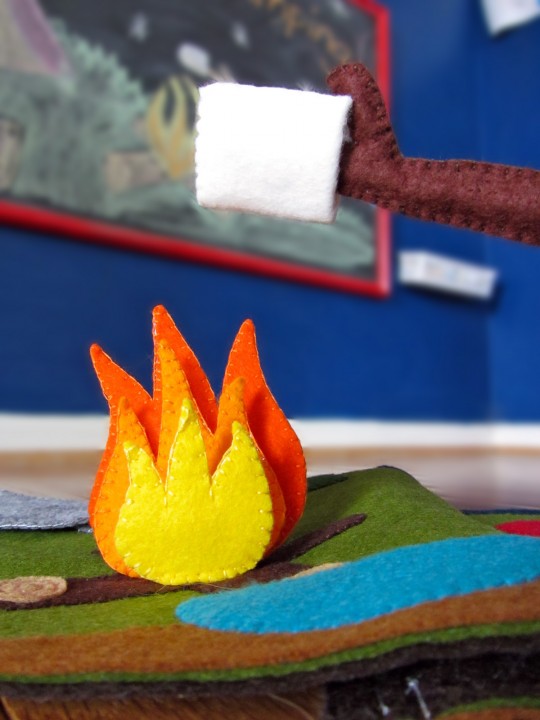
The Camp Fire: For each of the three camp fire flames, I pinned the pattern piece on to two pieces of felt layered around a bit of the crinkle fabric, then cut through all 3 layers. Then I sewed around the outside of each. I sewed the two logs down to the page in an X, and sewed on the log ends with back stitched circles. I layered the flames together and sewed them to the logs along the bottom. The crinkle material gives the flames enough stability that the camp fire can stick up when the page is laid flat.

The Lantern: The body of the lantern is drawn to wrap around the LED light I bought. You’ll have to modify it if you use a different light. The light is a keychain, so I pulled off both metal rings that came on it. I started by sewing the bottom of the lantern glass to the lantern body. Then I laid the light in place on the page and sewed the lantern body down over it on the left and right sides (so that the bulb of the LED sticks up into the window.) Leave the bottom open, but sew a snap on to hold the light in. This way, you can get it out to change the battery. I sewed the top of the lantern on, then finished it by back stitching the sides of the glass.

The S’mores:

Marshmallows: I folded my square of felt into quarters, then stitched it into a tube as shown in the photo above.  I sewed the inner tube, sewed the outer tube, then around the bottom edge to sew the two tubes together. You could cut your felt in half first then sew one tube inside the other.

Graham Crackers: The crackers are stitched on both sides with a dashed line down the center, then little + stitches to make the “holes”. I then stitched the two sides together. I made two, but you could make 4 if you prefer.

Chocolate: The tops of the chocolate had 4 rectangles sewn on before I stitched the front and back together.

The Bowls: I simply sewed the folded bowl shapes and sewed them to the page along the curves.

The Sticks: The sticks each have a pipe cleaner insider them. I folded the extra length back at the top, then out to make the branch. I folded the extra bit of branch back to the main stick and twisted it the secure it. I then sewed the felt over the pipe cleaners. I added a loop of felt to the table to hold the sticks.

The Hot Cocoa: I started by sewing three mini pom poms to the hot cocoa. Make sure they are on there good and secure! That’s the first thing Jax tried to pull off! I sewed the top of the hot cocoa to the mug back. I stitched the handle together, then layered it between the front and back of the mug as I sewed them together. I added a snap to hold the mug on the table.

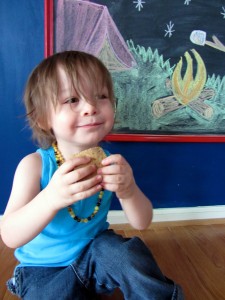
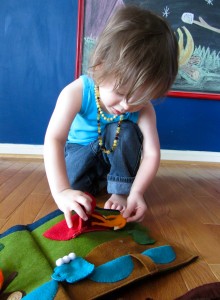
Jax is having a great time with this page. I think his favorite item is the hot cocoa and marshmallows. He loves the mini Jax, but can’t work the zipper yet. It will be good practice for him.


The Giveaway! I am super excited to announce that we’ve teamed up with AF&C to host a giveaway featuring many of the supplies needed to complete this page! One winner will receive the felt and crinkle material needed for the camping page, plus a mini LED light and a piece of clear vinyl for the lantern from my stash.

PLUS, two more winners will each receive a mini LED light.

Ready to enter this great giveaway?

a Rafflecopter giveaway


City Quiet Book Page

City Quiet Book Page

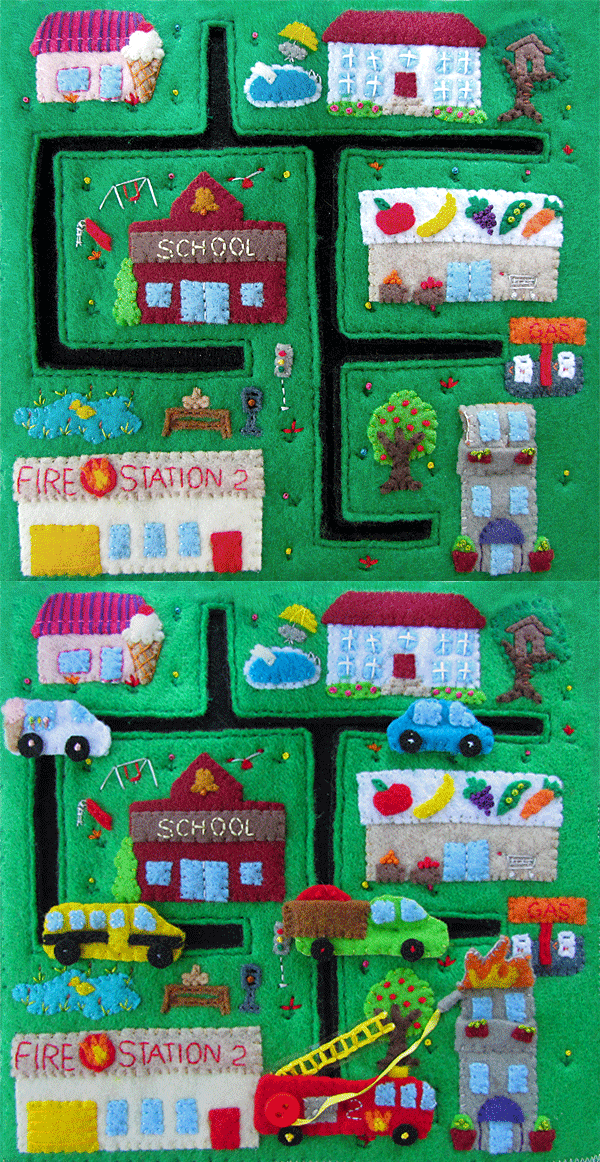
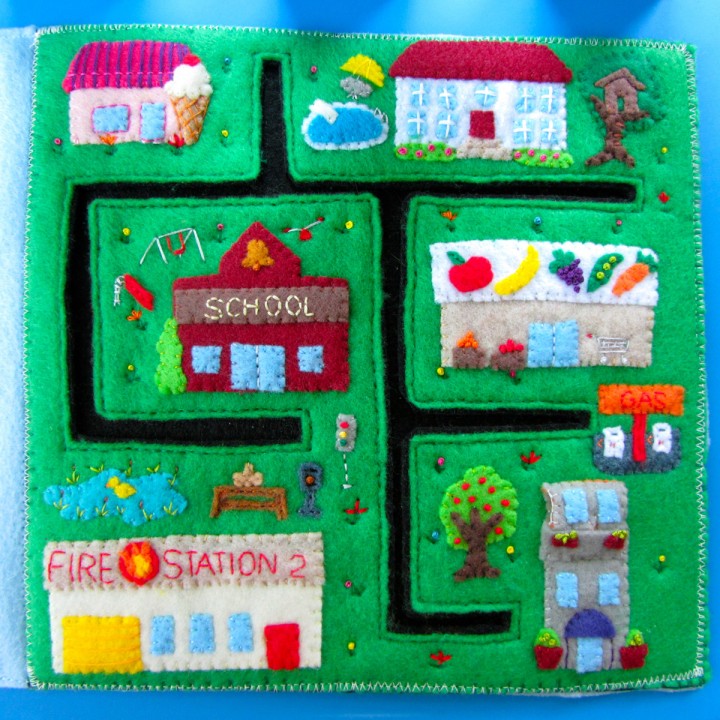
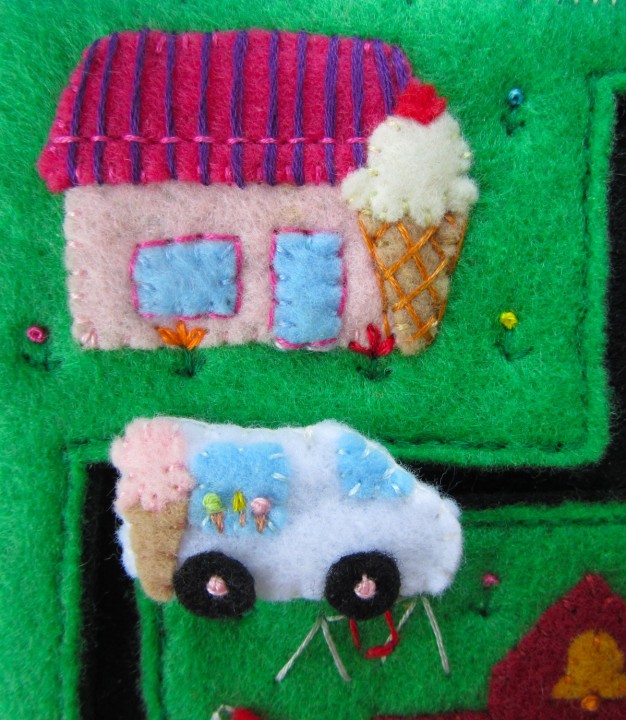
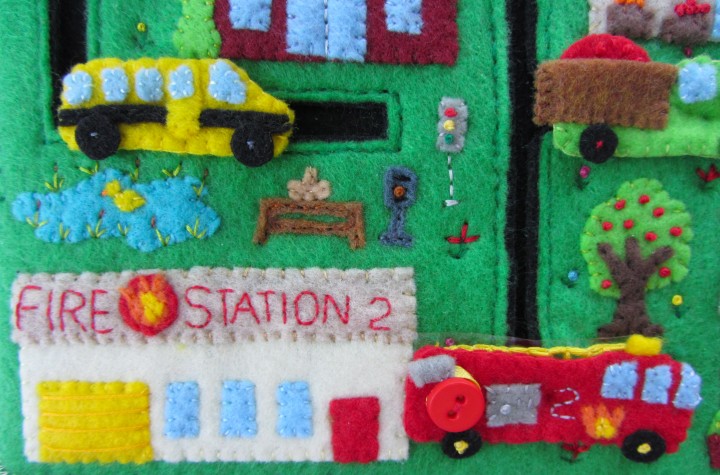
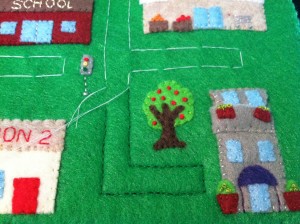
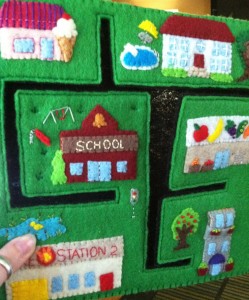
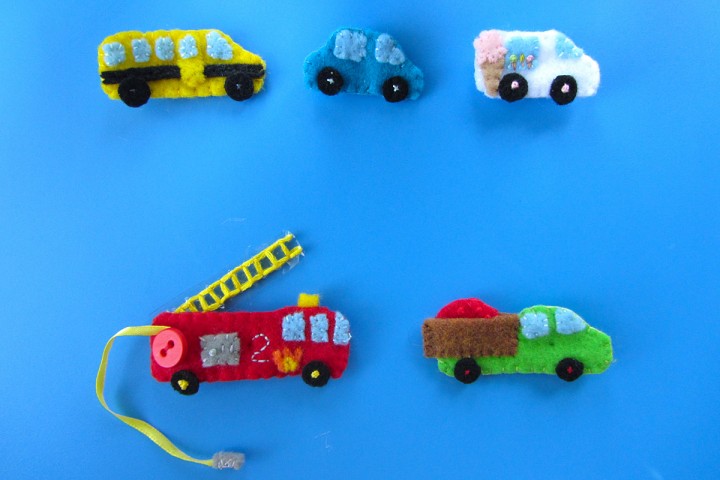
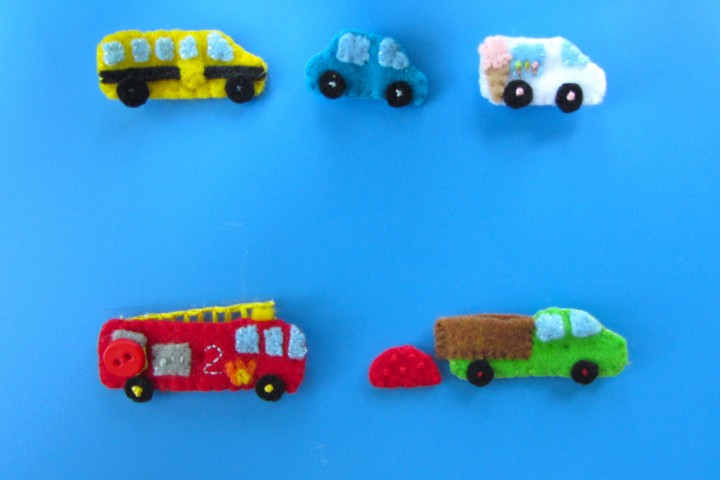
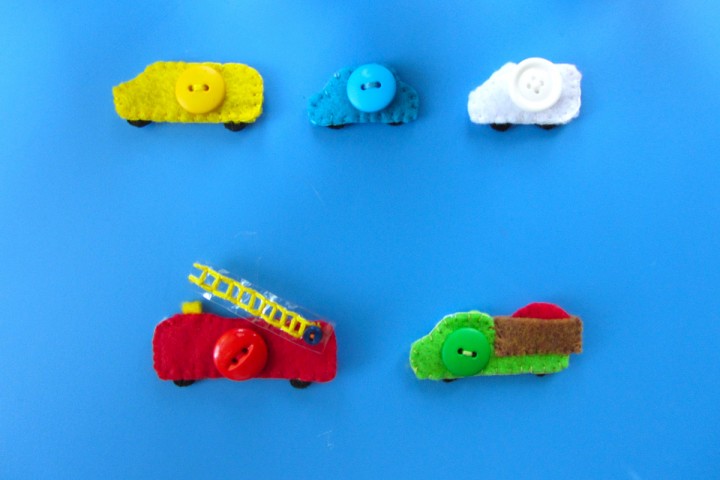
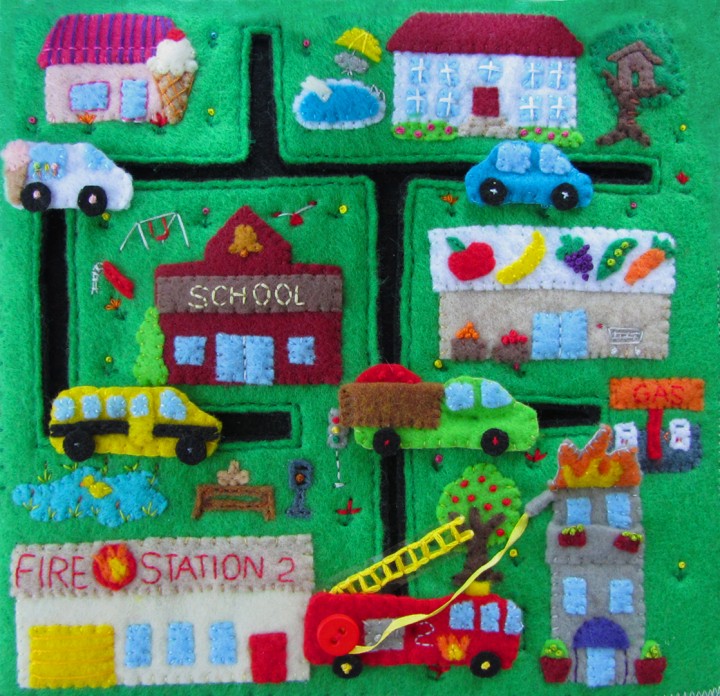
The is page is a fun way to use up all those scraps of felt you generate while making a quiet book. Plus, it is a lot of fun to play with! You can match the vehicles to the buildings they go with, drive on the roads or “park” them for storage by tucking the buttons on the back of the cars into the road’s channel.

This pattern is very crazy with a million tiny pieces. I cut all of the smallest elements by hand, but I went back and drew most of them into the pattern to help show the shapes you need.

What I Used: the pattern, green background felt, two 9″ x 9″ squares of stiff black felt (plus scraps), felt in a zillion colors (I used my scraps!), a scrap of vinyl, a scrap of yellow ribbon and buttons.

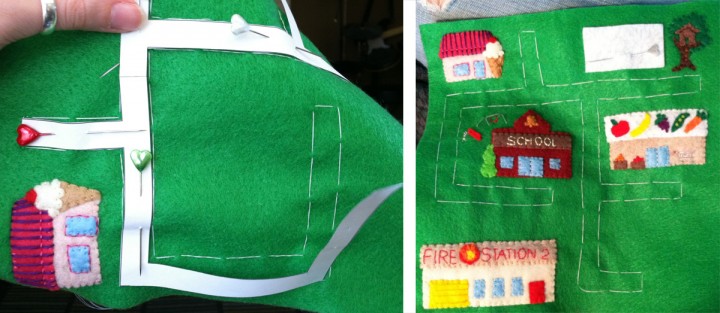
I started by pinning the road pattern onto my green 9″ x 9″ background and basting all around it to mark the road. Then I sewed the main elements to the green felt.

Ice Cream Parlor: I sewed down the building and the roof. I made purple stripes on the roof with long stitches, then held them secure with some pink back stitching. I sewed the windows and doors down and outlined them. I sewed on the ice cream and outlined the cone. I did crossing diagonal stitches for the waffle texture.

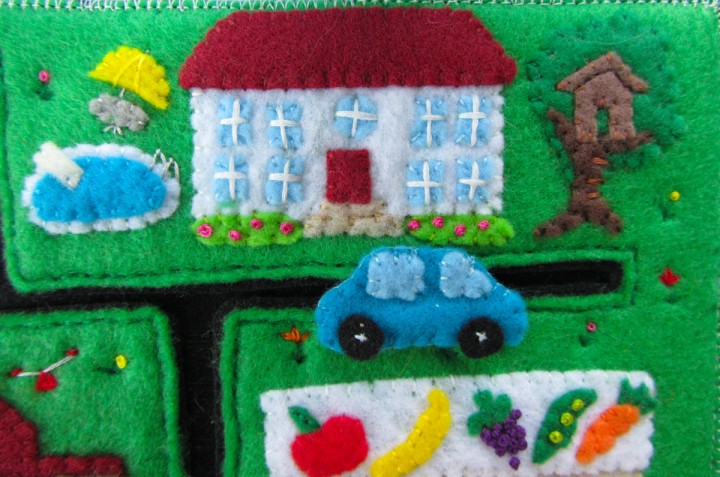
House: I sewed down the building and roof. I tacked on the windows at the corners then used 4 strands of white thread to make +’s for the panes. I sewed on the front steps and the door, then cut out green bush shapes and did pink French knots. I sewed down the pool and cut a little scrap for the diving board. I used gray thread to stitch on a ladder and the diving board attachments. I sewed down the umbrella and table and added stitched on legs and fold lines on the umbrella. I sewed on the tree and added the tree house. I sewed a line of back stitch to show the roof line, and made several stitches across the tree trunk for a ladder.
Tip: Worried your French knots won’t hold up to play? Practice until you can make then nice and tight, and try adding a drop of Fray Check to then – using a toothpick to apply it.

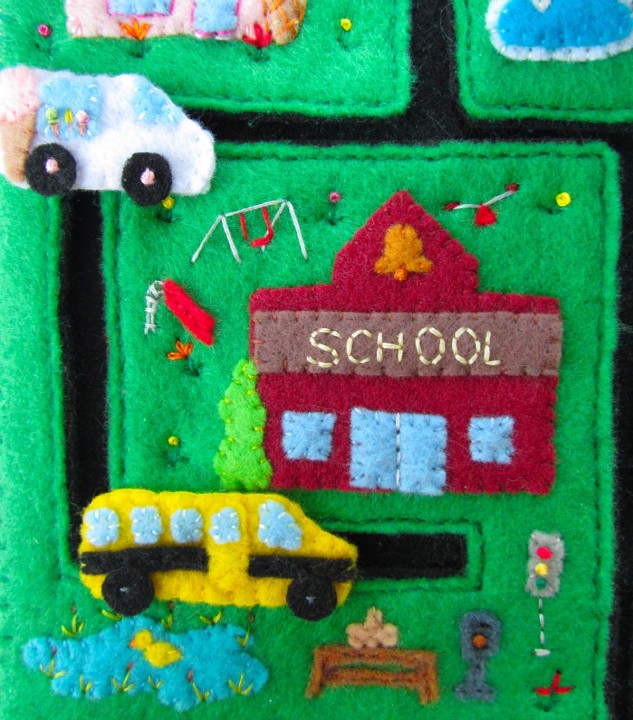
School: I started by sewing the word SCHOOL to the sign strip. I sewed down the building and the sign strip. I sewed on the windows and door, then sewed a line down the center of the door. I sewed on the bell and made a French knot at the bottom. I cut out a pine tree shape and sewed it to the side of the building. I stitched on some playground equipment with thread, using tine scraps of red felt for the slide and the triangle base of the seesaw.

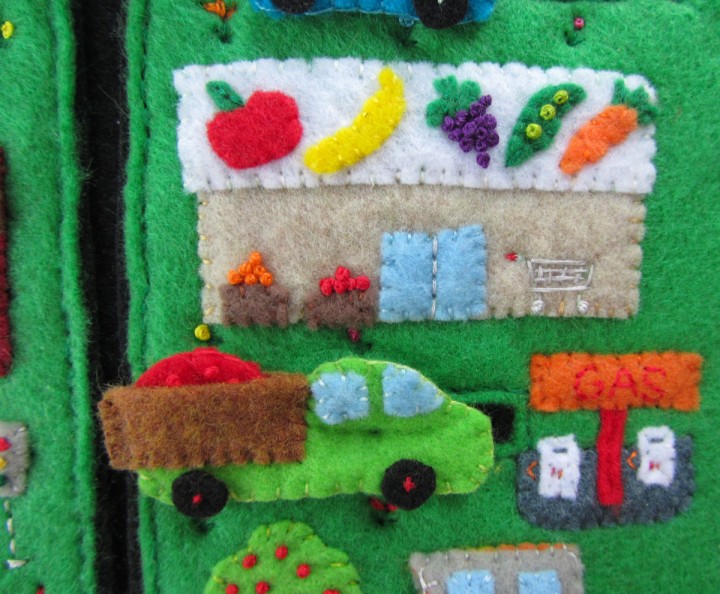
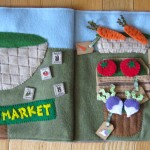
Market: I sewed on the building and the roof/sign base. I sewed on all the little fruits and veggies, using French knots for the peas and grapes. I sewed the door on and added a line down the middle. I stitched the grocery cart and wove some stitches in a basket weave pattern inside of it. The wheels are more knots. I sewed on the brown produce bins and used French knots to make the oranges and apples.
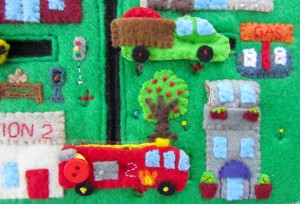
Fire Station: I sewed down the building and sewed on the garage door, windows and door. I added stripes to the garage door to show the panels. I sewed the words FIRE STATION 2 to the sign, as well as the fire emblem, then sewed it down.


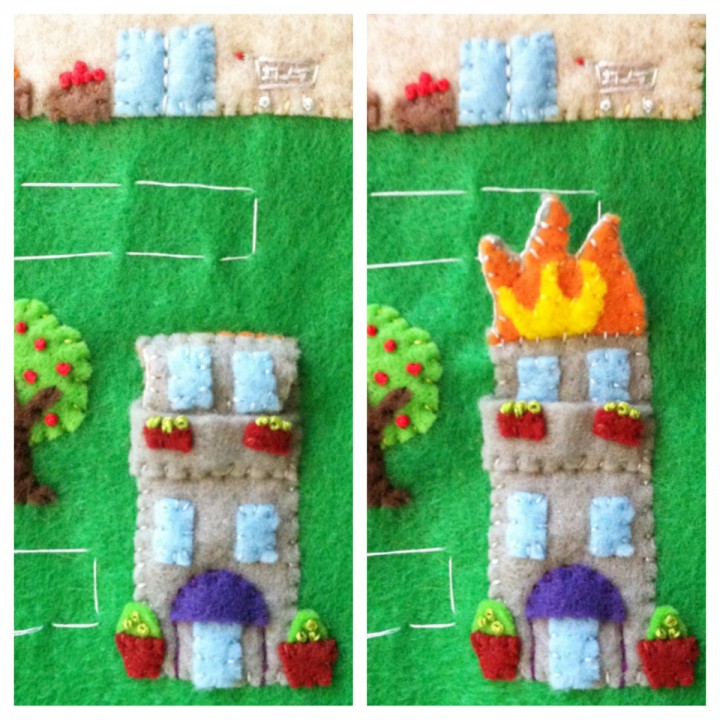
Apartment Building: I sewed down the building, door and windows, leaving room between the two rows of windows for the balcony pocket. I decorated with balcony before sewing it on – little maroon rectangles to make planter boxes and green French knot plants. I sewed the awning on only along the curved top, and added lines of stitching for support poles. I used more scraps and French knots to make the planter pots on either side of the door.
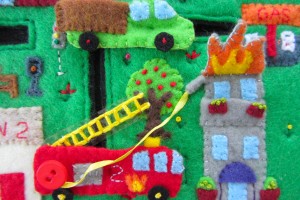
I created the flames as a little flap sewn to the top of the building. I sewed the yellow flames to the orange, and I sewed two windows to the grey flame backing (so they line up with the windows on the building when the flap is down.) Then I sewed the two sides together. I sewed the flat side of the flap to the top of the building, flame side up. Then I was able to tuck it in to the balcony to hide it.


Roads: I basted a square of stiff black felt (it’s this, but only $1.99 at the store) to the back of my green background. Pins probably wouldn’t work well, but paper clips or binder clips might. Using green thread, I sewed the shape of my roads and pulled out the basing (see photo above left.) I hand stitched, but a machine would work well. I sewed a second square of stiff black felt to the back, going through all three layers. (This is why clips might save you time! Since this 9″ square will ultimately be sewn to your full page, how you bind the layers together at this point doesn’t really matter. I machine sewed over all this when I constructed the page.) Then, with my micro-tip scissors, I cut away the green layer and the top black layer inside the roads. It then looked like the photo above right.

At this point, all the blocks in the city will flop around and definitely not hold the cars in place. You need to add some stitching through all three layers, about a 1/4″ from the edges of the roads. I sewed all of the elements below through all three layers to do some of that, then stitched little flowers along the road everywhere else to hold it in place.

Other Elements:

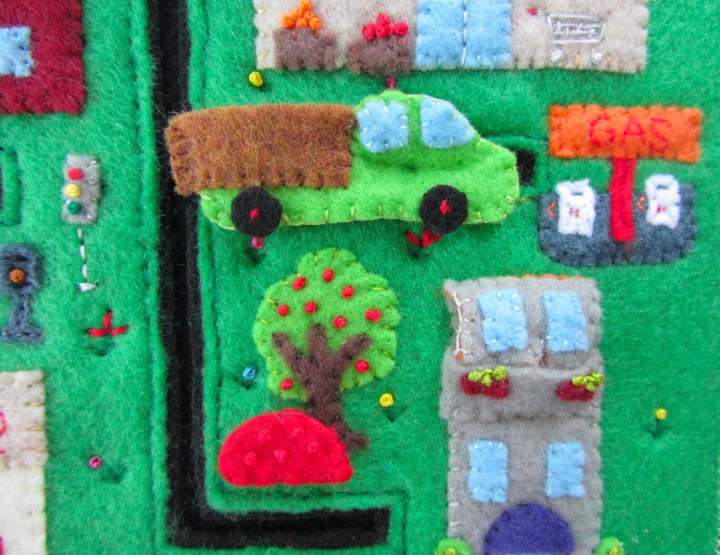
At the end of the road below the market, I sewed on the gas station base and pole. I sewed the word GAS to the sign, then sewed that down. I sewed on the pumps, making a few tiny stitches for the details and hoses.

Below the road under the school, I sewed on the pond. I cut a tiny scrap of yellow felt into a duck shape, using yellow thread to attach it and cinch in his neck. I stitched in a triangle shape for his beak. I added green stitches with little brown tops to make cattails around the pond. I sewed on a picnic table and basket, as well as a grill. I added black stripes to the grill and a brown French knot burger. I sewed on the traffic light and made the lights with French knots and stitched a base.

Next to the apartment building, I sewed down a tree and added French knot apples. The produce truck can visit and pretend to load up on apples.

The flower stems are made from three green stitches that fan out from the bottom point. I topped the center stitch with either a French knot or a daisy loop flower. Bring your needle up through the felt at the base of your petal, then down through the same hole – but don’t pull it all the way through.  Where the top of the petal will be, come up through the felt and run the needle through the loop you left. Pull tight and go back down through the felt a little ways away from your last hole, making a tiny stitch to hold the petal loop in place.

Vehicles:

School Bus: On the front piece I sewed the black stripe, the door, the windows and the wheels. (Some of the wheels are sewn on with a simple “x” and others are a French knot with an “x” over top.) I  sewed the two sides together and added a button to the back. I chose to go through both sides of the vehicle with my button for strength, but it might not be necessary.

Car: Super simple! I sewed the windows and wheels to the front, sewed the front to the back and sewed on a button.

Ice Cream Truck: I sewed the windows to the front then sewed on the ice cream cone. I embroidered some ice creams in the window. The cones are three little stitches in a triangle shape with French knot ice creams and a horizontal stitch below the knots to make the part of the ice cream that overhangs the cone. The popsicle is just some vertical stitches. I sewed on the wheels, sewed the back and front together and added a button.

Fire Engine: I sewed the windows, flame design, “2”, wheels and an instrument panel (with a knot and a couple stitches for decoration) to the front. I took a bit of yellow ribbon and wrapped a tiny scrap of felt around one end, sewing it in place. I sewed the other end of the ribbon to the front piece and sewed a red button on top. I made sure my button wasn’t flush down against the truck – you need room to wrap the hose around under it for storage. I took a scrap of clear vinyl and stitched a yellow ladder to it, leaving some extra vinyl at the bottom with a tiny hole cut in it. I took the tiniest button I had (1/4″ I believe) and sewed it to the back of the truck through the hole in the ladder piece. That let the ladder pivot up and down. I sewed the back and front together and added a button to the back.

Produce Truck: I sewed the windows and wheel tot he front then sewed the front and back together. I placed the two truck be pieces on either side of the truck and sewed them into a pocket along the sides and bottom. I added a button to the back. I sewed French knot apples to the front of the apple pile, then sewed the front and back together.

Phew! All done! I’d originally hoped I could have the vehicles stay buttoned to the page and you just slide them around. But, despite the stiff felt, the cars pop out when you go around corners. My first car had a large 1″ button that did stay in much better than these small ones, but it still pulled out easily. I decided that I’d use smaller buttons that didn’t detract from the vehicles, and I’d use the channels to “park” then when storing the page. Jax likes to have those tiny cars in his little hands anyway, so he’s happy!

For more free quiet book patterns, visit my quiet book page. Stop by the Facebook page with requests or photos of pages you’ve made, and visit my support page to help me run this site.

A camping page is already underway! Previews are being posted on Instagram and Facebook.

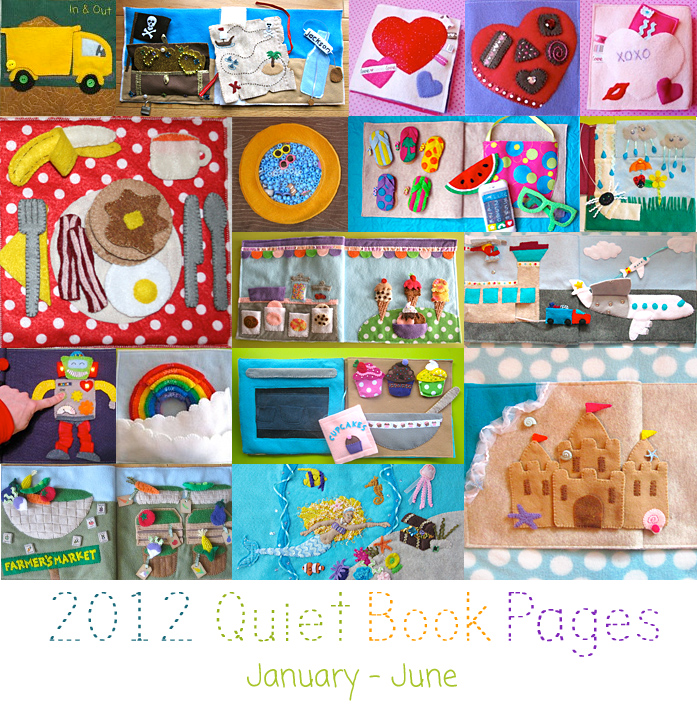
Quiet Book Pages from January through June

Back in January, I wrote up a review of all the quiet book pages I had designed and sewn since beginning in September of 2011. Six months have passed and I’ve gotten so much done. Time for another look back!

Click a thumbnail below to visit a post:


Top 5 Most Popular Patterns from January – June

  1. Sandcastle – 5 comments – 5,598 views
  2. Treasure & Pirate Map – 2 comments – 5,590 views
  3. Ice Cream Parlor – 2 comments – 4,487 views
  4. Cook Breakfast – 2 comments – 4,375 views
  5. Itsy Bitsy Spider – 12 comments – 4,054 views

Top 10 Most Popular Patterns

  1. Sock Matching – 13 comments – 14,459 views
  2. Circus Train – 8 comments – 9,337 views
  3. Forest – 7 comments – 8,898 views
  4. Starbucks – 2 comments – 6,378 views
  5. Mailbox & Letters – 2 comments – 5,681 views
  6. Cookie Shapes & Colors – 6 comments – 5,613 views
  7. Sandcastle – 5 comments – 5,598 views
  8. Treasure & Pirate Map – 2 comments – 5,590 views
  9. Rocket Ship – 6 comments – 5,574 views
  10. Astronaut – 2 comments – 5,440 views

I am so very happy to introduce you to Imagine Our Life’s newest sponsor. My addiction to sewing with felt has often lead me to browse online, drooling over the beautiful colors available in wool and wool blend felt. I am putting my heart and soul (and countless hours!) into sewing interactive quiet book pages that Jax will be playing with for years. I want them to last so that he can pass them on to his children. I knew I needed to try wool felt, which is thicker and more durable, and that is where American Felt and Craft really shines!

American Felt and Craft was founded on the idea that creativity means coloring with the whole box of crayons.  This philosophy inspired us to carry the largest selection of felt available anywhere on the internet. Because we know every stitch matters, we only sell heirloom quality felt and sundries.  We carry over 150 colors, shades, and tones to complete your personal work of art. From basic black to bubble gum, whatever you’re looking for, American Felt and Craft has the perfect color!

They had me at “heirloom quality” – because isn’t that exactly what we want to create when we are sewing for our children or grandchildren? You can find American Felt and Craft’s online store here and their Facebook page here. They ship worldwide and carry more that just felt. I’ll be trying out some of their crinkle material to make my campfire nice and crackly! Just look at those amazing felt colors!

Good news for you: American Felt and Craft will be offering a giveaway on an upcoming quiet book page. Can’t wait? You can save 15% off your first order with the code “imagine“.

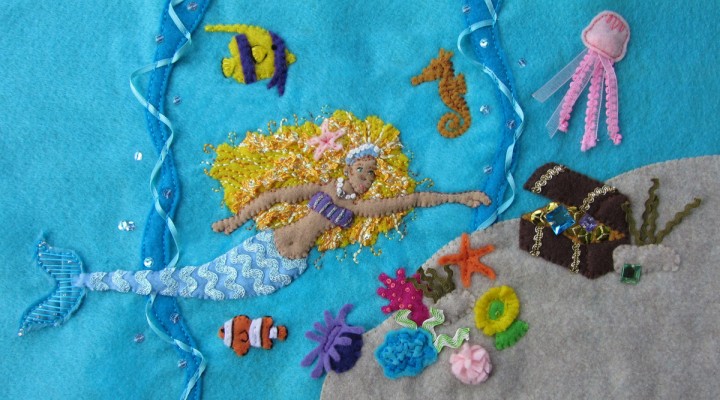
Mermaid Felt Embroidery Art Piece

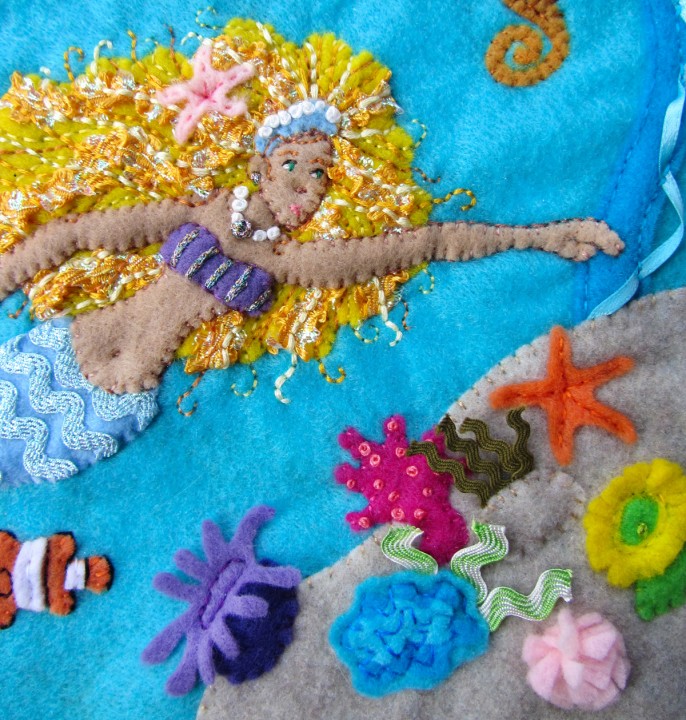
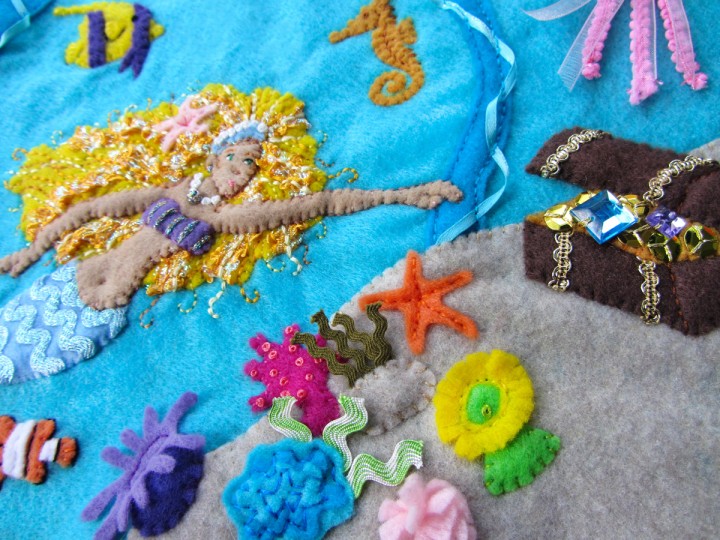
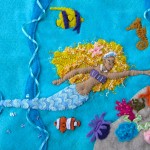
I took a little break from making quiet book pages and patterns to do some sewing purely as a creative outlet. I wanted something that could be used as the newest masthead at the top of the blog (Not reading this on the site? Come see!) and also be framed and hung up on the wall of my craft room that doesn’t exist yet. I am placing this in with the quiet book pages as I am including the pattern and suggestions for a page.

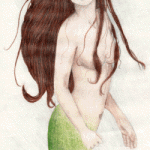
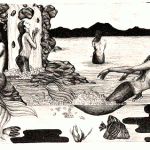
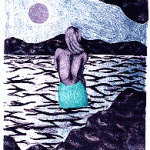
I’ve always loved mermaids. My major in college was studio art, with a focus on graphic design and printmaking. I especially loved doing lithography. Most of my printmaking work features fairies, angels and mermaids. Here are a few photos of my college mermaid art. The colored pencil drawing is probably from my senior year in high school. My dad shocked me the summer before that school year by buying me a $70 color pencil set. I found these photos on my computer last night. They were taken in 1998!! Thus the tiny file sizes. One day I’ll need to get the portfolio out and take better ones.


I also always wanted to be a mermaid for Halloween, and I didn’t want to do it halfway. Without a pattern, I sewed together my vision of a mermaid costume. I used a stretchy sparkle fabric so the skirt could be long and narrow, but I could still walk. There was some interfacing built into the fin to give it shape. I hand sewed a zillion and a half scale-shaped sequins all over it. I bought cheap party favor shell necklaces and cut them apart to hand sew to a nude bra. I added a lot of accessories made from shells and fake pearls. I loved it and ended up winning a Halloween costume contest!


Back to the felt! I’ve been working on this for the past 2 weeks while waited for supplies for the camping page to arrive. Because I had sewing time to fill, I kept adding and adding to it!

I drew out a quick pattern for the mermaid and treasure chest, but cut the rest by hand. The two fish and the yellow and green anemone were based on this pattern, but cut by hand. I spent a lot of time on the hair, using 4 colors of thread and a ruffly trim for texture. I kept sticking more and more color into the coral reef. I really could have gone on forever, hehe. I love how it came out!

I am including my mermaid pattern by request. Click here to download it. You could easily make her into a little doll to go on a quiet book page. Just cut two of everything except her face and top so she has a front and back. You could make both her and the chest snap off the page, and perhaps those free fish as well!


If you use the mermaid pattern, I’d love to see what you make with it! Email me or stop by the Facebook page.

Baking Cupcakes Quiet Book Page

A quick note:
Don’t forget to enter out blog-iversary giveaway for a chance to win a kit to sew
your very own Farmer’s Market quiet book page! You have until Wednesday.

I am super excited to have this page all done. It’s one of the pages I’ve known I wanted to do since I was first introduced to quiet books. I waited to start planning it because I really wanted to go all out. I’m glad I have so much experience now, because it turned out just how I envisioned!

Baking Cupakes Quiet Book Page

For those of you who belong to our Facebook page, you’ve been seeing a lot of sneak peeks and progress photos while I’ve made this page. I plan to continue that since it is much easier to update there ten make a ton of small progress blog posts. Make sure you join if you don’t want to miss out! (On another side note, I’ve had people ask how they can support this site and my free patterns. You can check out a little page about it here.)
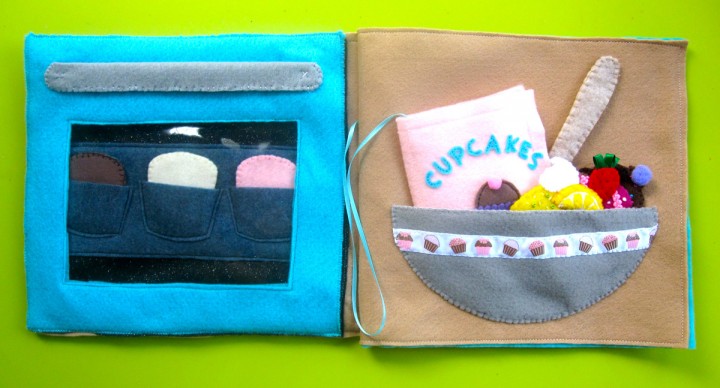
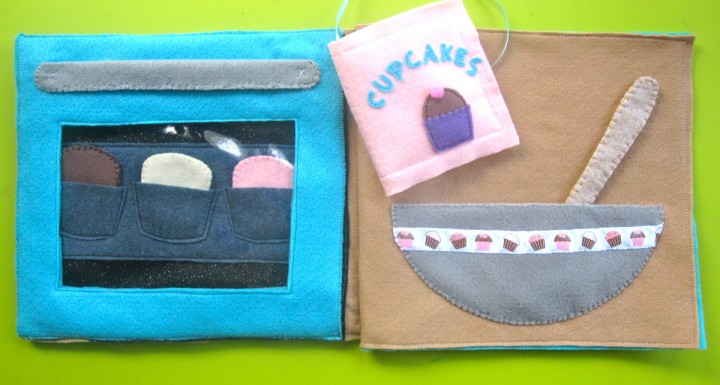
everything put away for storage

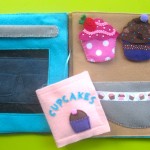
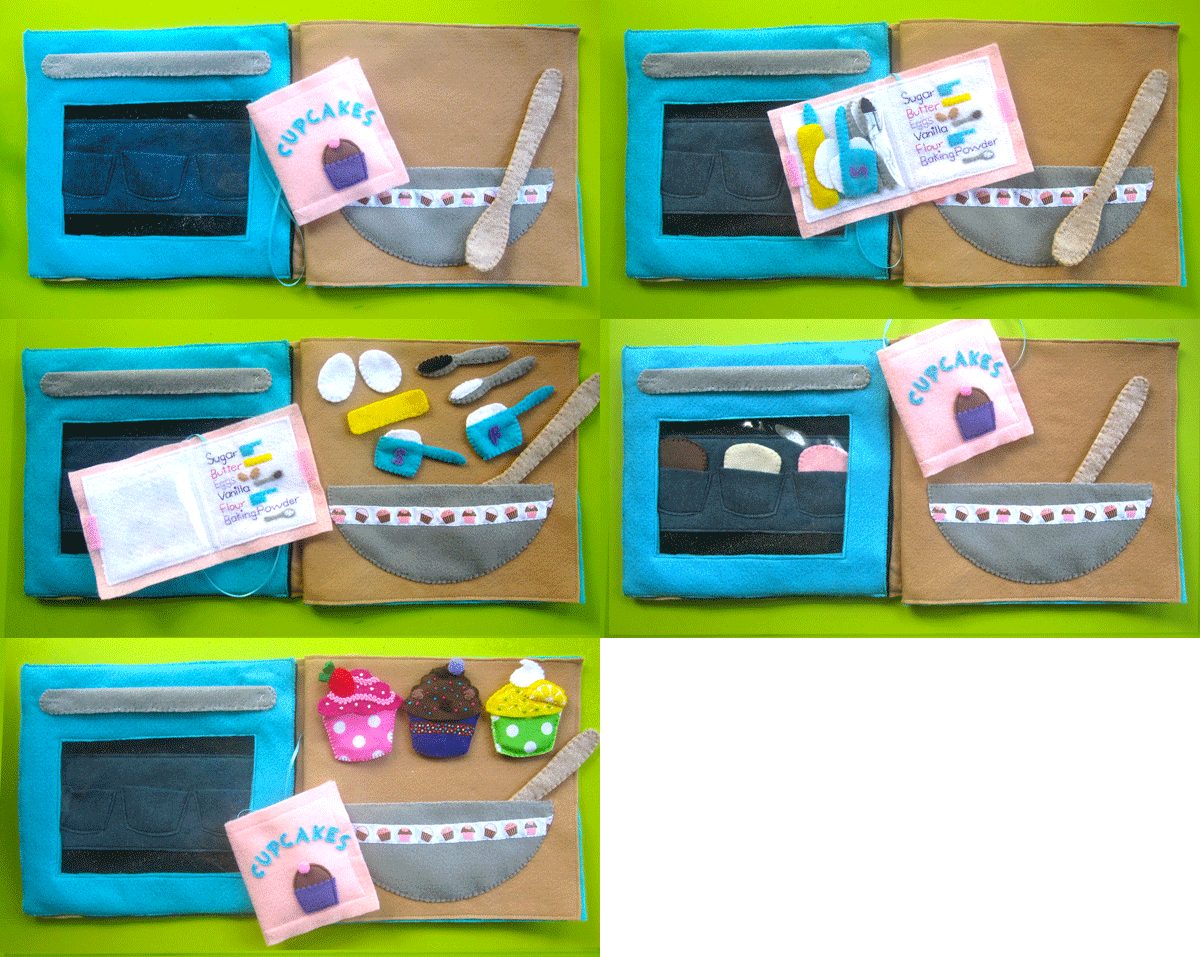
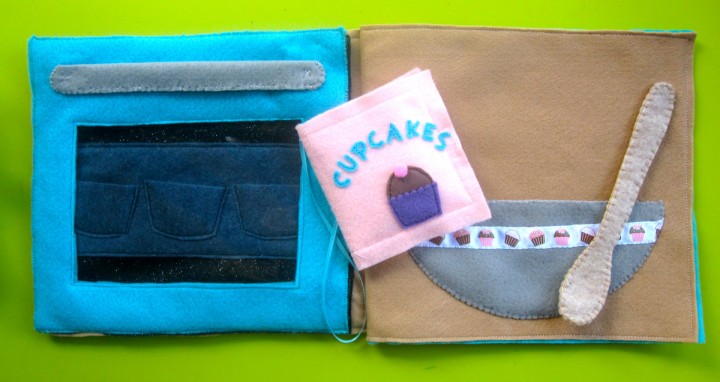
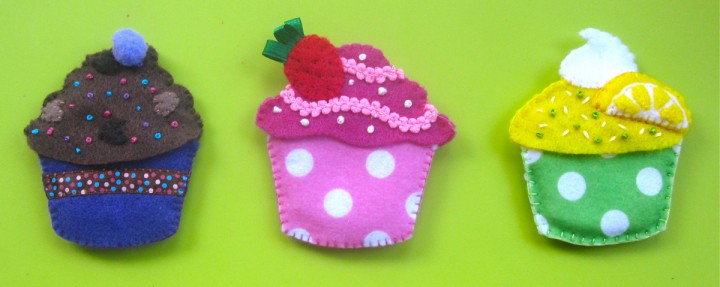
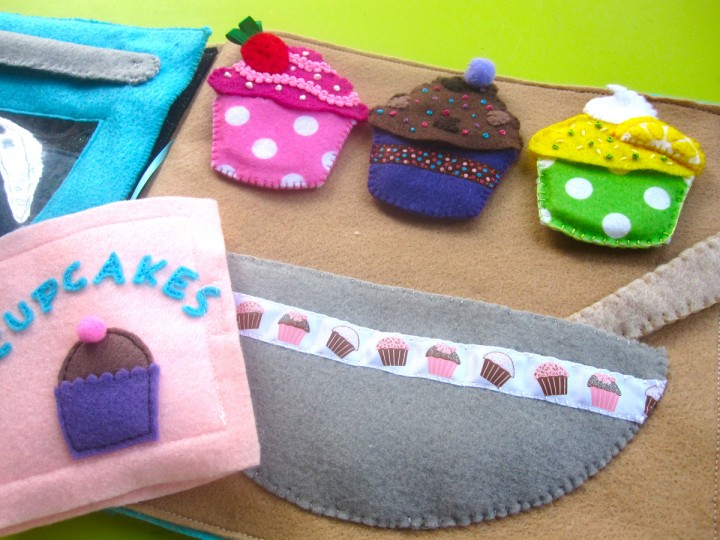
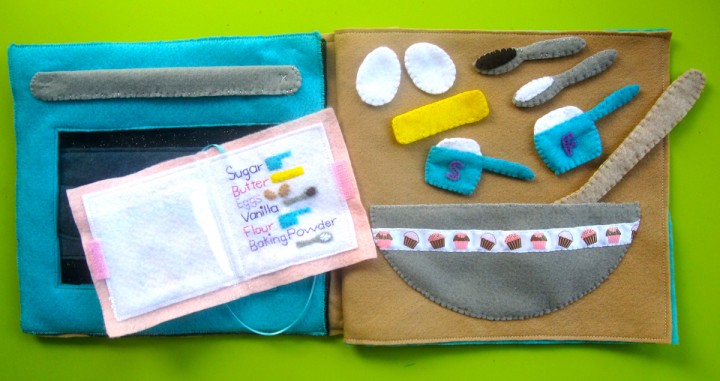
This page is another pretend play page featuring cooking (like out Let’s Cook Breakfast page.) The left side features an oven with a cupcake pan, the right side has a mixing bowl and recipe book. The recipe book holds cupcake making ingredients, and the mixing bowl stores cupcake parts and a spoon. There are three cupcakes: chocolate, strawberry and lemon, and they all come apart into three pieces. This is very good practice for manual dexterity. Jax can put the cupcakes in the cupcake tray, but he is still learning how to fit the frosting on top of the cupcake (it goes on like a hat.)
What I used: the pattern, 2 sheets of tan background felt, a 9” x 9” black glitter oven background felt, two 9” x 9” aqua oven door pieces with window holes, felt (in gray, dark gray, white, pink, hot pink, red, yellow, aqua, lavender, purple, cream, cocoa, brown, dark brown, natural and tan), clear vinyl to fit oven window and recipe pocket, two magnetic purse snaps, a scrap of Velcro, two small pompoms, thin aqua ribbon, green ribbon for strawberry stem, decorative ribbon for mixing bowl (mine is this, but from the craft store) and embroidery floss to match.


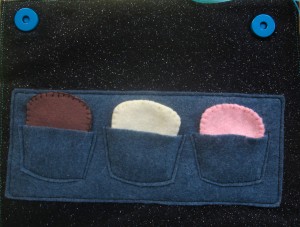
Oven: I used my sewing machine for the whole oven to speed it up. I started with the cupcake pan’s tray, sewing the 3 cups on like pockets. Then I sewed the tray down to the oven back (I used glittery black – $0.99 for one sheet at the store, but plain black would work too.) I sewed 3 layers of the oven handle together to make it sturdy, and stitched it to the top of the front piece of the oven door. I took two scrap squares of felt (2 pieces thick each) and installed the male half of a magnetic purse snap in each. I sewed these on to the inside piece of the oven door at the top corners. I sandwiched the clear vinyl in the window I cut out of the two door pieces, then sewed all around both it and the door itself. I went around the outside of the door a second time with a zig-zag stitch. I sewed the black oven inside piece down to the left side of my tan background and zig-zag stitched the oven door to the bottom. I installed the other halves of the purse snaps through both the black and tan layers of felt once I saw where the snaps lined up. I sewed the page backing to the whole page, making sure not to sew the oven door closed, then set it aside until the right-hand page was complete.

Mixing Bowl & Spoon: I sewed some decorative ribbon to the bowl (just because I wanted a reason to use it!) front and sewed the front to the back along the top. I then sewed the bowl to the bottom right of the tan background all around the bottom. I sewed the whole page to it’s backing, then sewed the two facing pages together with a length of aqua ribbon caught in the seam. (This will be used later for the recipe book.) I Sewed the pages together like this.

For the spoon, I cut three layers of felt to make it sturdy. I then trimmed the oval part of the top layer about 2mm smaller than the other layers. I sewed them together all around the edged with a blanket stitch, lining up all the edges exactly. This caused the bowl of the spoon to curve like a real one would.

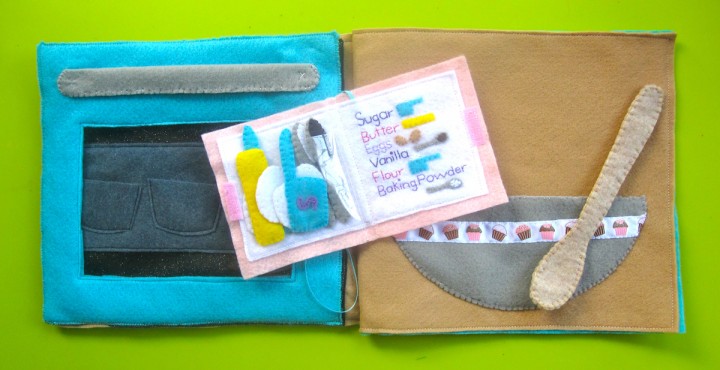
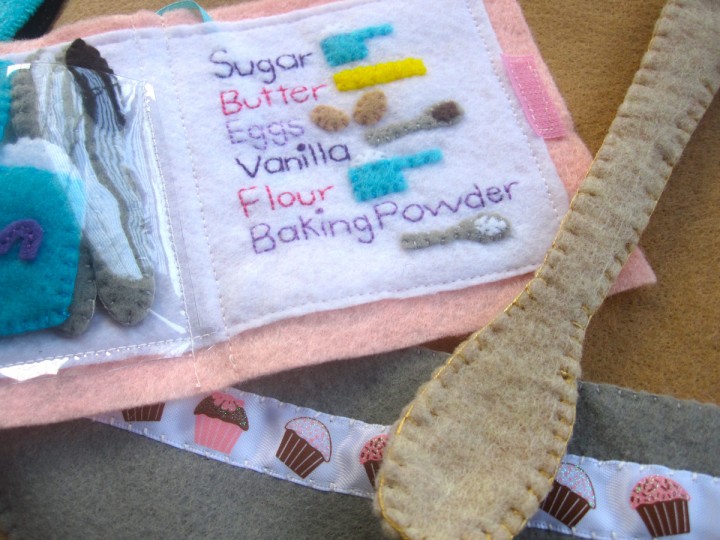
Recipe Book: I started out by stitching the recipe to the right side of the white felt “page”. I did mine totally by hand, but I later made up a pattern for you. The text is done in back stitch. The little felt pictures are sewn down in my usual applique technique of tiny perpendicular stitches around the edges. I sewed the white sugar, flour and backing powder with gray felt to make it show up more. I decorated the cover by back stitching the felt letters on, sewing down the cupcake and adding a pompom. I ran my needle straight through the pompom to sew it on.

I pinned the white page down to the inside of the cover and laid some clear vinyl over the left-hand side and the other end of the aqua ribbon sandwiched in like a bookmark. I sewed the page down, and made two vertical lines of stitched up the middle to make a book spine and close the right side of the clear pocket. I finished the recipe book by added a little Velcro to close it. I happened to have pink in my stash from years ago.

Cupcakes & Liners: The actual cupcakes are simply blanket stitched together all around the edges. For the cupcake liners, I trimmed the tops with my pinking shears to give that zig-zag look, then sewed the fronts to the backs along the sides and bottoms to make little pouches. I also added polka dot ribbon to my chocolate cupcake’s purple liner because I didn’t have the right polka dot felt. You can use whatever felt you’d like for your liners. Be creative!

Lemon: I sewed the four lemon segments to the cream colored rind, the sewed the rind to one of the yellow semi-circles. I sewed the two semi-circles together into the lemon wedge, then sewed it to the front of the lemon glaze. I also outlined mine with an orange-y thread to make it stand out more. I decorated both the front and back lemon glaze pieces with lime green French knots and cream colored stitches to look like sprinkles. I sewed the front and back together, leaving the bottom open so it can go over top of the cupcake and liner like a little hat. I then layered the two whipped cream pieces around it and sewed them together as well.

Strawberry: I had a little roll of pretty pink trim (mini ric-rac would work well too) I got for $0.50 at the fabric store. I stitched it down in two rows of waves on both the font and back of the strawberry icing. I made white French knots to add sprinkles. I sewed tiny brown stitches to the front of the strawberry to be the seeds, then sewed it down to the front of the icing through both layers of the strawberry. When I got to the top where the strawberry hung off of the strawberry, I sandwiched in some loops of green ribbon to make the top of the strawberry and finished the edge with a blanket stitch. I then sewed the front and back of the icing together, leaving the bottom open so it can go over top of the cupcake and liner like a little hat.

Chocolate: The chocolate is made the same way as the other two cupcake tops. I sewed down two shades of chocolate chips and added French knot sprinkles in colors to match my ribbon. I sewed a pom-pom to the top of the front. I then sewed the front and back of the icing together, leaving the bottom open so it can go over top of the cupcake and liner like a little hat.

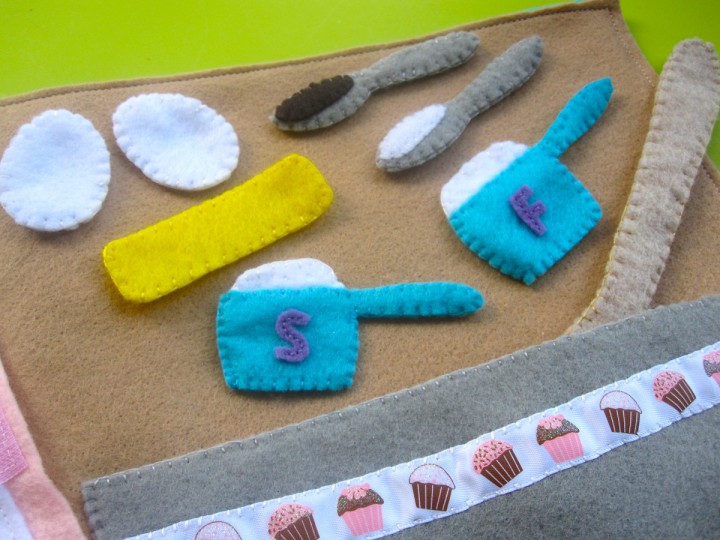
Baking Ingredients: The baking ingredients are all pretty similar in construction. They are sewn together with a blanket stitch around the outside. Where noted, I use 3 layers of felt for stiffness.

Measuring Cups: I back stitched the letters onto the front of the cups. I sewed little stitches on the white flour/sugar parts to giving it texture. When I stitched the handles, I stuck an extra strip of felt to stiffen it.

Butter & Eggs: These are all just sewed together around the edges.

Vanilla & Baking Powder: I sewed the vanilla/baking powder down tot he front of the spoon, then sewed around the edges of 3 layers of felt for strength.

And that’s it! All the ingredients go into the pocket in the recipe book. I had Jax pull them out and put them into the bowl in the order the recipe asked for. He loved it!

He keeps trying to put the completed cupcakes (liners and all) into the oven pockets. If you want yours to fit into the tray with the liners, you’ll have to make larger pockets. He loves the three flavors I made. I may end up make more in the future. The pattern makes it easy to add on.

I hope you enjoy this pattern! Please send me photos or post on the Facebook page if you make it!

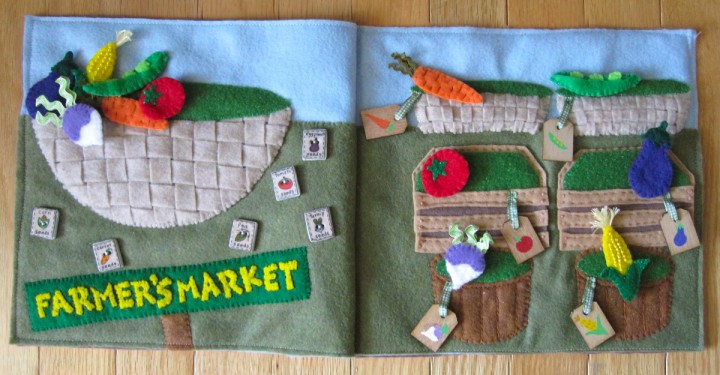
Farmer’s Market Quiet Book Page

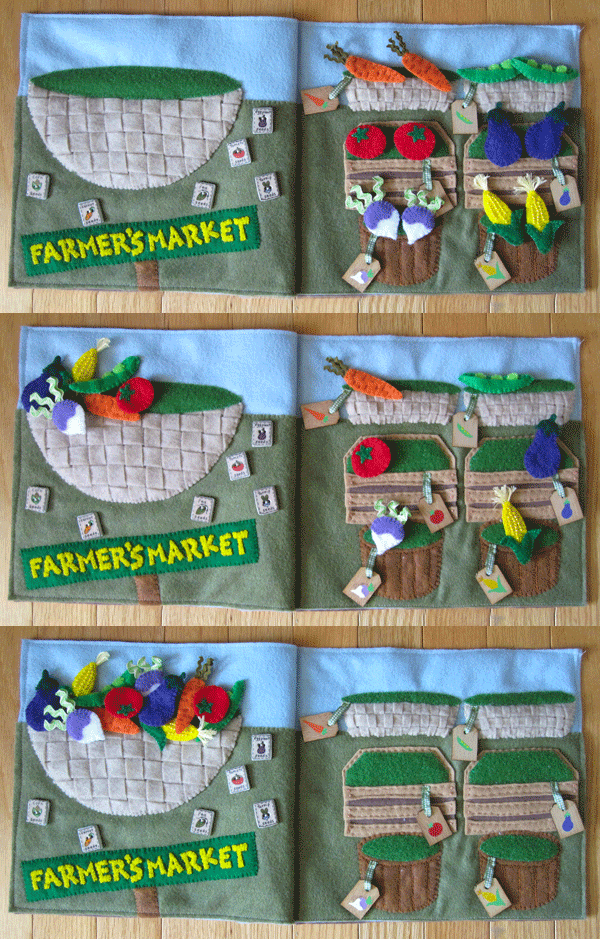
At last, I have another quiet book pattern for you! I got a little bit carried away on the details of this one, as I did everything but the veggies while on vacation at the beach. Feel free to simplify things wherever you need to.

Someone on the Facebook page suggested I do a farmer’s market page, and I loved the idea! I thought it was a great way to feature vegetables. Jax recently fell in love with this classic Sesame Street song from a sing-along DVD we got at the thrift store, so was is perfect timing.

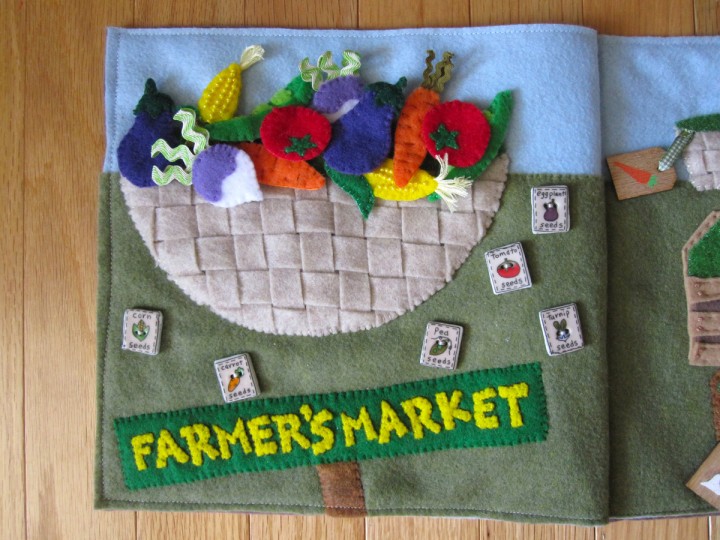
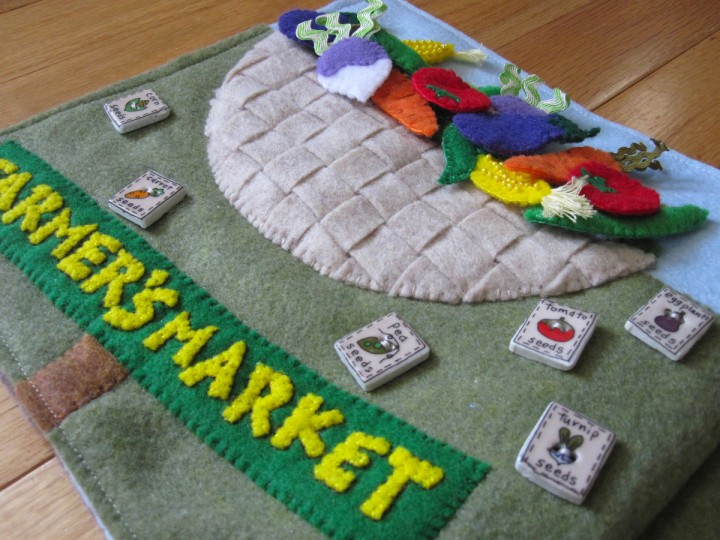
This page features sorting and matching. I also added some seed packet buttons I found at the thrift store. (I’d originally planned to make potatoes, but when I realized all but one of my veggies matched the buttons, I switched to a super cute turnip!) They have the veggie names so Jax can read them when he gets older. Right now he just tells me the letters he sees. The seed buttons are no longer sold, though I did see some on Etsy.

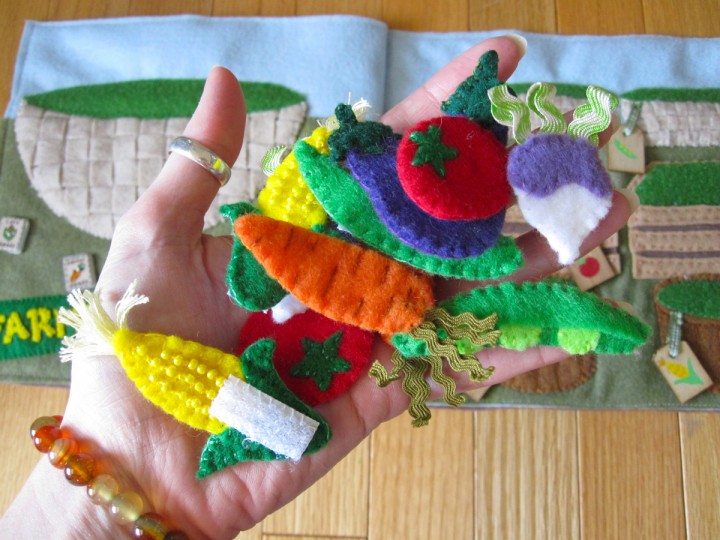
All of the bins and baskets have green Velcro (the soft loop side) for the green inside part. I used Babyville hook & loop tape I bought at Joann’s fabric store. I didn’t use the hook side. I find that the hook side of Velcro ruins felt when you pull it off. Instead, I used snag-free Velcro on the back of my veggies. While they don’t stick quite as strong to the loop unless you press down, they do zero damage to the page or the other veggies!

What I used: The pattern, background felt in sky blue and olive green, felt (in natural, tan, 2 browns, red, orange, yellow, 4 greens, purple, violet and white), thin green gingham ribbon, tiny olive green ric-rac, varigated green ric-rac, seed packet buttons and wood tags (that I painted to have the matching veggie shown.)

Background, Sign & Large Basket: I pinned olive green down to my sky blue background. Once all the baskets were sewn down, I went back and sewed down the exposed edges of the olive green. For the sign, I sewed down all the yellow letters to the green backing, then outlined them with a back stitch in dark brown. For the large basket, I cut scrap strips of natural felt and wove them together a little larger than the basket shape. I pinned it together and trimmed the woven strips to fit, then sewed it all down to the page. I cut the green Velcro (loop side) into the basket top shape and sewed it down.

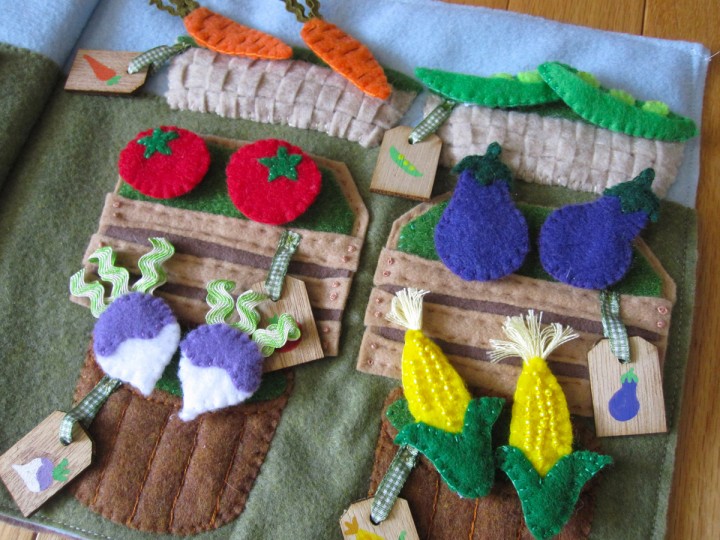
Vegetable Bins & Baskets: For the top baskets I cut three shapes for each. One was the base, one was cut into horizontal strips and one cut into vertical strips. I woven and sewed down the baskets the same way I did the large one. When I sewed them to the page, I let them puff up a bit to give a rounded shape. The tops are green loop Velcro.

For the middle bins, I laid down the tan backing piece, then the brown inner shadow piece, then the Velcro top piece and then finally three tan wood slats and pinned everything down. I used 2 French knots at each end of the wood slats, then did a running stitch across the top and bottoms. I did more running stitch around the top of the bin’s backing, then sewed down the Velcro.

For the bottom barrels I sewed down the barrel and the Velcro. I did a back stitch following the curve of the Velcro to make the lip of the barrel. I did a stem stitch to make the barrel’s slats. A back stitch would work well too.

I used plain wooden tags that I painted with craft acrylics as labels, sewing them on with loops of ribbon. If you have printable fabric, you could make tags that way to avoid painting.

Carrots: I decorated both sides with long, horizontal stitches in an orange-brown thread and sewed snag-free Velcro to one side. I sewed the two sides together with bits of tiny ric-rac sticking out of the top. I got my ric-rac at the craft store in the $1 trim bin.

Peapods: I sewed 3 peas down to one of the larger pod pieces and sewed snag-free Velcro to the other. I laid the smaller pod piece on top and sewed all three layers together around the edges. The top piece will become a little pocket.

Tomatoes: I sewed the green bits down to the fronts and snag-free Velcro to the backs before sewed them together.

Eggplants: I sewed snag-free Velcro to the backs of each eggplant, then sewed the purple pieces together. I layered the green tops around them and sewed them together as well.

Turnips: I sewed the violet tops to the white shapes then sewed snag-free to the backs. I sewed the front sand backs together with loops of variegated ric-rac sticking out of the top. That was also from the $1 trim bin.

Corn Cobs: I decorated my corn cobs with yellow seed beads. If your child will be playing with it unsupervised, I’d suggest skipping that step. For the corn silk, I tied a little bunch of cream-colored embroidery floss with a knot at the end. When I sewed the two sides of the corn ears together, I put the knot between them with the tassel stitching out of the top. I made sure to make a few stitches through the knot. I layered the green leaves over the bottoms of the ears and sewed them on. I sewed my snag-free Velcro on last, making sure to only go through the back layer.

For the seed packet buttons, I just sewed them on randomly by the big basket like they were laying out on the farmer’s market table.

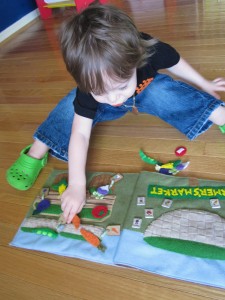
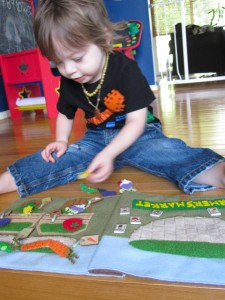
I love this page! And I really love that all the little pieces use Velcro but don’t stick to each other or cause pulls in the felt. Jax knew just what to do when he sat down with the page. He knows all the veggies except the turnip. We’re working on that one!