Tag Archives: Quiet Book

Holiday Quietbook: Birthday

I’m back with another pattern in my new Holiday Quietbook series. I’m planning to create these throughout the year, and I hope you sew along with me!

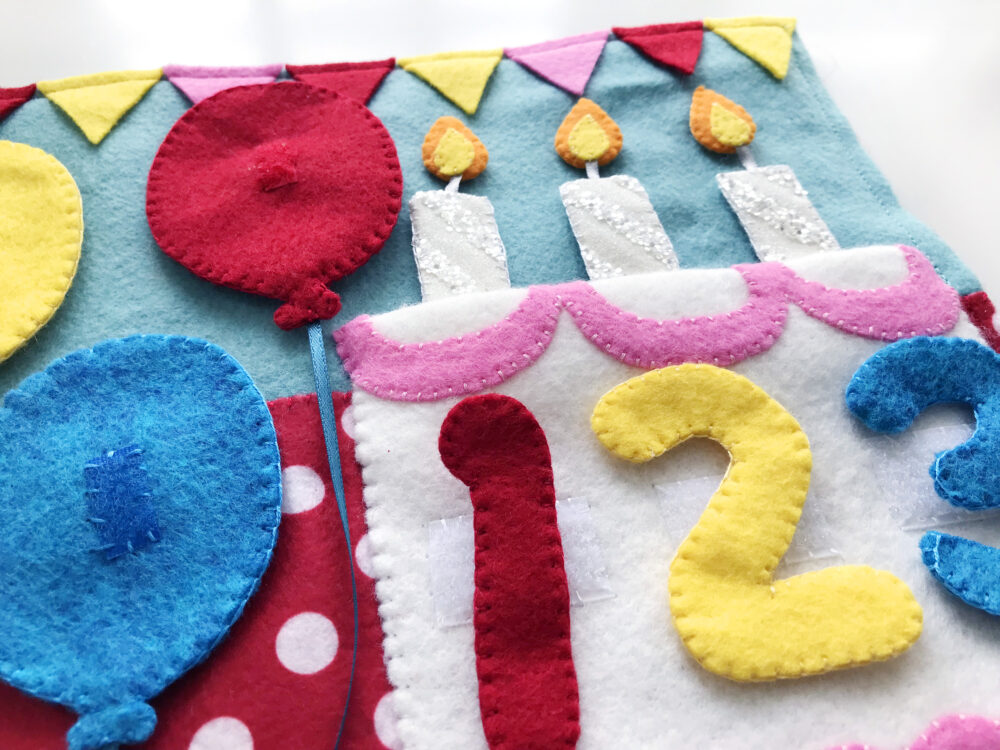
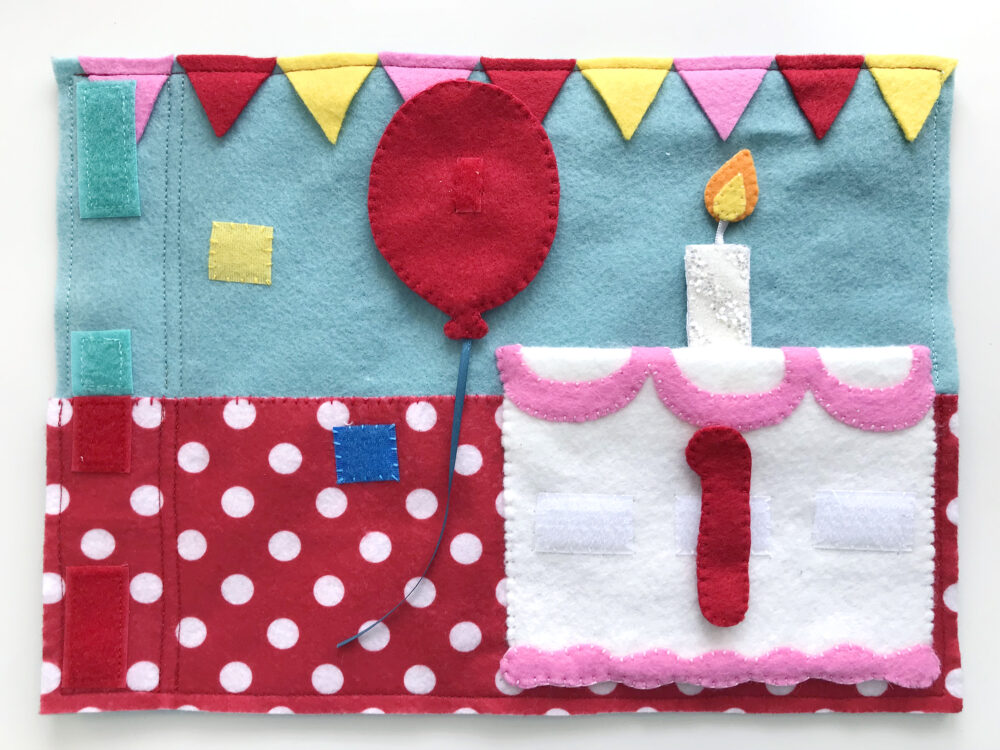
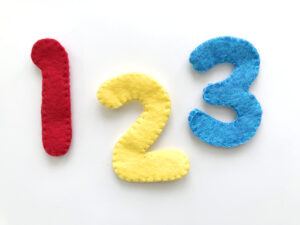
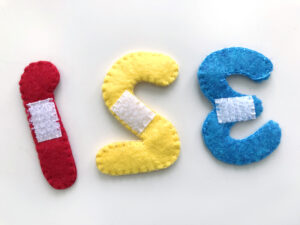
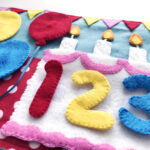
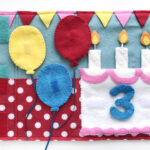
This page is a birthday page you could place anywhere in the holiday book, or make it as a stand-alone page. You can convert it to a 2-page spread by having two background pages and moving the balloons to the second page. It is an easy page to swap up the colors on, though I do like having the primary colors for the balloons and numbers.

To make this page I used:
The Pattern: download it here
Felt in:
 aqua, red polka dot, flamingoorange juice, lemon, big apple, white, pool party, and glitter stripe
Sequins in: white snag-free, red, yellow, and blue
Assorted Ribbon: I used thin teal ribbon for the balloons and thin silver for the candle wicks.
Your Choice of Binding Method: I’ve always used 3 grommets, but I’m testing out three 2″ hook & loop strips.
Other: felt glue and embroidery floss to match felt

Sewing the Background

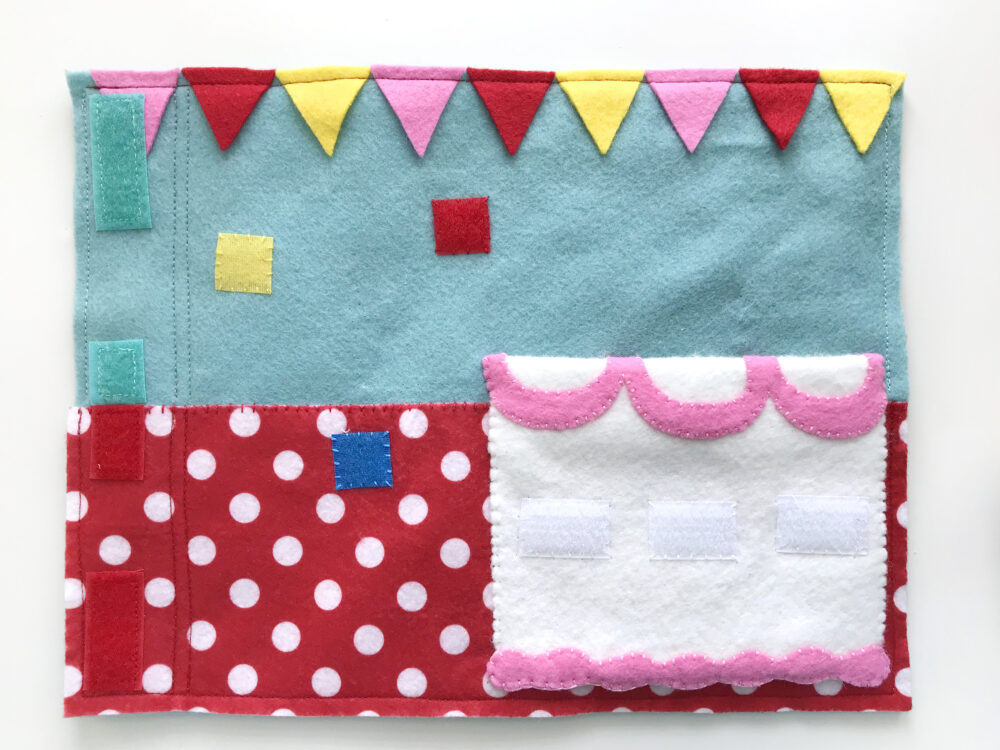
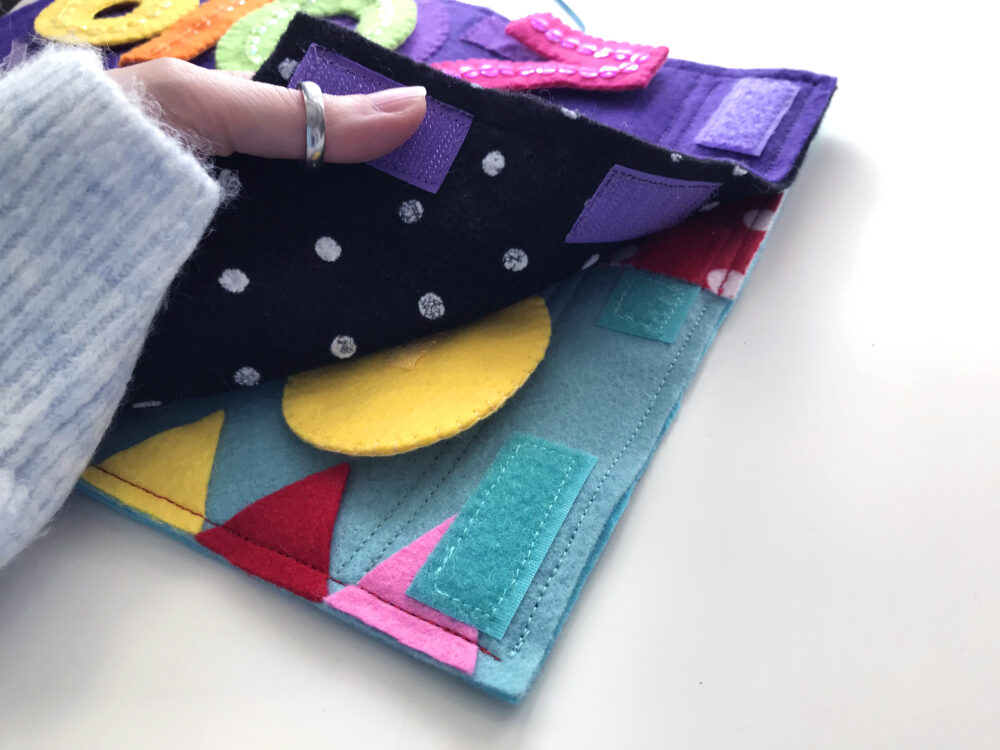
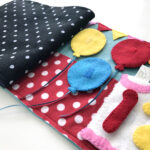
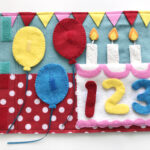
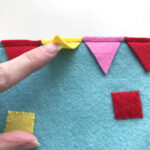
I used an appliqué stitch to sew down red polka dot felt onto the lower half of the page (mine was 12″ wide by 4.5″ high.) Refer to the picture above for where to sew three colored squares of hook and loop (soft side) for the balloons. I recommend doing that after the cake and balloons are sewn so you know everything has room.

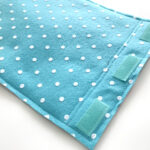
To attach the triangle flags, I just did a light line of glue across the top to tack them on to the top of the page. They got sewn down when I attached the backing onto the page with my sewing machine.


Sewing the Cake

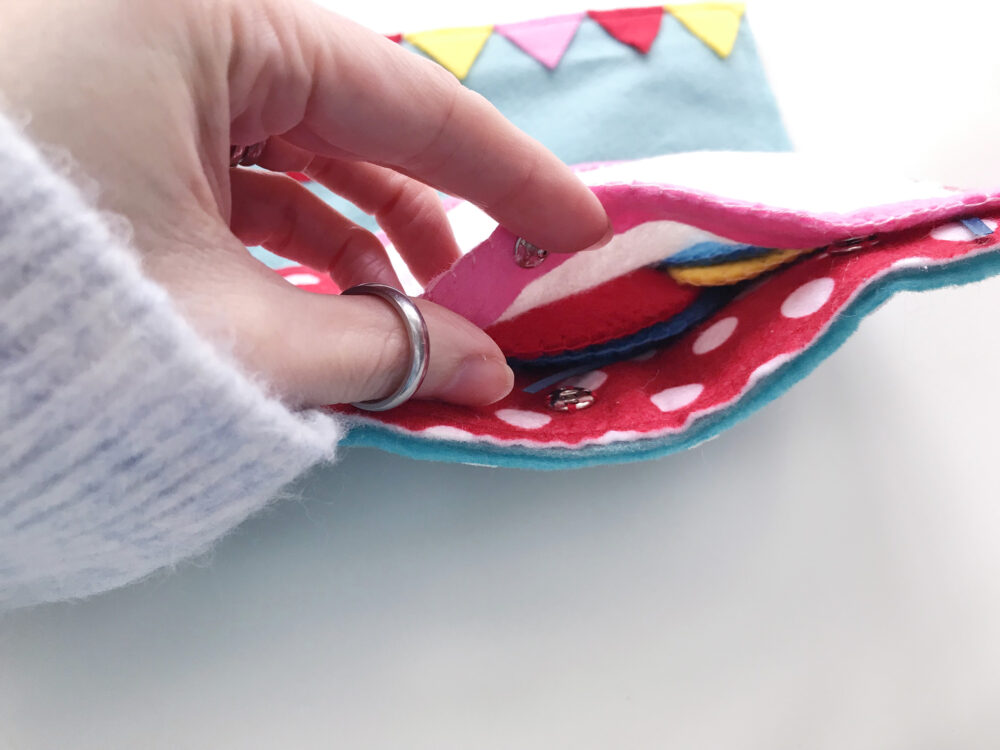
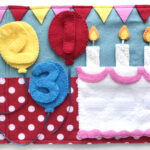
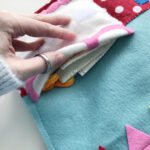
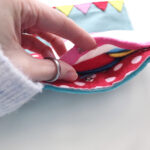
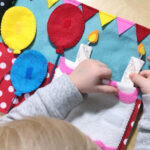
The cake is actually a bit more complicated then it looks. It has a shallow open pocket on the top and the rest is a pocket you access from the bottom and snap closed.

Start by decorating the cake. Sew down the icing swap and the top edge of the bottom icing. There is a larger bottom icing piece that goes on the other side of the cake. I glued it down lightly while lining it up with the front bottom icing, then I blanket stitched around the bottom edge through both layers. Sew three white snag free velcro bits onto the cake. I prefer to use snag free wherever I need the rough side of hook and loop on an actual page. Even though it doesn’t quite hold as well as traditional Velcro, the rough side is just too snaggy with felt.

Sew two snaps onto the inner bottom icing to hold the bottom pocket closed. Scroll down to the end of the cake section for a picture of the snaps.

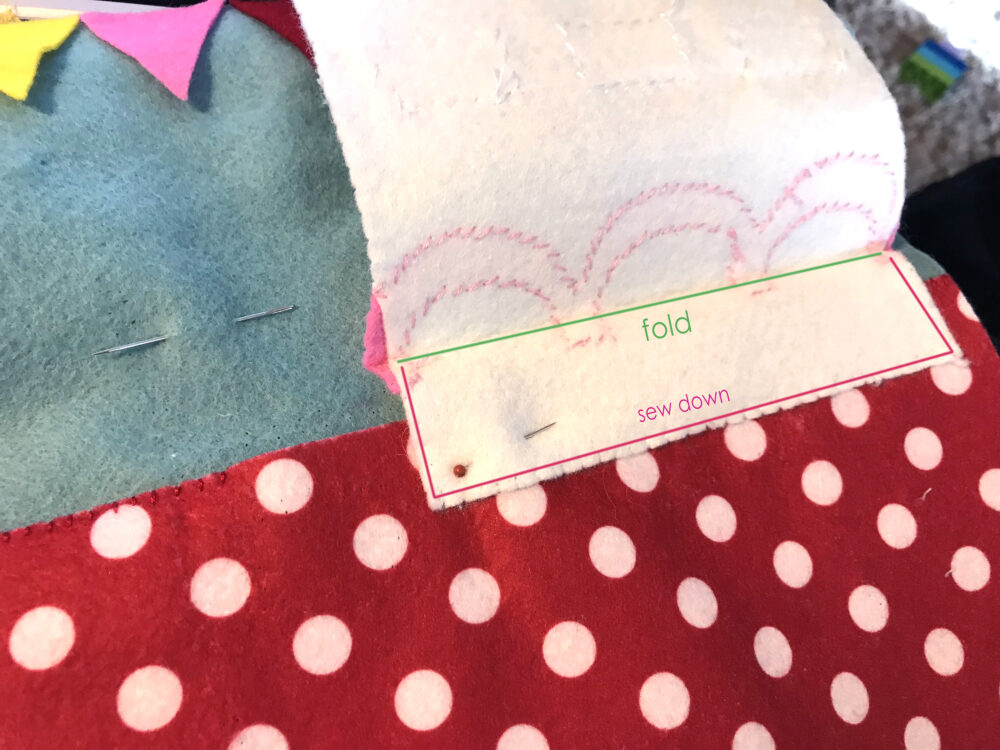
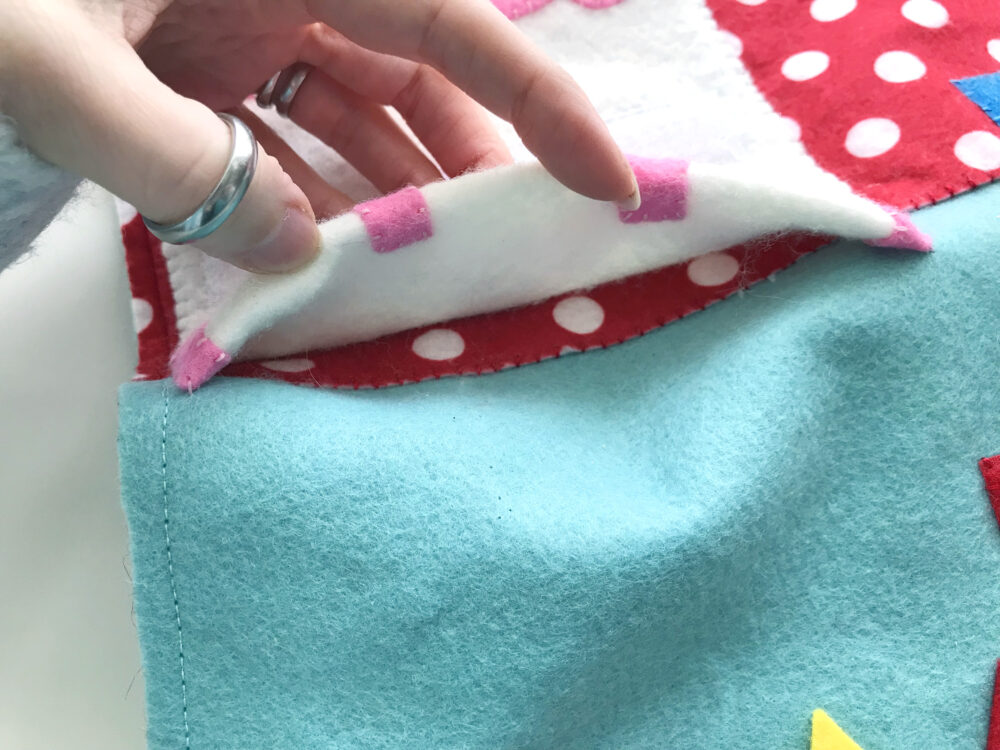
The tricky part is sewing the cake down to the page. You need to make a good crease where shown on the pattern. (I can use a light ironing on my felt, but test yours first! Sometimes using a straight edge to crease it works fine.) Place the cake piece as shown above: upside-down and wrong side facing out with the fold a bit above the table line. Make sure your cake fits well on the page when folded back down before sewing down the three sections shown above in hot pink.

When folded back down, you’ll have a shallow pocket at the top for the candles to sit in (or be stored sideways in.) Finish the cake by sewing down the sides of the cake. I did sew down the sides of the pink parts as well as the white cake sides. The last step is the sew the other halves of the snaps down to the page.

Sewing the Candles

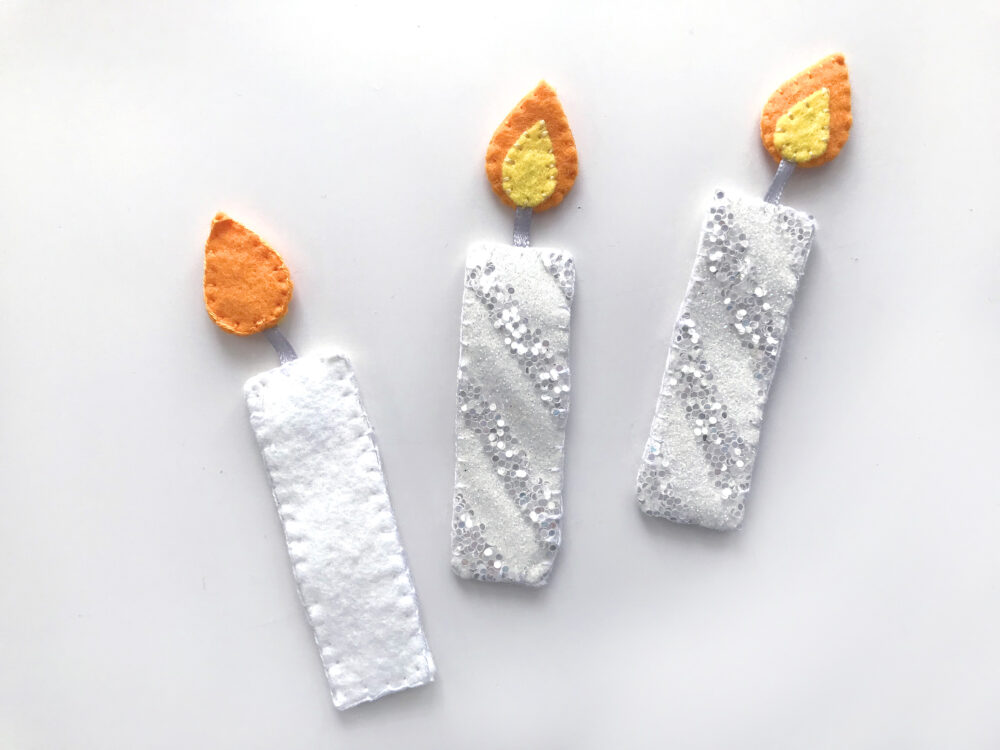
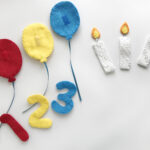
Start your candles by sewing each yellow flame onto three of the orange flames, lining up the bottoms. I tacked them down with a touch of glue first. Then sandwich a bit of ribbon between the flames and the rest of the orange flame pieces. The ribbons should stick out of the bottoms. The candle part is made of of the glitter stripe material and white felt. When you blanket stitch around it, be sure to catch the other end of the ribbon/wick in the top of the candle.

Sewing the Balloons & Numbers

The balloons are fairly straightforward. Sew a square of white snag-free Velcro to the backing pieces. Sew a bit of matching hook and loop (soft side) to the fronts. Blanket stitch the fronts and backs together, catching a thin ribbon for the balloon string in your stitching at the bottom.

The numbers are done very similarly, but without a string and no hook and loop on the front.

Finishing the Page

You can finish the page however you prefer. I normally sew a backing on, reinforce the binding edge with a couple rows of stitching, and add three grommet holes. This time I am trying something new. So far, so good! The two pages I’ve done this way are holding together nicely. I’ll definitely need a back cover to stop snagging, though.

I did everything the same as I normally would, except I sewed three 2″ strips of hook and loop tape to the page and the backing in the binding area. I put the rough side on the backing and the soft side on the page. The idea is you can stack the pages together but the child and separate them easily. I plan to do a cover that will attach to the top and bottom pages in the stack, once I see how big this holiday project ends up. Or maybe I’ll make separate front and back covers… We’ll see how it goes!

If you sew along with me on this holiday project, please tag me on any Instagram photos you post! My IG is @iolstephanieand you can use the hashtag #imagineourlife. You can also post to my Facebook page. I love our little community there and I hope we can all be more active in 2019! I’m not the best at social media as I try to spend my time creating. I don’t even watch tv, as I’d need more hours in the day!!

Something fun we’ve been doing is daily vlogging on YouTube! I include clips of sewing projects whenever I can. Please subscribe here, and click the bell to be notified of new videos. I post every night! Leave a comment to let me know you came from the blog!

A Valentine page is up next! I’ll see you soon with that!

Holiday Quietbook: New Year’s Eve

Hello friends! I’m so excited to finally have some quietbook patterns in the works for you. And, right before New Year’s Eve, I was inspired to start a holiday quietbook for Sebastian. I plan to regularly release quick holiday patterns (all free!) so you can sew along with me.

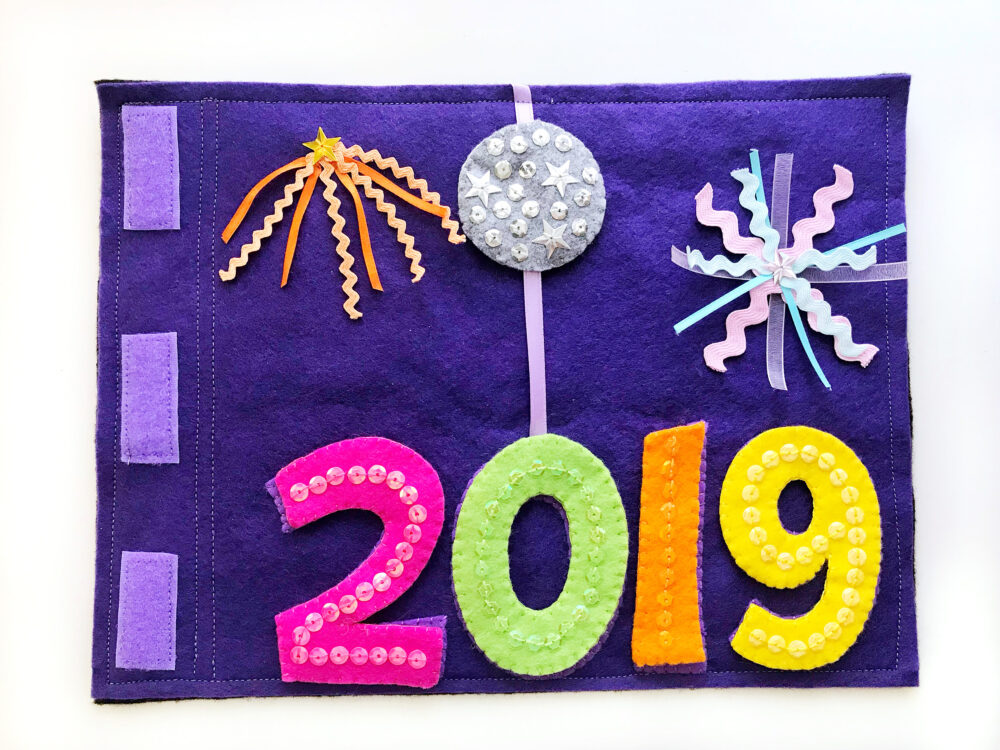
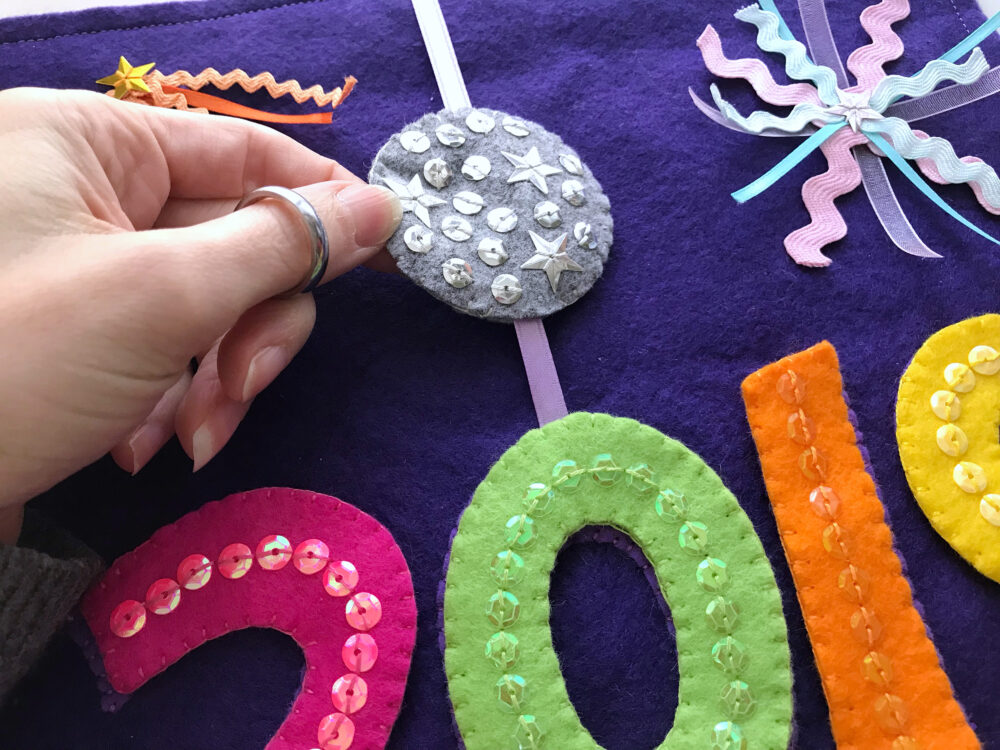
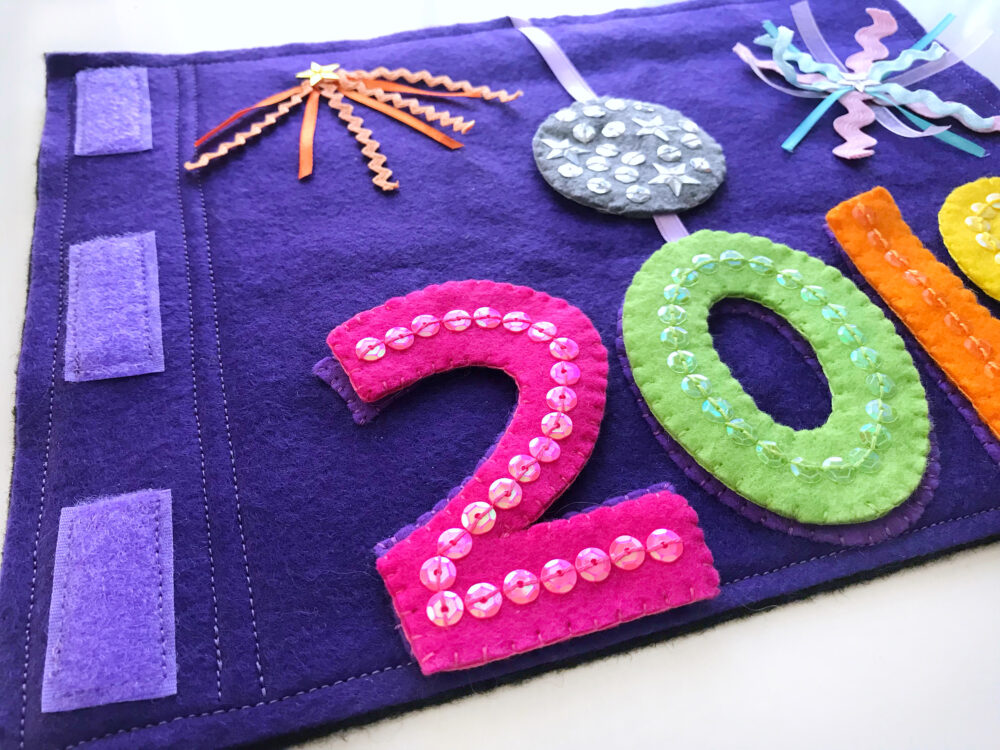
This pattern features New Year’s Eve. It has numbers to match, snaps to close, a NYE ball to “drop” and sequins that encourage little fingers to trace, much like Montessori sandpaper letters do. There are also two fireworks that add fun textures to feel.

To make this page I used:
The Pattern: download it here
Felt in:
grape, royal purple, hot pink, key lime pie, orange juice, sunshine, and grey flannel
Sequins in: silver streak, hot pink, dragonfly, goldfish, and buttercup
Star Sequins: assorted colors, plus three silver (mine are this brand but bought in a craft store)
Assorted Ribbon and Ric-Rac: I used 3″ – 4″ pieces from my stash
Your Choice of Binding Method: I’ve always used 3 grommets, but I’m testing out three 2″ hook & loop strips.

Sewing the Number Pieces

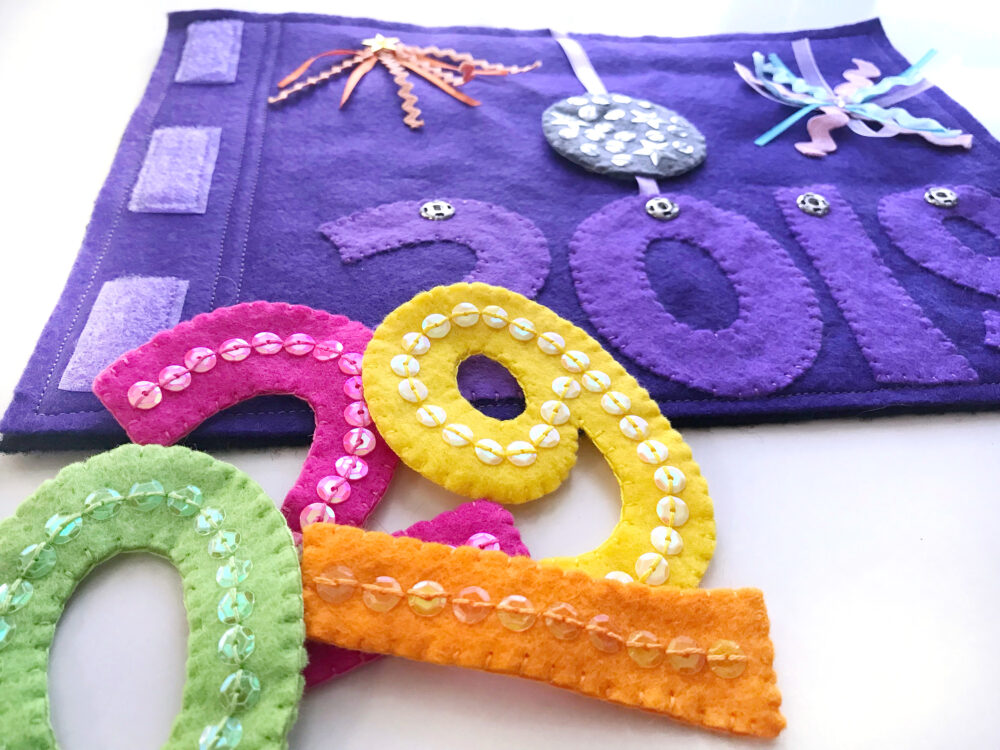
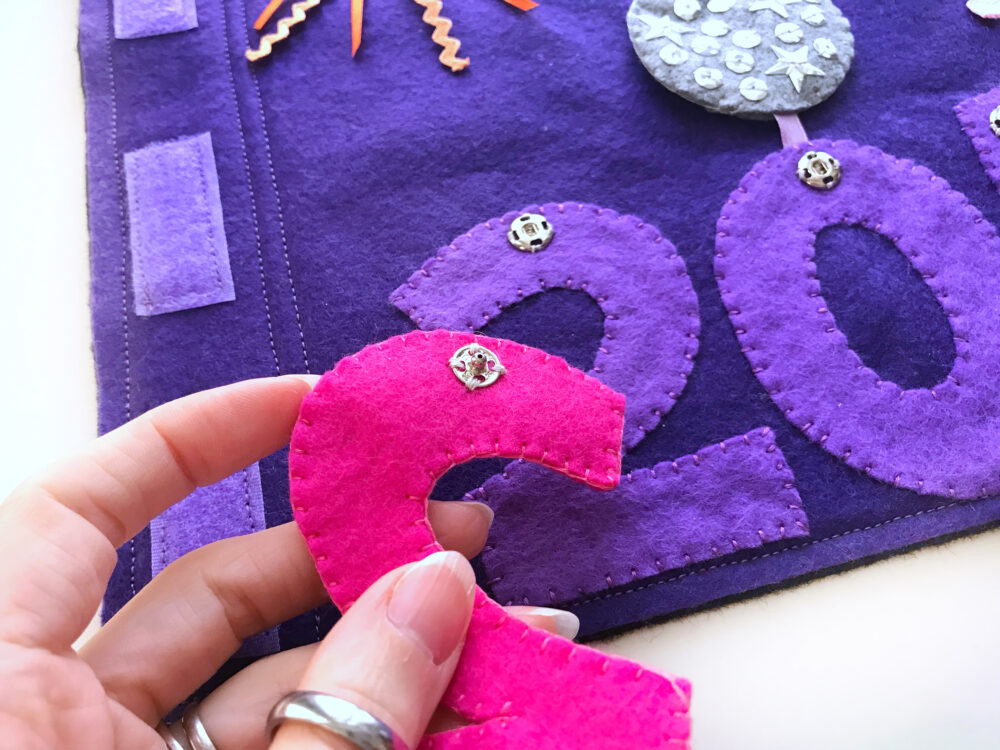
To make each of the number pieces, start by sewing a line of matching sequins down the middle of the front piece as shown. I like to make two stitches for each sequin. It looks like back stitch when they are all lined up. Sew a snap to the backing piece. I usually put the female side on the page and the male side on the loose piece. Use blanket stitch to sew around the edges of the piece.

You can definitely chose any color you’d like for the numbers. I let Sebastian choose. But it would look amazing in colors like black/silver/gold!

Sewing the Background

Allowing about 2″ on the side for the binding, sew down the purple numbers. Make sure to catch the end of a ribbon under the top of the 0. It need to be long enough to go past the top of the page. Sew the other half of the snap sets to the numbers, making sure they line up.


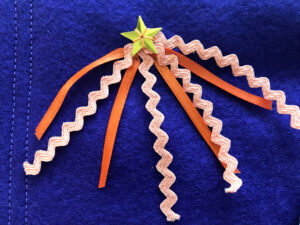
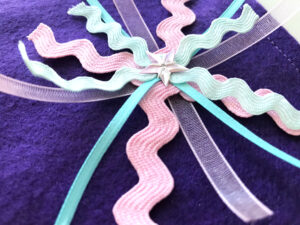
The orange firework is created by folding a bundle of 4″ – 5″ ribbons and ric-rac in half, stitching them down, and sewing a star sequin on top. I used two pieces each of orange mini ric-rac and ribbon. The pastel firework uses 3″ – 3.5″ ribbons and ric-rac laid out in a starburst shape with a star sequin sewn onto the intersection. I used two pieces each of pick and blue ric-racs and two each of pink and blue ribbons.

Choose and color combination you’d like for the fireworks! They are good for using up ribbon scraps.

Sewing the NYE Ball

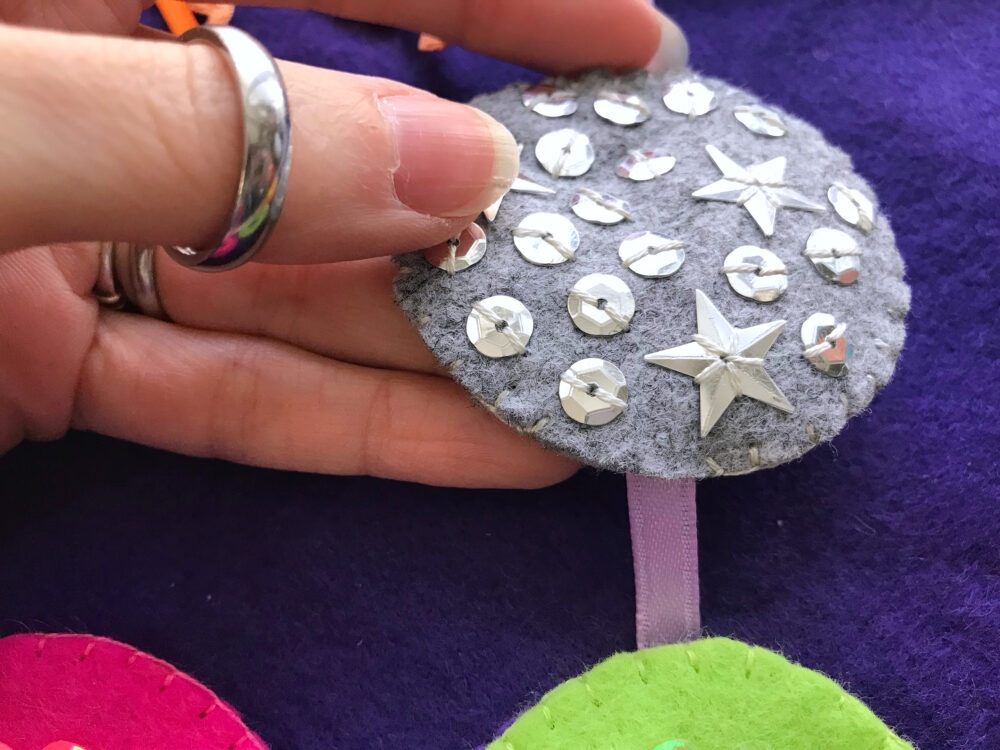
Start by sewing silver sequins to the front piece. I added 3 star sequins for extra sparkle. When sewing the front and back pieces together, you will need to leave a tunnel for the ribbon the slide freely through. I started my blanket stitch a bit off-center and continued just short of halfway around (see diagram). I then blanket stitched across the ribbon opening only through the top layer. I wrapped the piece around the ribbon before sewing the other side (leaving a gap at the top for the ribbon to come out) so I didn’t have to thread it through later. Along the top ribbon opening, I again blanket stitched only through the top layer. This made the stitching look consistent and gave the openings a bit more strength. Your finished ball should slide up and down the ribbon easily.

Finishing the Page

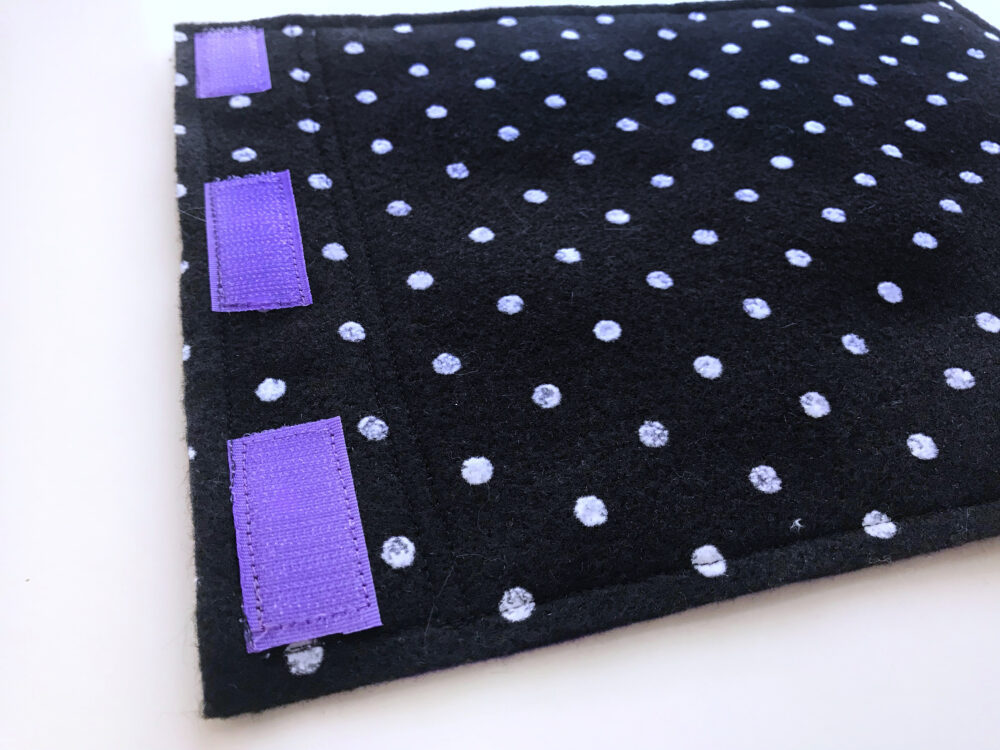
You can finish the page however you prefer. I normally sew a backing on, reinforce the binding edge with a couple rows of stitching, and add three grommet holes. This time I am trying something new. I haven’t tested it yet so I can’t let you know how it goes yet! I did everything the same, except I sewed three 2″ strips of hook and loop tape to the page and the backing in the binding area. I put the rough side on the backing and the soft side on the page. The idea is you can stack the pages together but the child and separate them easily. I plan to do a cover that will attach to the top and bottom pages in the stack, once I see how big this holiday project ends up. Or maybe I’ll make separate front and back covers… We’ll see how it goes!

If you sew along with me on this holiday project, please tag me on any Instagram photos you post! My IG is @iolstephanie and you can use the hashtag #imagineourlife. You can also post to my Facebook page. I love our little community there and I hope we can all be more active in 2019! I’m not the best at social media as I try to spend my time creating. I don’t even watch tv, as I’d need more hours in the day!!

Something fun we’ve been doing is daily vlogging on YouTube! I include clips of sewing projects whenever I can. Please subscribe here, and click the bell to be notified of new videos. I post every night!

Anyway, I hope you enjoy making this quick little page! I’d say the slowest page is the sequins, but they aren’t too bad. They really add a lot to the page. I’ll see you soon with a birthday-themed quietbook page!

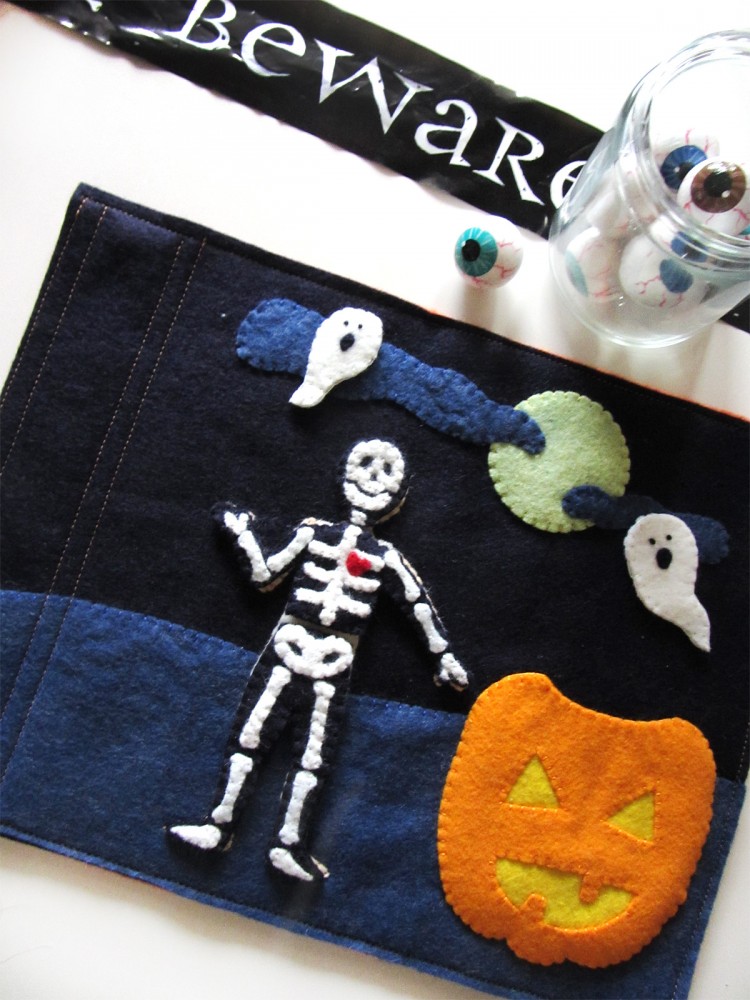
Halloween Costume Match Quiet Book Page

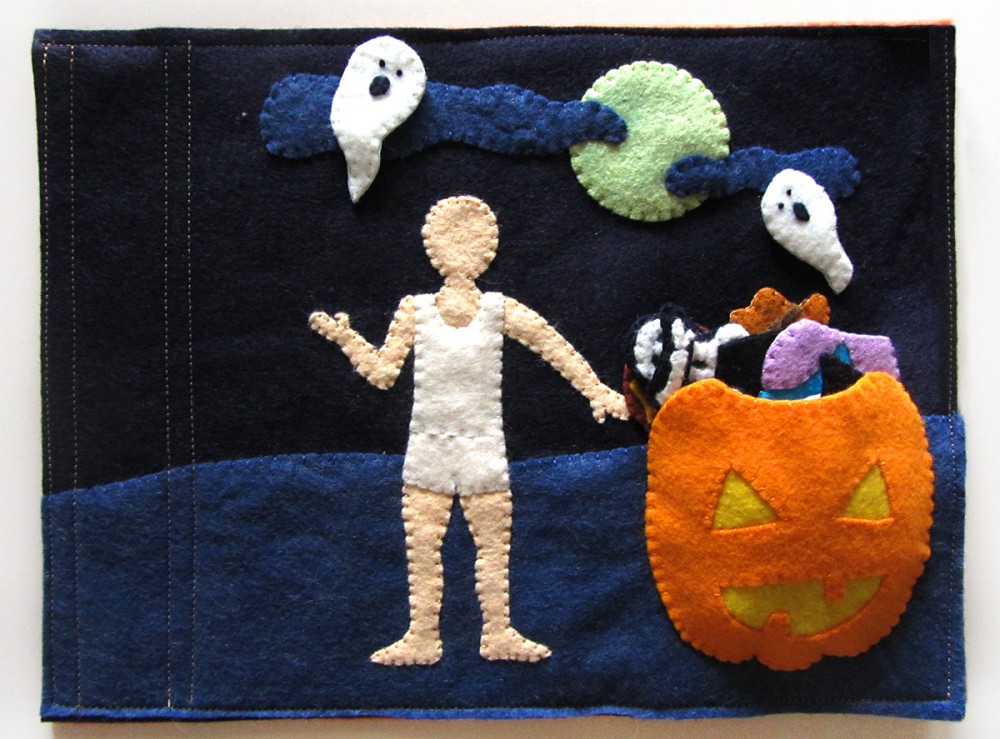
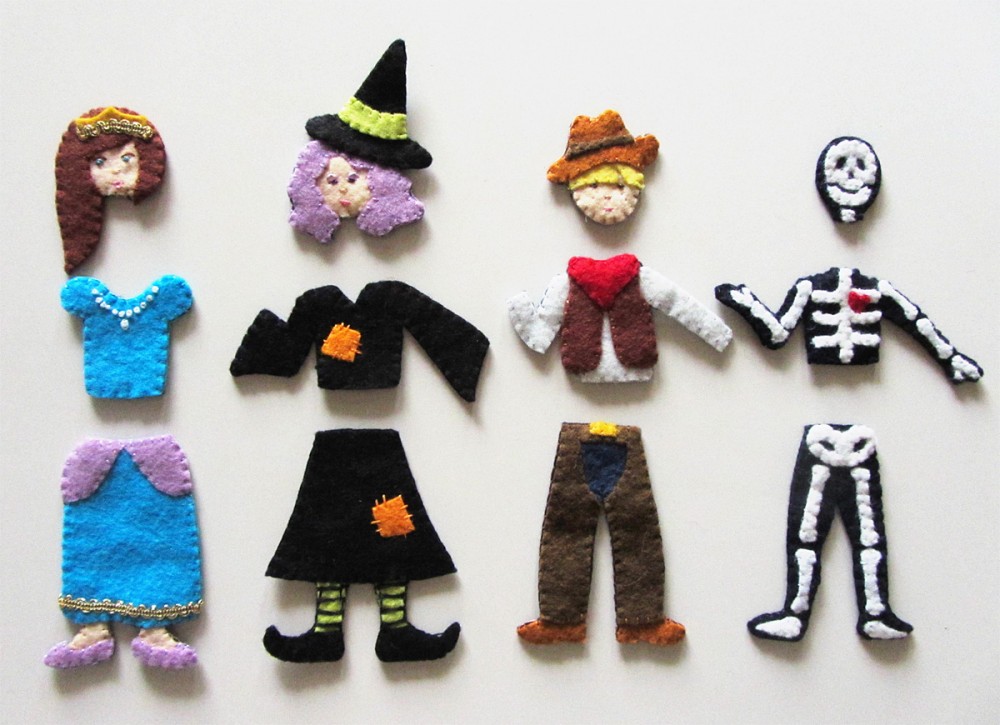
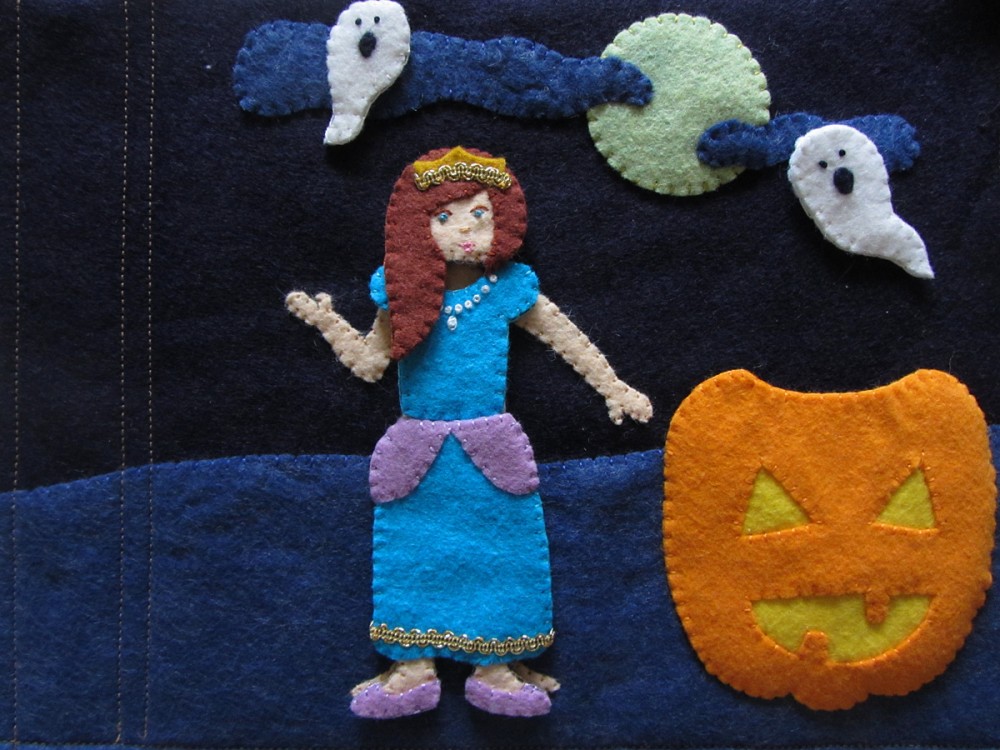
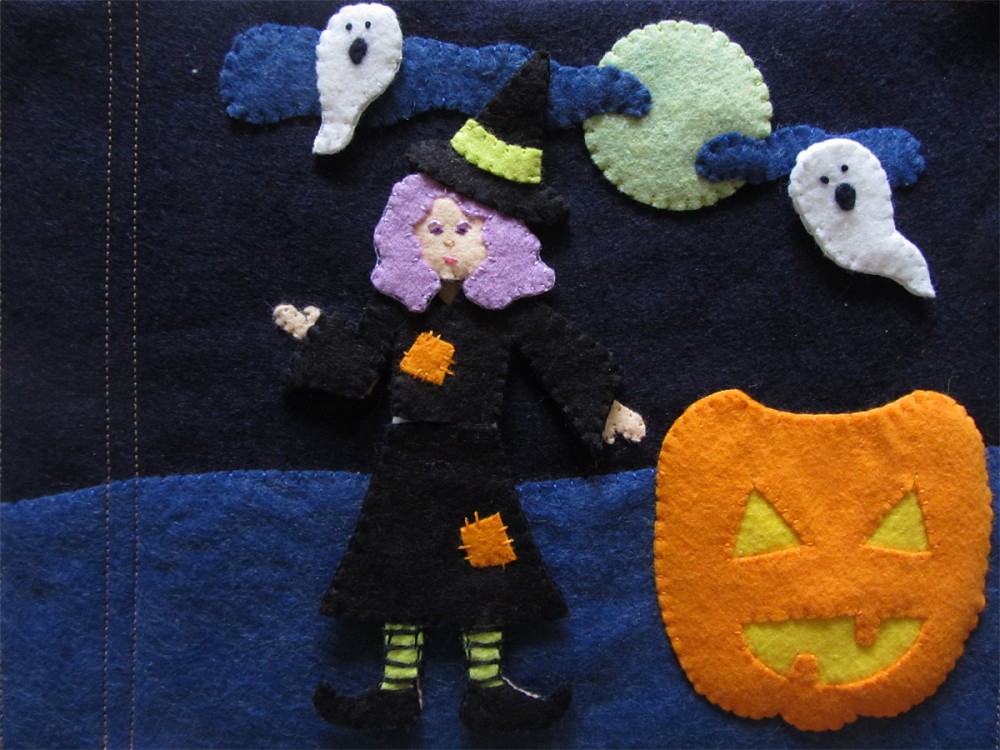
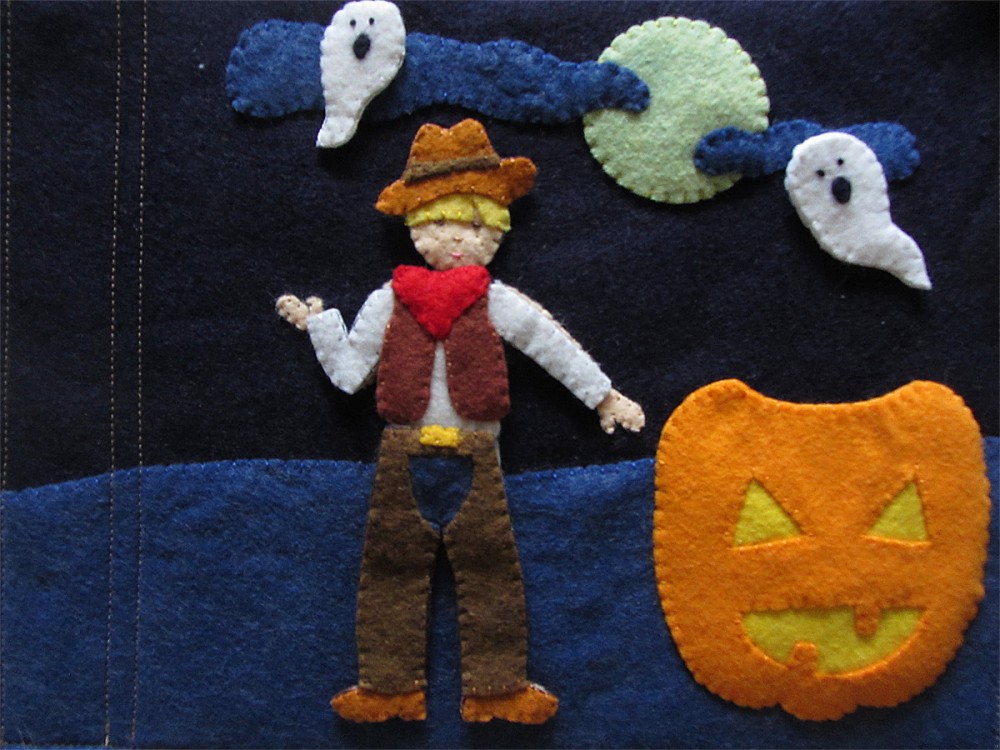
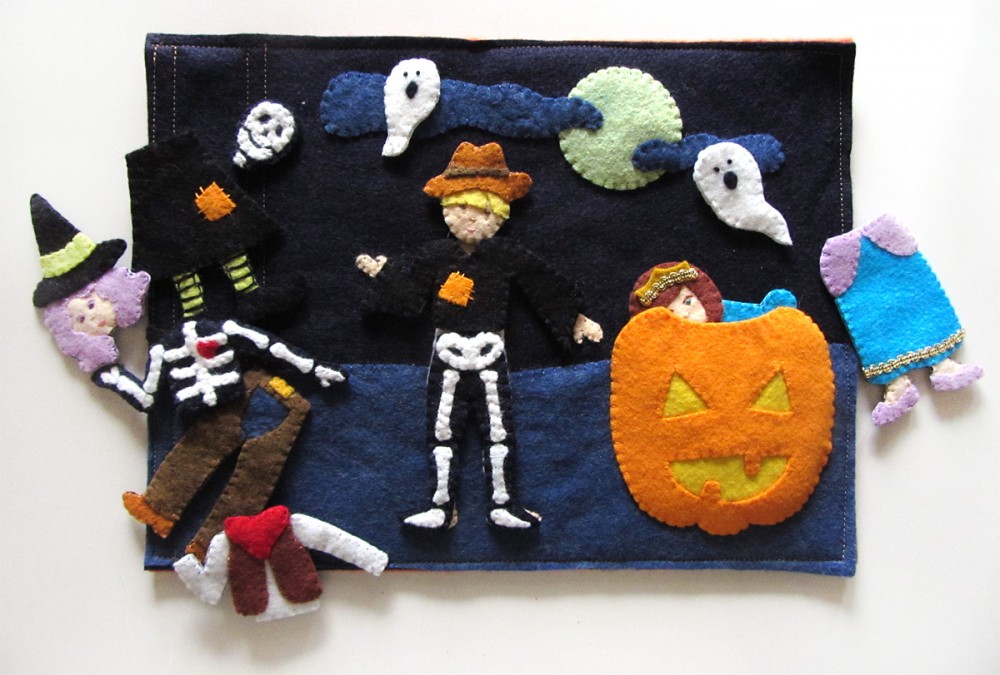
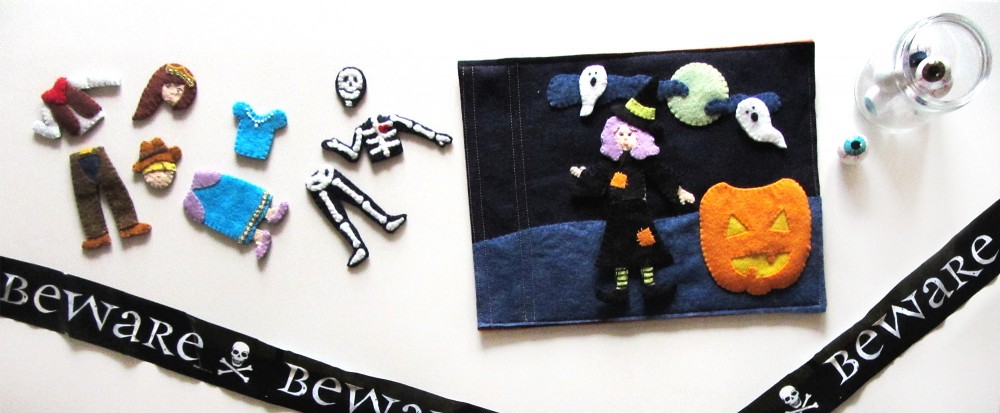
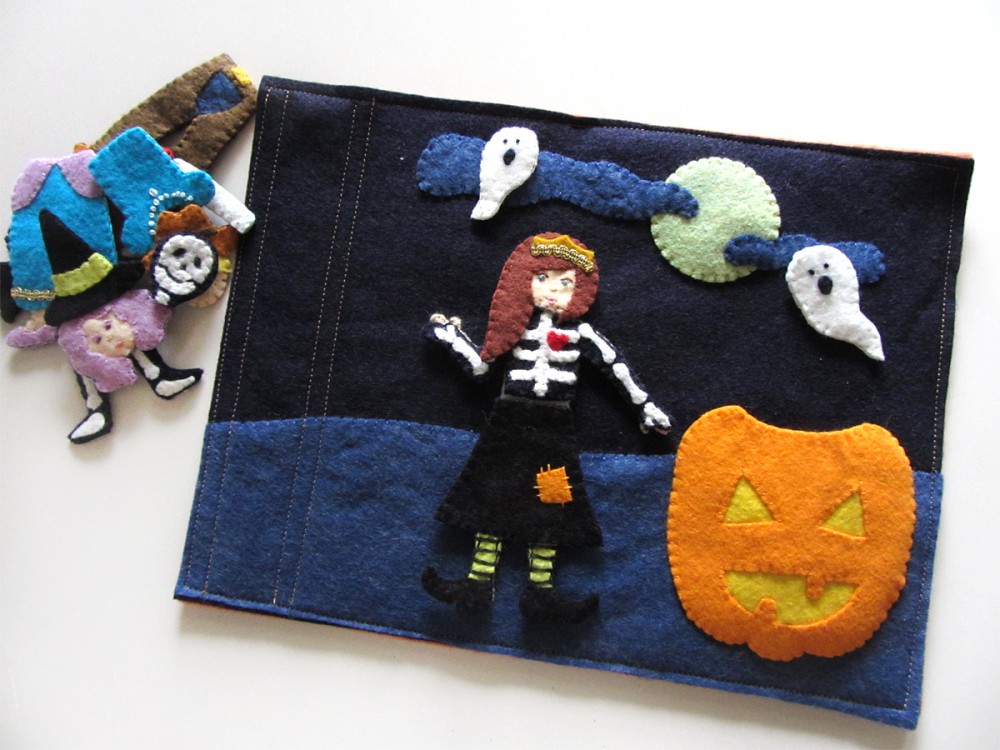
Halloween Costume Match Quiet Book PageThis is a fun quiet book page that would be a great addition to a holiday, seasonal or month activity book. The free pattern comes with 4 mix and match costumes, and you can easily make you own. There is a jack-o-lantern pocket for storage and two ghost friends that snap off.

Halloween Costume Match Quiet Book Page

Children can sort the costumes into their matching sets or have fun making silly combinations. This page would work great with my Halloween Jack-o-lantern page!

patternWhat I Used:

Halloween Costume Match Quiet Book Page
Are you ready to sew a fun Halloween costume match page?

Halloween Costume Match Quiet Book Page
Background

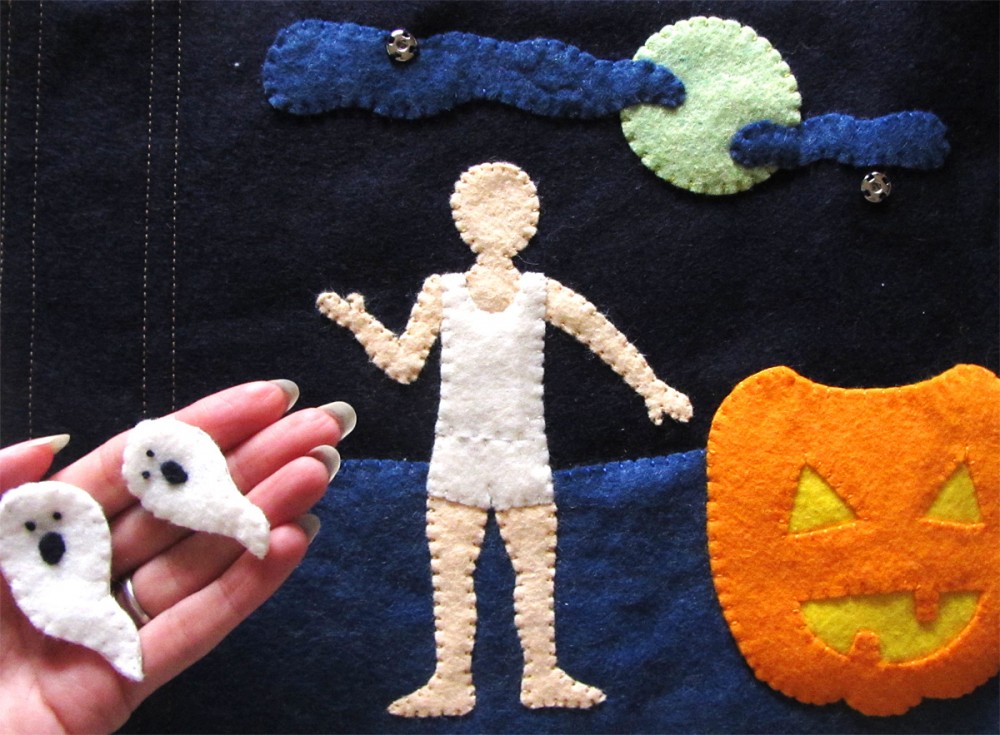
I started by cutting a 12″ x 4″ strip of denim blue felt into a sloping hill, then I sewed it down to the background. (When adding details to your page, be mindful of the way you bind your books. My way requires 2″ of width on the binding edge.) I then sewed down the moon and two clouds. Sew two snaps down where you want the ghosts to be. Pin the body and undies in place and sew them down. If you’d like to add snaps or Velcro to the backs of your costume pieces, sew them to the head, torso and groin of the body. (If you use Velcro, I recommend the snag-free kind for use with felt.)

Halloween Costume Match Quiet Book PageGhosts
For each ghost: Sew the other half of the snap onto the back of the ghost. On the front, make two French knot eyes and sew down the mouth. Sew the front and back together with a blanket stitch.

Halloween Costume Match Quiet Book PagePumpkin
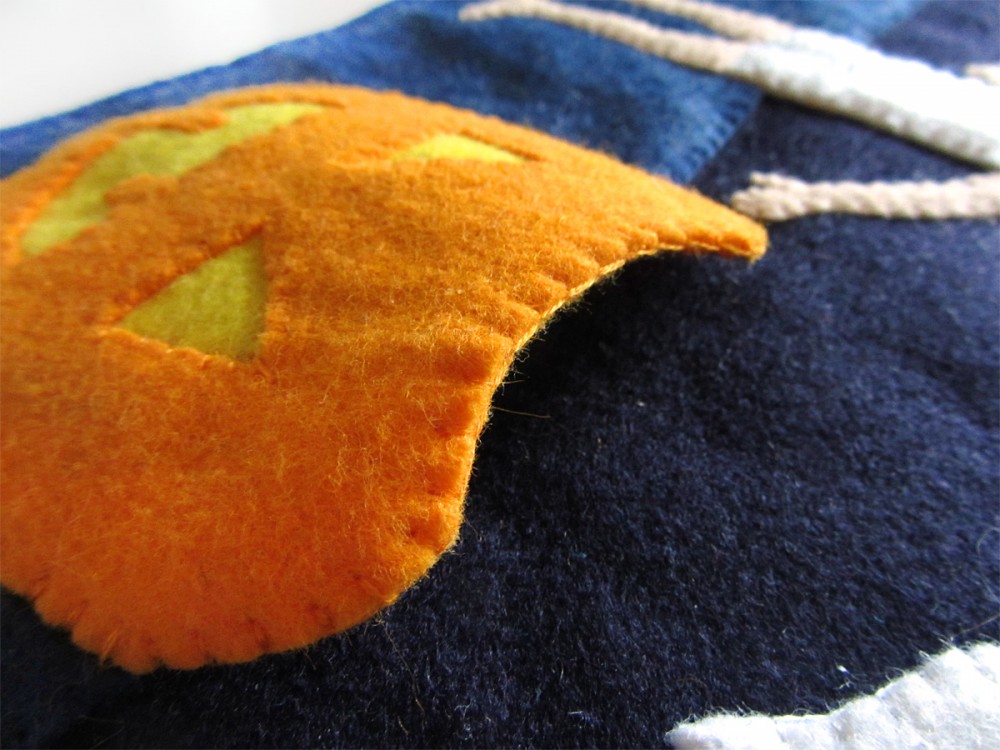
To make the pumpkin pocket, I cut a scrap of yellow felt large enough to go behind the cut-outs of the pumpkin face. I tacked it behind the face with a bit of felt glue, then sewed it on around the eye and mouth holes. I then layered another pumpkin piece behind the yellow to hide it, and sewed both layers together across the curved top with a blanket stitch. I positioned the pumpkin onto the page and sewed through both it and the background the rest of the way around. This makes a pocket that is open at the top.

Halloween Costume Match Quiet Book PageCostumes
To finish each costume piece: cut out a piece of backing felt to match the shape of your final piece, then sew it on with a blanket stitch, matching your thread colors to the felt. (If you are adding Velcro or snaps, do it before the blanket stitch.) I used the same “wild blueberry” dark blue felt as my costume backings.

Halloween Costume Match Quiet Book Page
Halloween Costume Match Quiet Book PagePrincess:
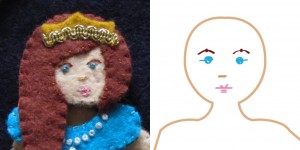
I started by stitching on her face. I made aqua French knots for her eyes with tiny stitches beside them as shown. I made two peach stitches together for the nose. I used red-brown for her eyebrows and made a long, loose stitch and tacked it down into a curve with a tiny vertical stitch. Using pink I made two small stitches together for the bottom lip, one longer one for the upper lip. On the upper lip, I made a small “v” of stitches in the center as shown. Using a light layer of felt glue, I tacked down her hair and crown. I stitched the hair down around her face. I took a small piece of gold trim and stitched it down to the crown with the ends tucked under. Then it was ready to attach the backing.

For her blouse, I made a series of French knot pearls, then attached the backing. On the skirt, I stitched the skirt puffs on, then stitched more gold trim along the hem. I glued the feet to the back of the skirt after confirming their positions by laying it on the body pattern. I tacked down the shoes with glue then stitched them on. I then attached the backing.

Halloween Costume Match Quiet Book Page
Halloween Costume Match Quiet Book PageWitch
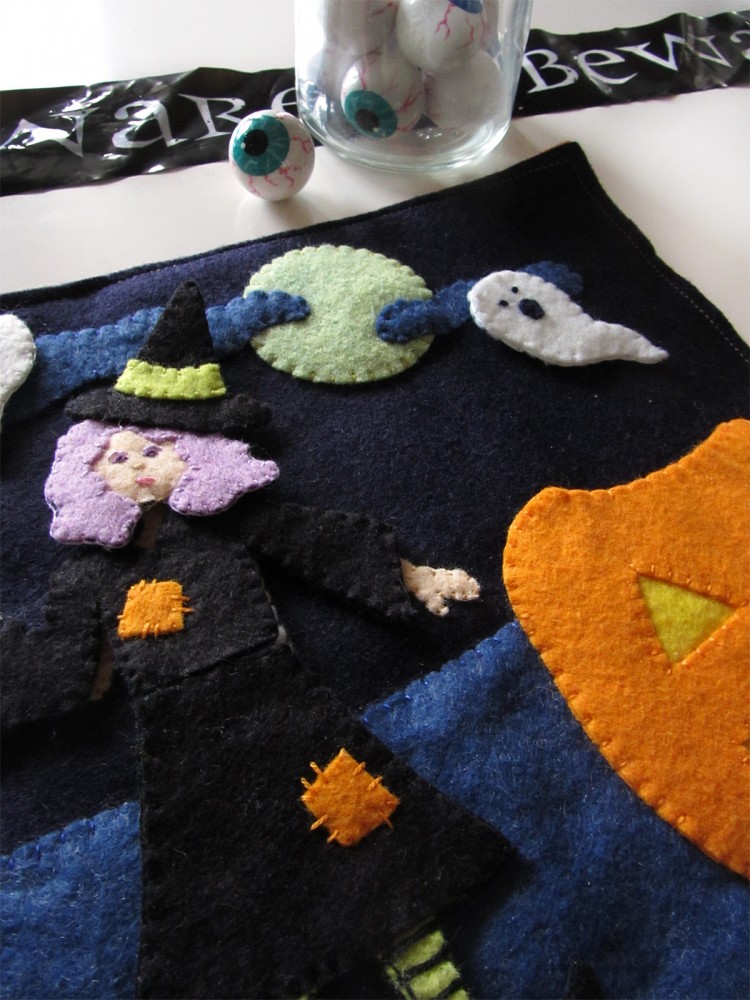
: I started by stitching on her face. I made purple French knots for her eyes with tiny stitches beside them as shown. I made two peach stitches together for the nose. I used lavender for her eyebrows and made a long, loose stitch and tacked it down into a curve with a tiny vertical stitch. Using pink I made two small stitches together for the bottom lip, two longer one for the upper lip. Using a light layer of felt glue, I tacked down her hair, hat and hat band. I stitched the hair down around her face and stitched down the hat band and where her hat meets her hair. Then it was ready to attach the backing.

On her blouse and skirt, I glued and sewed down the two patches using large, uneven stitches. I continued on with the skirt by positioning her stockings using the body pattern and gluing them and her shoes into place. On her stockings, I made long horizontal stitches to add stripes before attaching the backing.

Halloween Costume Match Quiet Book Page
Halloween Costume Match Quiet Book PageCowboy
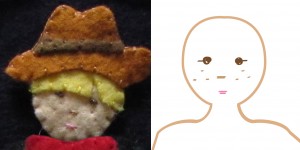
: I started by stitching on his face. I made brown French knots for her eyes with tiny stitches beside them as shown. I made two peach stitches together for the nose. Using the same dark peach, I made teenie stitches for freckles. Using pink I made two small stitches together for the mouth. Using a light layer of felt glue, I tacked down his hair, hat and hat band, then stitched all the inner edges. Then it was ready to attach the backing.

On his shirt, I tacked down the vest and then the scarf. I sewed down all the inner edges, then attached the backing. On his pants, I layered the jeans and shoes behind the chaps, using the body pattern for positioning, and tacked them with glue. I tacked down the belt buckle, sewed all the inner edges, then attached the backing.

Halloween Costume Match Quiet Book Page
Skeleton
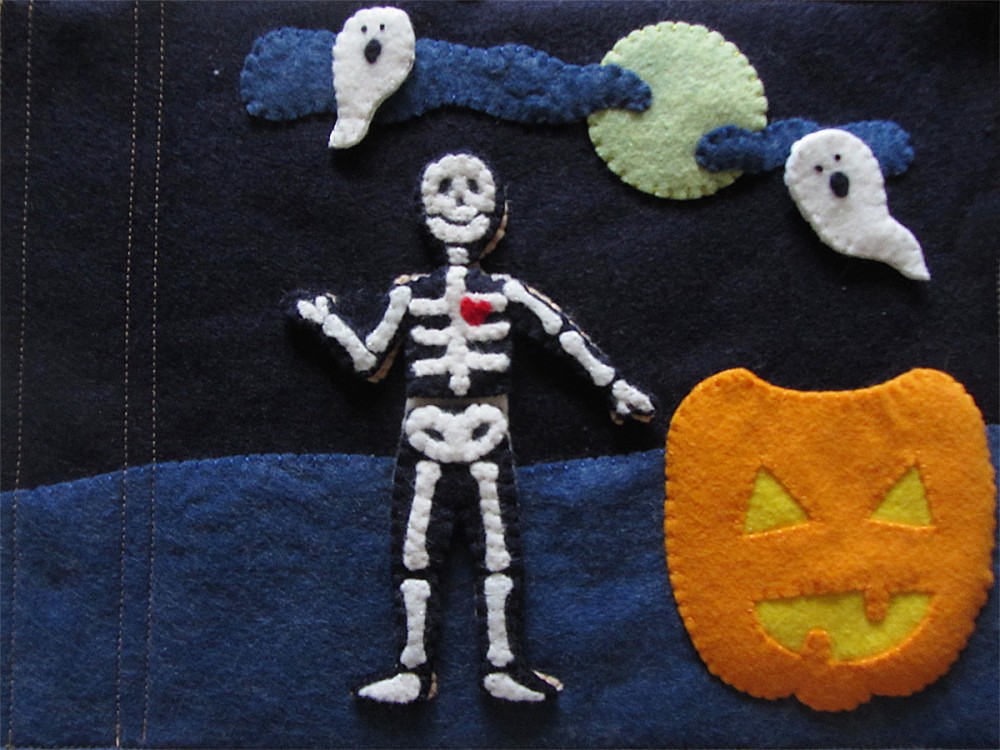
: For all parts of the skeleton, I tacked the bones down into place with a light layer of felt glue and them stitched them down. I added the red heart on top of the ribs because it was easier to see. I then attached all the backings.

Halloween Costume Match Quiet Book Page
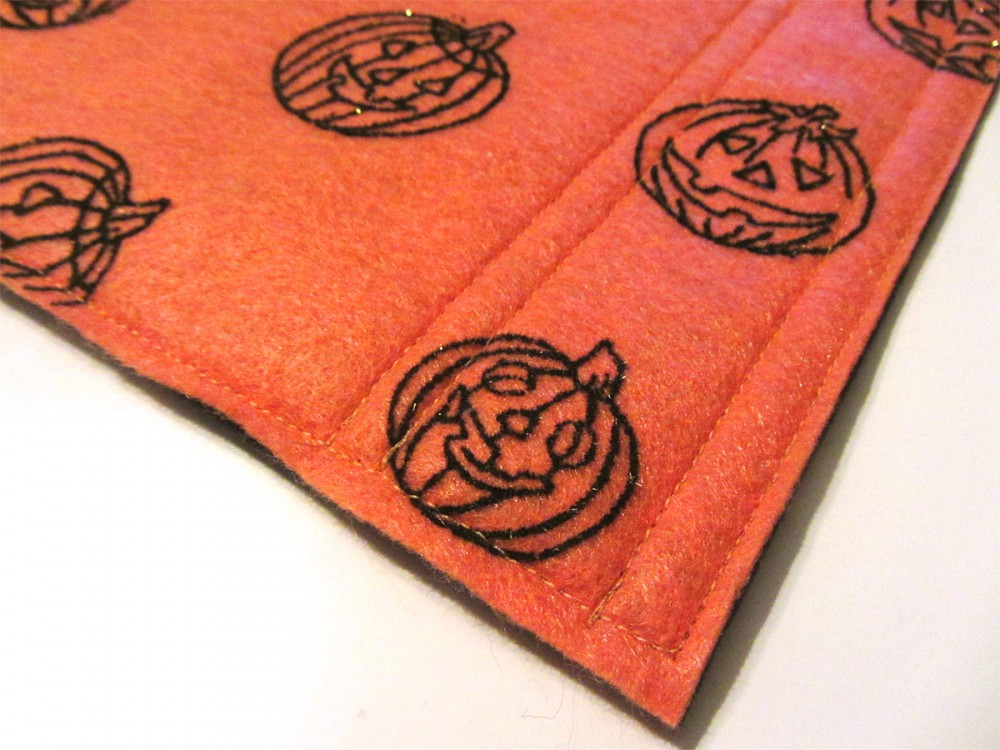
And there is something that makes it even more fun… Flocked pumpkin felt on the back of the page! The jack-o-lanterns are fuzzy and a little glittery. Super cute!

Halloween Costume Match Quiet Book Page
I hope you enjoy this free pattern! The commercial license for selling completed products from this pattern will be available in my Etsy shop.

Halloween Costume Match Quiet Book Page

Do you have a special pattern request? Stop by my Facebook Page or my Instagram (@iolstephanie) and let me know! Happy Halloween!

Recycling Quiet Book Set & Free Printables

Recycling Quiet Book Set & Free Printables
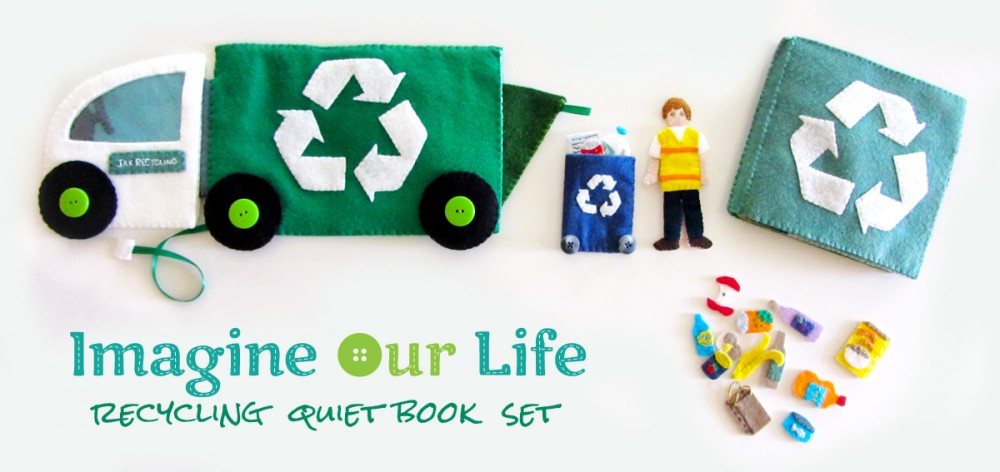
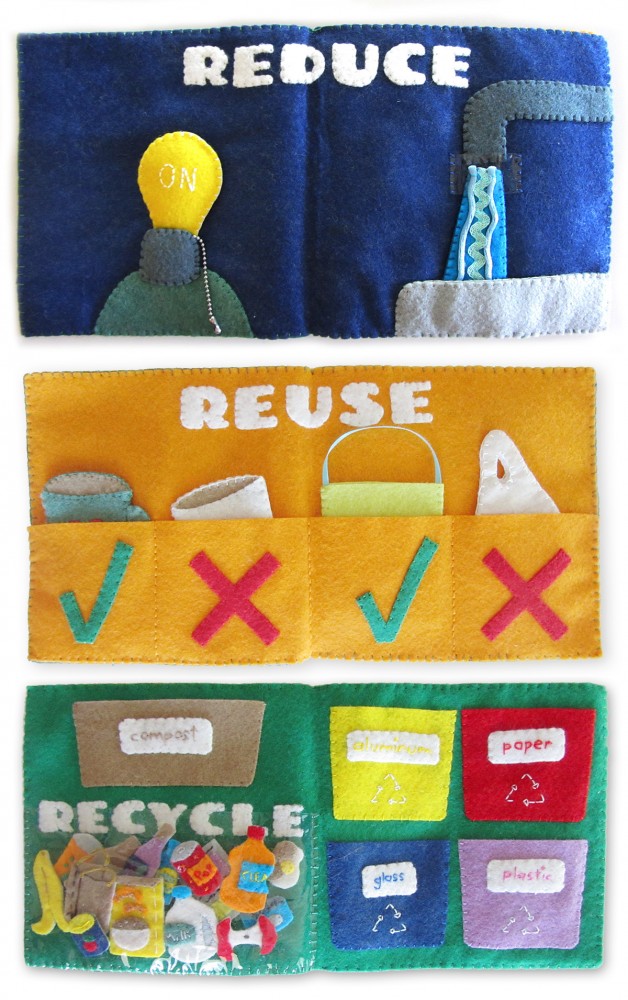
I’m always looking for ways to teach Jax about what we can do to help our planet. I knew a “Reduce, Reuse, Recycle” theme would make a wonderful quiet book theme. Trash and recycle trucks are so much fun for kids to watch, so I had to add one in to expand the project into a fun recycling set.

Recycling Quiet Book Set & Free Printables
This is a pay pattern available in my Etsy shop. Purchasing my pay patterns will let me move towards making a living at crafting and give me more time to devote to both pay and free projects.

Recycling Quiet Book Set & Free Printables
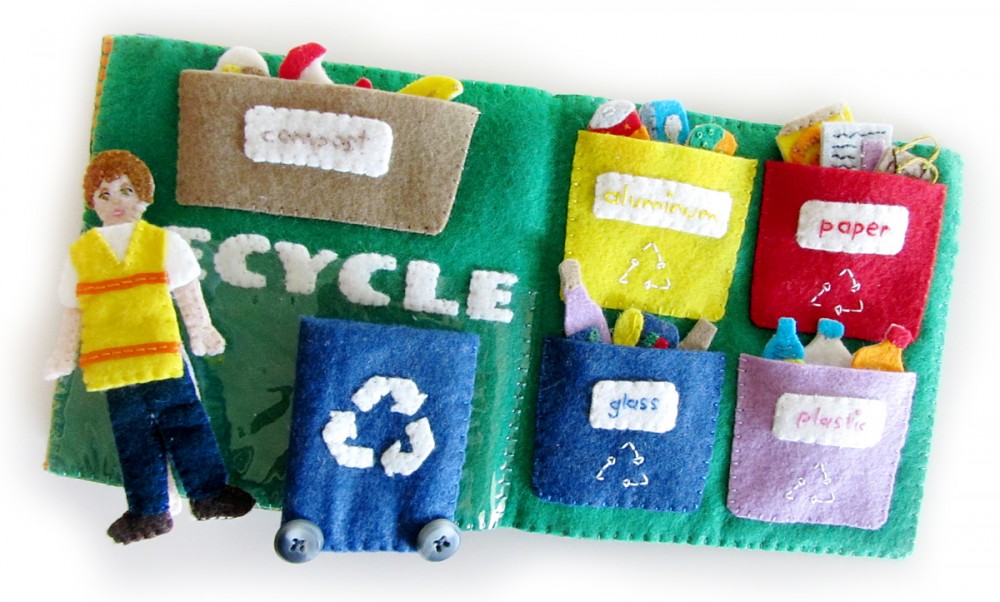
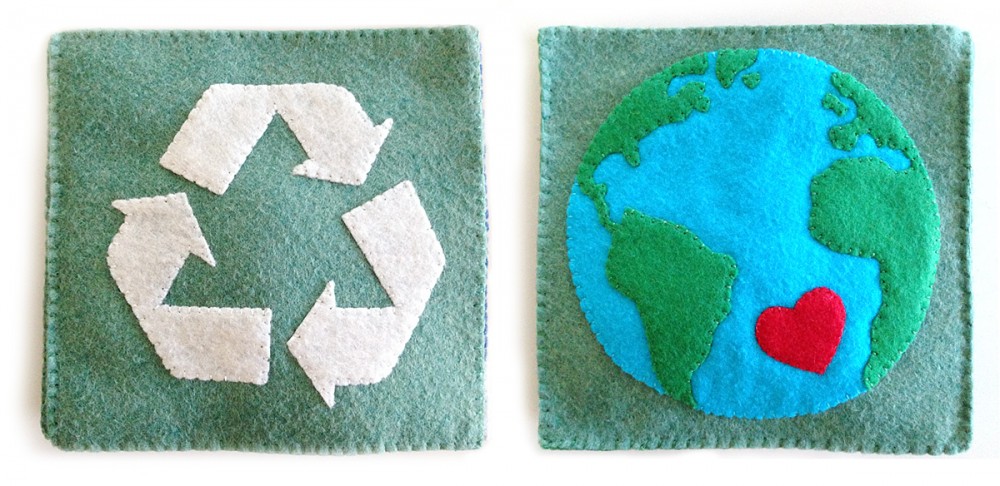
The 6″ square quiet book features 3  double pages: Reduce teaches turning off lights and faucets to save resources. Reuse promotes using reusable cups and bags whenever possible. Recycle introduces sorting recyclables (and compost items!) into their bins. The cover has a recycle symbol and an earth with a heart.

Recycling Quiet Book Set & Free Printables
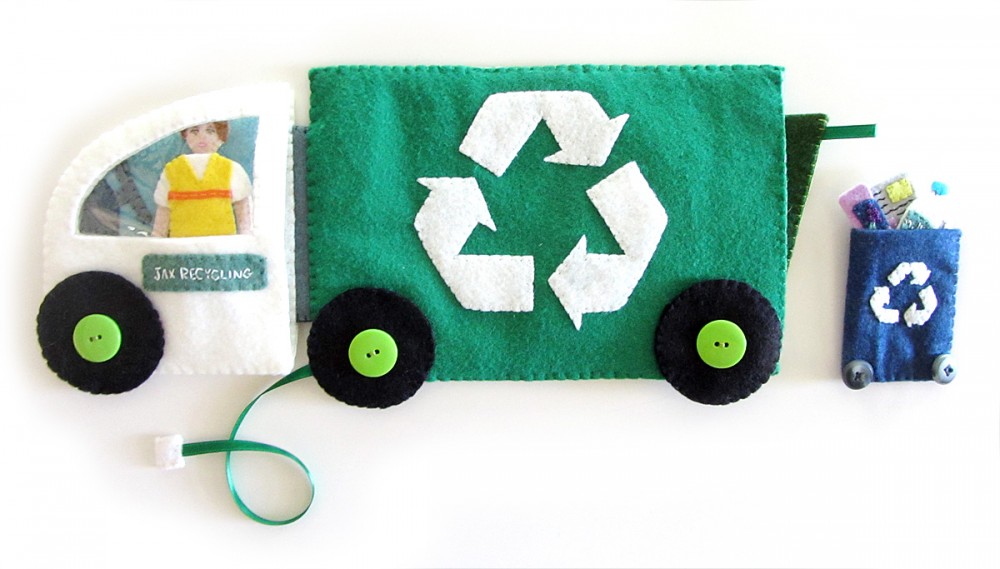
All of the sorting items can be used with the recycle truck that features a working back hatch. Pull the loop to open the hatch, then pull the ribbon to close it up again. There is also a recycle bin and a felt doll that is compatible with my other dress up felt dolls (fire station and dollhouse.)

I hope you’ll find the pattern files to be beautiful and helpful. A lot of time went into them! The pattern includes a stitch guide and full tutorial with photos and illustrations. You will also receive a coupon for $5 off at American Felt and Craft to help you get started on your felt stash.

Recycling Quiet Book Set & Free Printables
You can purchase this pattern for $8 in my Etsy shop, Imagine Our Life. If you would like to sell the finished product, you can purchase commercial licensed version for $20. This is a one time fee, and you’d be able to sell as many recycle quiet books as you’d like after purchasing it.

Recycling Quiet Book Set & Free Printables
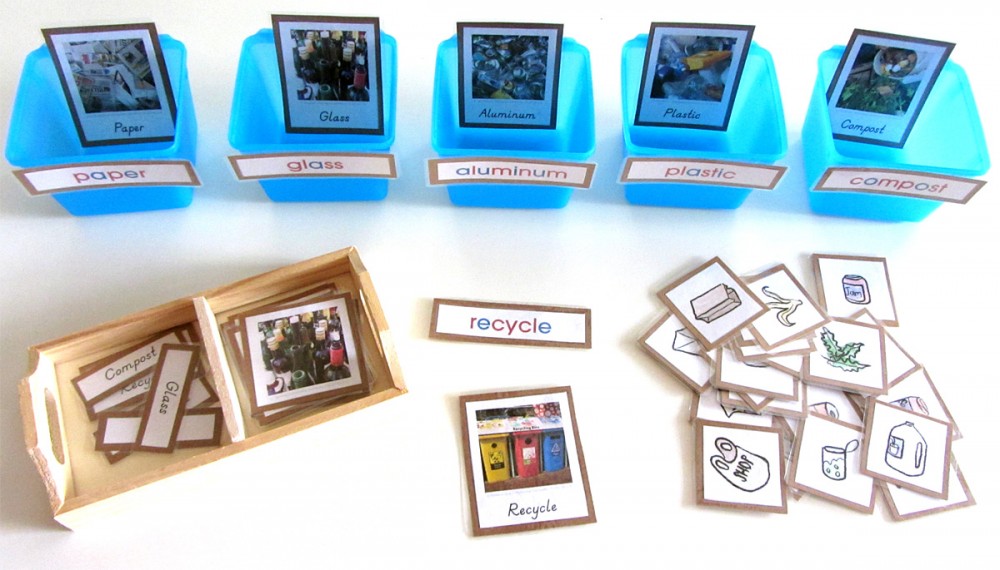
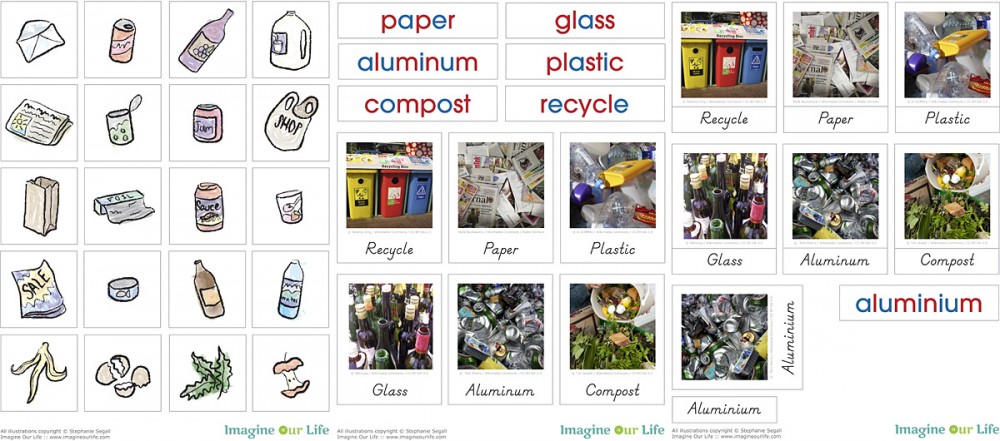
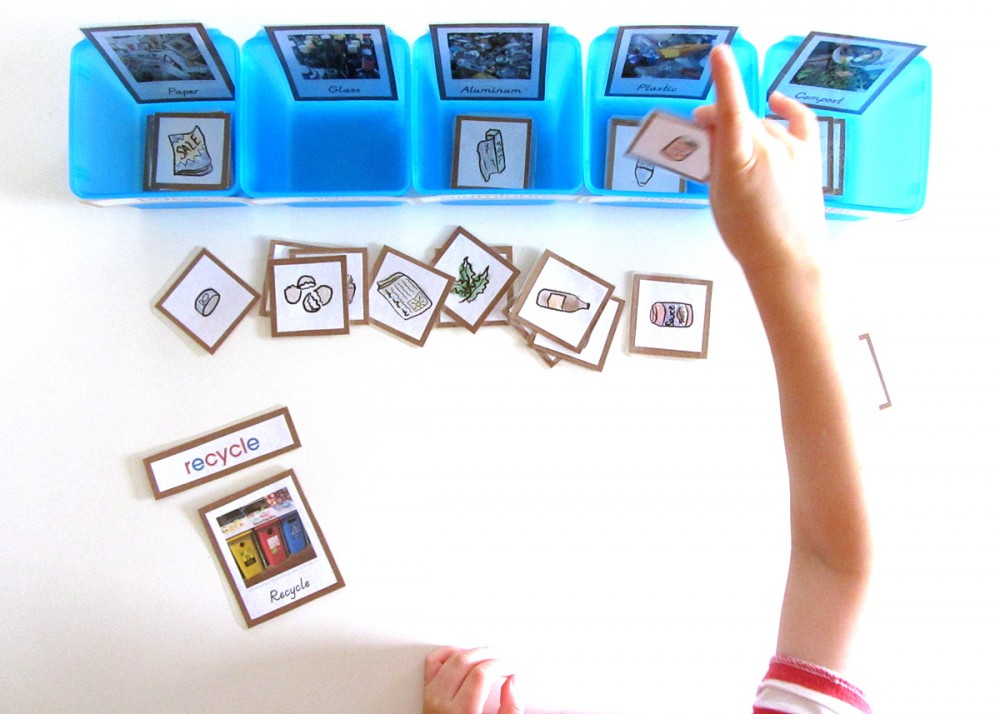
As a free add-on to this felt set, I am providing my matching 3-part cards and recycle sorting game free for educational use! Click here to download the pdf.

Recycling Quiet Book Set & Free PrintablesThe cards and game include the same sorting categories as the felt set, giving you an additional way to teach the new vocabulary. (I include both the North American spelling on “aluminum” and the world spelling of “aluminium”.) The game features illustrations that were hand drawn by me.

Recycling Quiet Book Set & Free Printables

Montessori MondayTo assemble, print out the cards and cut them out. Glue them to card stock backs, then laminate and trim. I use this laminator. To make laminating a bit easier, you can try adding a dab of glue stick to the cards when you position then in the lamination sleeves. It keeps them from wiggling and overlapping.

I purchased two 3-packs of blue drawer organizers from Dollar Tree to use as my sorting bins.

If you liked this free homeschool printable and want more homeschool ideas, visit Montessori Monday at Living Montessori Now.

I hope you enjoy this pattern! I can’t tell how much your support means to me. Big thank yous to all of you who are a part of our Facebook page. You have given me so much inspiration! Please feel free to comment here or on Facebook if you have suggestions for new projects. I am sketching patterns and ordering felt for all my fall projects this week. I’ll post some sneak peeks on Instagram. Come follow along!

Recycling Quiet Book Pattern

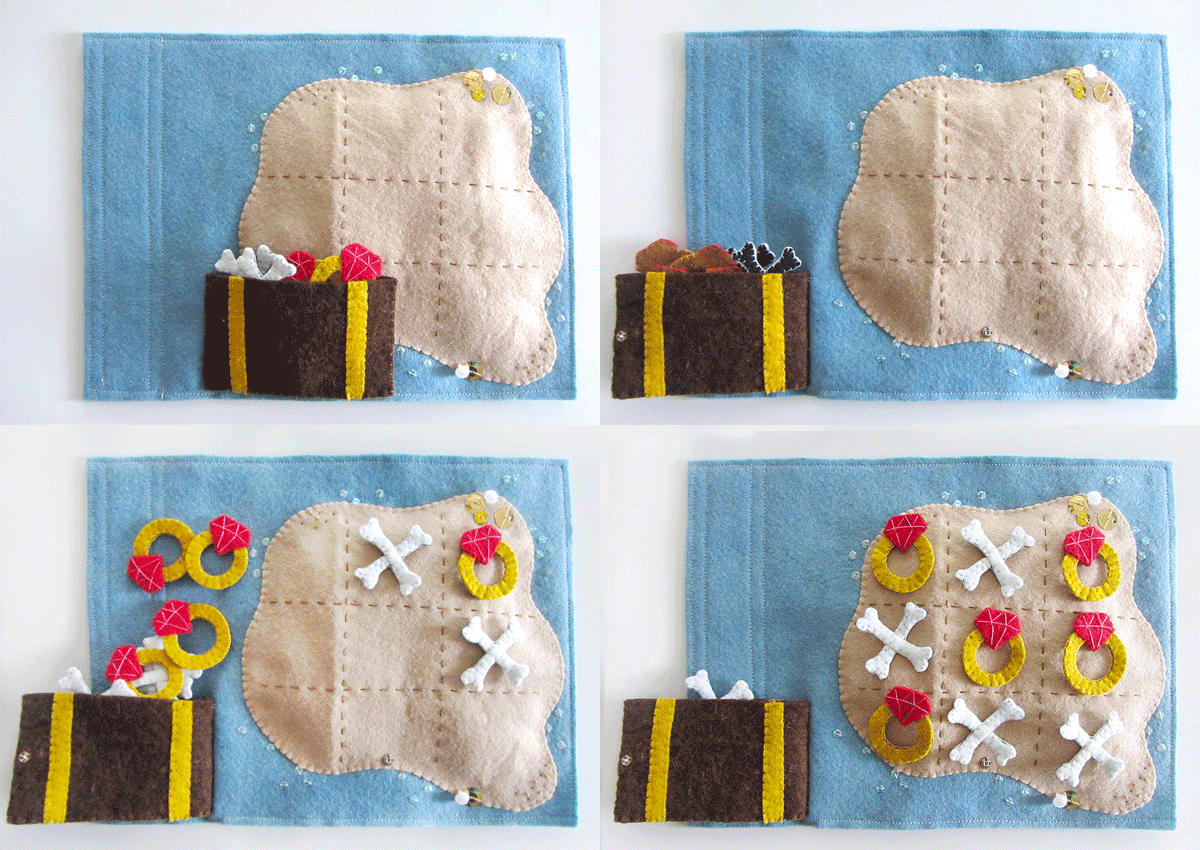
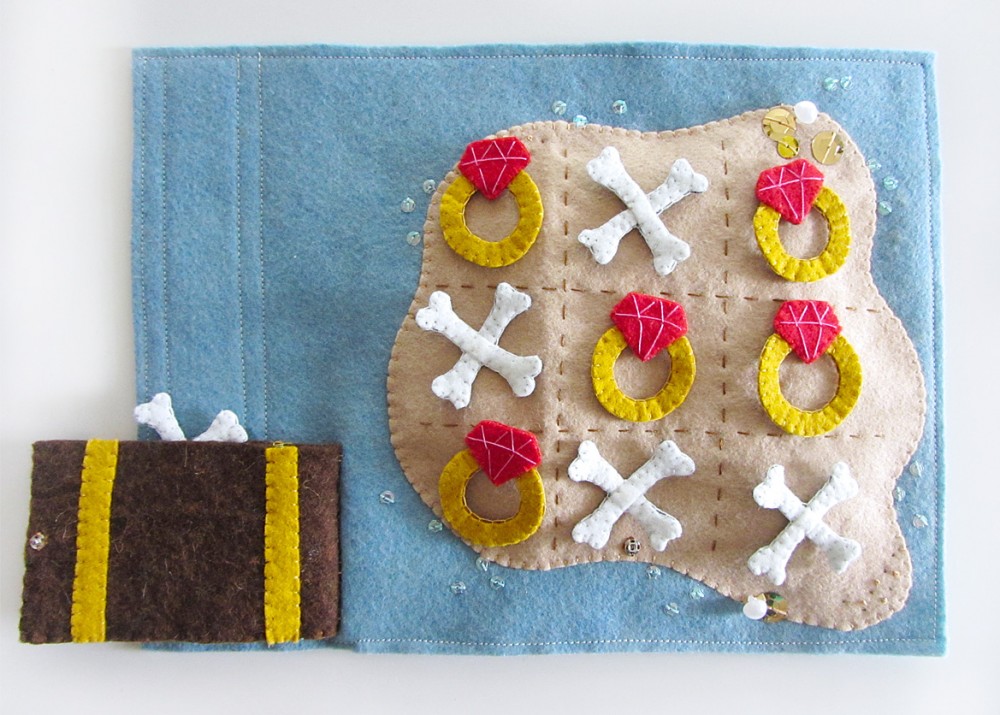
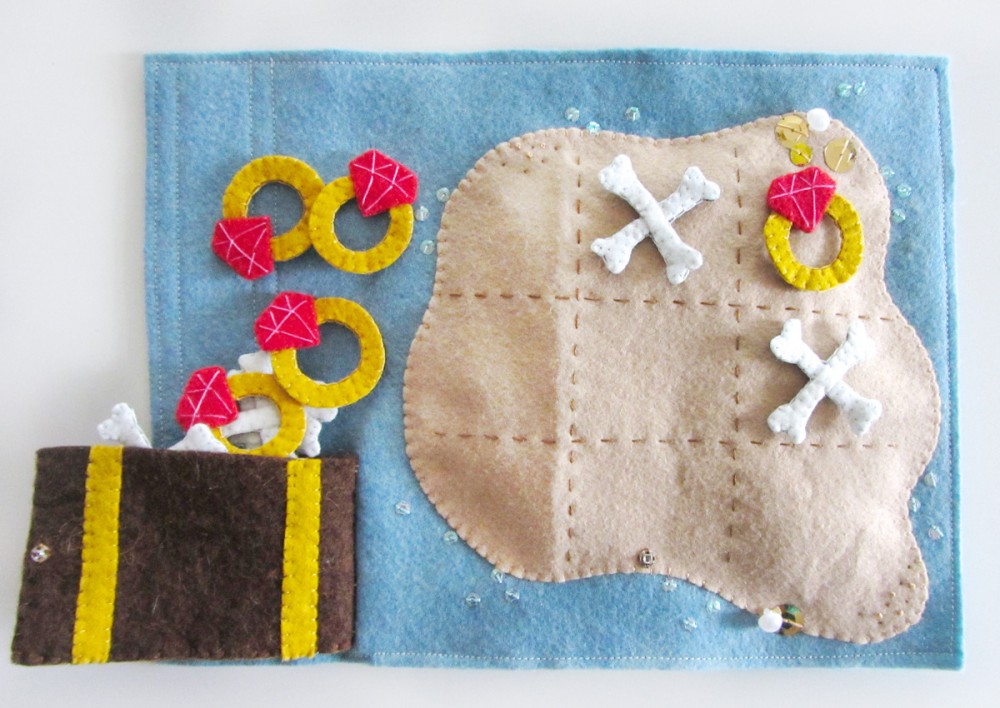
Pirate Island Tic-Tac-Toe Quiet Book Page

Pirate Island Tic-Tac-Toe Quiet Book Page

Tic Tac Yo-Ho-ho!

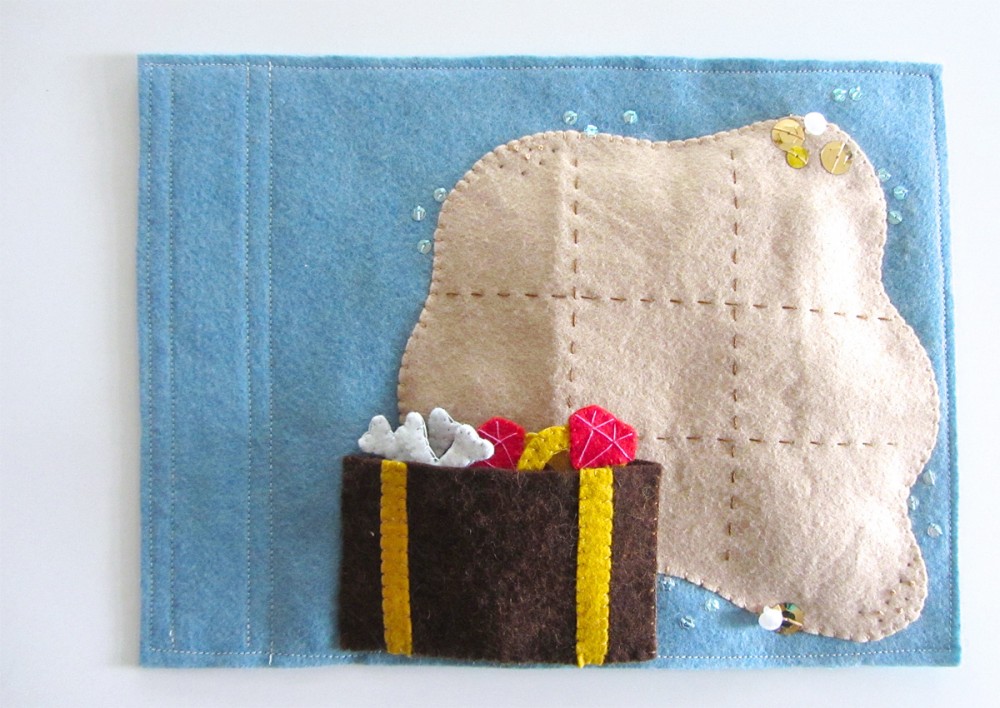
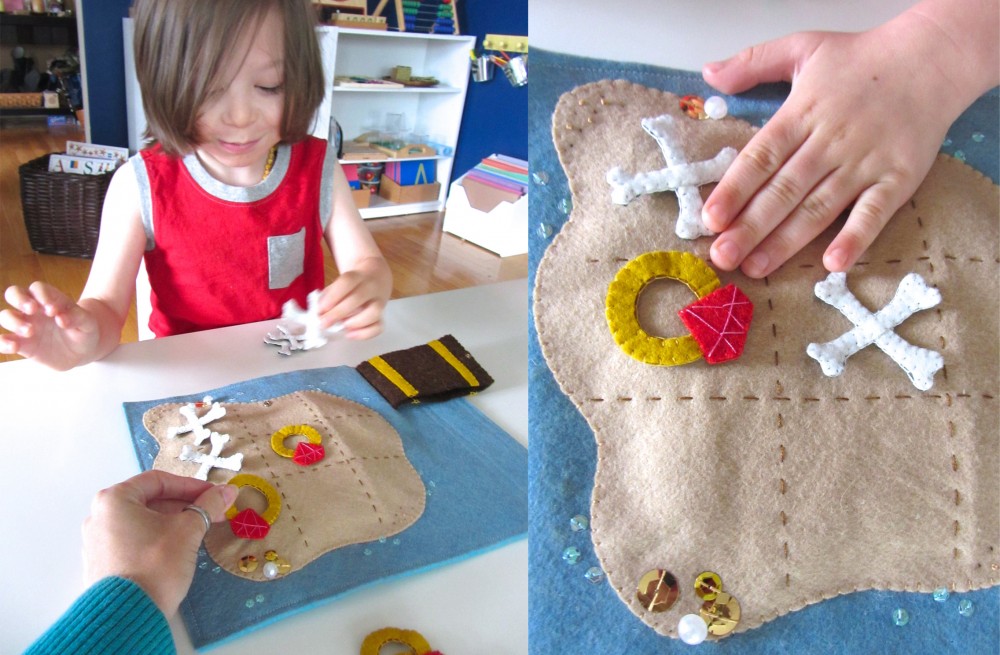
Jax has recently taken an interest in learning how to play tic-tac-toe (Noughts and crosses, Xs and Os, etc…) so I thought it would be a fun and quick page to sew up. This project would also work great as a stand-alone 9″ square felt tic-tac-toe set. We’ll be going to the beach in September, so I thought up a pirate island theme!

This page can be made as a stand-alone game by sewing it to a 9″ square background.

Pair this page with: The Treasure Quiet Book Page

Pirate Island Tic-Tac-Toe Quiet Book Page

What I used:

Pirate Island Tic-Tac-Toe Quiet Book Page

Sewing the Island

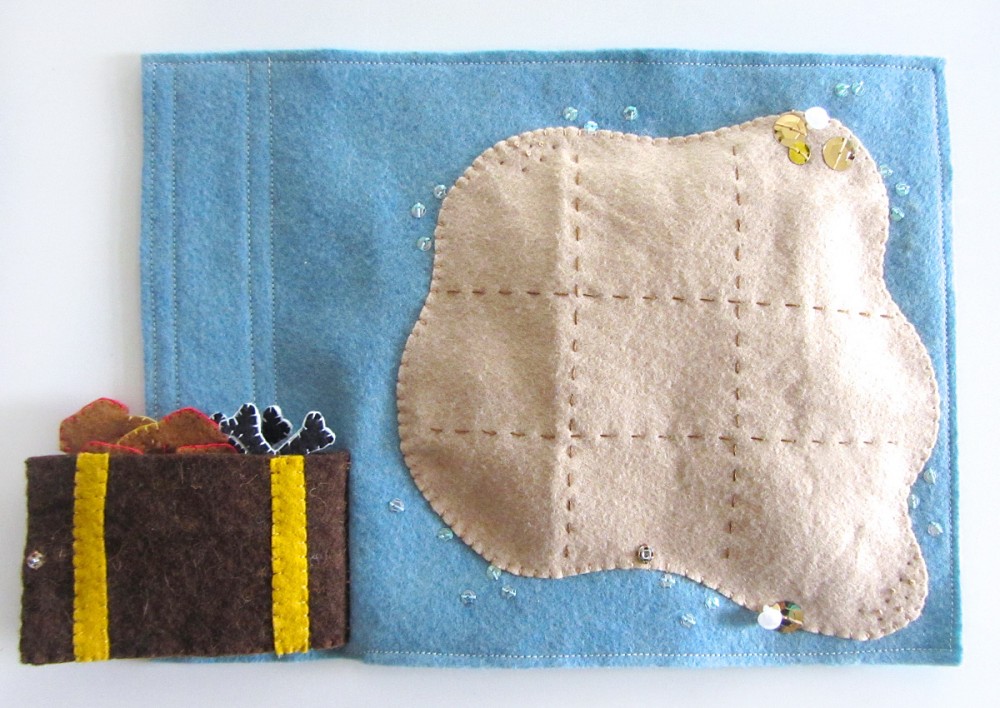
Following the template, sewing the tic-tac-toe grid onto the island piece.

Pirate Island Tic-Tac-Toe Quiet Book Page

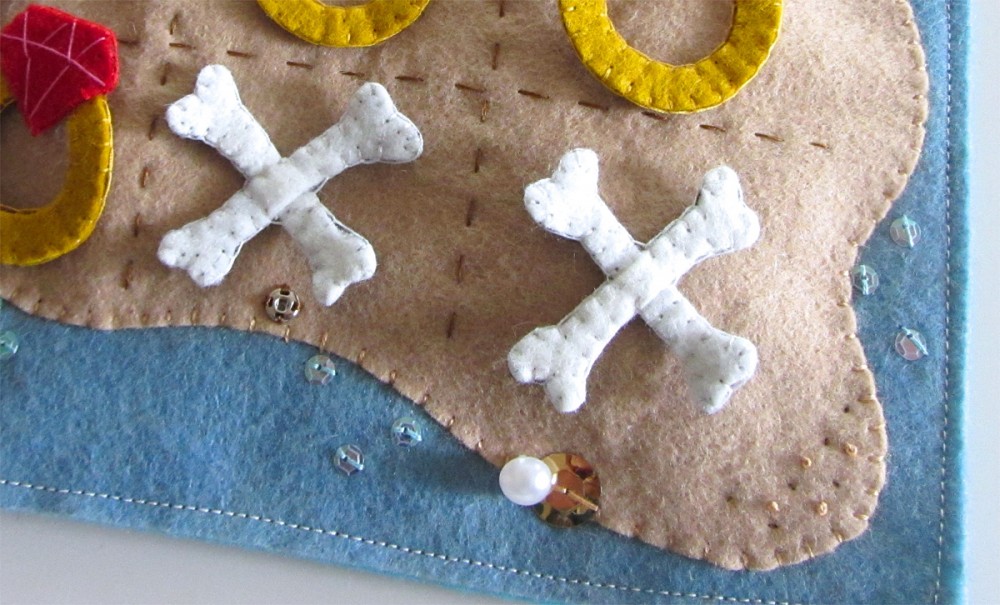
Pin down the island with a bit of stuffing or batting underneath for dimension. Sewing it down, then embellish it with French knots and tiny stitches to show the sand texture.

Pirate Island Tic-Tac-Toe Quiet Book Page

Decorate the water’s edge with blue crystal sequins. Decorate the sand with some pirate’s treasure: gold sequins and pearl buttons.

Pirate Island Tic-Tac-Toe Quiet Book Page

Treasure Chest

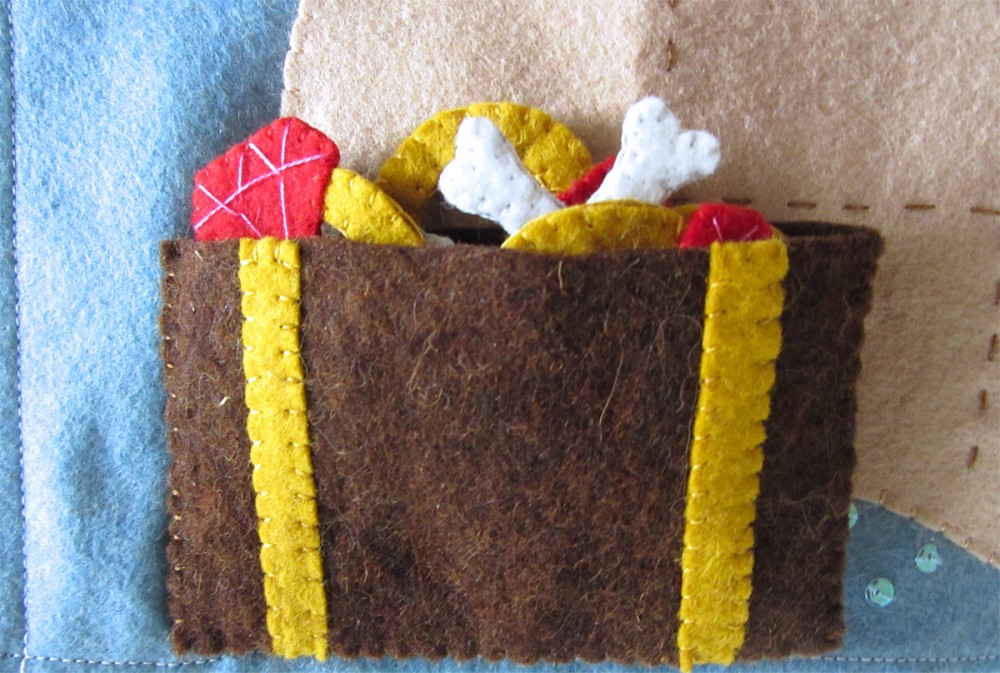
Stitch two gold bands onto each side of the treasure chest. I used thick 100% wool felt, so I didn’t line the chest. If you are using regular felt, place a blank chest piece behind each side of the chest and sew them together along the long top side.

Pirate Island Tic-Tac-Toe Quiet Book Page

Place the two finished sides together and sew the right sides and bottom together, then place it on the page as shown and sew the left side together through the page. This will make a pocket that is hinged to the page. You can flip it out of the way when it is time to play. Add a snap to the back of the chest on the loose side, then sew the matching half to the page. This holds the pocket still while you flip through your quiet book.

Pirate Island Tic-Tac-Toe Quiet Book Page

Cross Bones

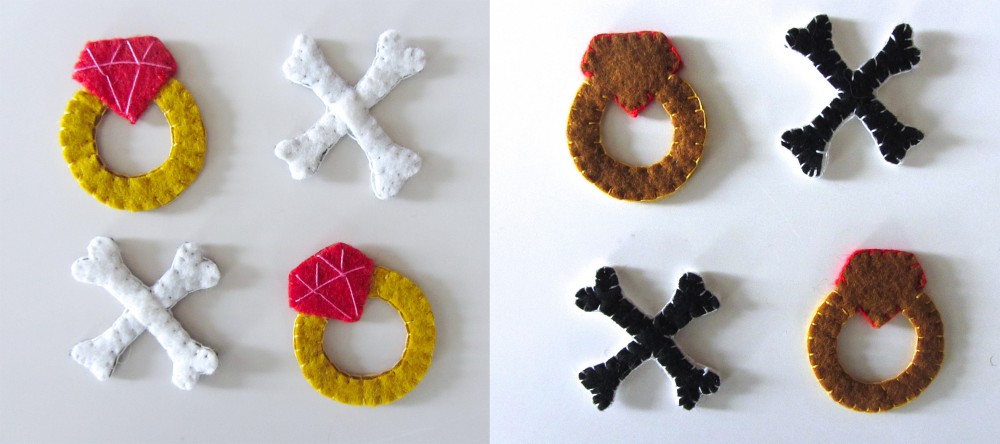
Using a light layer of felt glue, tack down two of the bones into a cross shape onto black felt. Once it is dry, cut it out and sew it all around the outside. Repeat so you have 5 X’s.

Pirate Island Tic-Tac-Toe Quiet Book Page

Ruby Rings

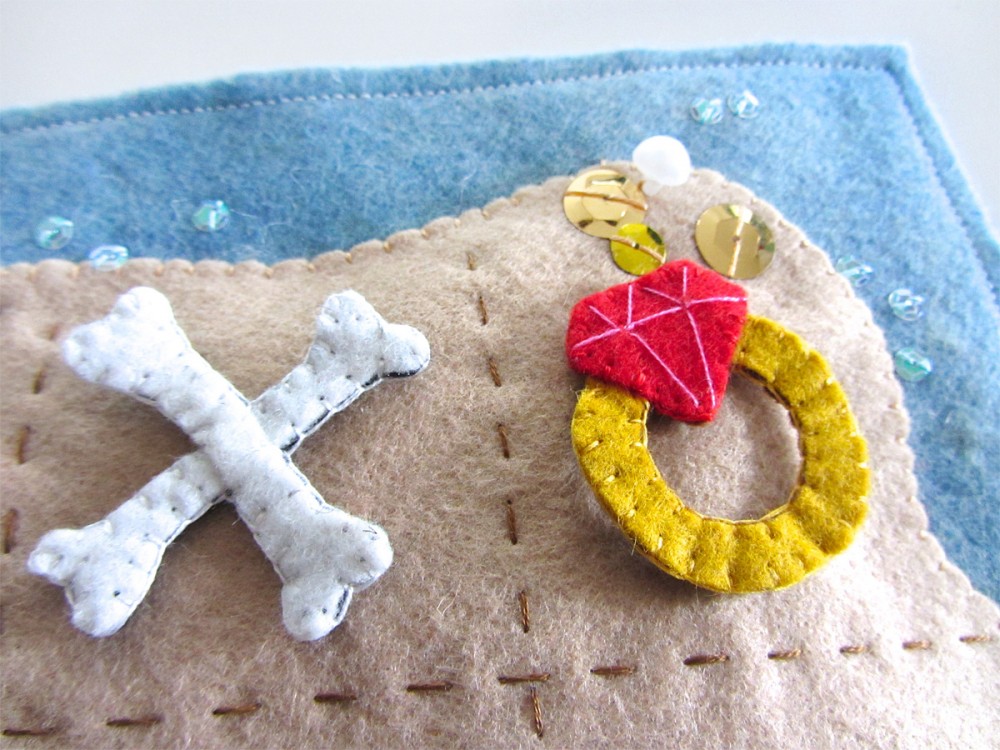
With on strand of pink thread, sew the gem lines onto each felt ruby. Start with a long horizontal line, then make two V’s above it and one large V below it. Use the template as a guide.

Using a light layer of felt glue, tack down a gold ring onto brown felt.  Glue a ruby on top as shown. once it is dry, cut it out and sew it all around the edges. Repeat so you have 5 O’s.

Arrrrh! Have Fun!

Pirate Island Tic-Tac-Toe Quiet Book Page


Learn and Play with the Learning Laptop

Learn and Play with the Learning Laptop

Quick Links: Purchase this pattern for personal use or commercial use!

A colorful, handmade invitation to learn & play…
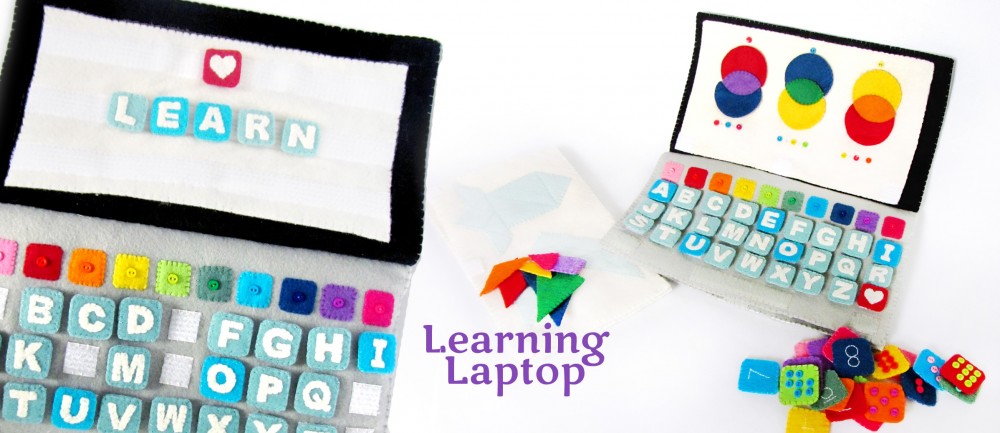
The Learning Laptop!

Introducing the newest pattern in the Imagine Our Life Etsy pattern shop.

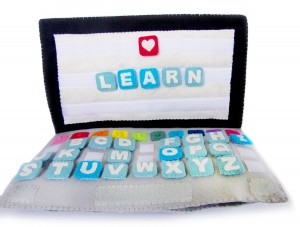
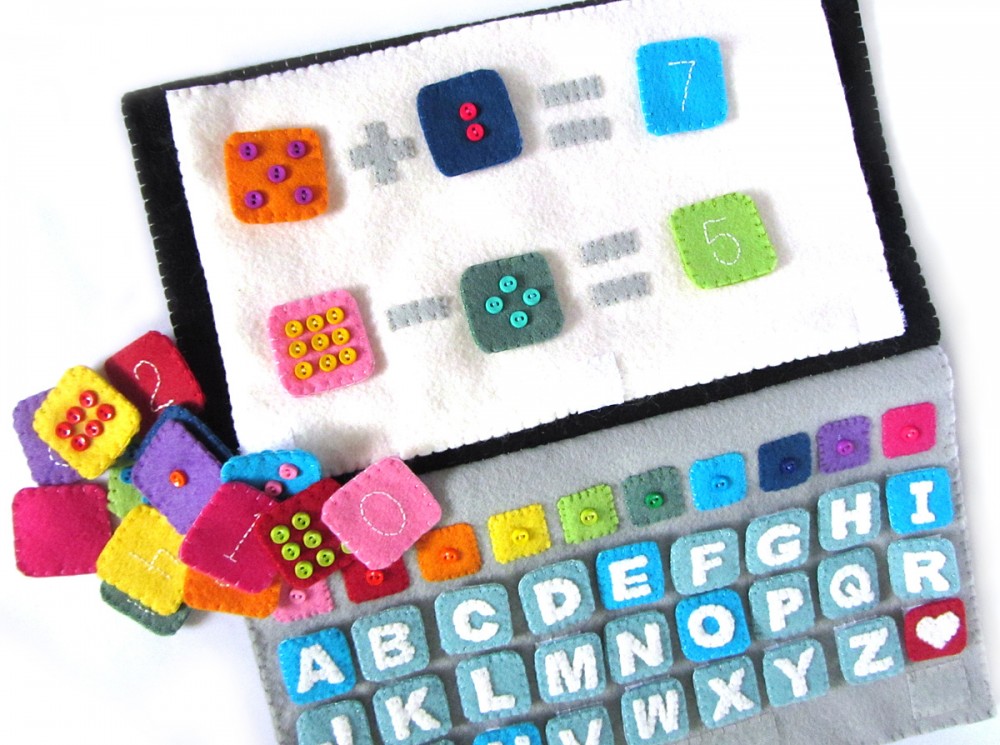
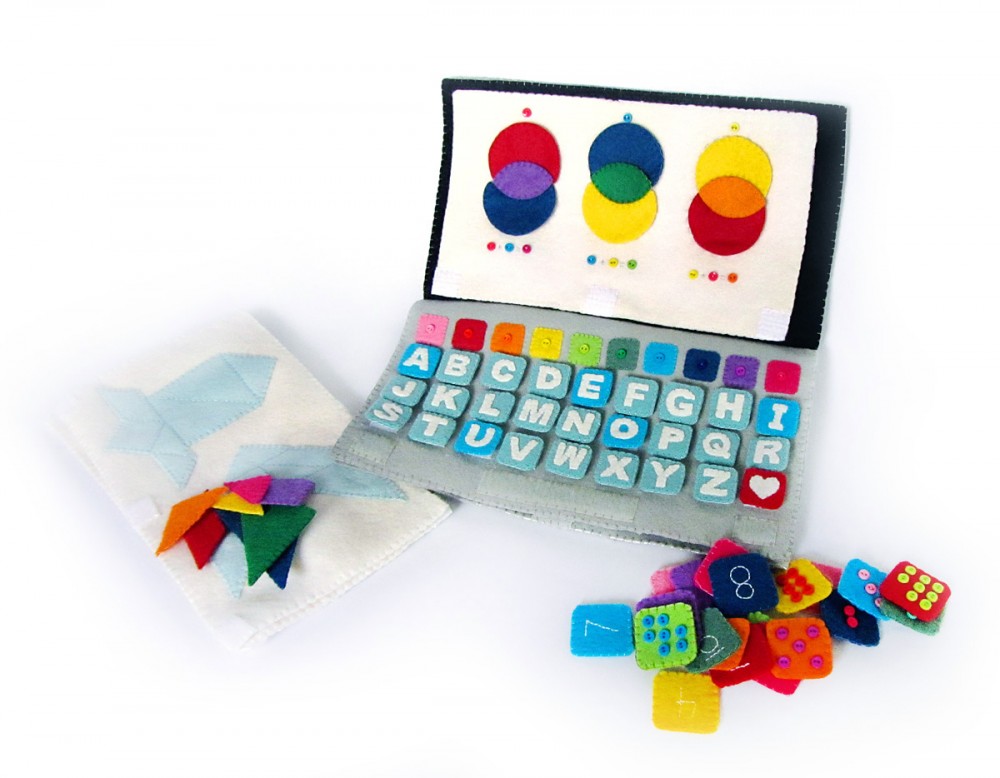
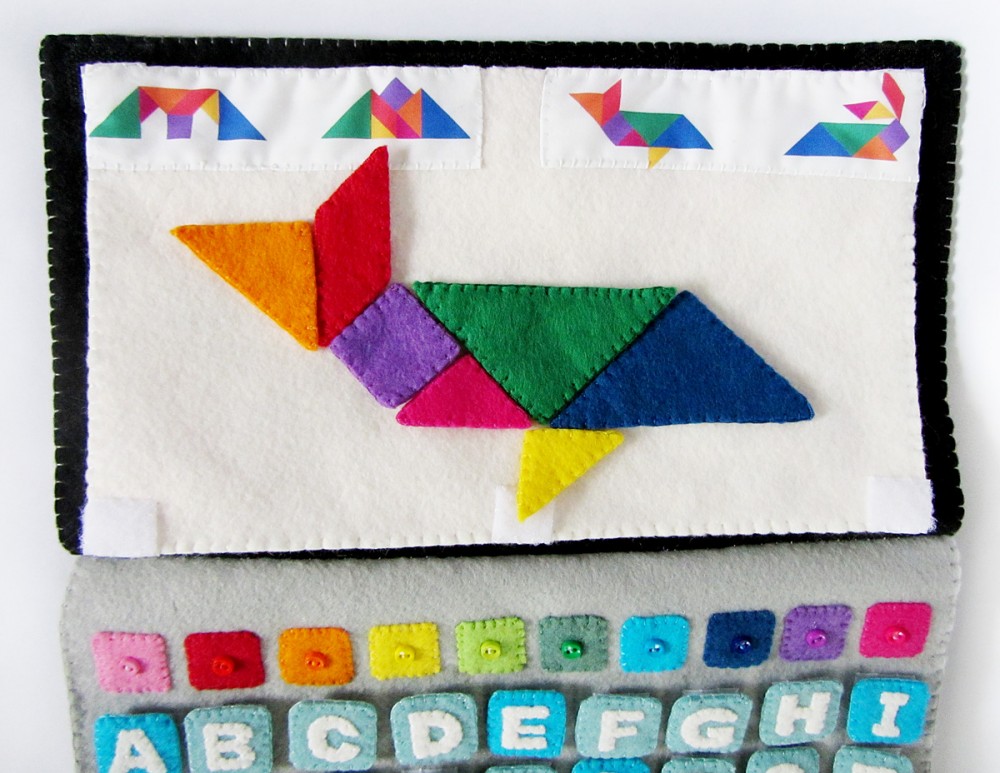
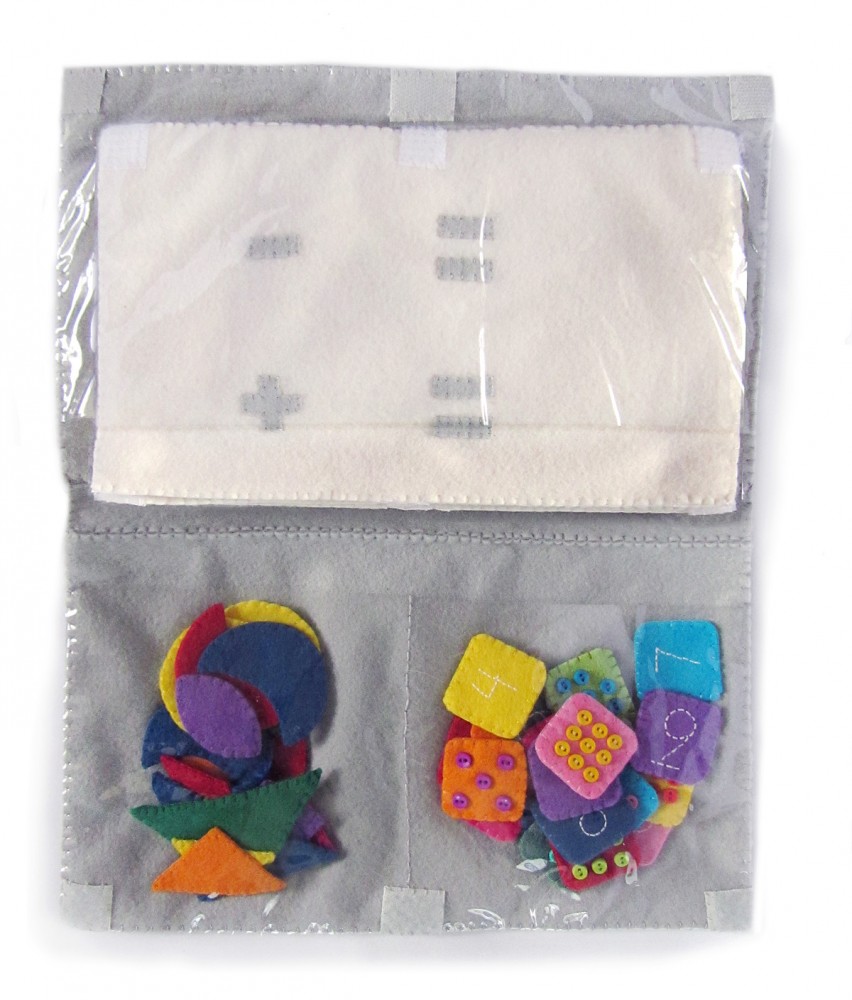
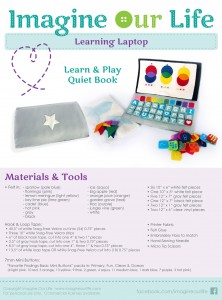
The Learning Laptop project makes a laptop-style quietbook with multiple activity sheets that pull out of a storage pocket and attach to the screen. The “keyboard” is made of letters attached by hook and loop tape. Activities include: the alphabet, numbers (quantity, addition & subtraction), colors (matching & mixing) and tangrams (two difficulty levels). The keyboard lifts up to reveal storage pockets for all the loose parts and activity pages. This book is perfect for a broad range of ages, but I recommend children under three have adult supervision due to small parts.

Learn and Play with the Learning Laptop   Learn and Play with the Learning Laptop

All the wool blend felt and vinyl in this project was provided by American Felt & Craft. The colors are all so beautiful, and I have a lot of leftovers to create more projects from. You do use quite a bit of hook & loop tape in this project. So much that I ended up not putting it on any of the loose parts beyond the alphabet. I used white Snag-Free Velcro for the screen and keyboard, then gray and black for the case. The only other special supply that is used is an assortment of colorful mini buttons. Mine were 7mm Favorite Findings Basic Mini Buttons in Ocean, Fun, Primary and Clean. I collected mine in craft stores, but I generally can find them online too. I have plenty leftover for other projects.

Learn and Play with the Learning LaptopAlphabet

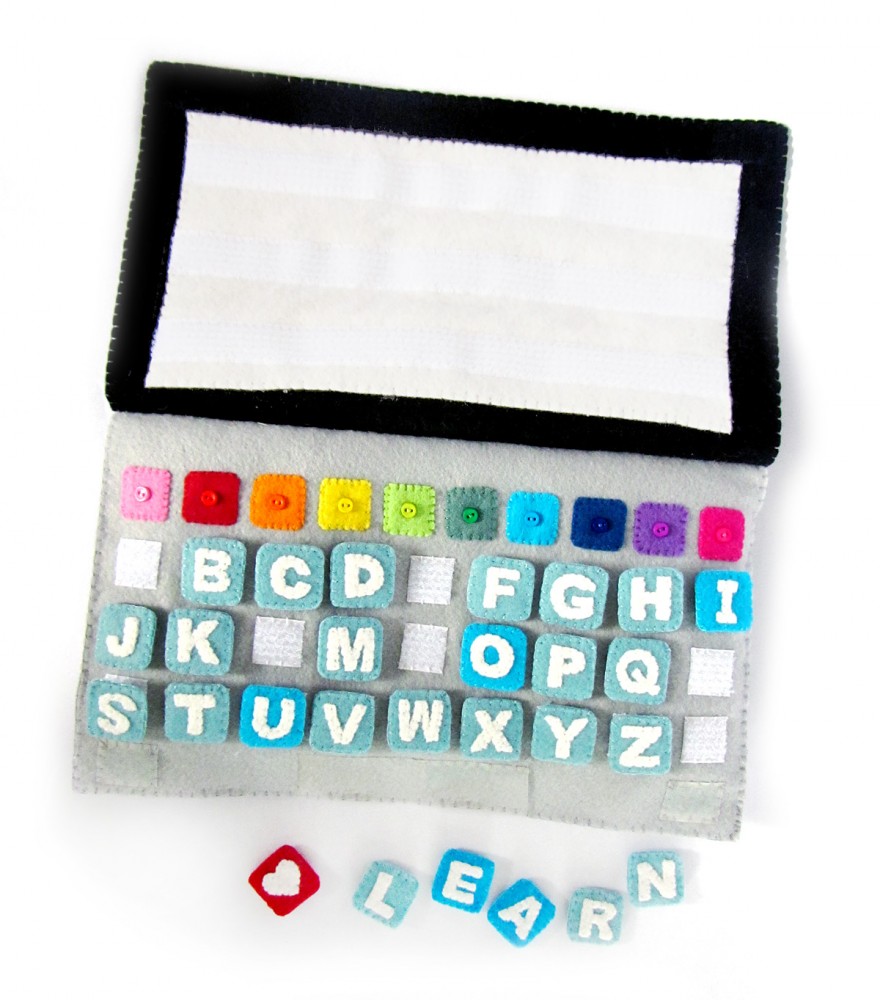
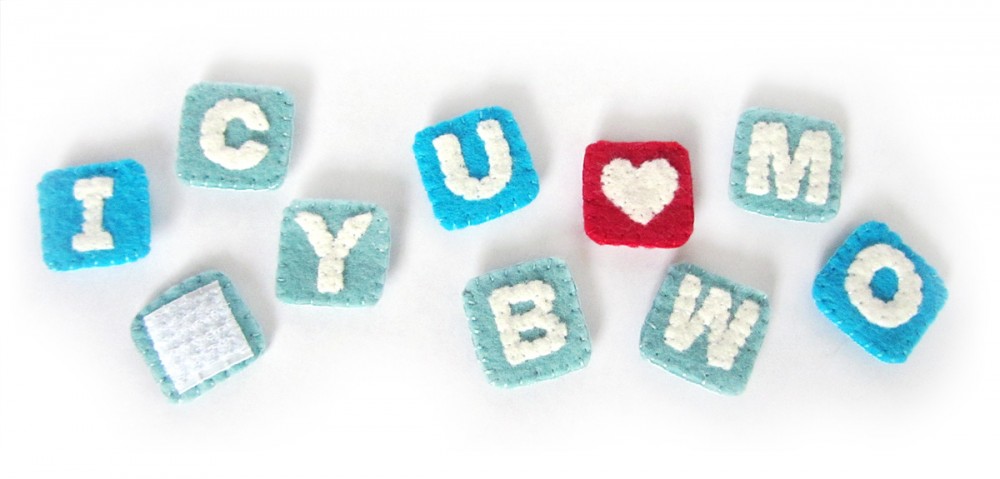
The first thing you see when you open the Learning Laptop is the alphabet. It isn’t in qwerty, as it is meant to teach alphabetical order. (You would need to scale your letters down a bit to convert it to qwerty, as you’d need 10 instead of 9 on the top row.) The letters can all be pulled off and put back in the correct order, or used to make works on the screen. The basic pattern calls for one of each letter, but you can make extras and store them inside. I’d recommend extras if there are double letters in your child’s name.

Learn and Play with the Learning Laptop

I chose two shades of aqua for my letters, separating the vowels with a darker shade. You can change them to all the same, or perhaps the classic Montessori red and blue combination. I added a little heart to fill in our extra space.

Learn and Play with the Learning LaptopNumbers

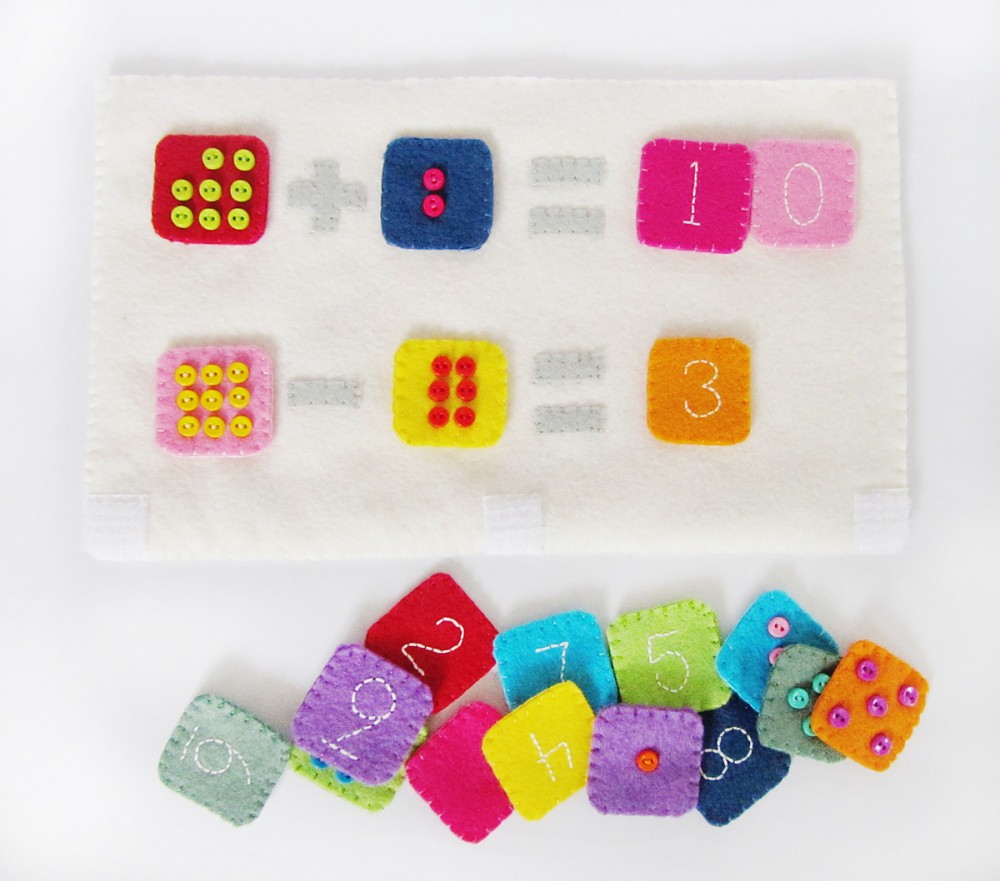
There are two sets of number tiles that range 0 through 9. One set has buttons to show the quantity, the other has written numerals. I chose not to match the felt colors between the two sets so that a matching game will be harder for my 4-year-old. A younger child who is just learning number quantities might benefit from having the felt colors correspond.

Learn and Play with the Learning Laptop

Learn and Play with the Learning Laptop
A math page is included in the storage pocket to introduce addition and subtraction. It includes one line for each, with space to have up to two tiles as the answer (for example when using the 1 and 0 to make a 10.)

Learn and Play with the Learning Laptop

Colors

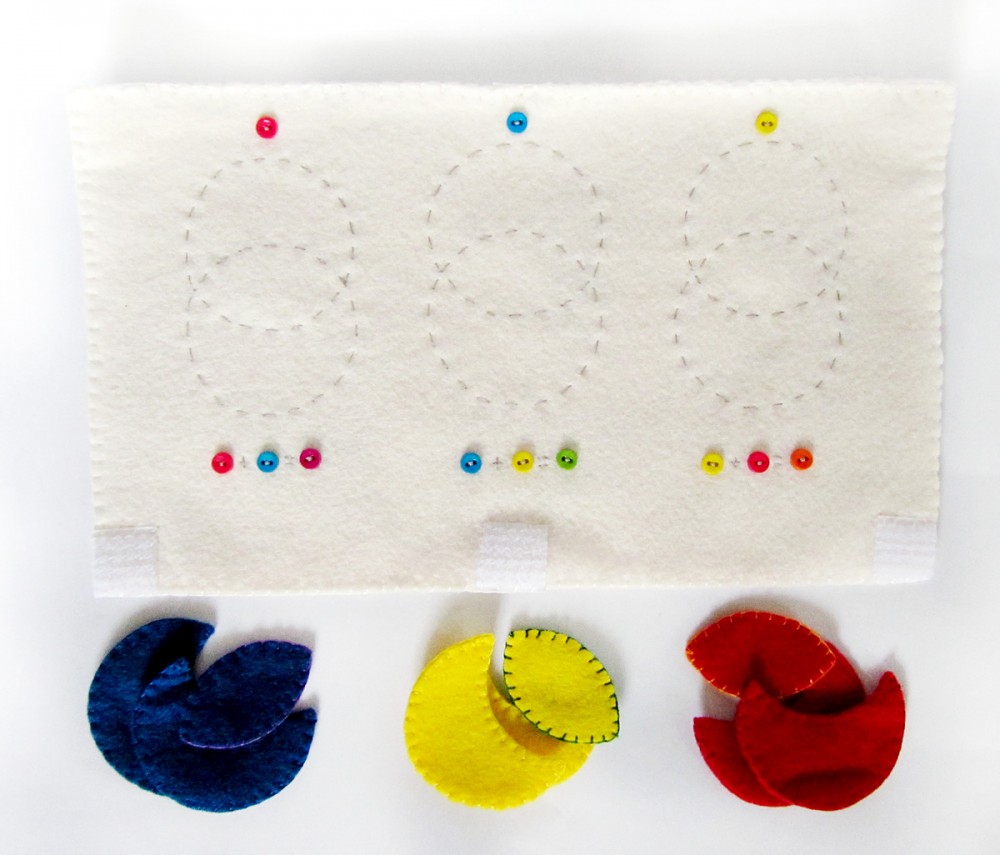
The Learning Laptop has three simple color puzzles. You could create additional pieces and add more button combinations if you wanted to. Included is a page that lets the child either sort the three primary colors into three puzzles, or they can follow the mixing equations to make the complimentary colors.

Learn and Play with the Learning Laptop

The outer pieces are the same primary color on each side. The inner pieces are primary colors (red, yellow and blue) on one side and complementary colors (orange, green and purple) on the other.

Learn and Play with the Learning Laptop

Tangrams

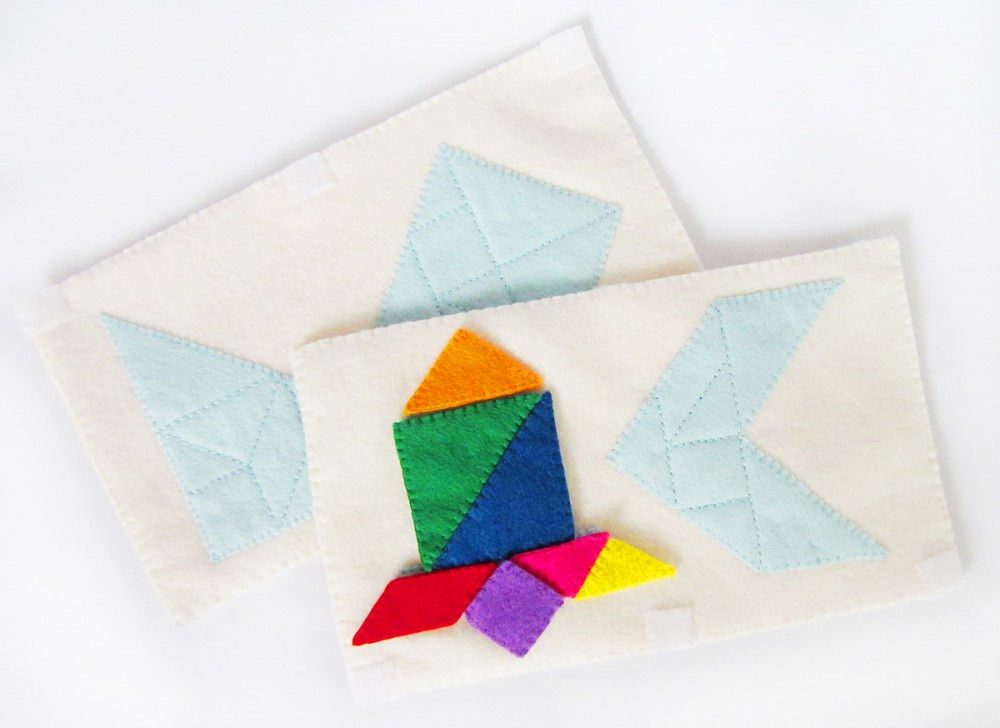
The tangram puzzle are Jax’s favorite! The pattern includes two sheets of full-size puzzles that have guide lines and two pages with smaller color examples of additional puzzles. This gives the child two difficulty levels to work through.

Learn and Play with the Learning Laptop

The tangrams are colorful and fun. Jax started out struggling with the easier puzzles, but after working out how to rotate and flip the pieces, he soon was able to move on to the harder puzzles. Now he is showing interest in creating his own!

Learn and Play with the Learning LaptopEverything tucks away into the storage section to keep it safe, though I help Jax clean up so we know nothing is missing.

Learn and Play with the Learning Laptop

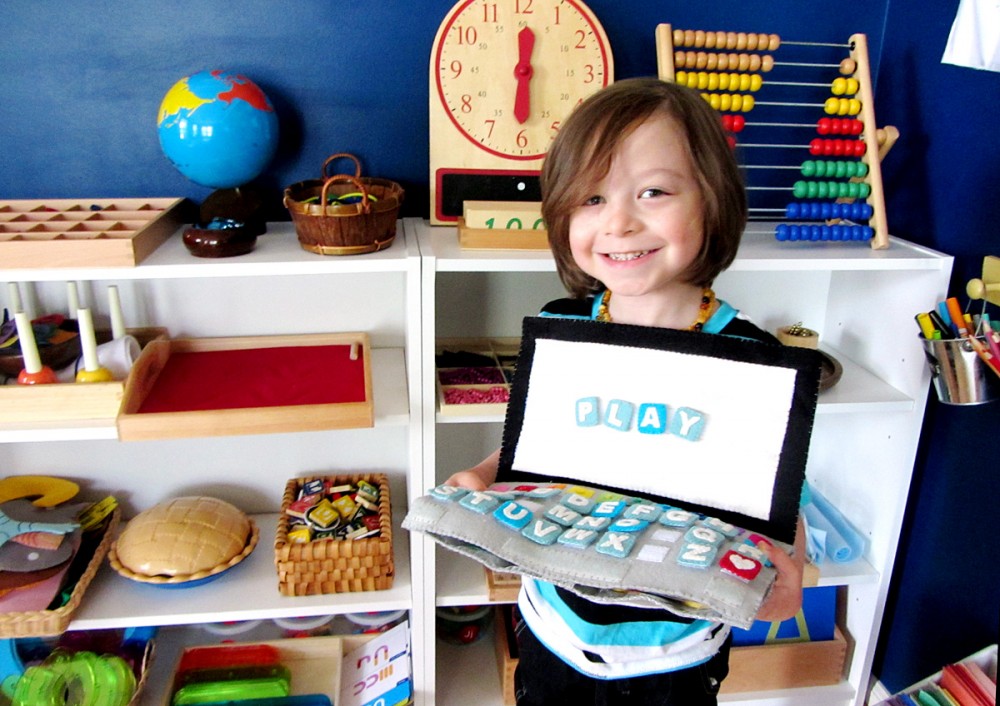
Jax in his Montessori homeschool room. Learn more here.

Jax really adores this laptop quiet book and was so anxious for me to finish it! In honor of the tangrams being his favorite, I created a free pdf file with 12 additional puzzles in matching colors. Download it here.

Learn and Play with the Learning Laptop    Learn and Play with the Learning Laptop

I worked hard to really make the pattern and instructions look beautiful. I’ve included a full tutorial and a brand new stitch guide! As an added bonus, there is a $5 American Felt & Craft coupon to help you purchase beautiful felt!

The Learning Laptop pattern can be purchased for personal use for only $8.00 here. Your purchase helps me towards my goal of making this site my full-time job so I can share so many more projects with you. And, don’t worry! I will be mixing in plenty of free patterns!

Plan to sell the finished product? Purchase a commercial license for $25 and sell as many as you like! You will also be listed on my Authorized Sellers page.

Felt Weather Station Pattern & Free 3-Part Cards

Felt Weather StationLearning about the weather is always fun for kids. It is easy to relate what you learn to what is going on outside the window.

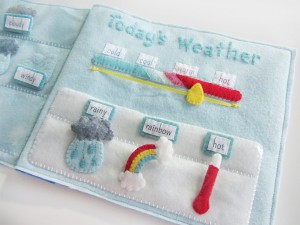
I knew I wanted to create something for Jax to let him explore and learn about different weather conditions. I decided to go with a felt set that can both be used to learn new weather words and to post the daily weather.

bg-left bg-right

This pattern is my very first pay pattern. I hope you find the pricing reasonable! I am really hoping to turn my crafting into a career that lets me both be creative and have time to be the best mama I can be. I will still be offering free patterns. At this point, I expect 50% will be free. I’d love to hear your thoughts!

You can purchase this pattern for $6 in my Etsy shop, Imagine Our Life. If you would like to sell the finished product, you can purchase commercial licensed version for $20. This is a one time fee, and you’d be able to sell as many weather charts as you’d like after purchasing it.

Felt Weather Station Pattern

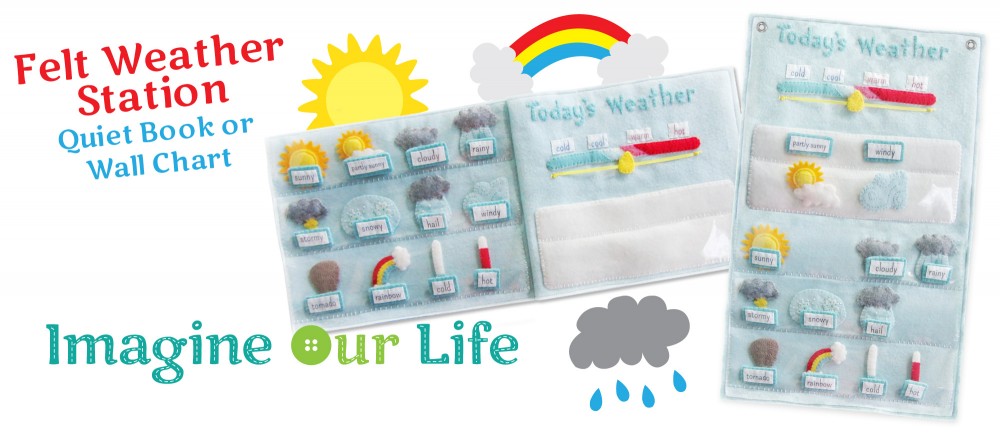
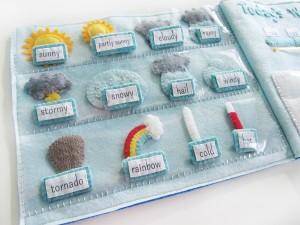
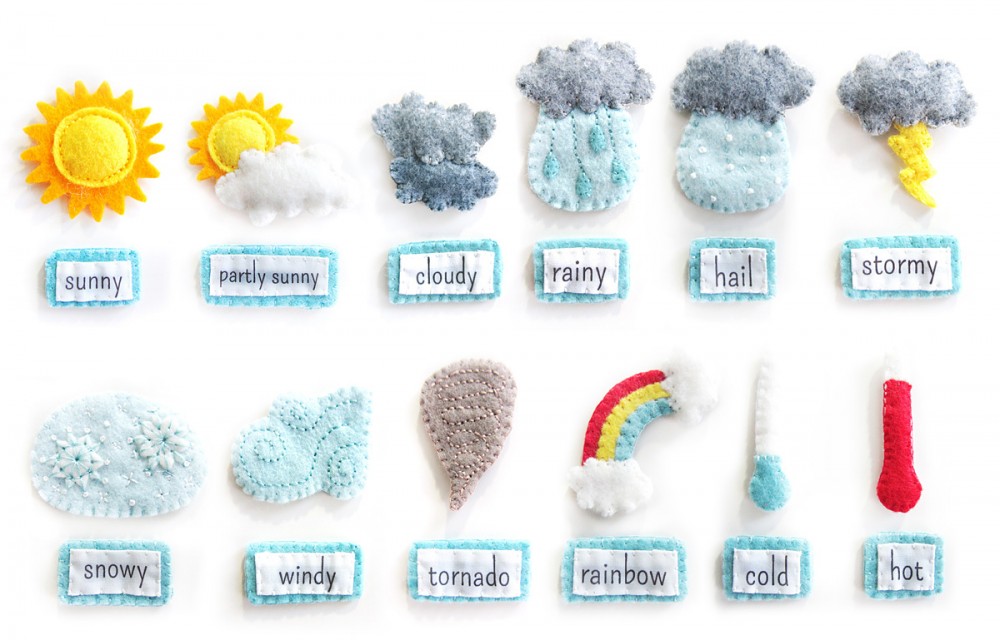
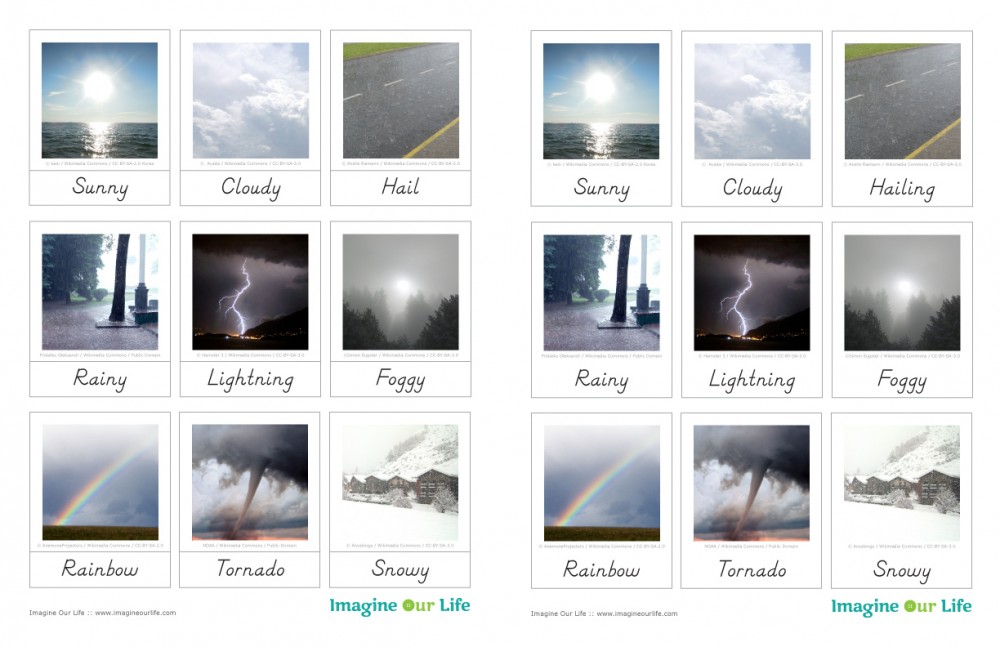
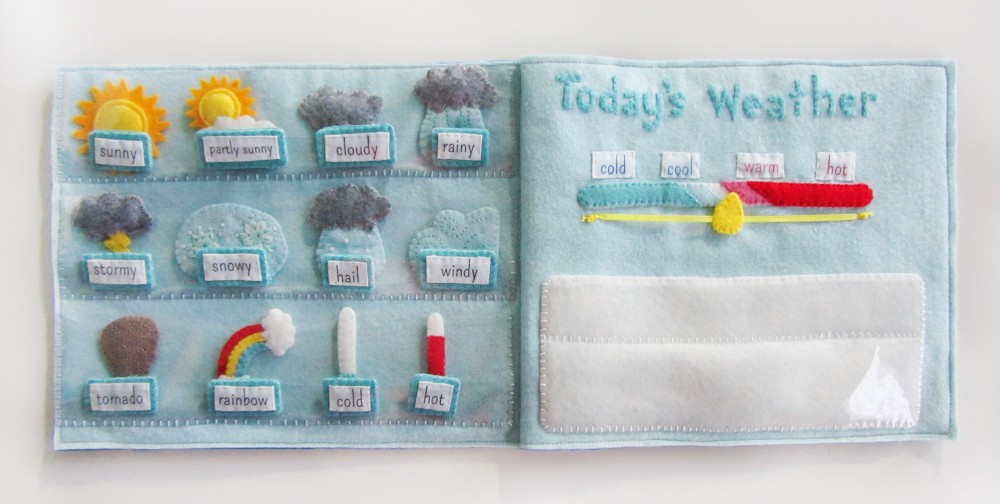
This pattern included instruction to sew both a felt weather wall chart and a quietbook version. The wall chart is perfect for classrooms, while the quietbook is a fun way to make learning portable. There are 12 adorable weather condition pieces, along with matching labels printed on photo fabric. (You can also print the labels on card stock and laminate them.) There is a slider that can be set to the current temperature. A special pocket allows children to post the current weather conditions.

I worked hard to really make the pattern and instructions look beautiful. I’ve included a full tutorial and a brand new stitch guide! As an added bonus, there is a $5 American Felt & Craft coupon to help you purchase beautiful felt!

Felt Weather Station Pattern

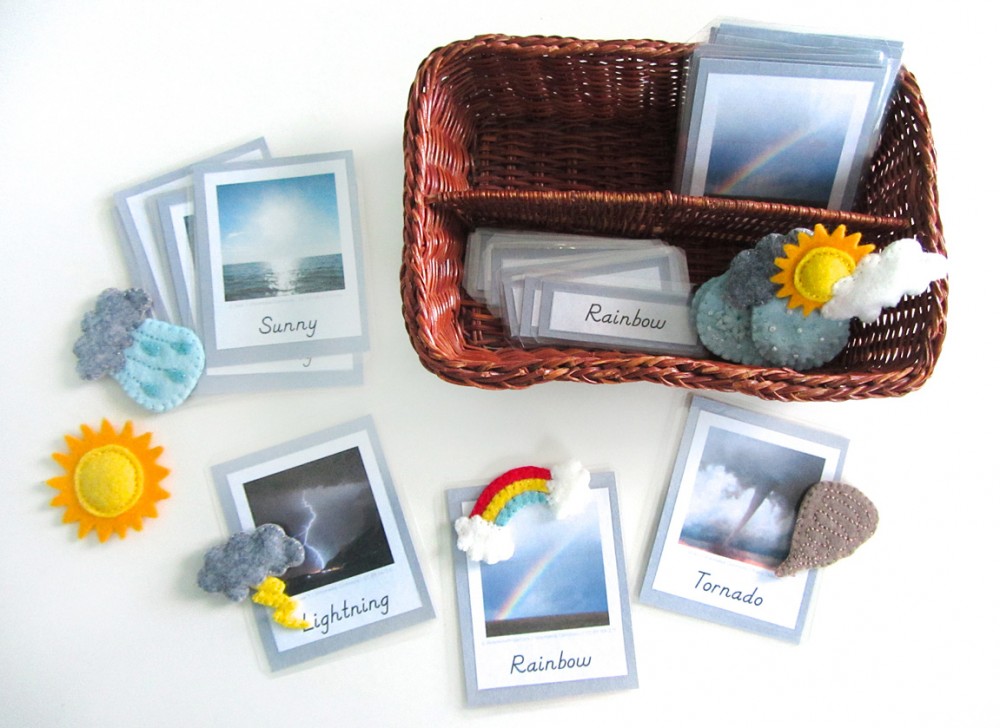
As a free add-on to this felt set, I am providing my matching 3-part cards free for educational use! Click here to download the pdf. The cards include many of the same weather conditions as the felt set, giving you an additional way to teach the new vocabulary.

3-Part Cards - Weather

Montessori MondayTo assemble, print out the cards and cut them out. Glue them to card stock backs, then laminate and trim. I use this laminator. To make laminating a bit easier, you can try adding a dab of glue stick to the cards when you position then in the lamination sleeves. It keeps them from wiggling and overlapping.

If you liked this free homeschool printable and want more homeschool ideas, visit Montessori Monday at Living Montessori Now.


Felt Weather Station Pattern

I hope you enjoy this pattern! I can’t tell how much your support means to me. Big thank yous to all of you who are a part of our Facebook page. You have given me so much inspiration! Please feel free to comment here or on Facebook if you have suggestions for new projects. I’ll also be posting sneak peeks at this week’s free pattern on my Instagram. Come follow along!

Felt Weather Station Pattern

A Year of Quiet Book Pages 2013

A Year of Quiet Book Pages 2013

Happy new year!

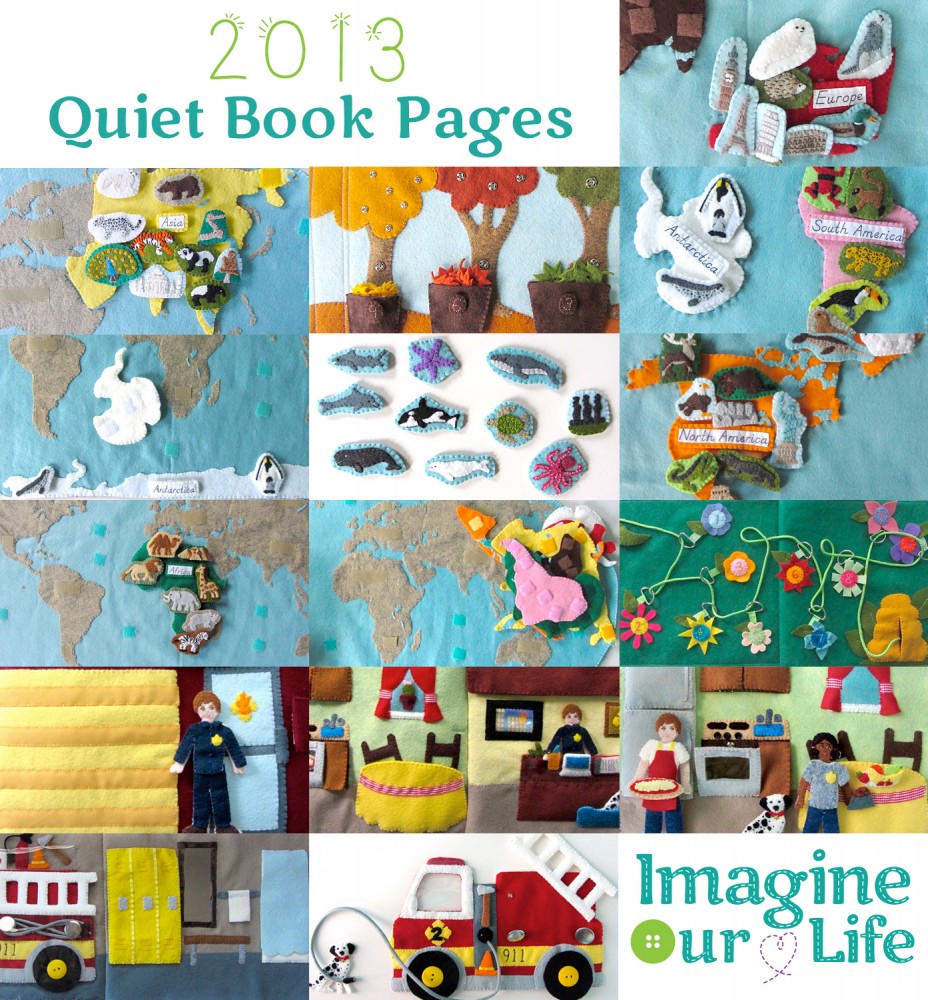
In 2013 I felt like I always had at least 2 sewing projects going at all time. With Jax turning 3 back in February, my quiet book projects grew with him. For our annual beach trip, I sewed him a large fire station quiet book. I also began a massive project to sew the whole world!

Felt Patterns on Imagine Our Life

With a new year beginning, it’s fun to look back on the pages I made and shared with you, as I did in 2012 and 2011.

Current Top 5

  1. Sock Matching Quiet Book Page – 71,096 views | 18,000+ pins
  2. Bumble Bee Lacing Maze Quiet Book Page – 16,972 views | 2,000+ pins
  3. Autumn Leaves Quiet Book – 8,794 views | 1,000+ pins
  4. Forest Quiet Book Page – 37,092 views | 1,000+ pins
  5. Circus Train Quiet Book Page – 35,987 views | 3,000+ pins

The sock matching page has been the top page for 3 years!The sock matching page has been the top page for 3 years!

All Time Top 10

  1. Sock Matching Quiet Book Page – 32,292 views | 9,000+ pins
  2. Forest Quiet Book Page – 37,092 views | 1,000+ pins
  3. Circus Train Quiet Book Page – 35,987 views | 3,000+ pins
  4. Sandcastle Quiet Book Page – 35,333 views | 7,000+ pins
  5. Let’s Cook Breakfast Quiet Book Page – 28,227 views | 4,000+ pins
  6. Mailbox & Letters Quiet Book Page – 27,230 views | 2,000+ pins
  7. Treasure Quiet Book Page – 26,466 views | 3,000+ pins
  8. Cookie Shapes & Colors Quiet Book Page – 25,461 views | 2,000+ pins
  9. Astronaut Quiet Book Page – 22,976 views | 1,000+ pins
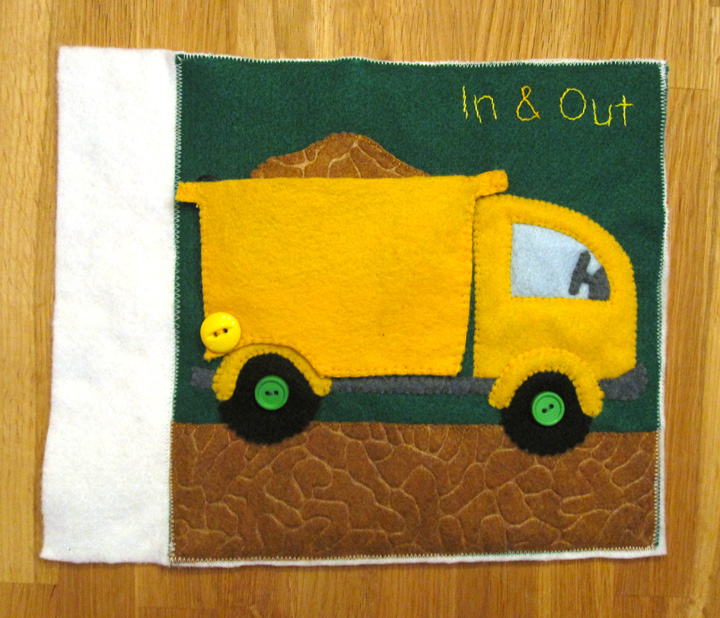
  10. Dump Truck Quiet Book Page – 22,073 views | 1,000+ pins

The dump truck made the all-time top 10 for the first time in 2013.The dump truck made the all-time top 10 for the first time in 2013.

10 Most Popular from 2013

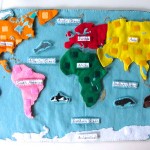
  1. Montessori Continents Map & Quietbook – 18,854 views | 1,000+ pins
  2. Bumble Bee Lacing Maze Quiet Book Page – 16,972 views | 2,000+ pins
  3. Felt Fire Station – Fire Truck & Dalmatian – 10,259 views | 1,000+ pins
  4. Autumn Leaves Quiet Book – 8,794 views | 1,000+ pins
  5. Felt Fire Station – Cover – 7,289 views | 298 pins
  6. Animals of the Ocean for the Montessori Wall Map & Quietbook – 6,989 views | 675 pins
  7. Animals of Africa for the Montessori Wall Map & Quietbook – 6,657 views | 661 pins
  8. Felt Fire Station – Garage & Locker Room – 5,299 views | 876 pins
  9. Animals of North America for the Montessori Wall Map & Quietbook – 4,631 views | 512 pins
  10. Animals of South America for the Montessori Wall Map & Quietbook – 4,522 views | 395 pins

Animals of Europe for the Montessori Wall Map & Quietbook with PrintablesThe Montessori Wall Map & Quietbook posts got a combined 52,682 views this year!

Overall, I’ve shared 62 quiet book pattern posts with you since I started sewing them in September of 2011, including 4 multi-page books. Wow! You can check them all out here.

Click a thumbnail to visit a post:

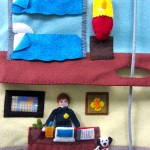
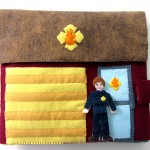
Felt Fire Station - Fire Truck & Dalmatian  Ready to fight fires!  Felt Fire Station - Kitchen

Felt Fire Station - Office & Bedroom  Felt Fire Station - Cover  Bumble Bee Lacing Maze Quiet Book Page

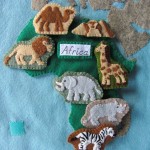
Montessori Continents Map & Quietbook with 3-Part Cards  Animals of Africa for the Montessori Wall Map & Quietbook with Printables  Animals of North America for the Montessori Wall Map & Quietbook with Printables

Animals of the Ocean for the Montessori Wall Map  Animals of Antarctica for the Montessori Wall Map & Quietbook with Printables  Animals of South America for the Montessori Wall Map & Quietbook with Printables

Autumn Leaves Quiet Book & Fall Homeschool Unit  Animals of Asia for the Montessori Wall Map & Quietbook with Printables  Animals of Europe for the Montessori Wall Map & Quietbook with Printables

I’m always taking suggestions for new page ideas. Join our Facebook page, or leave a comment here!

Small Sewing Projects

Along with quiet book sewing, I also did a long of small sewing projects in 2013. My Little Ponies are a common project for me, thanks to my niece who adores them. I also do a lot of ornament sewing every Christmas.

Top 10 Sewing Projects in 2013

  1. Wee Wonderfuls – Sewing Rag Dolls – 11,512 views | 897 pins
  2. Pillow Quiet Book Cover – 5,550 views | 218 pins
  3. Felt Valentine Play Set – 5,155 views | 3,000+ pins
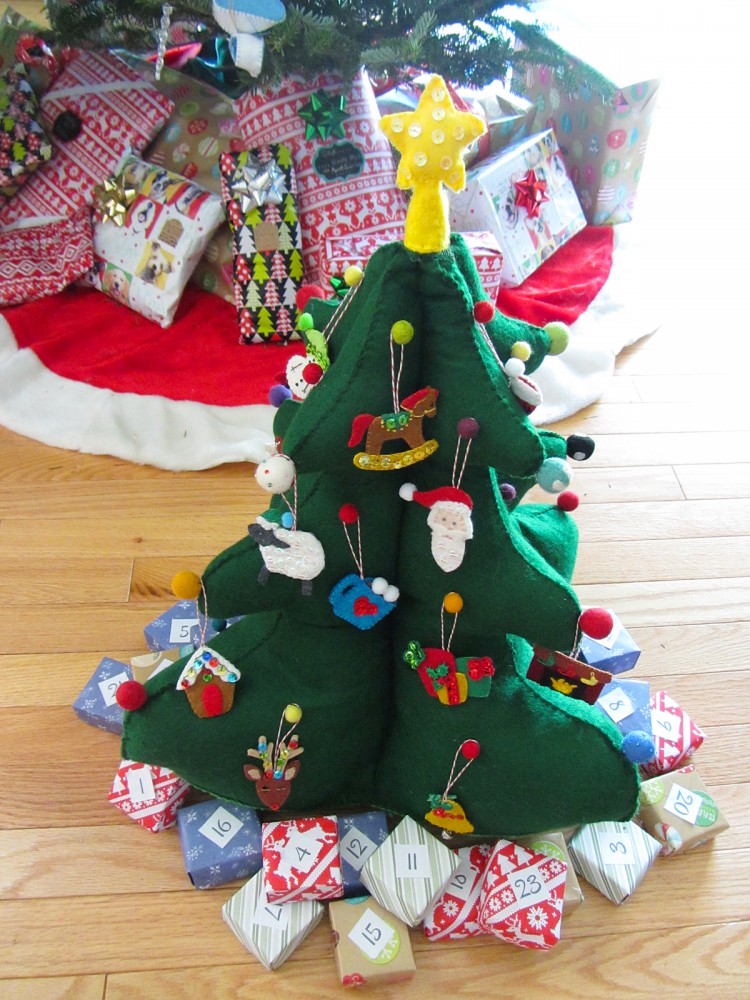
  4. Christmas Tree for Toddlers – 5,137 views | 179 pins
  5. DIY Rainbow Dash Plush with Goggles – 4,383 views | 324 pins
  6. DIY Sewing Labels – 3,444 views | 330 pins
  7. Make the World’s Best Robot Costume! – 2,890 views | 82 pins
  8. Mini Advent Ornaments Set One – 2,331 views | 97 pins
  9. Felt Caterpillar Coin Purse – 2,283 views | 238 pins
  10. DIY Felt Poppy Headband – 1,811 views | 199 pins

Mini Advent Ornaments Set FourOur Reader’s Choice project this holiday was the Christmas Tree Play Set!

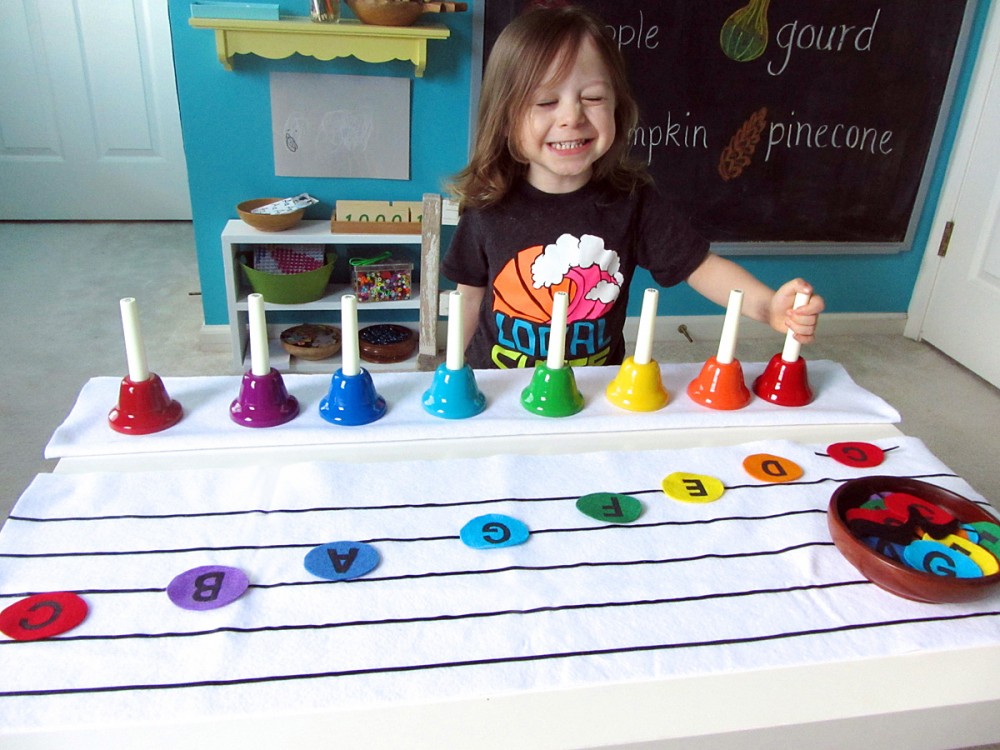
Preschool Handbells: New-Sew Felt Musical Notes and PrintablesHonorable mention to this no-sew project: our color-coded handbell music note set!

Thank You!

A big thank you to American Felt and Craft for supplying felt for many of my creations! Their wool blend felt is just so nice to work with. And thank you Safari Ltd. for helping me make a lot of my projects more exciting and educational!

Thank You!Thank you American Felt and Craft!

Top 5 Referring Blogs in 2013:

  1. The Quiet Book Blog
  2. American Felt and Craft – The Blog
  3. Living Montessori Now
  4. Lapappadolce
  5. Proverbs 31 Woman

Let’s Be Friends!

Stephanie Segall

Want to get social? I’m the best at responding on Instagram, but you can always email if you don’t mind waiting (Sorry about that!) You can join my Facebook page or message me via Twitter. My personal site is Stvlive.com. I’m on Pinterest, and I host a large quiet book board. I also love postal mail! Jax enjoys postcards from around the world. Our mailing address is here.

Jax is growing up (he’ll be 4 in February!) but he hasn’t outgrown quiet books. But, you may have noticed that I am tending towards educational projects and larger multi-page books.

Upcoming projects will include a bit of everything: a weather page and money page that can be used in homeschooling, the last installment of the world map (Australia!) and something donut-themed (the birthday party theme Jax chose!) Have an idea for me?

Happy New Year!

Autumn Leaves Quiet Book & Fall Homeschool Unit

Autumn Leaves Quiet Book & Fall Homeschool Unit

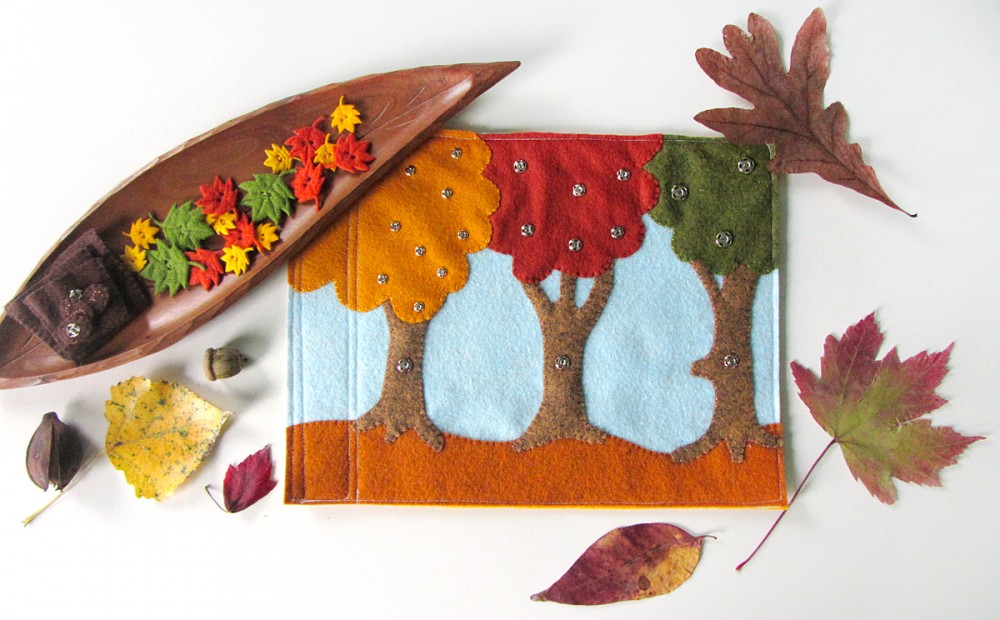
This quiet book page was designed last year, but I ran out of time before autumn ended to actually sew it. This year I made sure to pause my projects and get it finished. We don’t have any trips coming up that require a quiet book, so I especially like making ones that fit in well on our Montessori homeschool shelves. This page certainly does!

Autumn Leaves Quiet Book & Fall Homeschool Unit

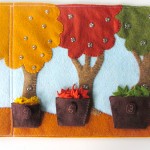
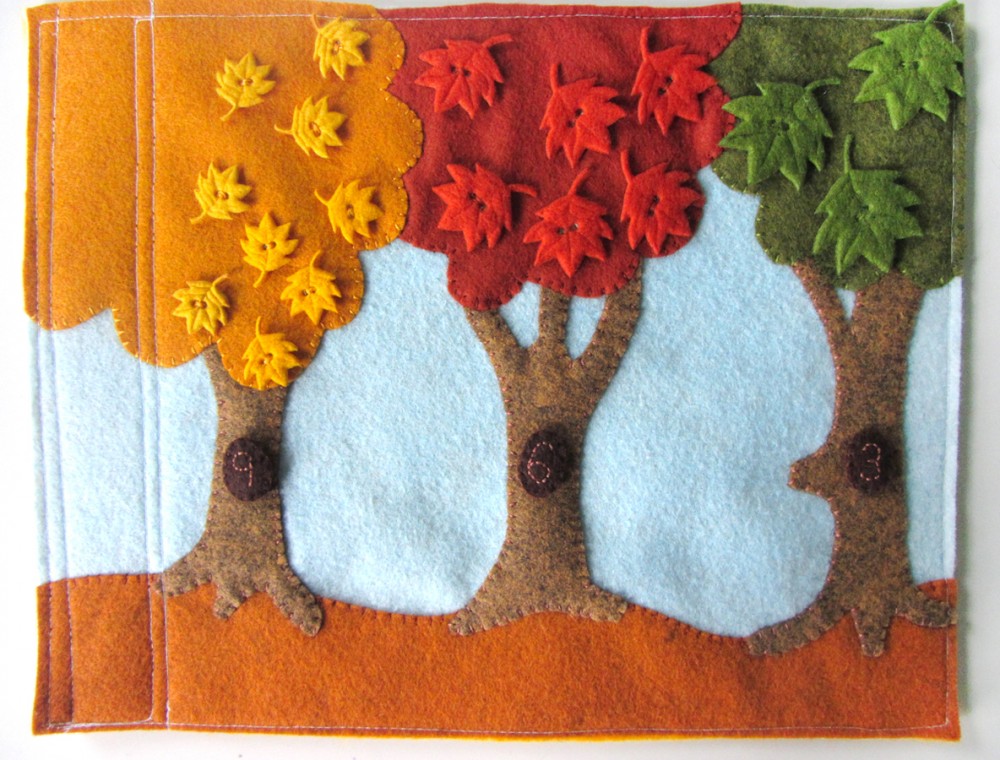
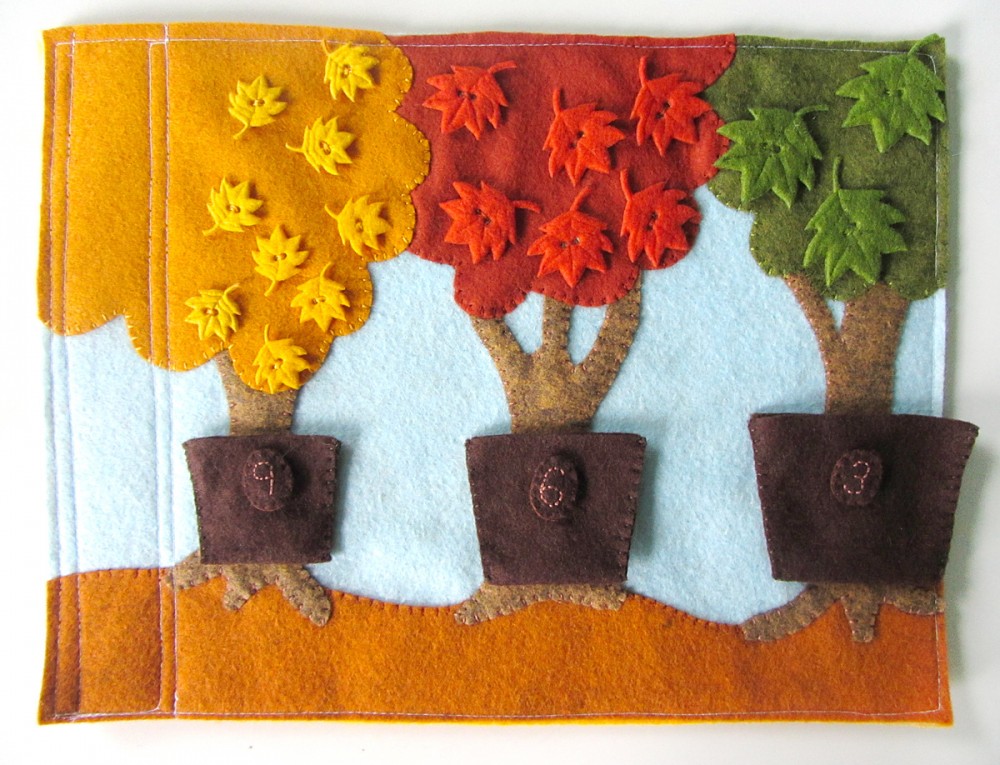
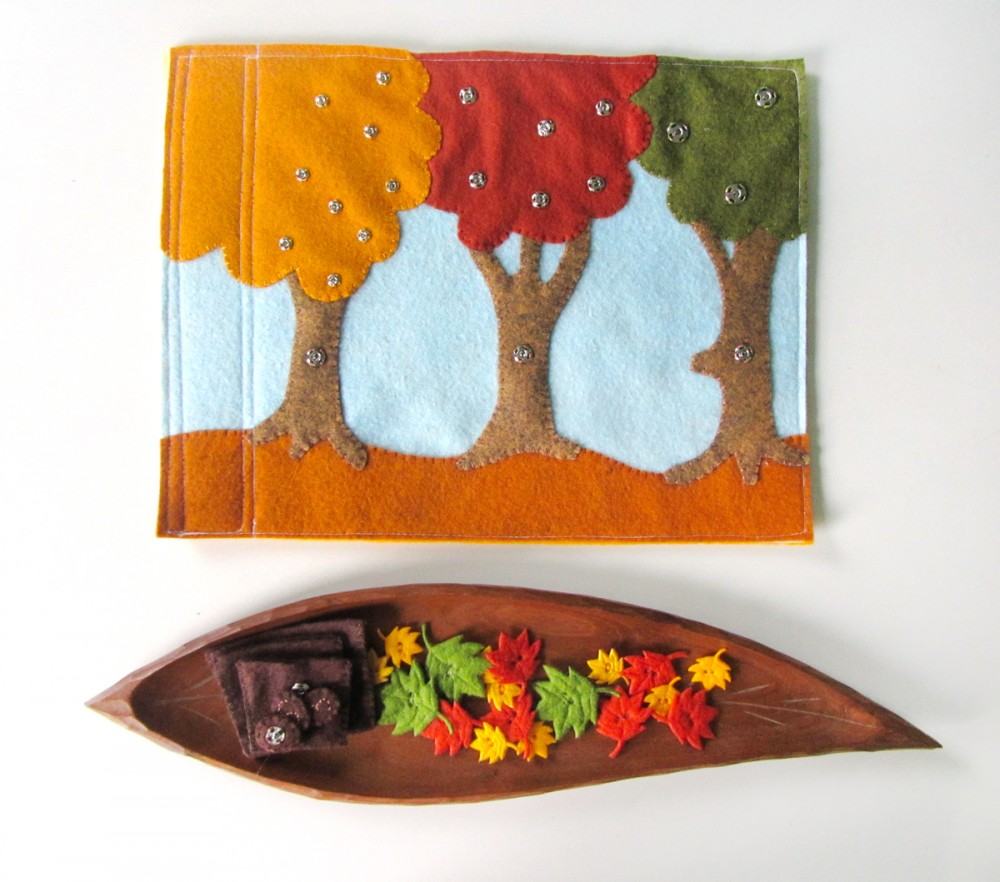
There are a number of features to this page: practice with snaps (which improves motor skills and the ability to dress yourself), sorting colors,  sorting sizes, and counting.

Autumn Leaves Quiet Book & Fall Homeschool Unit

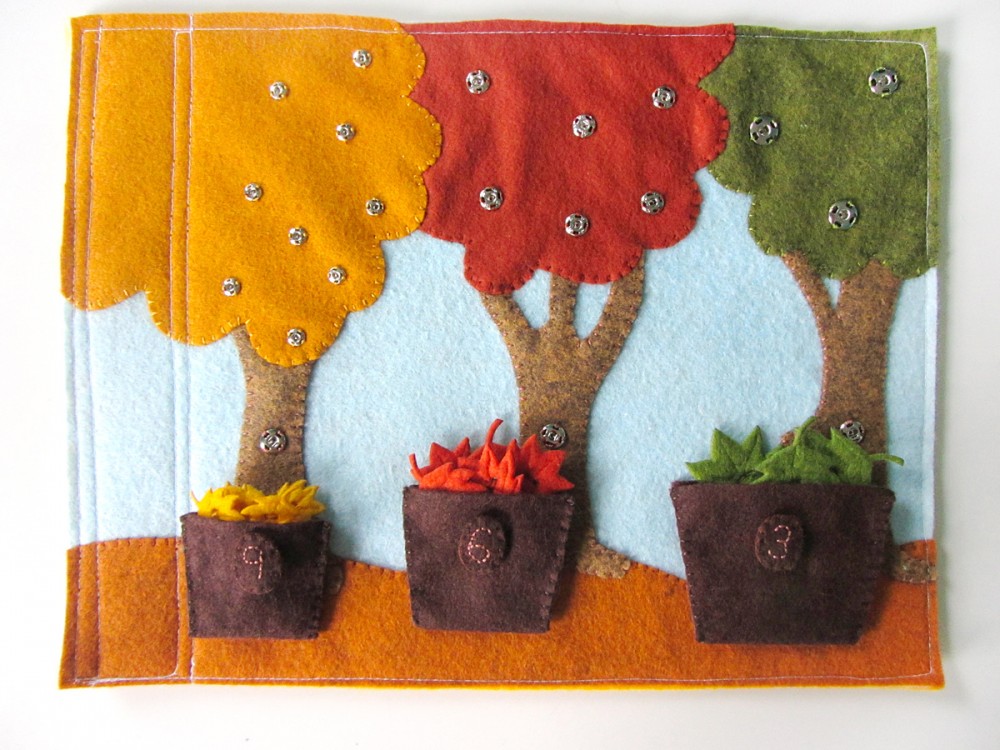
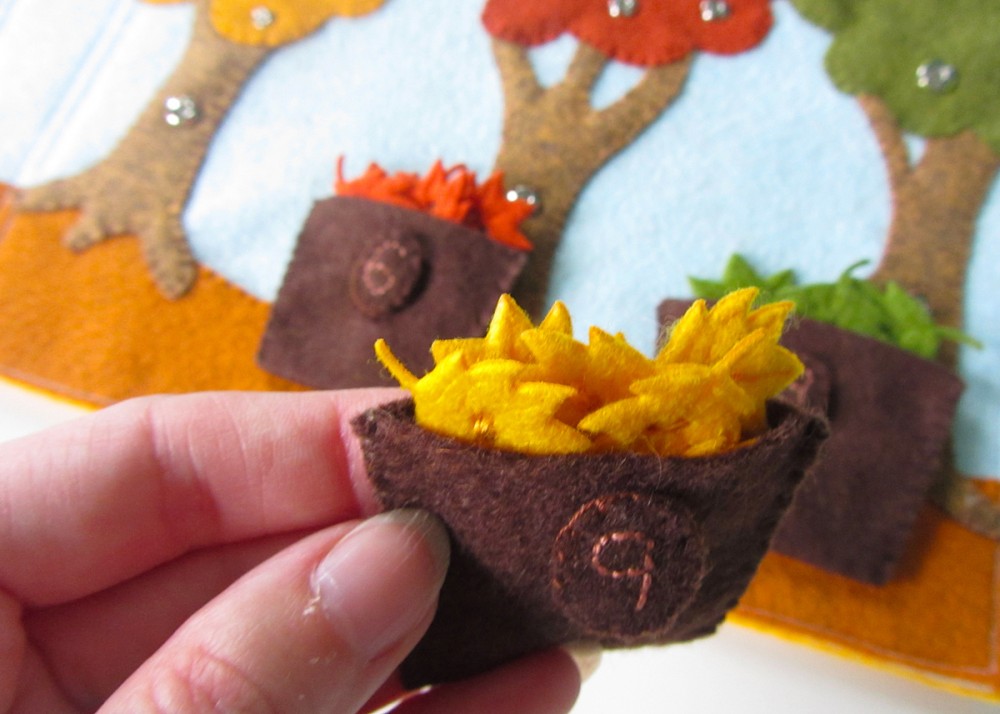
I included three bins with snaps to add number labels. (The labels can also be placed on the trees!) I left it open for Jax to decide how to use the bins. He could potentially put the largest quantity of leaves in the largest bin, or he could put the largest sized leaves in it. This is something you could explore with your child.

Autumn Leaves Quiet Book & Fall Homeschool Unit

When you are finished with the page, you can snap the bins to the trees for storage.

What I Used:

This biggest bummer about this project is that I bought the leaf buttons last year, and now they are no longer made by the manufacturer! When I posted to our Facebook page about it, I linked to the one source I had seen so far. But now all 10 packs are sold out.

Autumn Leaves Quiet Book & Fall Homeschool Unit

Here are a few non-felt button options you could try. I’m not sure how well sewing a snap to a plastic button would work though. There is a pack of 12 buttons that match the colors and sizes I used, but you’d need multiple packs to have the same number as me. Here is a larger listing of those buttons. This is another brand, but the colors and sizes seem more assorted. There are a number of felt die cut leaves on Etsy, but they all seem to be larger. This seller has some that are 25mm. (Last photo below copyright Planeta Costura.)

etsy

You may be better off cutting out your own out of felt. If you want to skip snaps, you could just cut one layer of felt for each leaf (I recommend thicker wool-blend felt), but be aware they are more likely to get damaged or lost. You could take the time to cut 2 layers per leaf and sew them together. It’s so frustrating that they aren’t sold anymore!

Sewing the Page

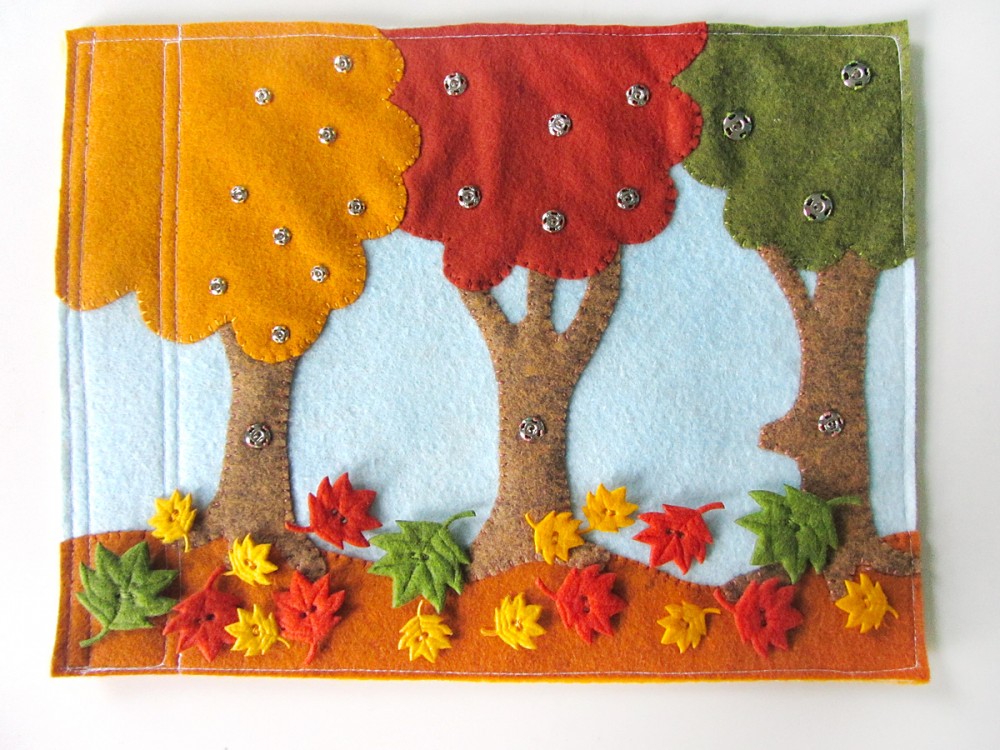
Background: I started by cutting everything out and pinning it down: first the ground, then the trunks, then the tree tops (green, red, then yellow). I sewed down the tree trunks, then sewed down the tree tops. Then I sewed down the top edge of the ground that was showing between the trees.

Note: This is how I sew my quiet book pages together. Because I sew all the way around the edge while sewing on the backing, I don’t usually bother to sew elements along the edges of the page.

Autumn Leaves Quiet Book & Fall Homeschool Unit

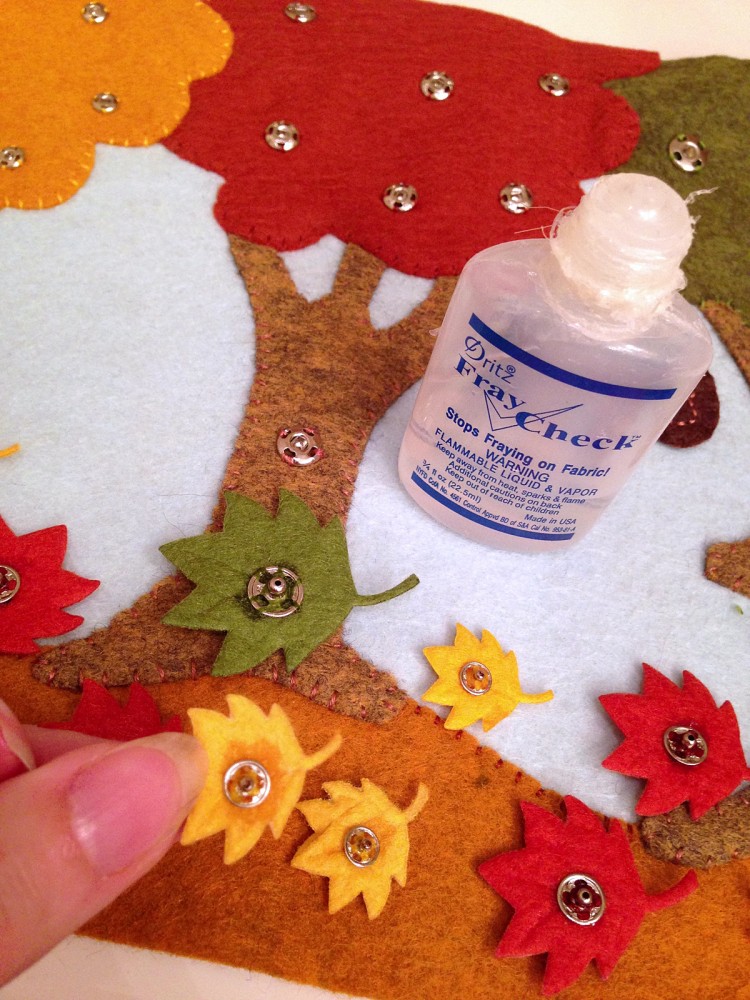
Leaves: For all of the leaf buttons, I used A LOT of stitches to attach snaps to the backs. Then I coated the stitches with Fray Check and let them dry overnight.

Tree Snaps: On the green tree, I sewed down 3 size 1 snaps. I sewed the matching halves to the backs of the green leaf buttons. On the red tree, I sewed 6 size 2/0 snaps on to the tree top and the red leaves. On the yellow tree, I sewed down 9 size 4/0 snaps to the tree top and leaves. Not that I left a 2″ area on the left without snaps to allow for where I sew my binding and add grommets. I have not added grommets yet. I usually do that right before a trip when I need to link pages together.

I added a size 1/0 snap to each tree trunk to hold either the numbers or the bins.

Numbers: I back stitched numbers on the fronts of each number pieces and the other half of those 3 size 1/0 snaps to the backs. Then I sewed them together.

Autumn Leaves Quiet Book & Fall Homeschool Unit

Bins: The bins were just sewn together with an open top. I cut mine on a fold so I didn’t have to sew the bottom. I added a snap to each one – one half of the snap set on each side of a bin. These snaps let you either attach the number label or attach the bins to the trees.

Montessori Use

Autumn Leaves Quiet Book & Fall Homeschool Unit

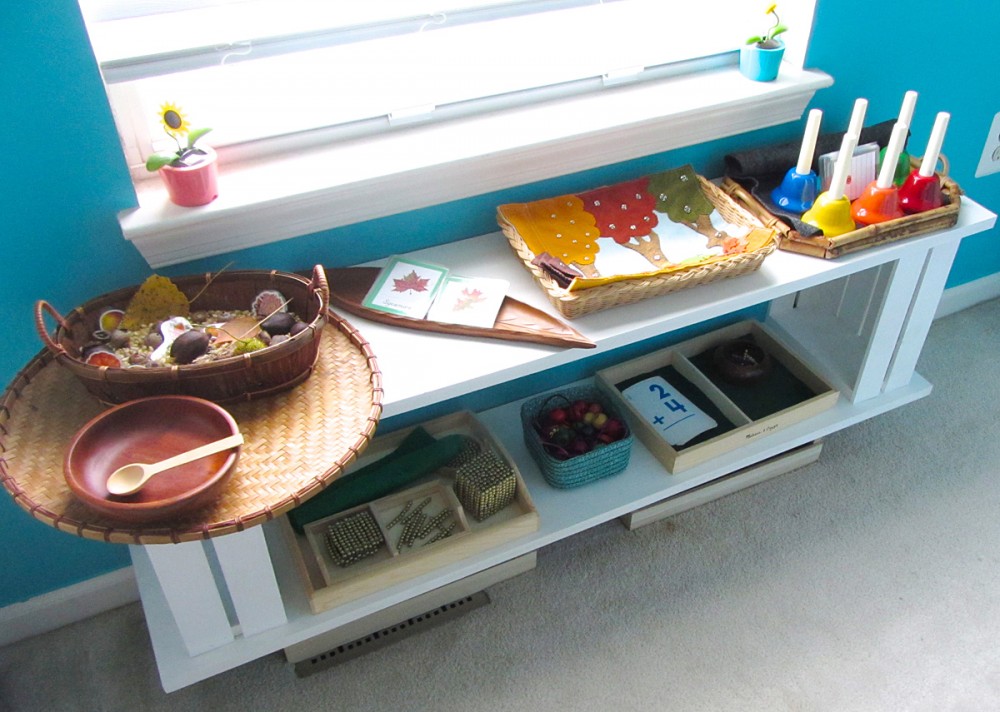
This page works well as a Montessori activity for our autumn unit. I adore this wooden leaf tray I found at a thrift store! It is perfect for presenting the leaves or other autumn supplies. I’ve also laid it out in a tray with the leaves spread out on the ground just like Jax finds them outside.

Autumn Leaves Quiet Book & Fall Homeschool Unit

Here is our current main shelf of our homeschool room. The bells will be featured in an upcoming post!

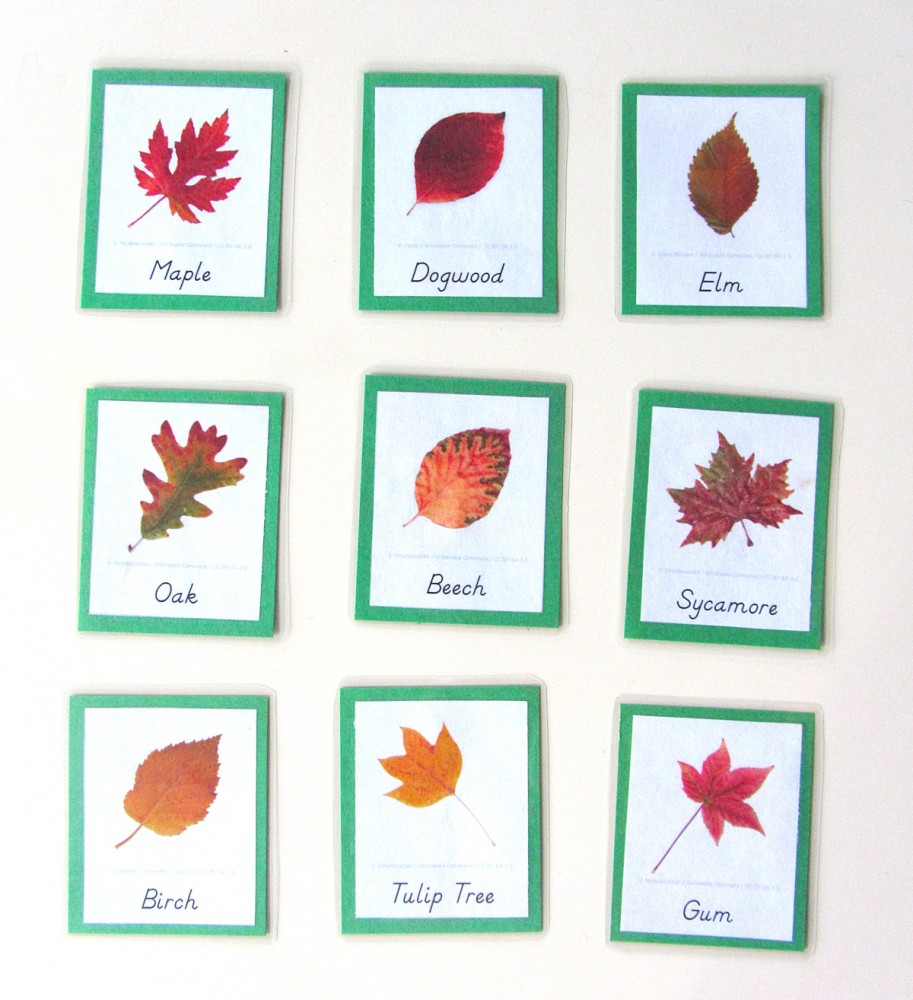
Autumn Leaves 3-Part Cards

Autumn Leaves 3-Part Cards

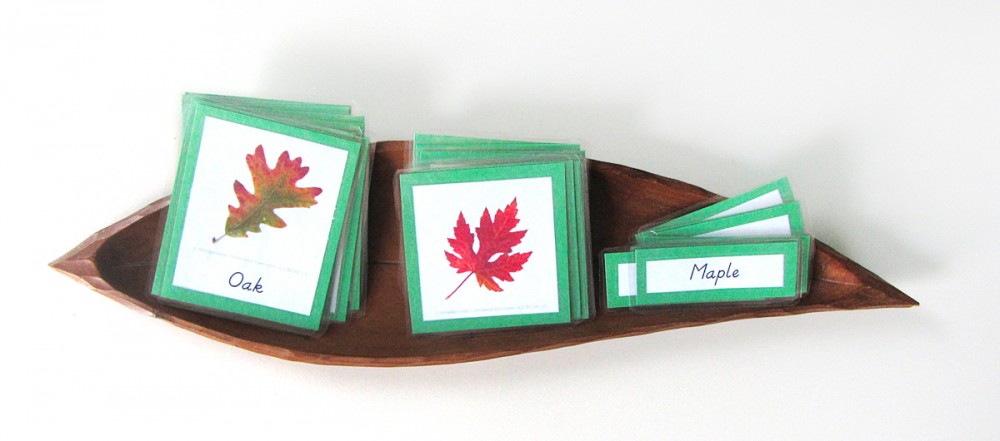
In the Montessori method, 3-part cards are an essential tool that can follow your child through multiple levels of development. They can be used in any subject to aid in adding vocabulary, learning to sort/classify, reading practice and so much more. Three-part cards are made up of two photos – one with a label, one without – as well as a separate label. Younger children start with the labeled card to help them learn the vocabulary. One of the best ways to use them is with small objects that match the photos. Older kids can work with the unlabeled card, matching the correct words or writing their own.

Autumn Leaves 3-Part Cards

I put together a set of 3-part cards for Jax to learn how to recognize various leaves in our area. I used only trees that can be found in our area, but they are very common ones. You are welcome to use my free pdf to make your own set! I am hoping to take our cards out on a walk once more leaves start changing colors so we can match them up. (Our server caching is causing troubles for some people. Here is an alternate download link!)

Autumn Leaves 3-Part Cards

To make mine, I cut them out, glued them to green card stock (this is simply a color I chose to assign to all my future botany collateral) then laminated them. It makes them shiny and strong. I really love my laminator – as everyone told me I would!

Autumn Leaf Watercolors

Autumn Leaf Watercolors

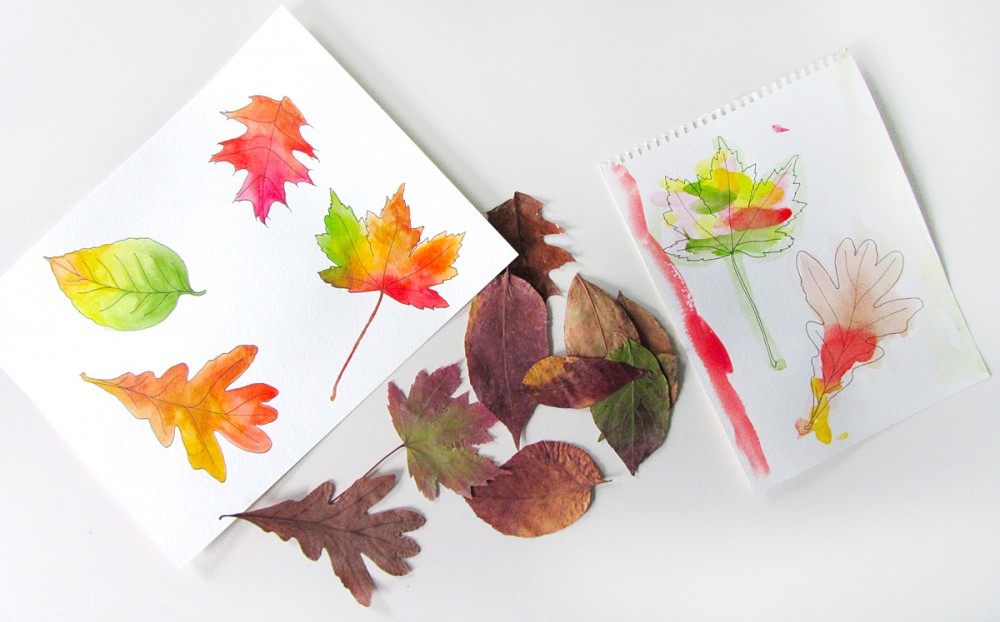
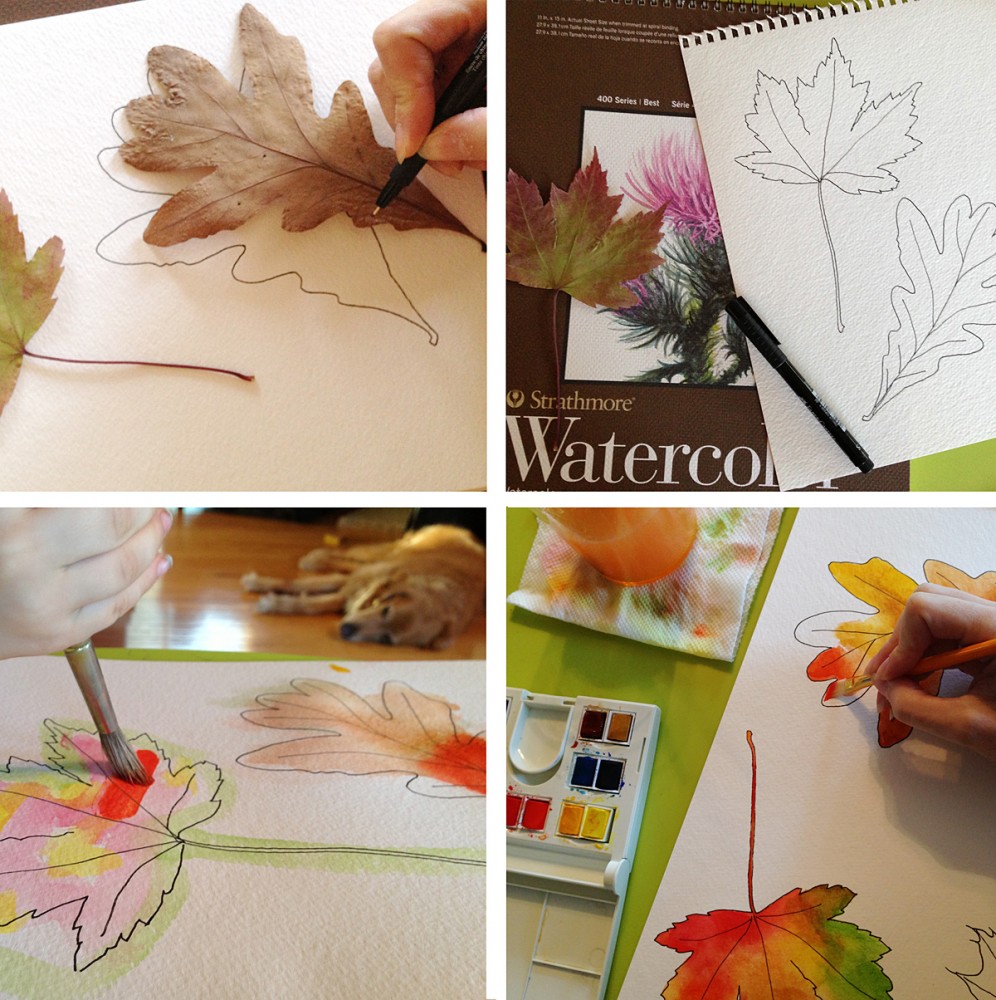
We needed a quick afternoon activity the other day, so I took some watercolor paper and traced some leaves using my artist pen. (For the exact materials and techniques I used, see my recent watercolor post.) Then Jax and I each painted in our leaves with watercolor paints.

Jax was very set on painting his leaves only the proper colors you’d find in nature. He also wanted to add a red sky and green ground (he still does sky and ground as little strips at the edges of the page!)

Autumn Leaf Watercolors

We both ended up with beautiful artwork, worthy of a frame!

For an even quicker activity, print out my free leaf coloring sheet!

Autumn Nature Walk

Autumn Nature Walk

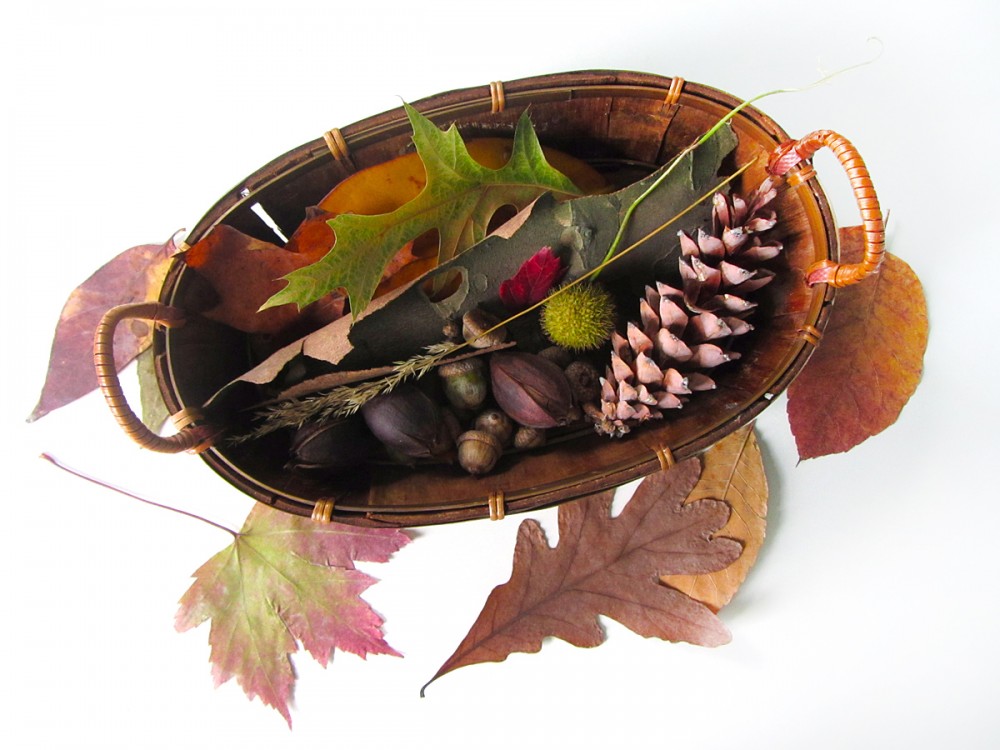
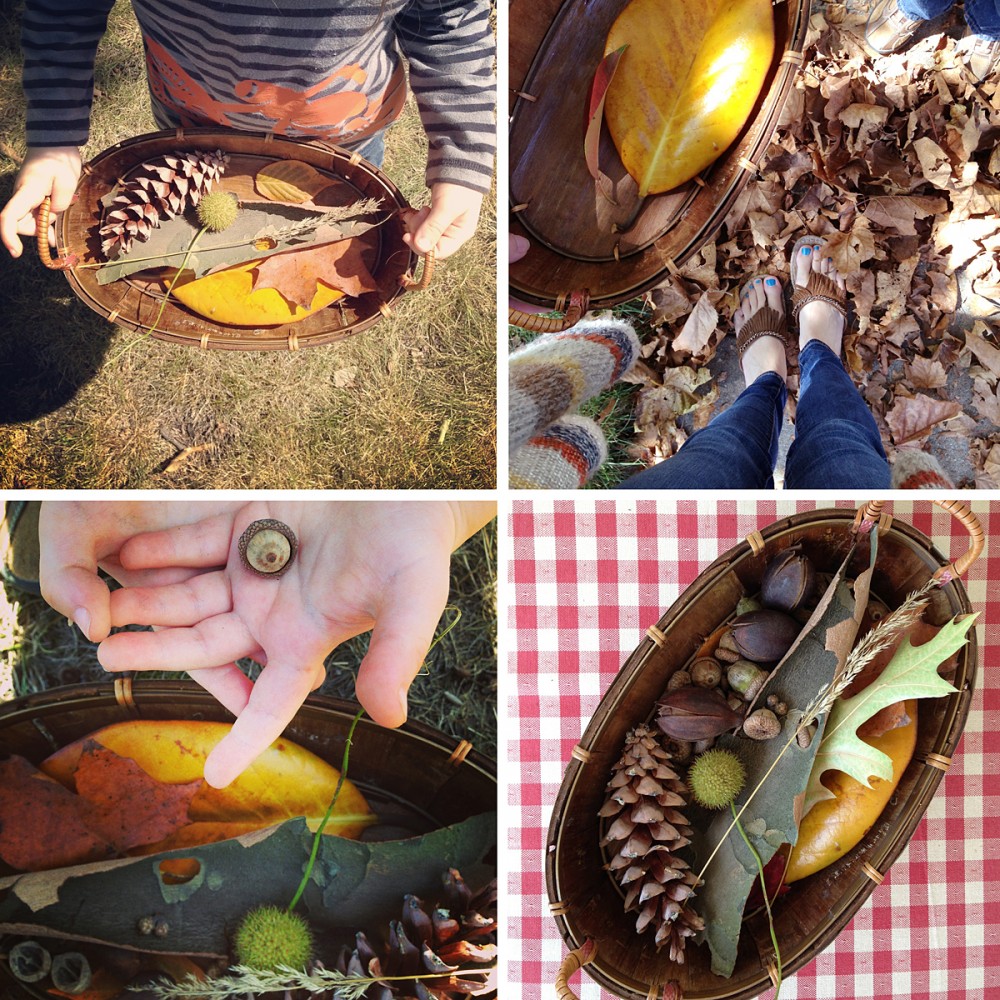
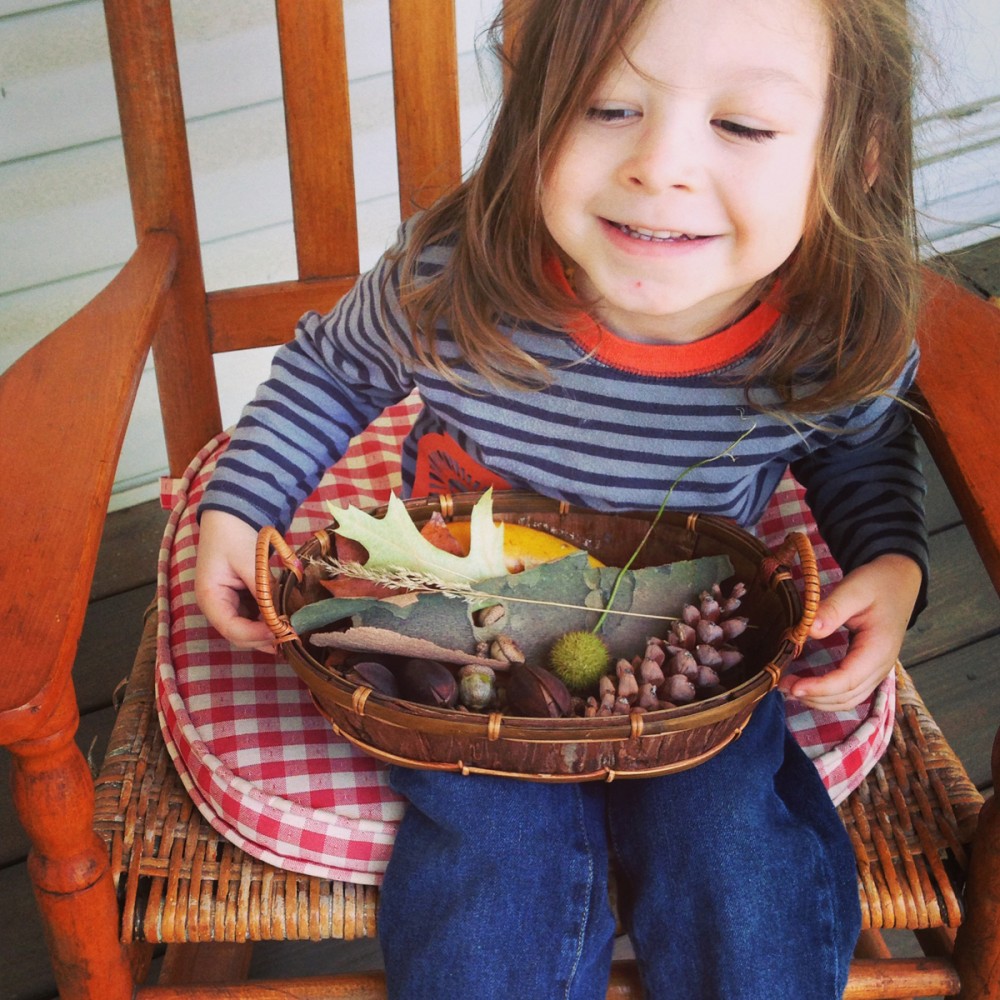
This past weekend was beautiful here in northern Virginia! Jax and I grabbed a basket and set out looking for early autumn treasures. The leaves are just now starting to turn, so we focused mainly on other items.

Autumn Nature Walk

We found all sorts of seeds and acorns, bits of birch bark, leaves and acorns. Jax quickly got into our “treasure hunt” and was very excited to show me each new find!

Autumn Nature Walk

We brought our bounty home to look through and enjoy.

Autumn Sensory BinAutumn Sensory Bin

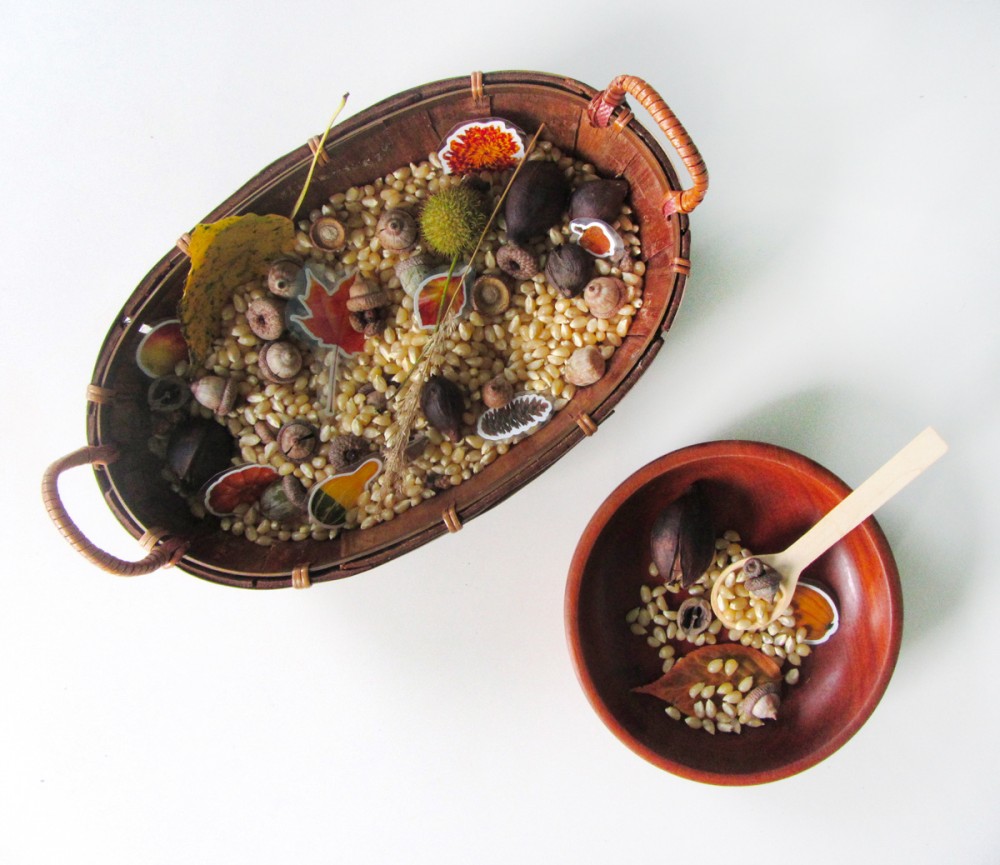
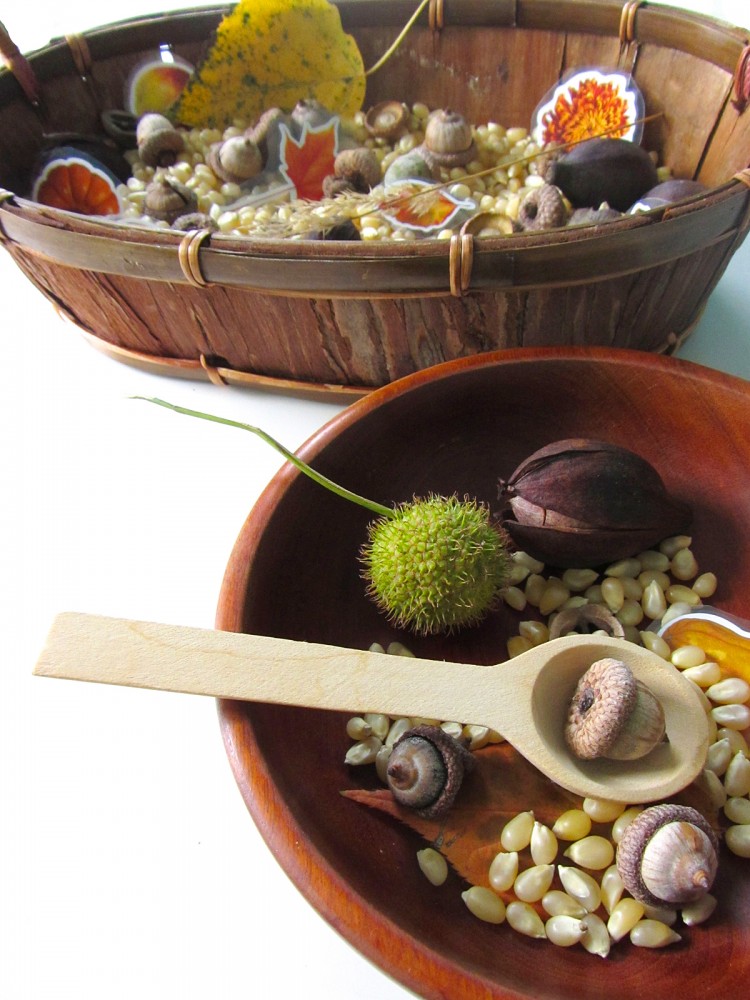
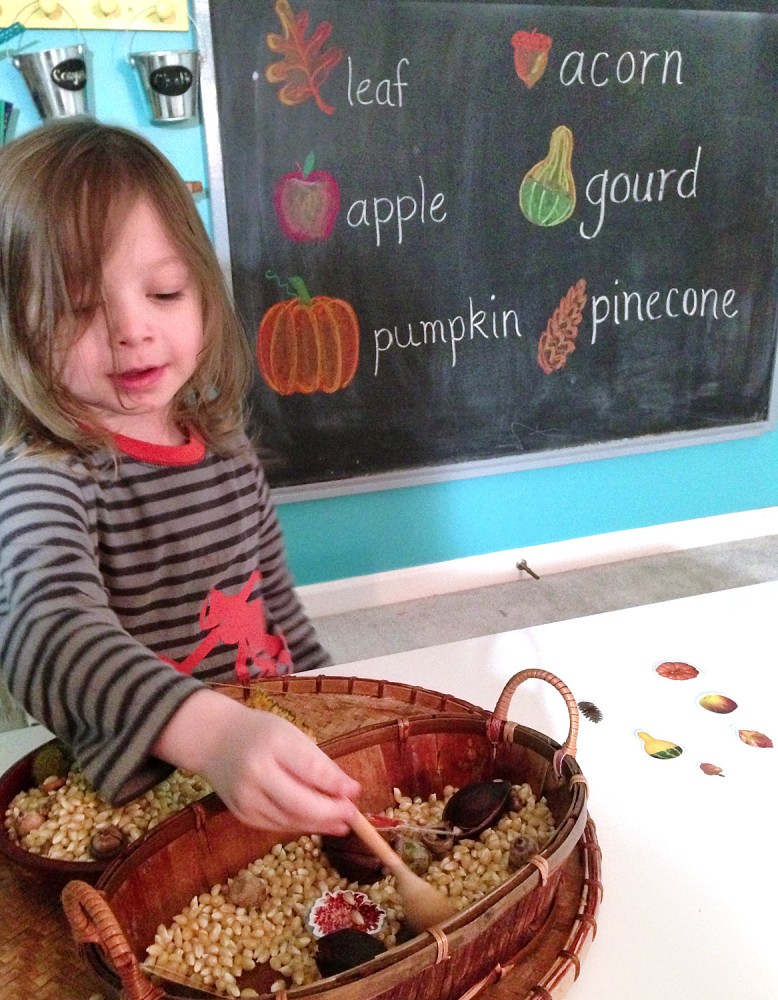
I don’t do many sensory bins, but I should! I pulled together an autumn sensory bin for Jax using our nature walk treasures. I added them to a basket of dried corn, and autumn season stickers I’d laminated and cut out. I provided a wooden bowl from the thrift shop and a little wooden spoon (from an old brown sugar jar.)

Autumn Sensory Bin

Jax jumped right in and started scooping the contents and exploring the textures. I’d drawn a few autumn items on our schoolroom chalkboard along with writing the words. I had Jax hunt for those three stickers in the sensory bin, then let him choose three more for me to draw. Next time he can hunt for all six.

Autumn Sensory Bin

We plan on doing many more autumn-themed activities throughout the season. Do you have any fun ideas for us? Let me know here, or send me ideas via Pinterest, Twitter, Facebook or Instagram.

Here is a Pinterest-ready photo for you to pin!

Autumn Leaves Quiet Book & Fall Homeschool Unit

I am linking up to the wonderful Montessori Monday! If you do any homeschooling, I urge you to check out the weekly link up for great ideas!

Montessori Monday

Animals of South America for the Montessori Wall Map & Quietbook with Printables

Animals of South America for the Montessori Wall Map & Quietbook with Printables

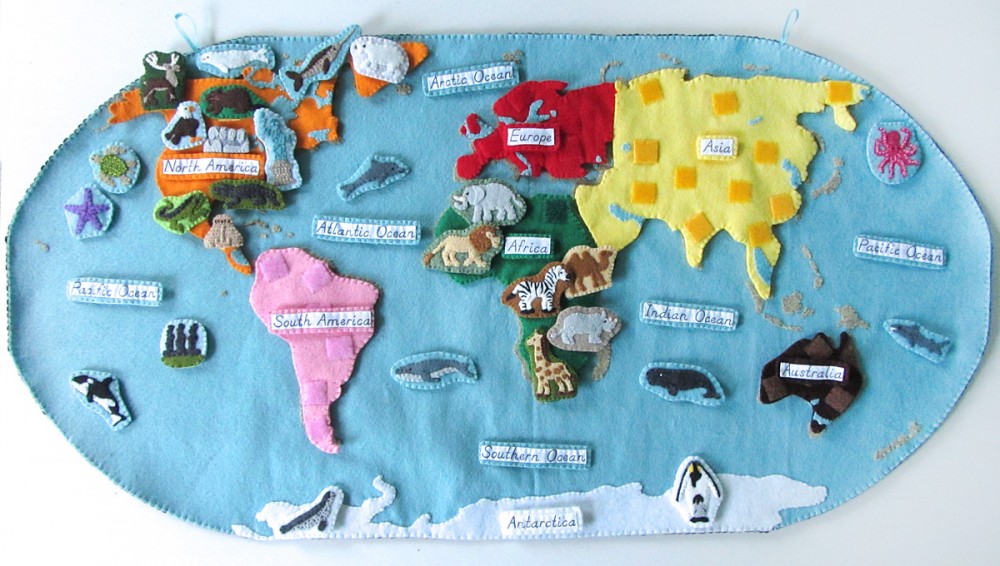
If you haven’t been introduced to our Montessori wall map and quiet book yet, you can read all about it here. This post is for the continent of South America! Every continent (and the oceans) will have landmarks and animals. Some, like Europe, have more landmarks than animals. South America has all animals, as it has so many great ones to choose from!

Overview and Map PatternsAfricaAntarcticaAsiaEurope North AmericaOceans • South America

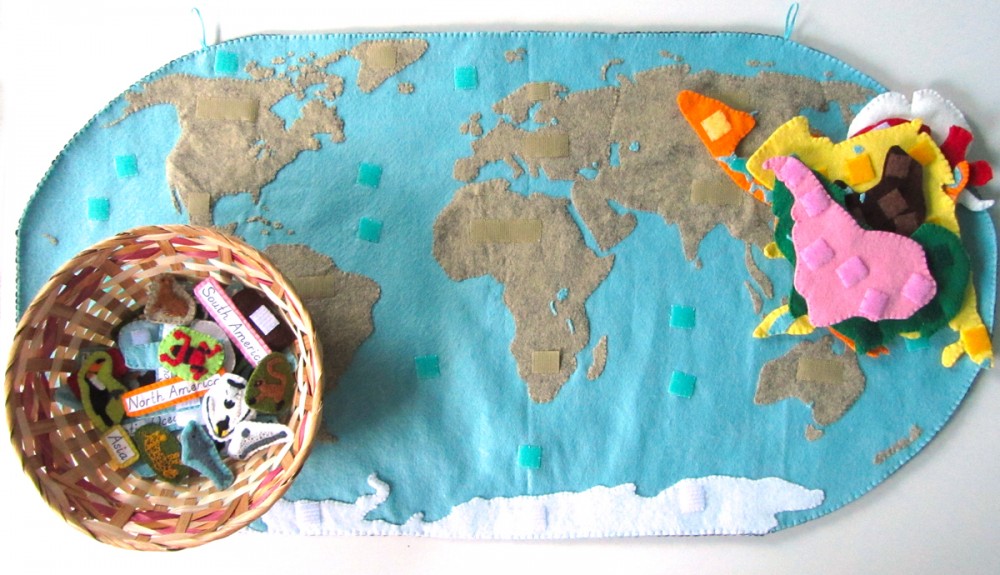
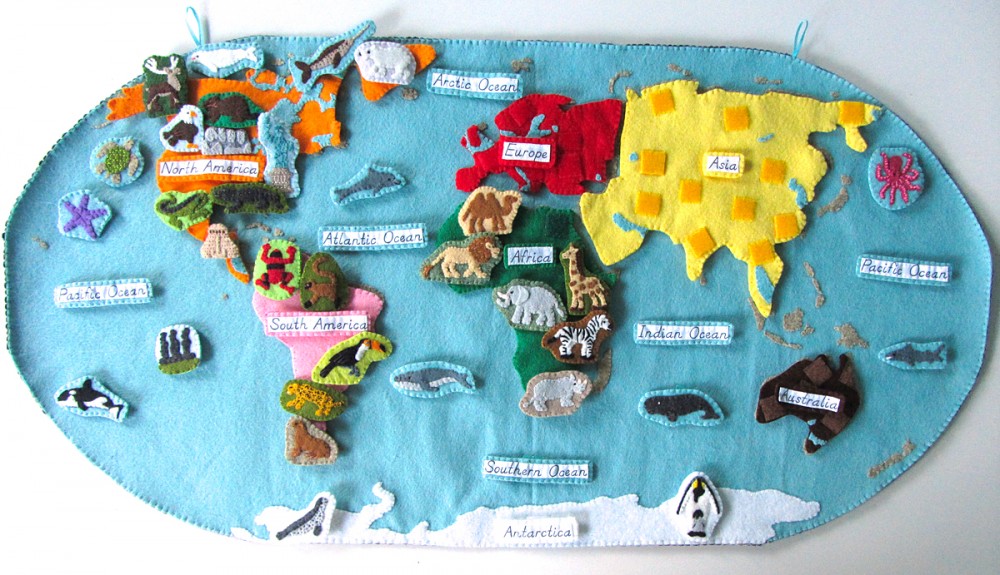
All our pieces so far!

All our pieces so far!

A quick note: Do you have a website that fits in with our readers’ interests: sewing, felt, homeschool or Montessori? I am trying out a new sponsor banner system and I have my 125×125 spots open for free swaps! There are currently 3 spots left, so please visit the Sponsor page to read more! Check it out to the left! Thank you for the help!

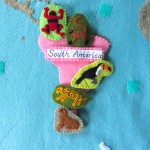
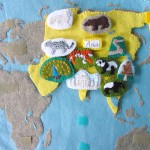
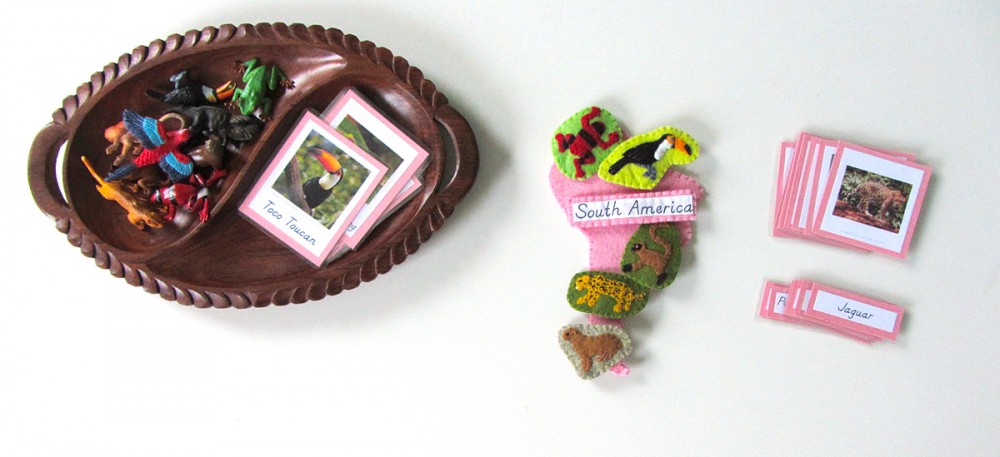
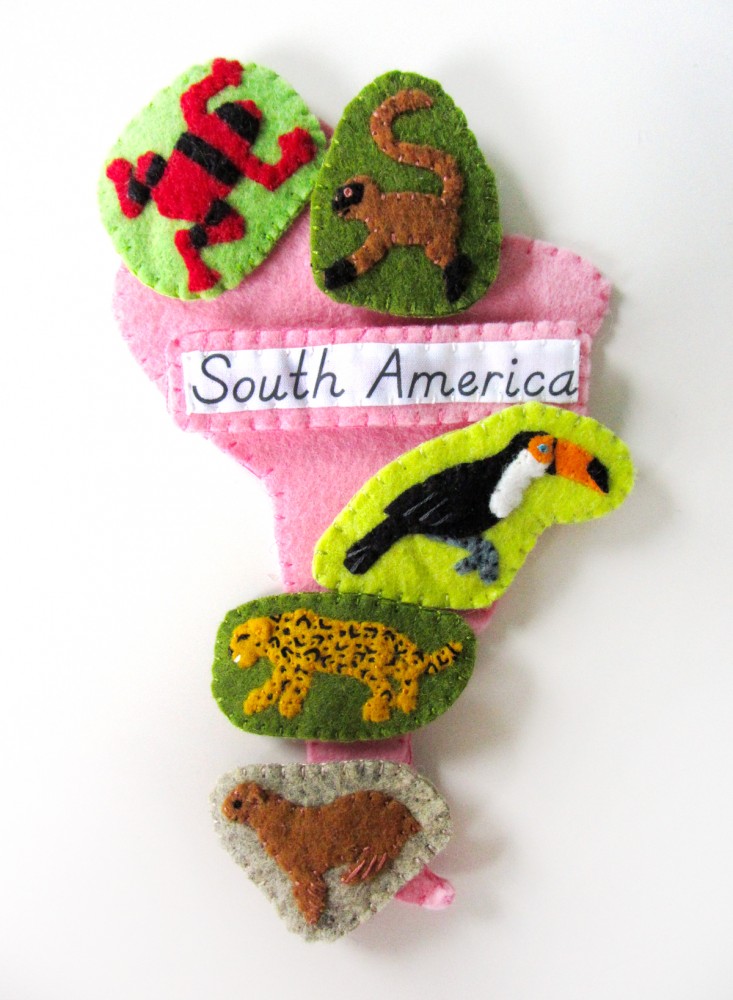
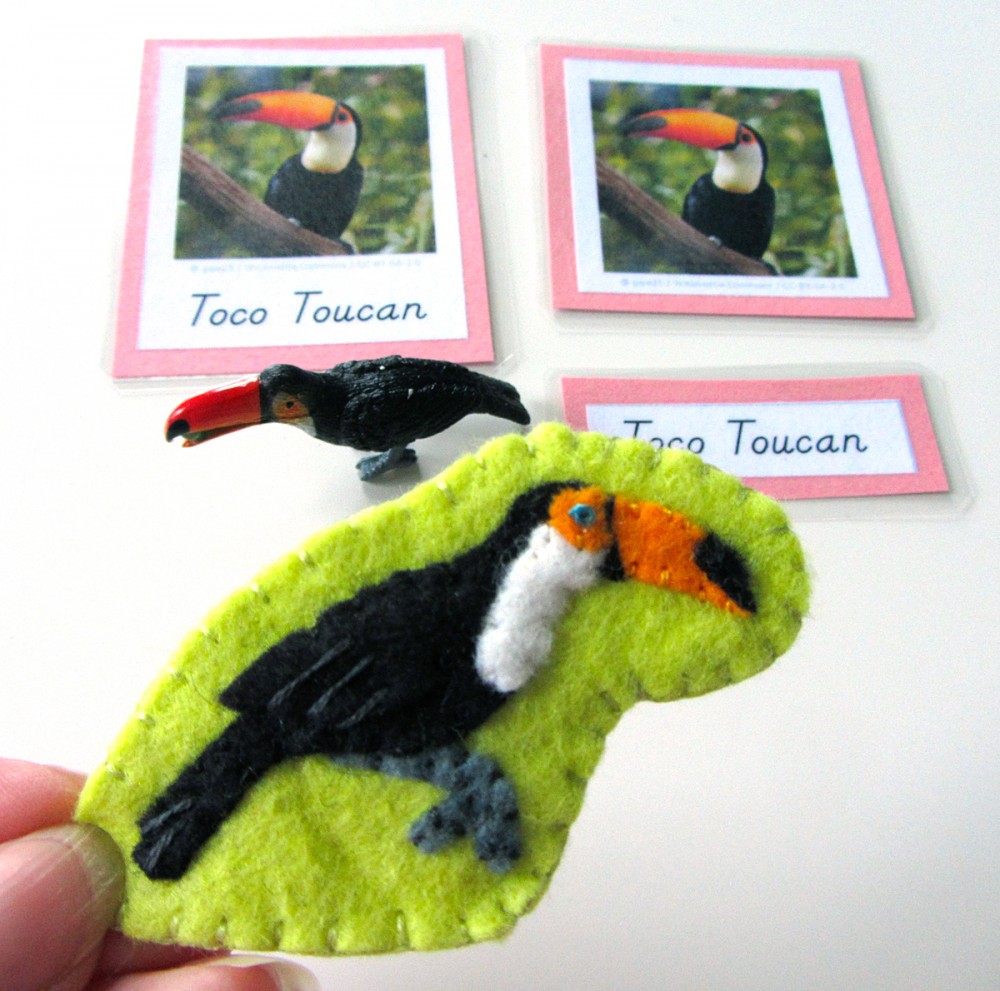
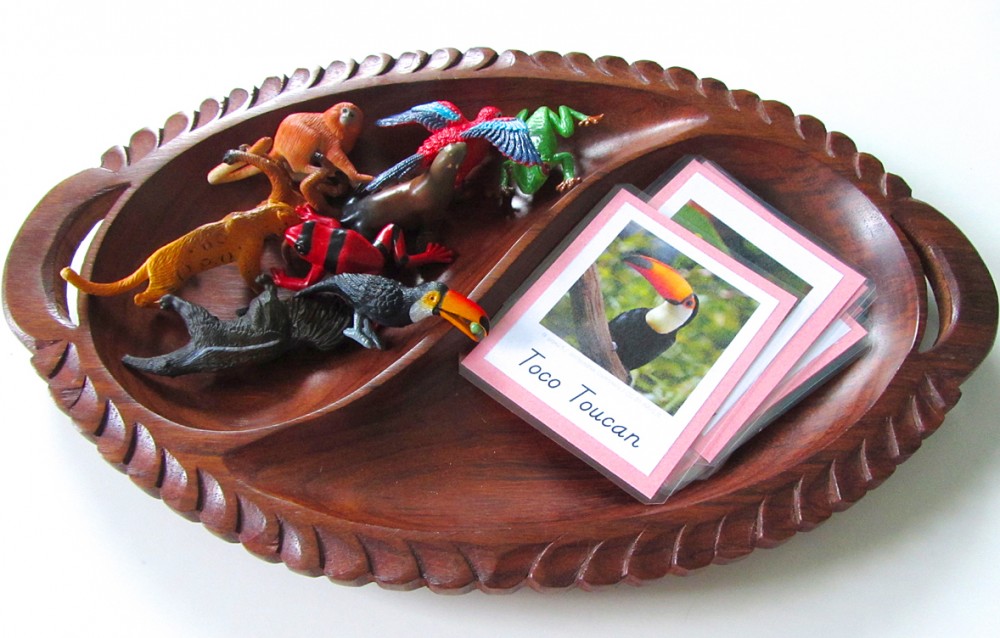
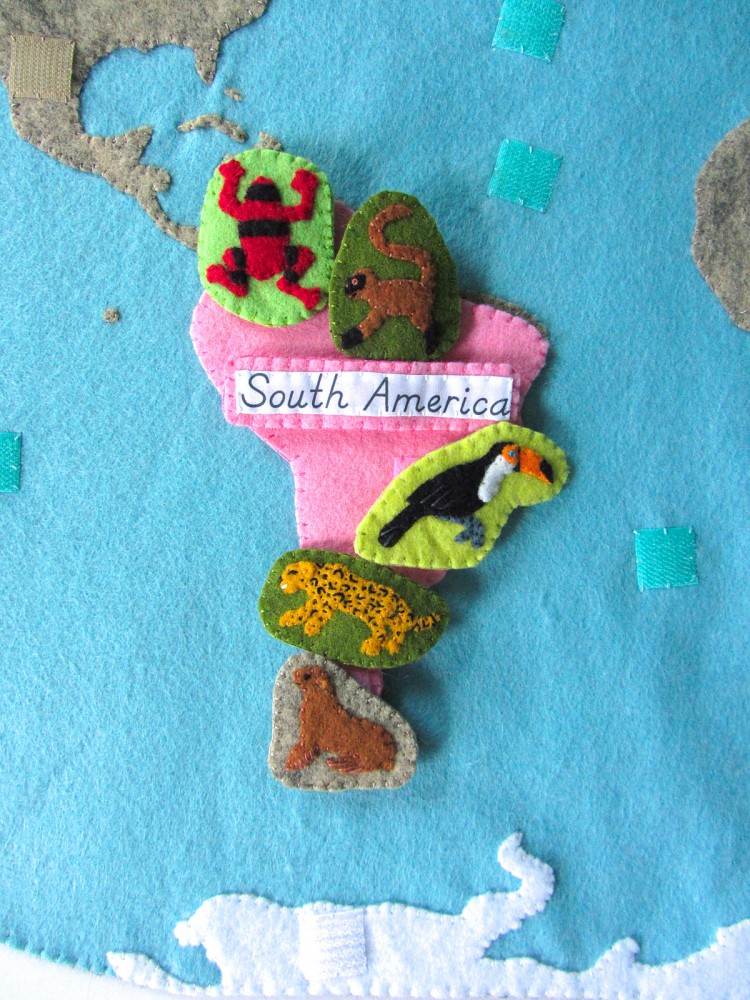
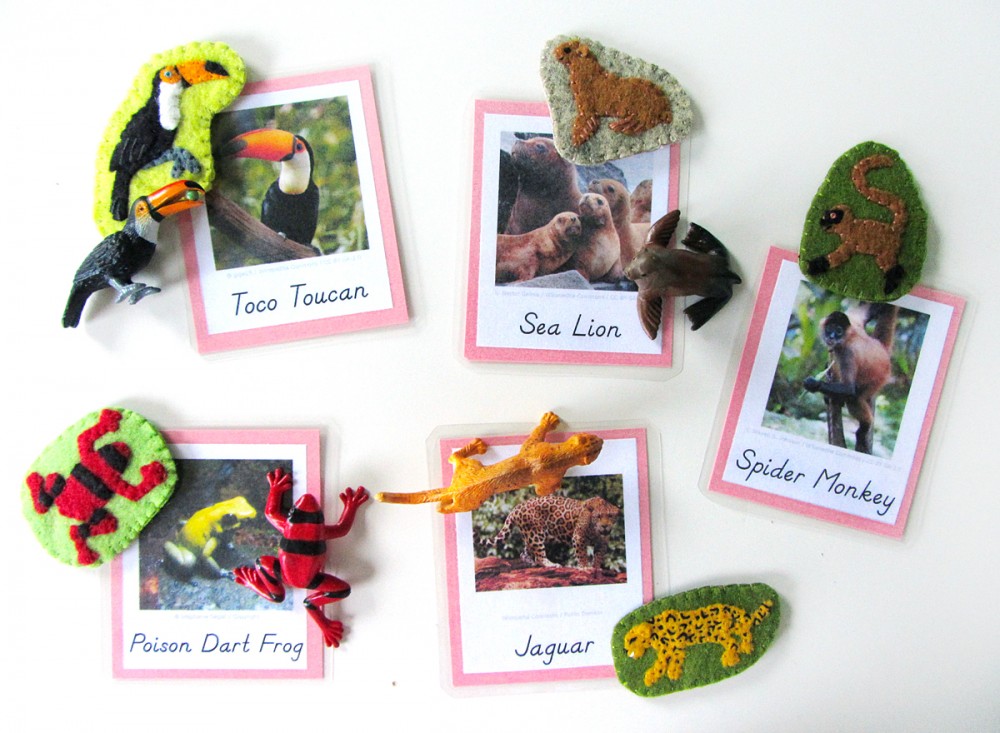
Those of you who follow along on Facebook or Instagram have been seeing all the fun South American animals I’ve sewn. I love that there were some brighter colors, thanks to the rainforest animals! I made: a poison dart frog, a toco toucan, a spider monkey, a jaguar and a sea lion.

Animals of South America for the Montessori Wall Map & Quietbook with Printables

I want to say a quick thank you to Libby A. for the surprise off of Jax’s Amazon wishlist! I use his list to bookmark school and craft items until I am able to get them. I’d added some trims I need for Jax’s robot Halloween costume (which will be featured here!) and they arrived in the mail to us this week! Thank you!! For more ways to contribute to this site, visit my support page.

Animals of South America for the Montessori Wall Map & Quietbook with Printables

Materials I Used

The Pattern (see the first post for the main patterns) Felt from American Felt & Craftbig apple [red], orange juice [orange], gold nugget [gold], limeade [lime green], cilantro [olive green], stone [taupe]  doe [brown] elephant [med gray], white and black. Hook & Loop – I used white snag-free Velcro on the backs of all these pieces and pink hook & loop (loop only) on the front of the South America puzzle piece. My pink hook & loop was store brand at Joann’s but you can find all colors here. Felt glue to tack down the pieces before sewing, printer fabric for the continent label, embroidery floss in colors to match the felt and micro tip scissors.

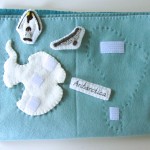
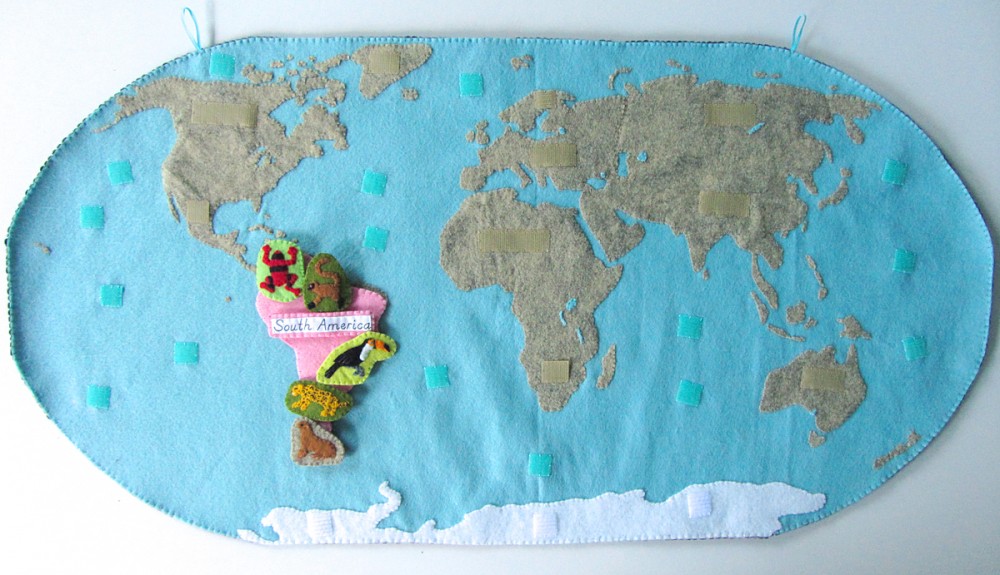
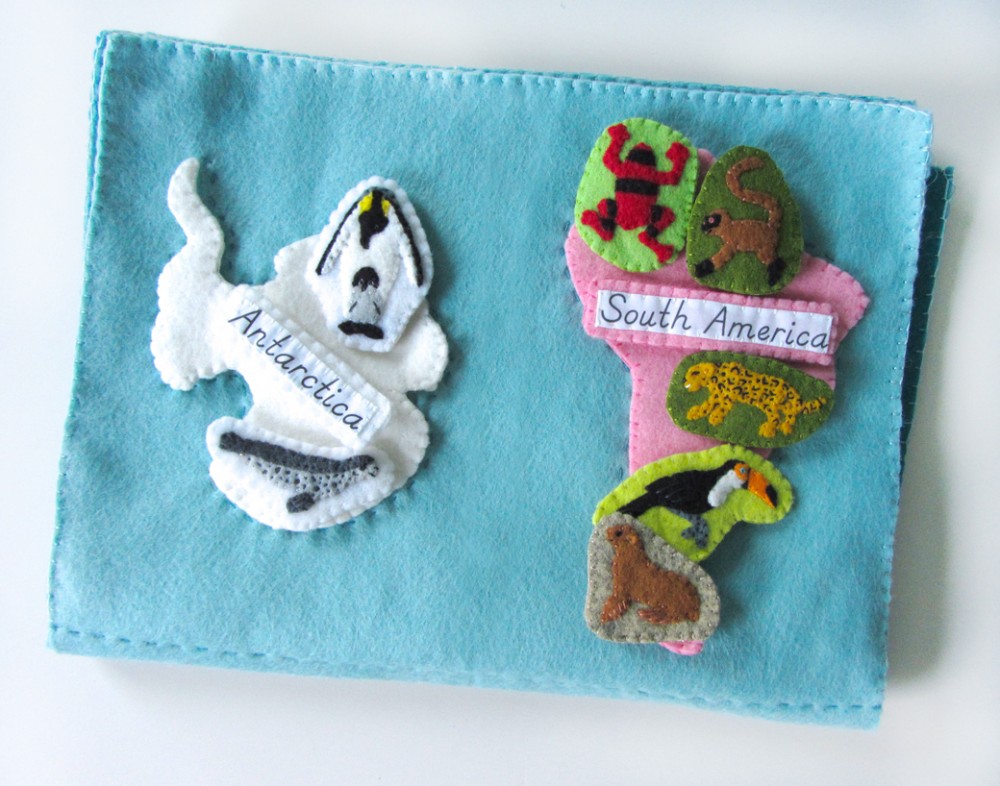
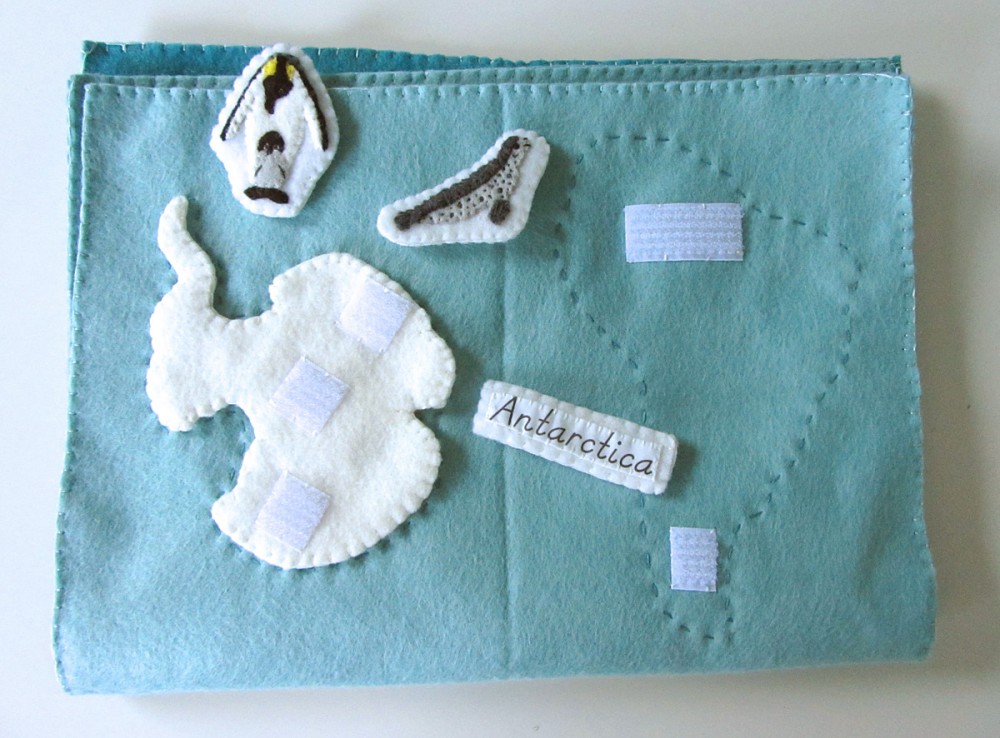
South America shares a page in the quietbook with Antarctica.

South America shares a page in the quietbook with Antarctica.

Sewing the Pieces

South America: (Felt used: bubble gum pink) For the South America continent puzzle piece, I sewed down pieces of pink loop Velcro. On the back, I sewed a strip of white snag-free Velcro to correspond with the Velcro in the quietbook. I finished it by sewing the two sides together around the edge with a blanket stitch. Label: (Felt used: bubble gum pink) For the continent label, I folded under the edges (just a tiny bit to hide the rough edges) and creased it with my nails. The printer fabric held the folds nicely without ironing. Then I stitched the label to some white felt and trimmed it down to be a border. I cut a matching felt rectangle for the back, sewed snag-free Velcro to it and then sewed both sides together.

Animals of South America for the Montessori Wall Map & Quietbook with Printables

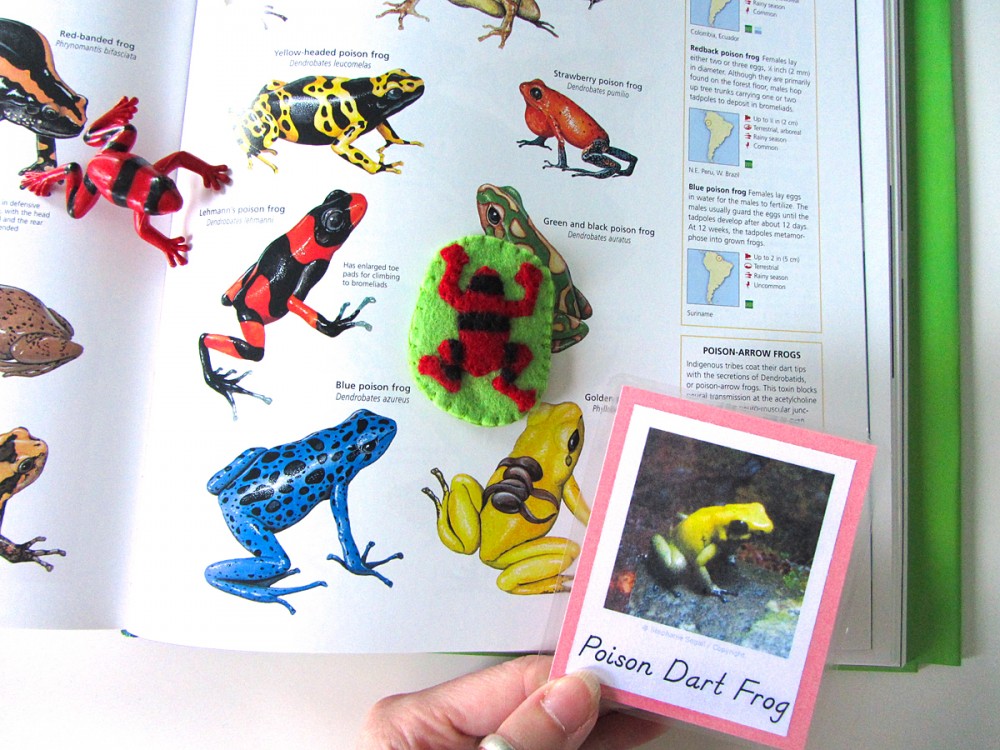
For all of the animals, I started by gluing the pieces down to a scrap of background felt with a very light amount of felt glue. I glue multiple animals at a time to give them time to dry. I sewed them down, trimmed the background and cut a matching backing piece. I sewed snag-free Velcro to the back and sewed both sides together with a blanket stitch. Poison Dart Frog: (Felt used: big apple red for the body, black for body details and limeade lime green for the background) I started by gluing down the red body, then gluing the strips on top. I sewed around all the edges. I matched my frog to the one in the Safari Ltd Rainforest Toob, which our animal encyclopedia says is Lehman’s Poison Dart Frog. You could make yours any color, especially if you have the Frogs and Turtles Toob. (My 3-part card is not a red Lehman’s. I never use photos without permission and I was unable to find a photo I could use of one. But the photo I took of a Golden Poison Dart Frog at the aquarium makes for a fun lesson where we can match them to our book.)

Animals of South America for the Montessori Wall Map & Quietbook with Printables

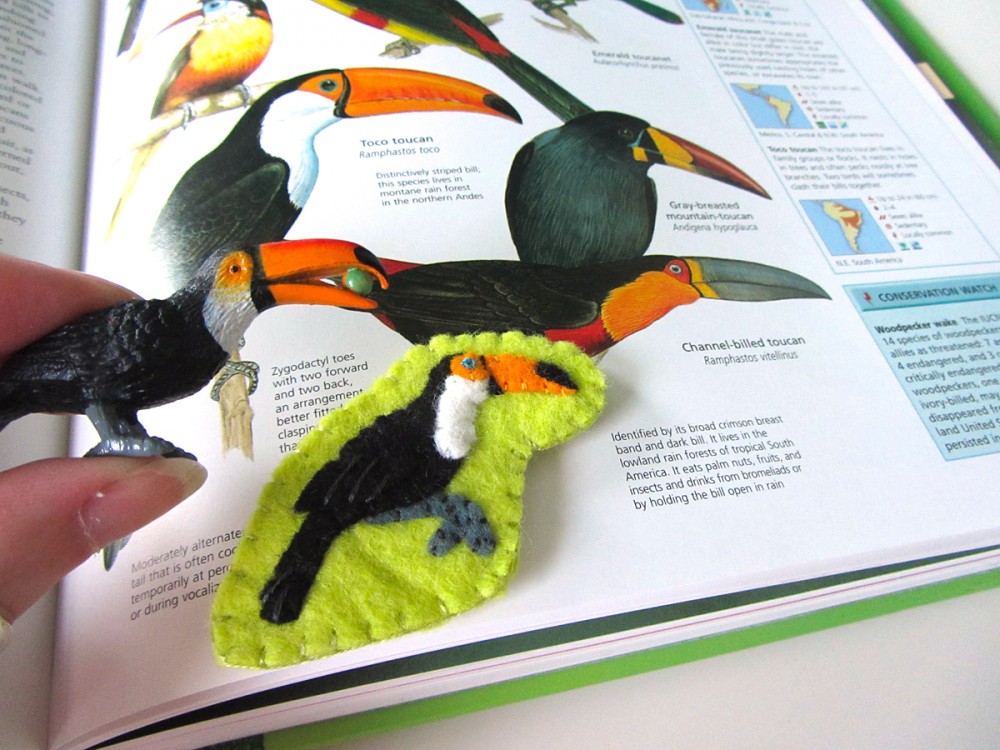
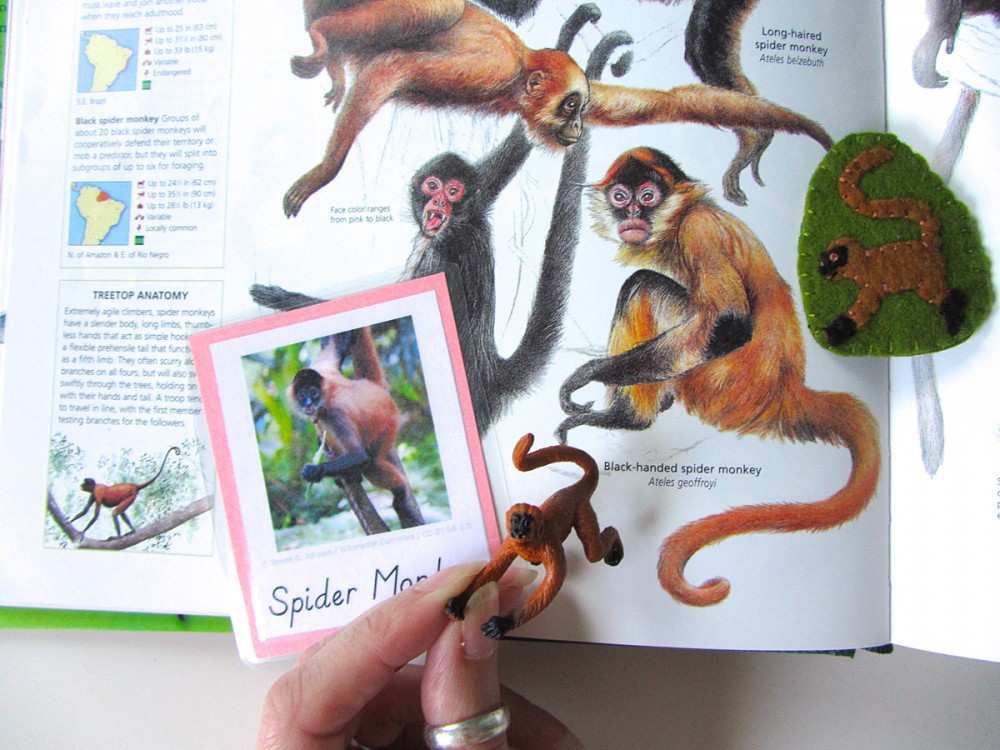
Spider Monkey: (Felt used: doe brown for the body, black for body details and cilantro olive green for the background) I glued the brown body of the spider monkey down first, then his hands, feet and face. I sewed all around the edges. I gave him French knot eyes, a little brown stitch for his nose, and a long black stitch to make an open mouth. Toco Toucan: (Felt used: black for body, orange juice for the beak,  limeade for the background and white) I first glued down her orange beak and gray leg, then her black body and wing. I glued the white chest on top and then the orange eye area. On top of the beak, I added the black felt piece. I sewed around all the edges then I gave her a bright blue French knot eye. (Their eyes are not really blue – that is a ring of blue skin around their black eye.) On her wing and tail, I made long straight stitches to show the feathers.

Animals of South America for the Montessori Wall Map & Quietbook with Printables

Jaguar: (Felt used:gold nugget gold for the body and cilantro olive green for the background) I glued the golden body of the jaguar with his far legs layered underneath. I glued one side of his ear down, then added a stitch to hold it once it was dry. I gave him a French knot eye with little black stitches on either side to make a cat-eye shape. I used white to make a mouth and black to make a small nose. For the spots, I made the larger ones using a similar technique to the lazy daisy stitch (a loop of thread that is pinned down by a small stitch at the peak) but used arch shapes instead of closed loops. The smaller stitches are just tiny stitches – some with a few close together to make medium spots.Animals of South America for the Montessori Wall Map & Quietbook with Printables Sea Lion: (Felt used: doe brown for the body and stone taupe for the background) I glued the brown body of the sea lion, then sewed around the edges. I made long stitches on his flippers to show the webbing. I glued one side of his ear down, then added a stitch to hold it once it was dry. I gave him a French knot eye and a little black mouth.

Animals of South America for the Montessori Wall Map & Quietbook with Printables

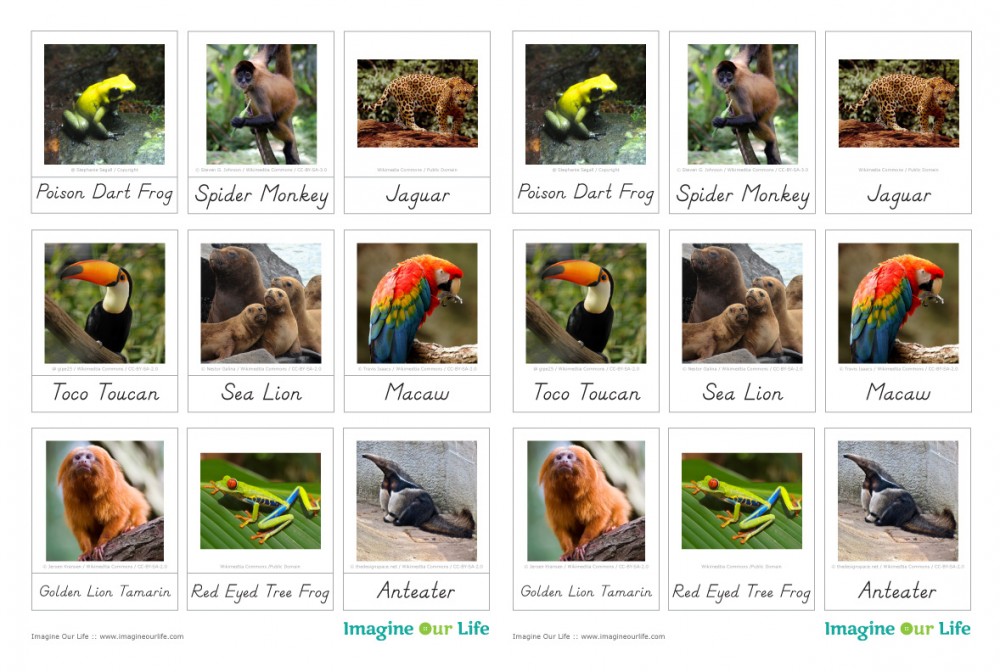
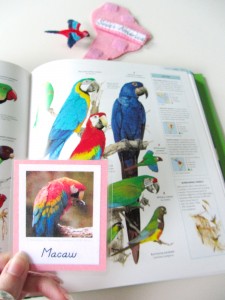
Montessori South American Animals 3-Part Cards

Currently jax is focusing on his world continent 3-part cards, but we’ve done a small session with each of the animal card sets as I’ve made them. He sees me making them and insists! We will study the animals with more depth when we focus on a particular continent.

Animals of South America for the Montessori Wall Map & Quietbook with Printables

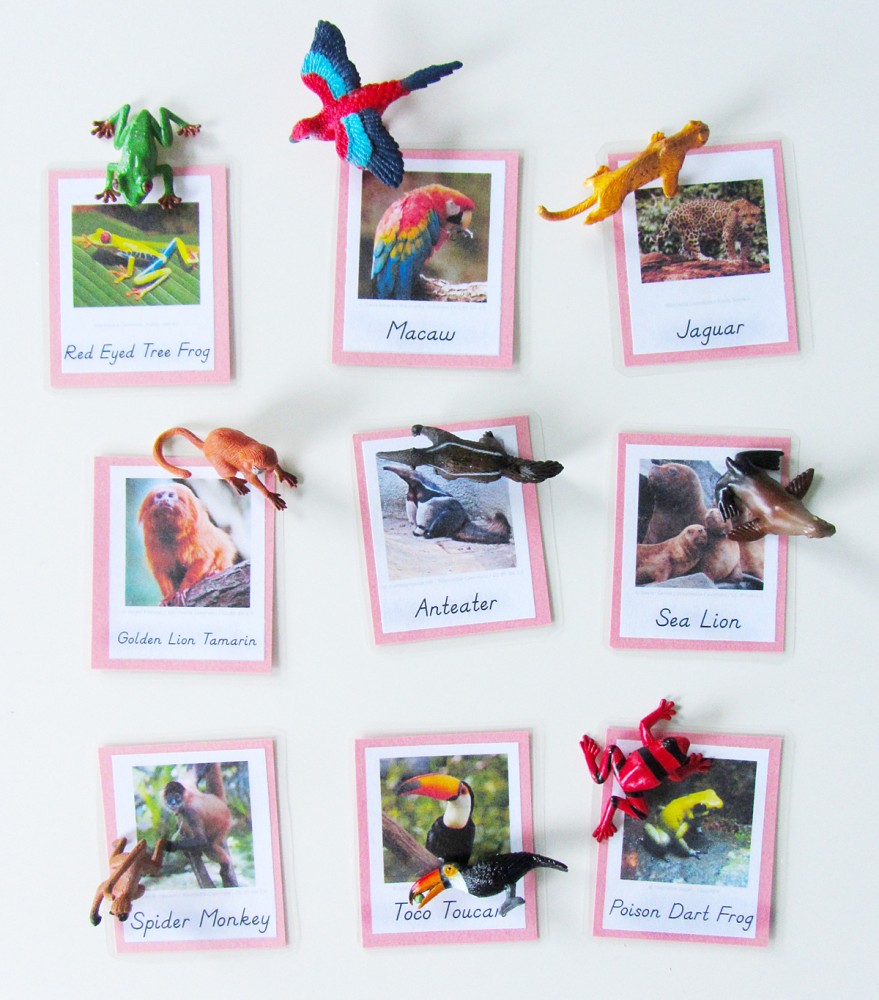
For now, we pull out our SafariLTD’s TOOB figurines and use our 3-part cards to match them whenever he shows interest. We like to watch short videos about an animal, then study some pictures and draw our own.

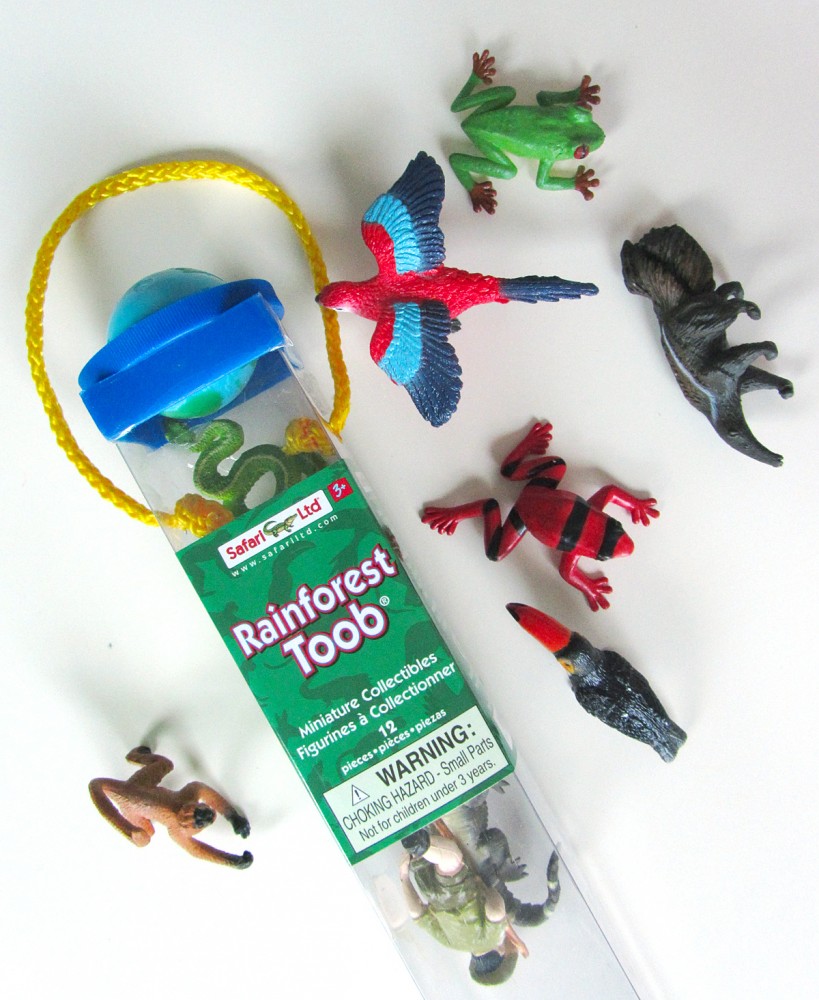
I used the Rainforest Toob for these cards. The sea lion is from the Ocean TOOB.

I used the Rainforest Toob for these cards. The sea lion is from the Ocean TOOB.

Click here to download my free pdf file to make your own. To make mine, I cut them out, glued them to pink construction paper (to match South America’s Montessori color) then laminated them. I love my new laminator! It makes everything so shiny and strong! I’ve been giving it a workout!

Animals of South America for the Montessori Wall Map & Quietbook with Printables

Exploring South America’s Animals

I’m still so happy I found my The Encyclopedia of Animals: A Complete Visual Guide when our basement flooded! (Though I’m less happy that my dining room table is covered in 2′ high piles of books.)

Animals of South America for the Montessori Wall Map & Quietbook with Printables

It has a lot of beautiful photos and useful facts about many different animals. Jax and I will be using it to match up with our 3-part cards and read more about the animals. We also use my iPad and YouTube to watch short video clips.

Animals of South America for the Montessori Wall Map & Quietbook with Printables

Here we used the encyclopedia to identify which kind of spider monkey we had.

Animals of South America for the Montessori Wall Map & Quietbook with Printables  Animals of South America for the Montessori Wall Map & Quietbook with Printables

I know many of you are sewing along (or about to!) If you are, stop by my Instagram @iolstephanie and leave a comment on one of my photos (I can’t see your photo if it you are private, but I can request to follow you temporarily if you leave a comment on mine about it) or share photos on Facebook. You can also email me. I love seeing others’ take on my patterns!

Animals of South America for the Montessori Wall Map & Quietbook with Printables

It’s not even slightly Montessori Monday still, but I hope you’ll check out the other great links!

Montessori Monday

Animals of Antarctica for the Montessori Wall Map & Quietbook with Printables

Animals of Antarctica for the Montessori Wall Map & Quietbook with Printables

If you haven’t been introduced to our Montessori wall map and quiet book yet, you can read all about it here. This post is for the fastest continent to sew for – Antarctica! Every continent (and the oceans) will have landmarks and animals. Some, like Europe, have more landmarks than animals. Antarctica just has two animals featured, as there are mainly just seals, penguins and other birds.

Animals of Antarctica for the Montessori Wall Map & Quietbook with Printables

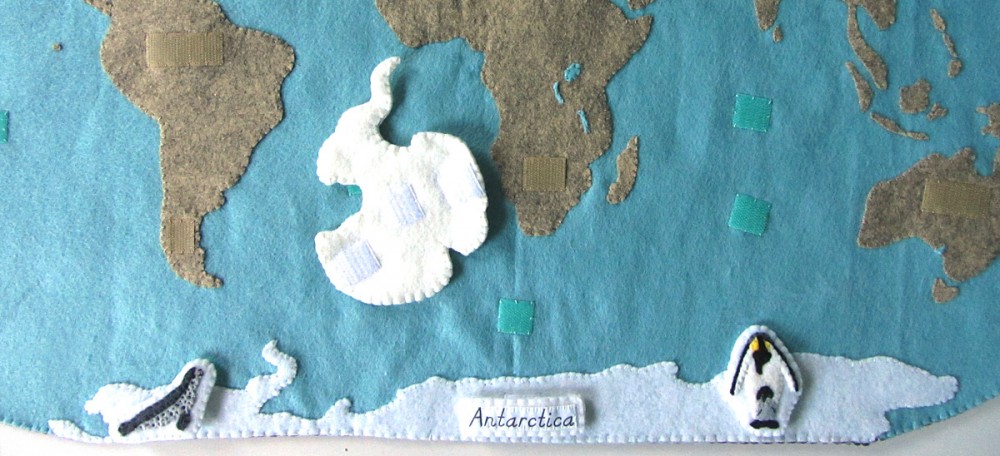
Antarctica was a bit different than the rest in another way: it is the only continent that is hugely affected by the map projection. On the wall map, it is shown as a long, unraveled strip at the bottom. So Antarctica is sewn to the map, but I also made a piece in its actual shape that Jax can compare to it or to his globe.

Overview and Map PatternsAfrica • Antarctica • AsiaEurope
North AmericaOceansSouth America

A quick note: Do you have a website that fits in with our readers’ interests: sewing, felt, homeschool or Montessori? I am trying out a new sponsor banner system and I have my 125×125 spots open for free swaps! There are currently 5 spots left, so please visit the Sponsor page to read more! Check it out to the left! Thank you for the help!

Animals of Antarctica for the Montessori Wall Map & Quietbook with Printables

My pyramids are still missing… Time to sew a new one!

Those of you who follow along on Facebook or Instagram might have seen there was a bit of a mishap in Antarctica. Well, the Antarctica in our house, at least. Our golden retriever got a little too excited about my penguin and ate him! Since I had to sew him a second time, I made him even cuter. He now is a daddy penguin with a little chick!

Regardless of that excitement, I still love working on this project! This will be an amazing resource for Jax throughout his school years. Yes, I am giving you all my patterns and printables for free! If you’d like to contribute, visit my support page. School items off of Jax’s Amazon wishlist always help! Especially because our heating/cooling unit just just freaked out and flooded our basement. We are now $6k poorer, despite insurance help. Yikes. I am currently saving up Amazon credit for the handbells on his wishlist. If I can get those, I’ll share a music unit with you all! but it looks like I won’t have enough until the end of September.

Animals of Antarctica for the Montessori Wall Map & Quietbook with Printables

Materials I Used

The Pattern (see the first post for the main patterns)

Felt from American Felt & Craftwhitesalt & pepper [dark gray], elephant [med gray], black, rubber duckie [yellow] and gray.

Hook & Loop – I used white snag-free Velcro on the backs of all these pieces and on the Antarctica puzzle piece.

Felt glue to tack down the pieces before sewing, printer fabric for the continent label, embroidery floss in colors to match the felt and micro tip scissors.

Animals of Antarctica for the Montessori Wall Map & Quietbook with Printables

Shown here on the quietbook page that Antarctica will share with South America.

Sewing the Pieces

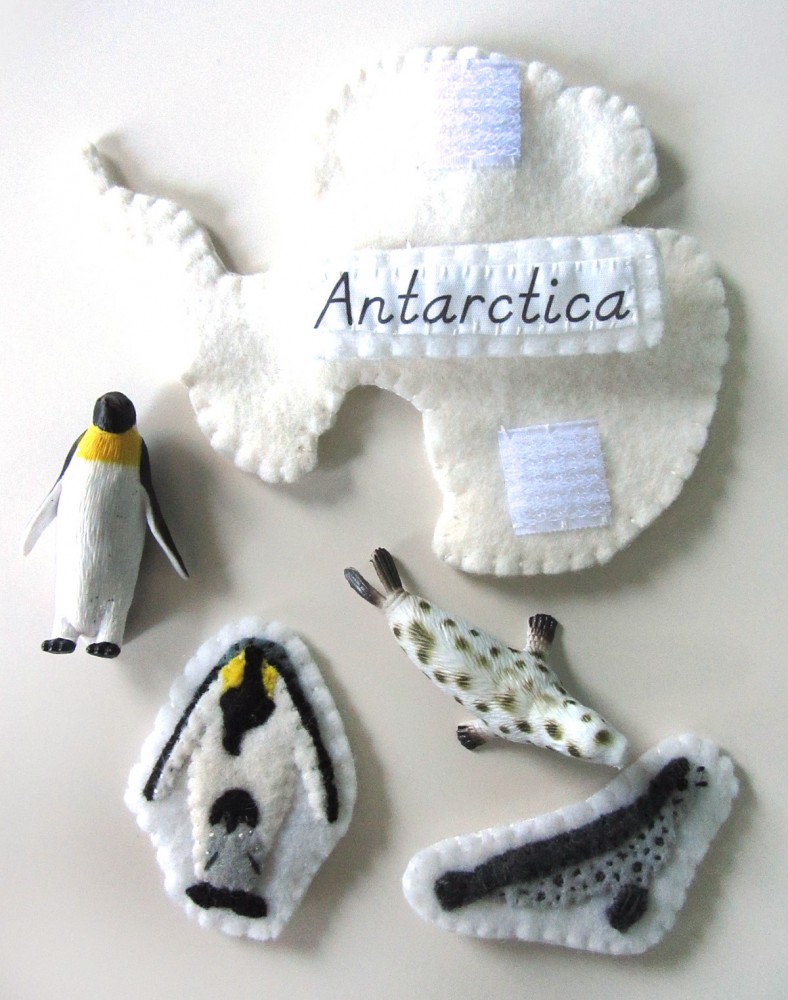
Antarctica: (Felt used:white) For the Antarctic continent puzzle piece, I sewed down pieces of white snag-free Velcro. On the back, I sewed a strip of white snag-free Velcro to correspond with the Velcro in the quietbook. I finished it by sewing the two sides together around the edge with a blanket stitch.

Label: (Felt used: white) For the continent label, I folded under the edges (just a tiny bit to hide the rough edges) and creased it with my nails. The printer fabric held the folds nicely without ironing. Then I stitched the label to some white felt and trimmed it down to be a border. I cut a matching felt rectangle for the back, sewed snag-free Velcro to it and then sewed both sides together.

Animals of Antarctica for the Montessori Wall Map & Quietbook with Printables  Animals of Antarctica for the Montessori Wall Map & Quietbook with Printables

For all of the animals, I started by gluing the pieces down to a scrap of background felt with a very light amount of felt glue. I glue multiple animals at a time to give them time to dry. I sewed them down, trimmed the background and cut a matching backing piece. I sewed snag-free Velcro to the back and sewed both sides together with a blanket stitch.

Penguin: (Felt used: white for the body and background, black for body details, elephant for the shoulders, gray for the chick and rubber duckie yellow for the neck) I started by gluing down the shoulders, the gluing the black wings to the back of the white body. I glued the body down over the shoulders, then glued the neck, feet and head. I then glued down the two parts of the baby chick penguin.

I sewed down all the edges with matching thread. For the baby, I sewed two long, dark gray stitches for wing flaps. I made French knot eyes then highlighted them with a ring of white stitches. The daddy penguin got a dark gray French knot eye.

Animals of Antarctica for the Montessori Wall Map & Quietbook with Printables

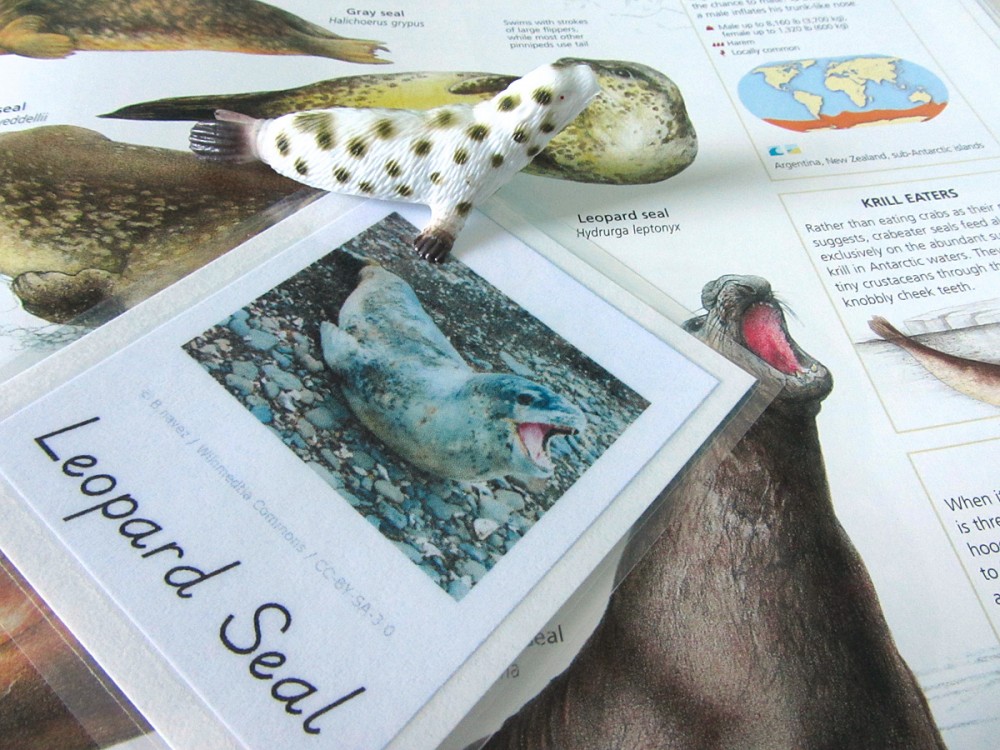
Leopard Seal: (Felt used: white for the background, salt & pepper dark gray for the back and flipper, and gray for the body) I first glued the gray body down, then added the darker back and flipper. To make the spots, I just made lots of little stitches. The tiny spots are just one stitch. The larger ones are a few stitches side-by-side. She has a French knot eye, a little stitch nose and a longer stitch mouth. On the tail and flipper, I made long dark gray parallel stitches.

Animals of Antarctica for the Montessori Wall Map & Quietbook with Printables

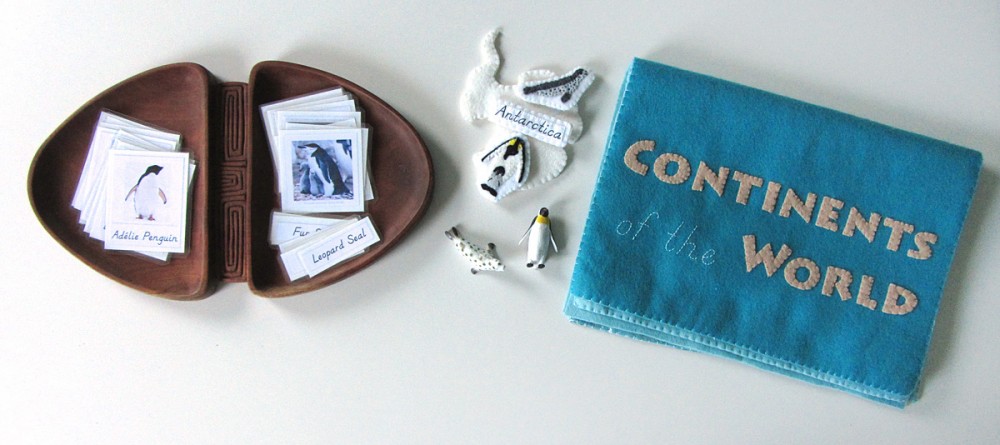
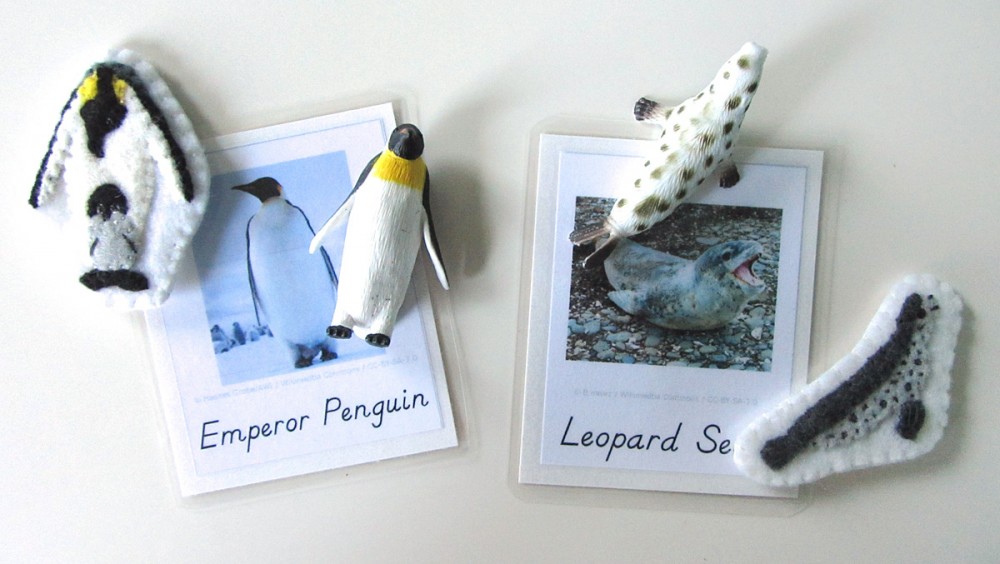
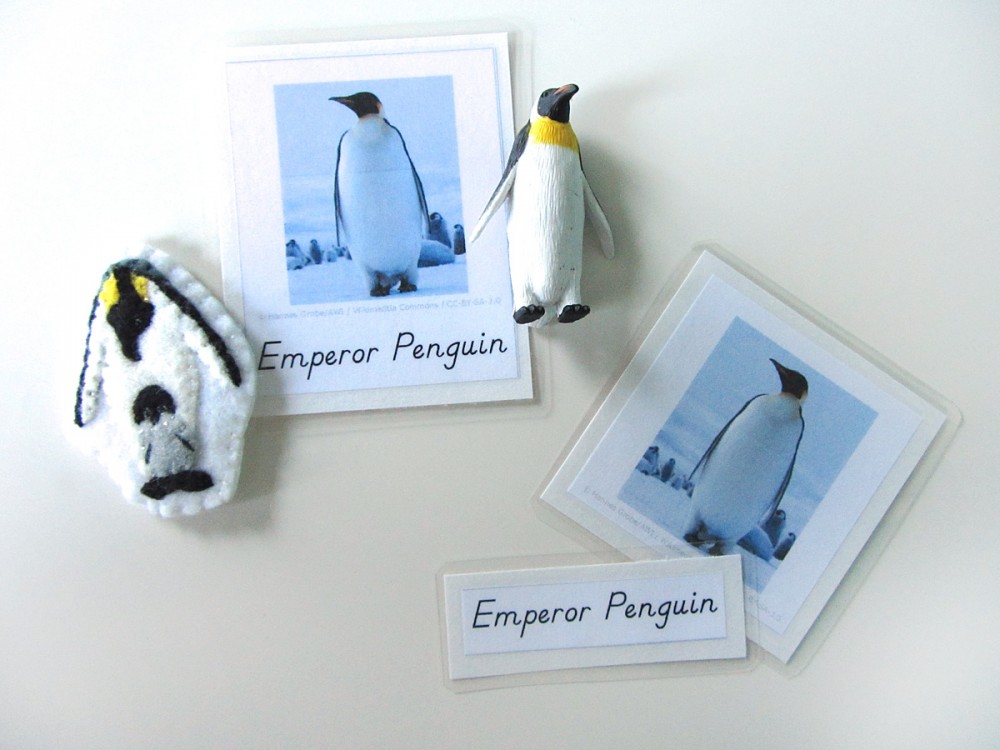
Montessori Antarctic Animals 3-Part Cards

Jax is still focusing on his world continent unit with the world continent 3-part cards I made up for him. We are using our Montessori globe and singing the continent song I made up. So far, He can point out the continents I ask for, and he can usually tell me the names of Africa ans Antarctica without prompting. We’ve also started using the ocean cards a lot. For the animals, we haven’t done a lot of formal lessons yet. We will when we focus on a continent. For now, we pull out our SafariLTD’s TOOB figurines and use out 3-part cards to match them whenever he shows interest. We like to watch short videos about an animal, then study some pictures and draw our own.

Animals of Antarctica for the Montessori Wall Map & Quietbook with Printables

These Antarctica cards don’t really have a good match in figurines. I would LOVE if SafariLTD would create continent-themed TOOBs! (Contact them if you are interested too!) You can match the Penguins Toob to their penguins. They don’t have any antarctic seals. Mine is from the craft store where they sell diorama supplies. I mention it in more detail in my ocean homeschool post.

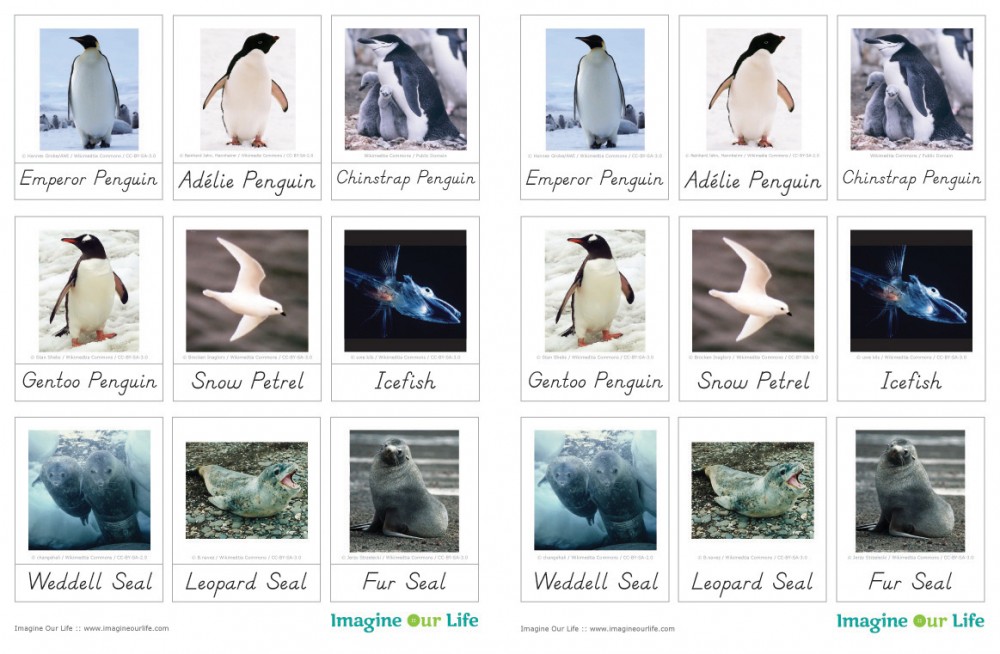
Click here to download my free pdf file to make your own. To make mine, I cut them out, glued them to white construction paper (to match Antarctica’s Montessori color) then laminated them. I love my new laminator! It makes everything so shiny and strong!

Animals of Antarctica for the Montessori Wall Map & Quietbook with Printables

Exploring Antarctica’s Animals

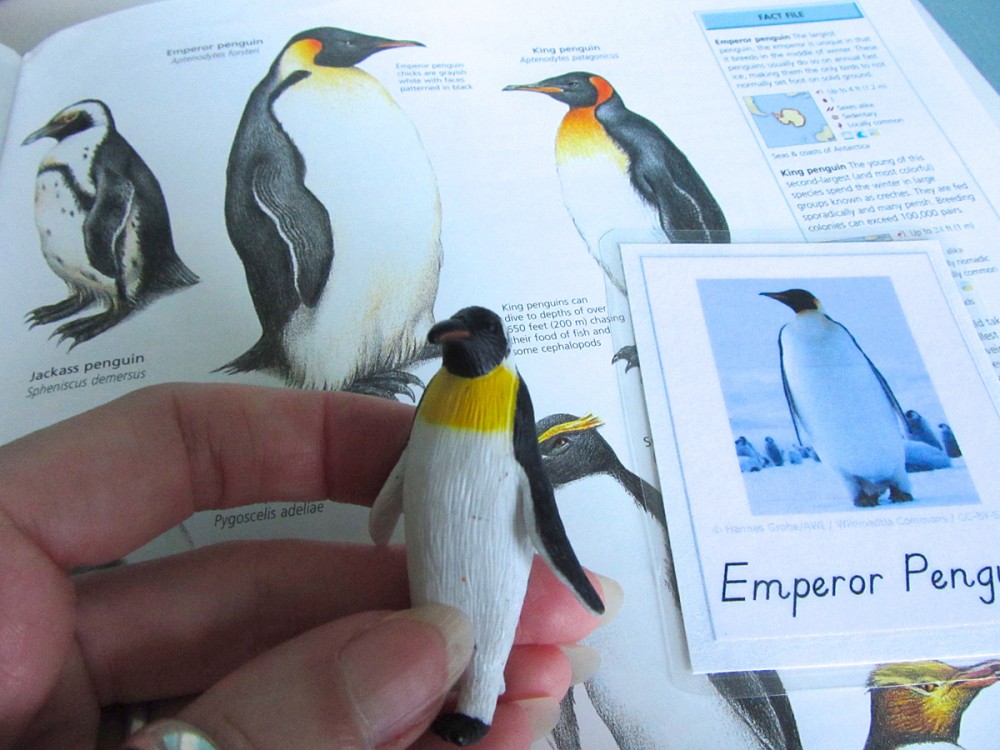
One thing that came of our basement flood – I had to move all our books out of the bookshelves and I found my The Encyclopedia of Animals: A Complete Visual Guide!

Animals of Antarctica for the Montessori Wall Map & Quietbook with Printables

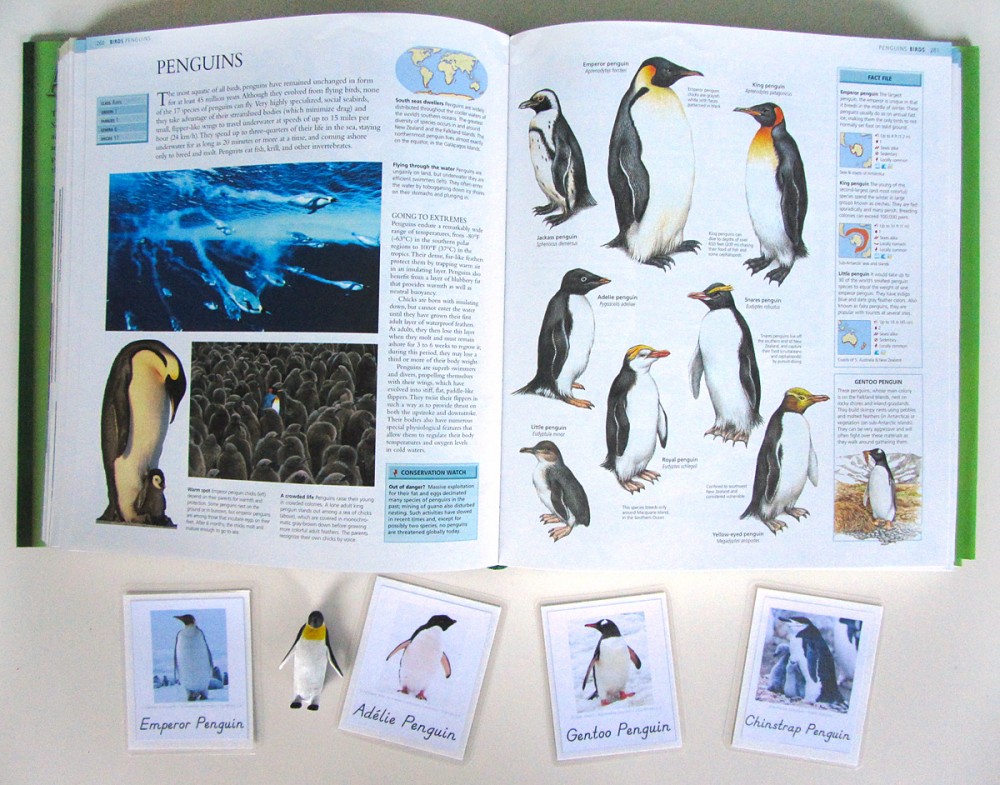
It has a lot of beautiful photos and useful facts about many different animals. Jax and I will be using it to match up with our 3-part cards and read more about the animals.

Animals of Antarctica for the Montessori Wall Map & Quietbook with Printables

I didn’t notice until after I took these pictures that there is a penguin called a “jackass penguin“. Oh my! Poor little penguins!

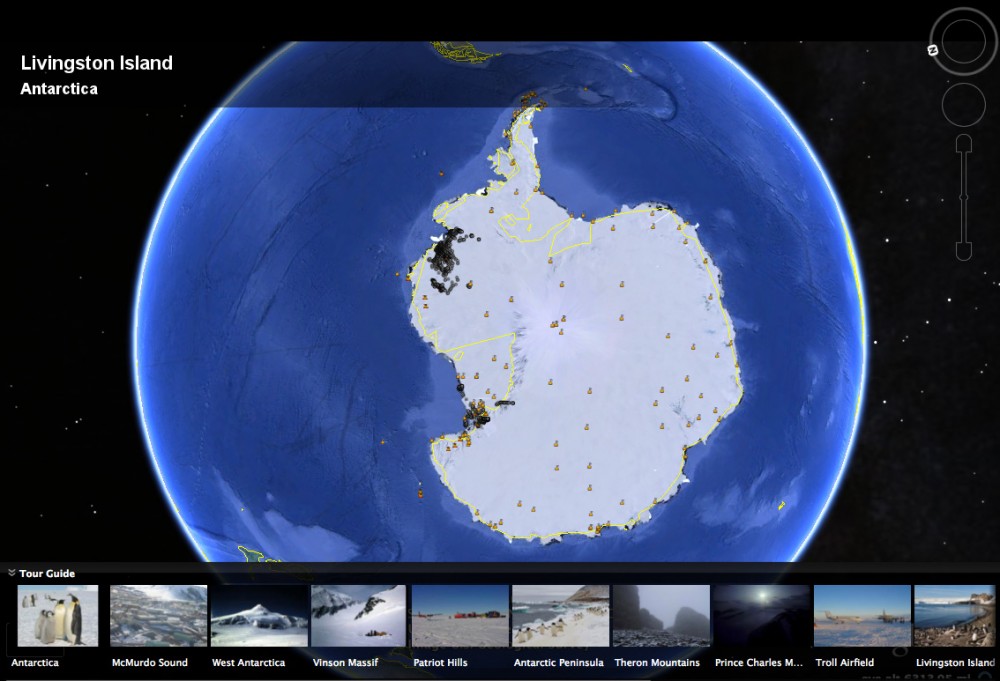
Screenshot courtesy Google Earth.

Screenshot courtesy Google Earth.

I have Google Earth installed so Jax I I can explore the earth. It is great! If you’d like to load a special Antarctica map with all sorts of points already saved, visit this site. Make sure you have Google Earth installed already!
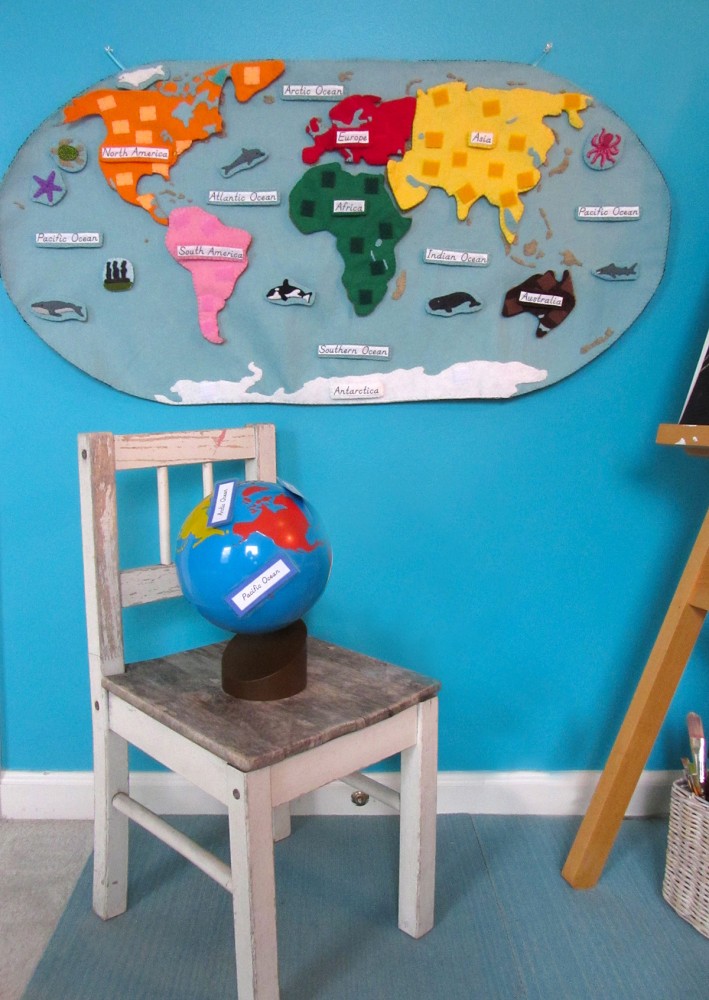
Animals of Antarctica for the Montessori Wall Map & Quietbook with Printables

I hope you are enjoying this project as much as I am! I’ve gotten see the maps a few of you have started! If you are sewing along, stop by my Instagram @iolstephanie and leave a comment on one of my photos (I can’t see your photo if it you are private, but I can request to follow you temporarily if you leave a comment about it) or share photos on Facebook. You can also email me.

It’s not even slightly Montessori Monday still, but I hope you’ll check out the other great links!

Montessori Monday

Animals of the Ocean for the Montessori Wall Map & Quietbook with Printables

Animals of the Ocean for the Montessori Wall Map

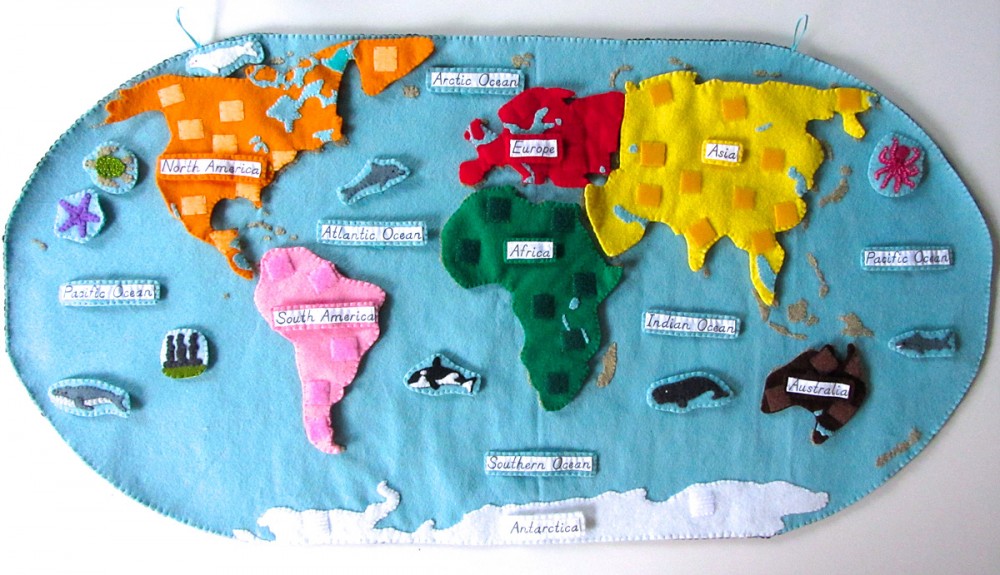
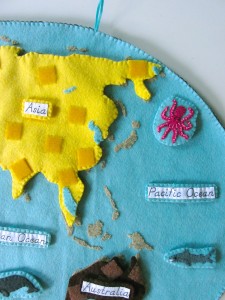
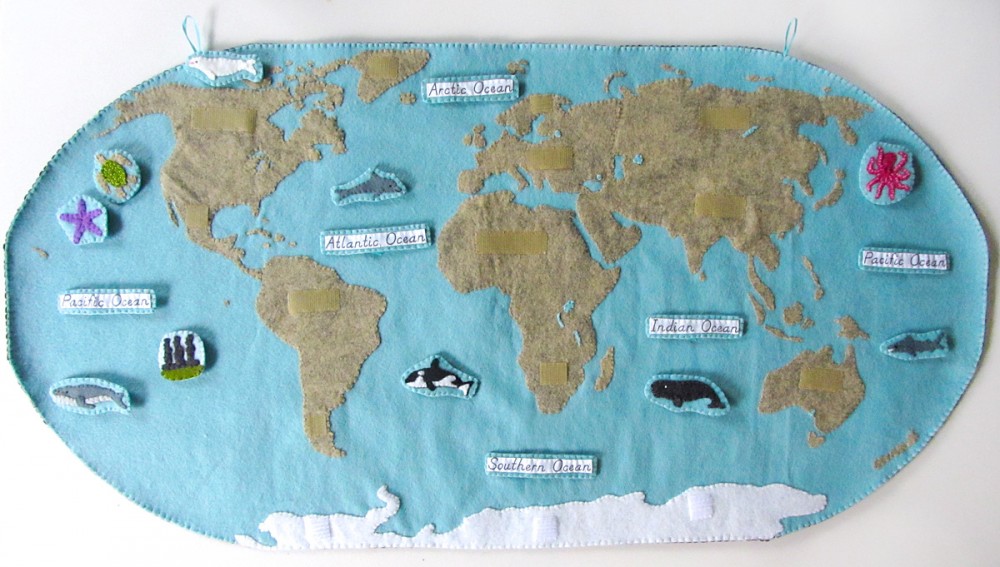
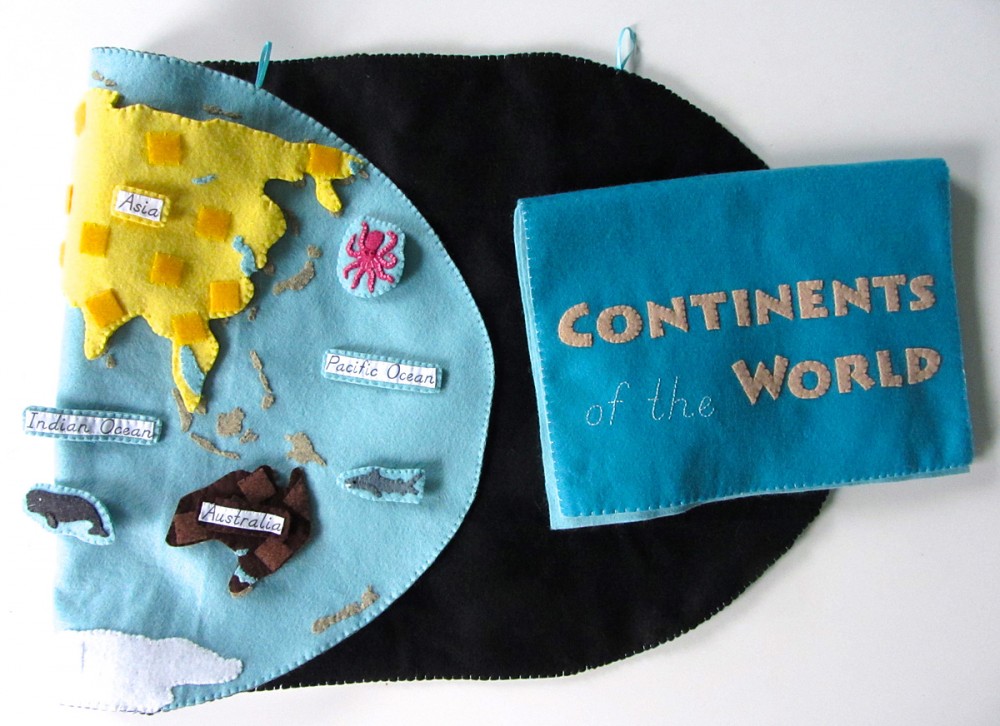
If you haven’t been introduced to our Montessori wall map and quiet book yet, you can read all about it here. This post isn’t actually for a continent… It’s for the oceans! Every continent (and the oceans) will have landmarks and animals. Some, like Europe, have more landmarks than animals. The oceans have a lot of labels, 9 animals and one island landmark.

Overview and Map PatternsAfricaAntarcticaAsiaEurope
North America • Oceans • South America

Animals of the Ocean for the Montessori Wall Map & Quietbook with Printables

Those of you who follow along on Facebook or Instagram have been seeing my progress as I’ve worked on the ocean animals. I’m so exciting to be working on this project! This will be an amazing resource for Jax throughout his school years. Yes, I am giving you all my patterns and printables for free! If you’d like to contribute, visit my support page. School items off of Jax’s Amazon wishlist always help!
Animals of the Ocean for the Montessori Wall Map & Quietbook

Materials I Used

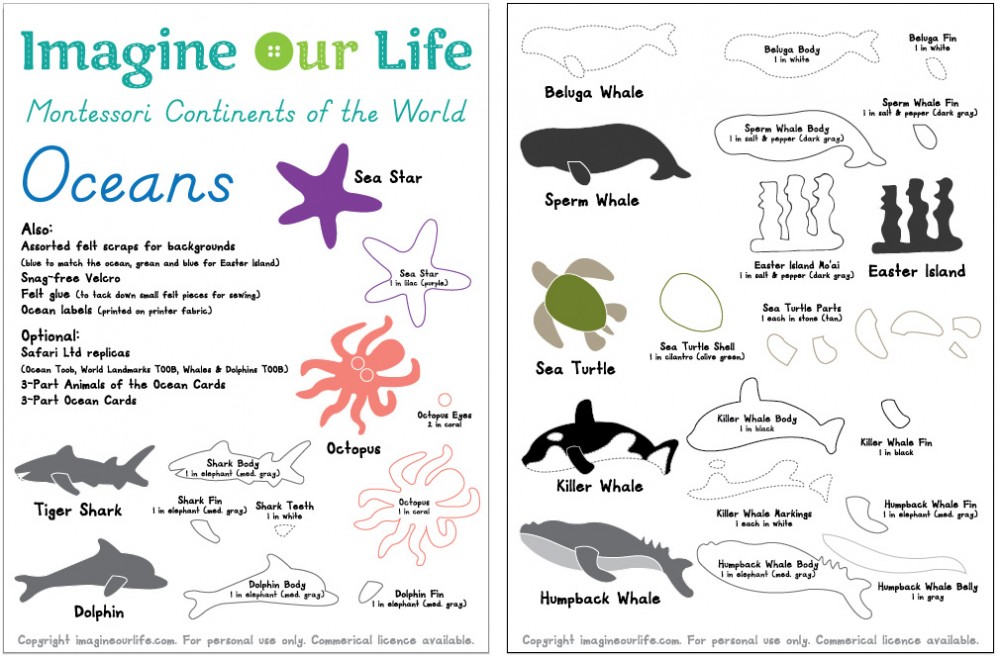
The Pattern (see the first post for the main patterns)

Felt from American Felt & Craft – lilac [purple], cilantro [green], stone [beige], pomegranate [pink], whitesalt & pepper [dark gray], elephant [med gray], black and gray. From Benzie Design – swan [blue] for the water.

Animals of the Ocean for the Montessori Wall Map & Quietbook with Printables  Animals of the Ocean for the Montessori Wall Map & Quietbook with Printables

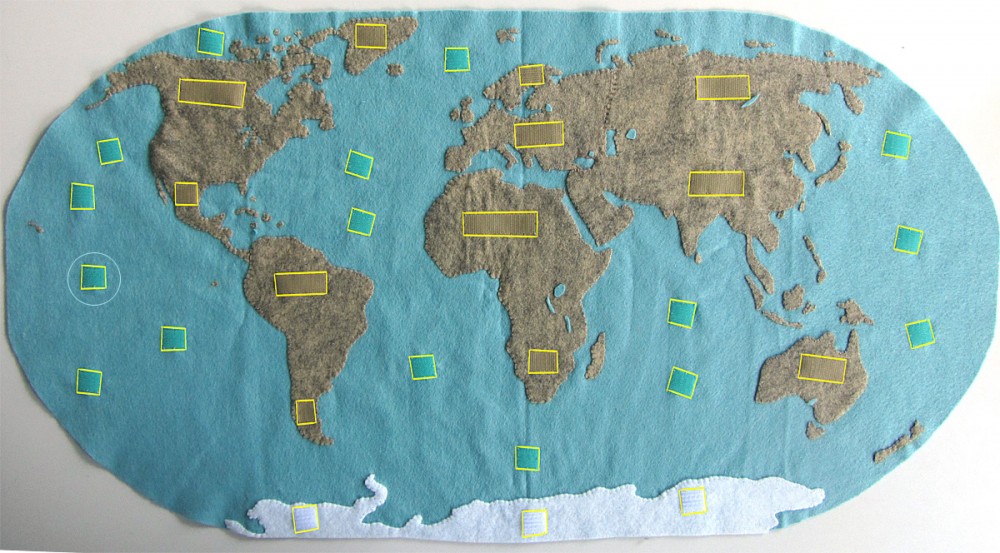
Hook & Loop – I used white snag-free Velcro on the backs of all these pieces. I used aqua blue hook where the animals attach to the ocean.

I updated this 8/6/13 to add one more ocean Velcro piece in the Pacific near Hawaii!

I updated this 8/6/13 to add one more ocean Velcro piece in the Pacific near Hawaii!

Other Things: Felt glue to tack down the pieces before sewing, printer fabric for the continent label, embroidery floss in colors to match the felt and micro tip scissors.

Animals of the Ocean for the Montessori Wall Map & Quietbook with Printables

Sewing the Pieces

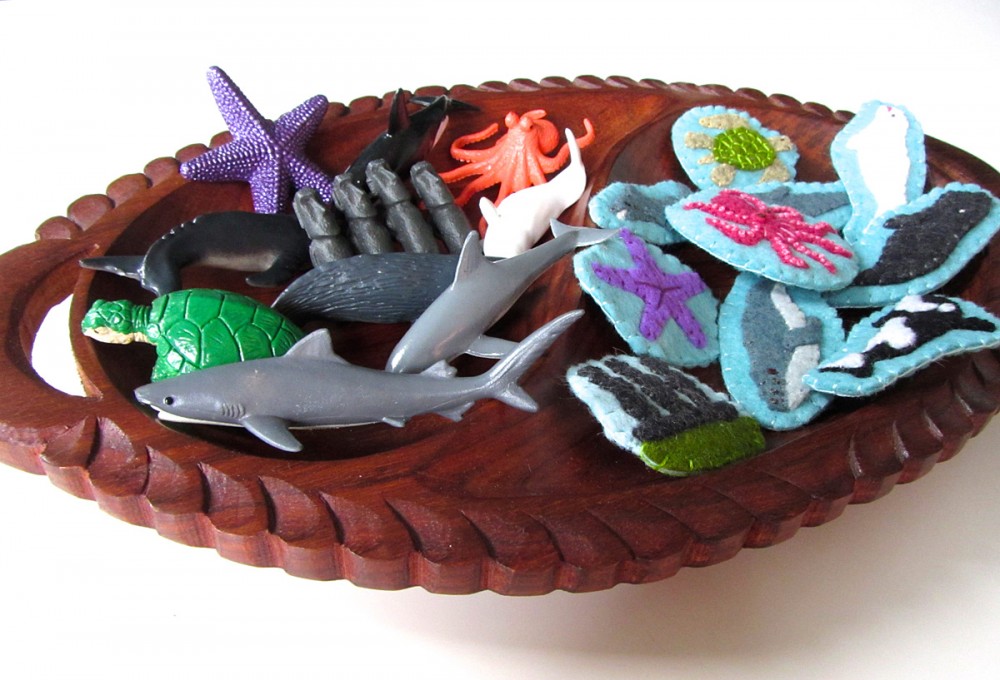
For all of the animals & landmarks, I started by gluing the pieces down to a scrap of background felt with a very light amount of felt glue. I glue several animals at a time to give them time to dry. I sewed them down, trimmed the background and cut a matching backing piece. I sewed snag-free Velcro to the back and sewed both sides together with a blanket stitch.

Animals of the Ocean for the Montessori Wall Map

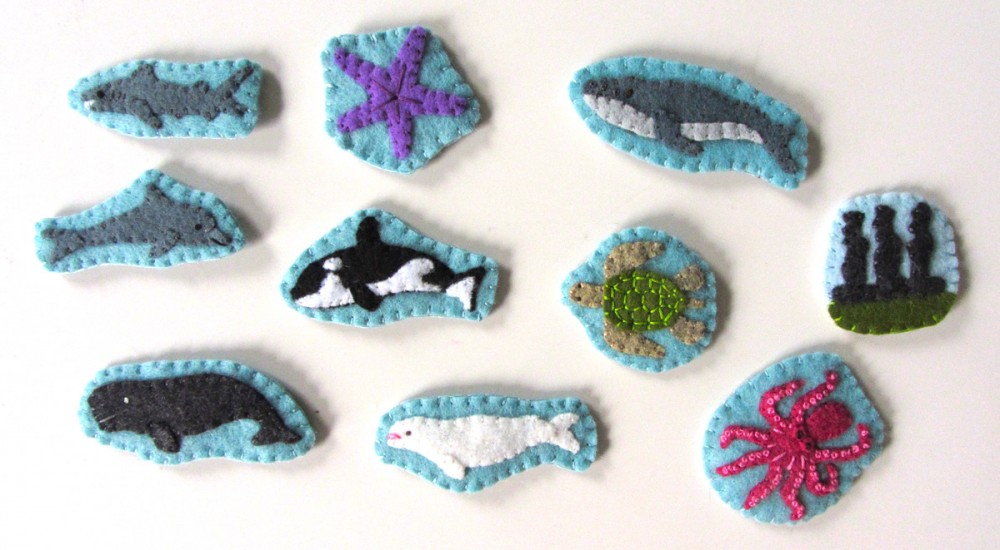
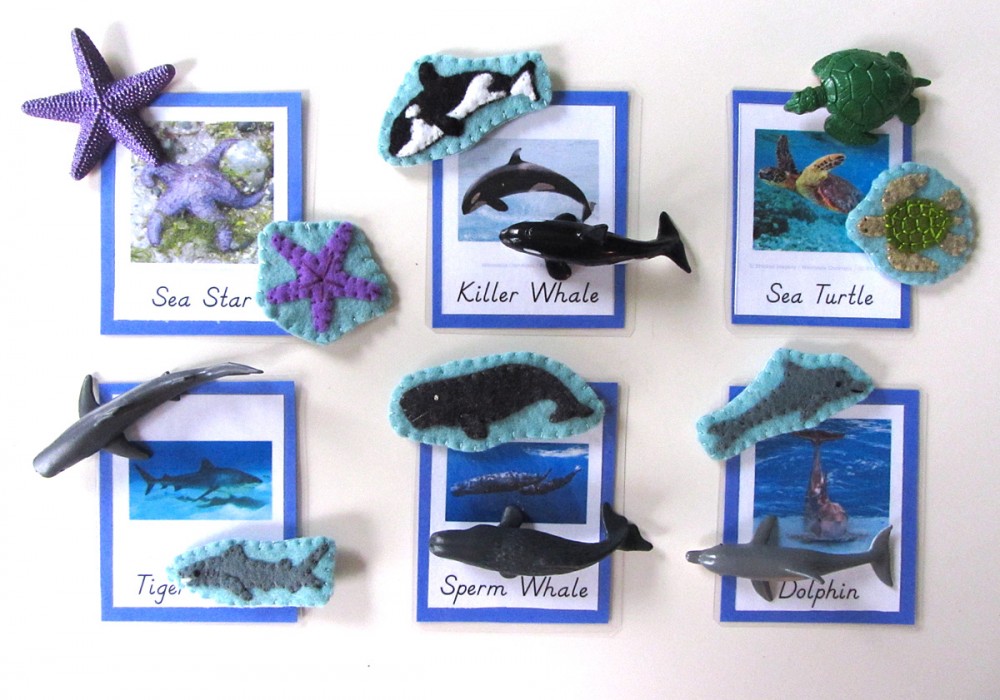
Sea Star: (Felt used: lilac purple for the star and swan blue for the background) I glued down the sea star then sewed all around it. Using long straight stitches, I sewed a starburst in the center.

Killer Whale: (Felt used: black for the body, white for the markings and swan blue for the background) For the killer whale (orca), I glued the black body down first, then the white markings and the fin. I stitched around all the edges.

Sea Turtle: (Felt used: cilantro green for the shell, stone beige for the soft parts and swan blue for the background) For the sea turtle, I glued the soft parts of the turtle down, then glued the shell on top. I sewed around the edges of the soft parts. On the shell, I used a lighter green thread and stitched all around the edge using longer stitches than I usually do. Then I used long stitches to make a shell pattern. View the image full size to use as a guide.

Animals of the Ocean for the Montessori Wall Map & Quietbook with Printables

Tiger Shark: (Felt used: elephant med gray, white for the teeth and swan blue for the background) For the shark, I glued down the teeth first, then the body and fin. I sewed around all the edges, made some long, parallel stitches for gills and a French knot eye. I made some white zig zag stitches over his teeth.

Sperm Whale: (Felt used: salt & pepper dark gray and swan blue for the background) For the sperm whale, I glued down the body and fin. I sewed around all the edges, made a long stitch for his mouth and a French knot eye.

Dolphin: (Felt used: elephant med gray and swan blue for the background) For the dolphin, I glued down the body and fin. I sewed around all the edges, made a long stitch for her mouth and a French knot eye.

Animals of the Ocean for the Montessori Wall Map & Quietbook

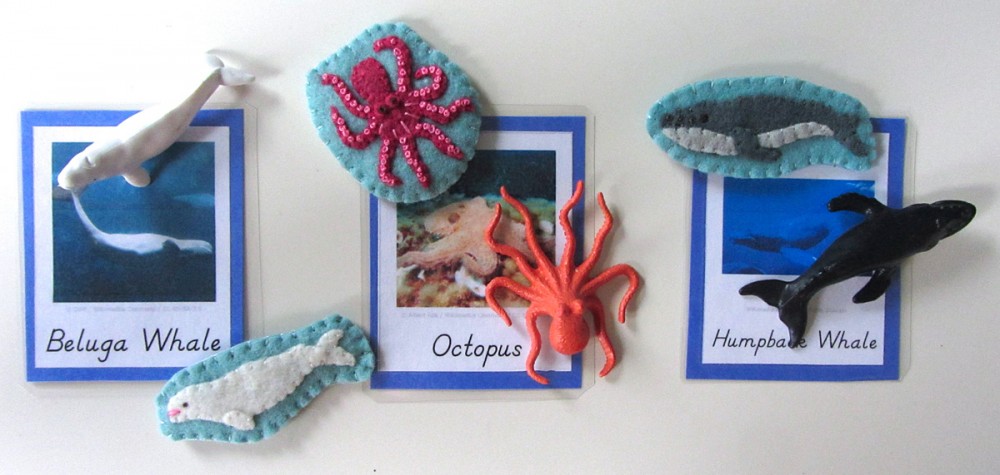
Beluga Whale: (Felt used: white for the body and swan blue for the background) For the beluga, I glued down the body and fin. I sewed around all the edges, made a few pink long stitch for her mouth and a French knot eye.

Octopus: (Felt used: pomegranate pink for the body [but I’d recommend a coral or peach if you have it] and swan blue for the background) For the octopus, I glued down the body and eye bugles. I sewed around all the edges and made French knot eyes in black on the bulges.I made a few light pink long stitches in between the tentacles to show the webbing. Then I made ten bazillion French knots! I used two strands of embroidery floss (of the 6 it comes with) and wrapped my needle twice for each knot.

Humpback Whale: (Felt used: elephant med gray for the body, gray for the belly and swan blue for the background) For the Humpback whale, I glued down the body, belly and fin. I sewed around all the edges and added a French knot eye.

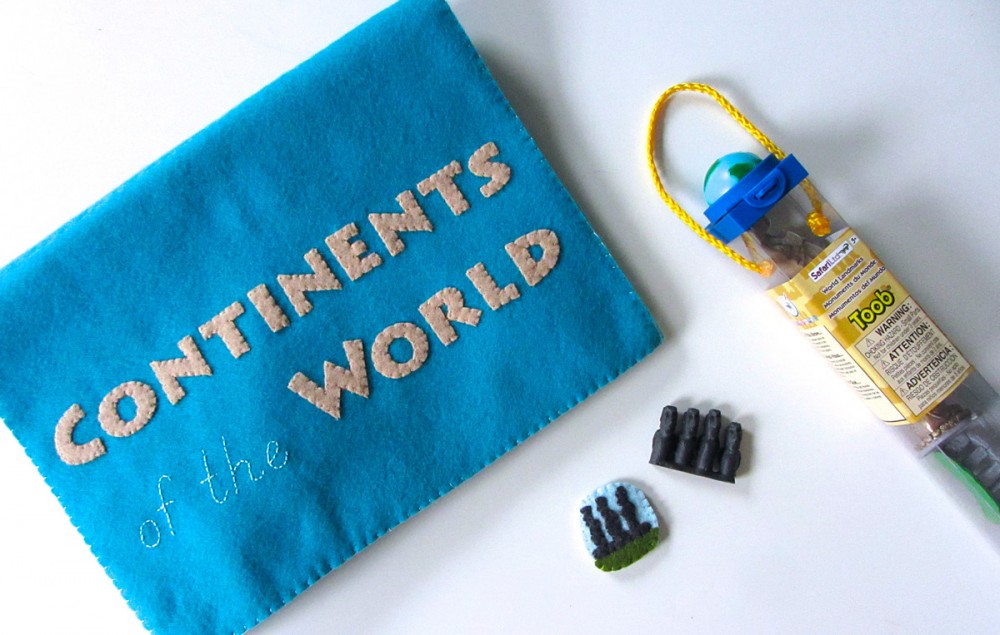
SafariLTD provided me with these beautiful World Landmarks and Around the World TOOBs. I am working with them to make this project as amazing as possible. All opinions of these products are honest and my own. We are planning an exciting giveaway for you at the end of this project!
SafariLTD provided me with this beautiful World Landmarks TOOB. I am working with them to make this project as amazing as possible. All opinions of these products are honest and my own. We are planning an exciting giveaway for you at the end of this project!
Sewing the Landmarks

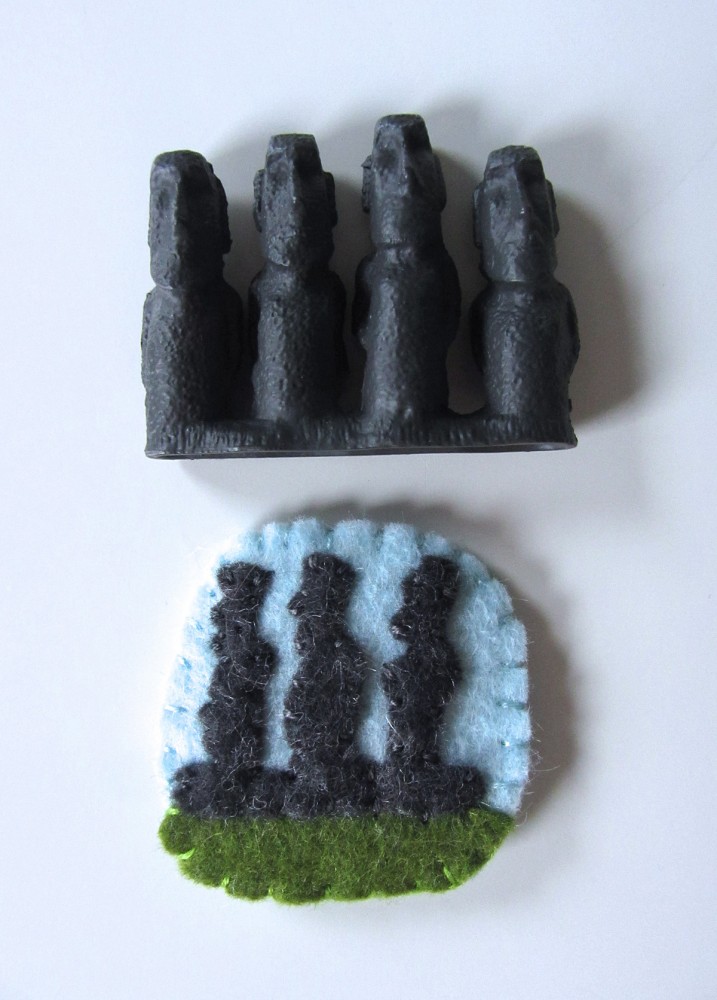
I only did one landmark in the ocean set: the mo’ai statues on Easter Island.

Animals of the Ocean for the Montessori Wall Map & Quietbook

Easter Island: (Felt used: salt & pepper dark gray for the statues, cilantro green for the ground and sparrow blue for the background) I went very simple for this one and just glued and stitched the statues and background down. For all the landmarks, I started by sewing the front piece. Then I cut out a backing felt to match the final shape and added some snag-free Velcro to it. I finished sewed around the whole edge, switching colors where needed.

Animals of the Ocean for the Montessori Wall Map & Quietbook with Printables

Did you notice I sewed the backing on? I used regular craft store polyester felt in black – the large piece that they sell in a package. It was only $3, and I figure I can turn it around and use the back as a felt board. I added two loops of ribbon for hanging. I sewed the backing on with a blanket stitch.

Montessori Ocean Animals 3-Part Cards

Montessori Ocean Animals 3-Part Cards

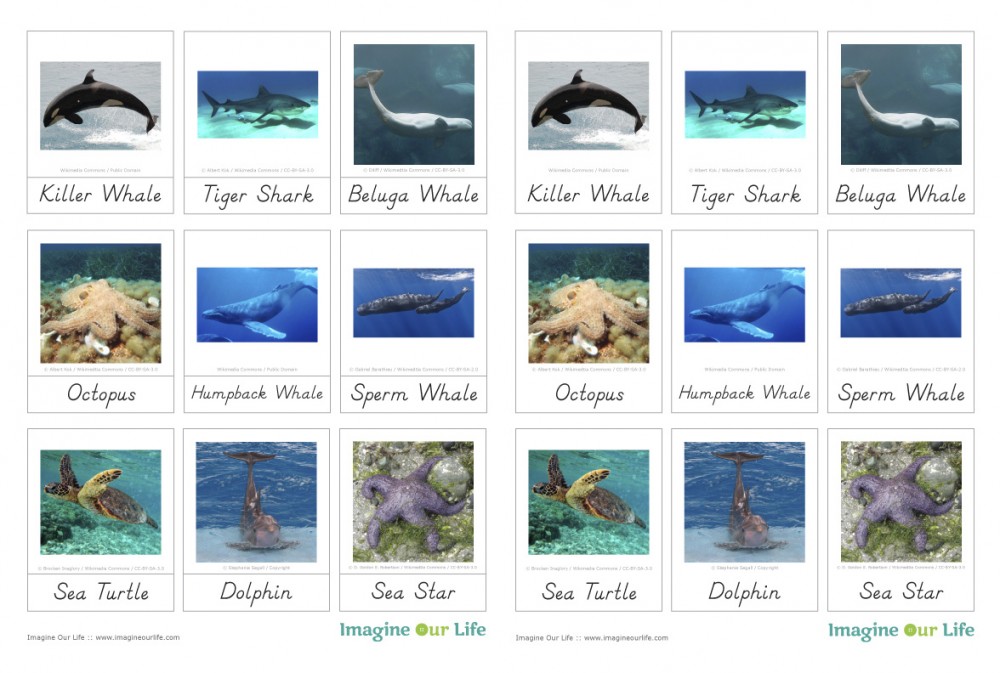
Montessori-style 3-part cards are great tools to help your young child learn new things. Jax loves them! I like to pair them with nature video clips from BBC and NatGeo that I play on YouTube about each animal. I created these ocean animal cards to be used along with SafariLTD’s TOOB figurines and my felt wall map animals. For the ocean, I used the following TOOBs: the Whales and Dolphins Toob and the Ocean Toob.

Animals of the Ocean for the Montessori Wall Map & Quietbook with Printables

 Click here to download my free pdf file to make your own. To make mine, I cut them out, glued them to orange construction paper (to match North America’s Montessori color) then laminated laminated them. It makes them shiny and strong.

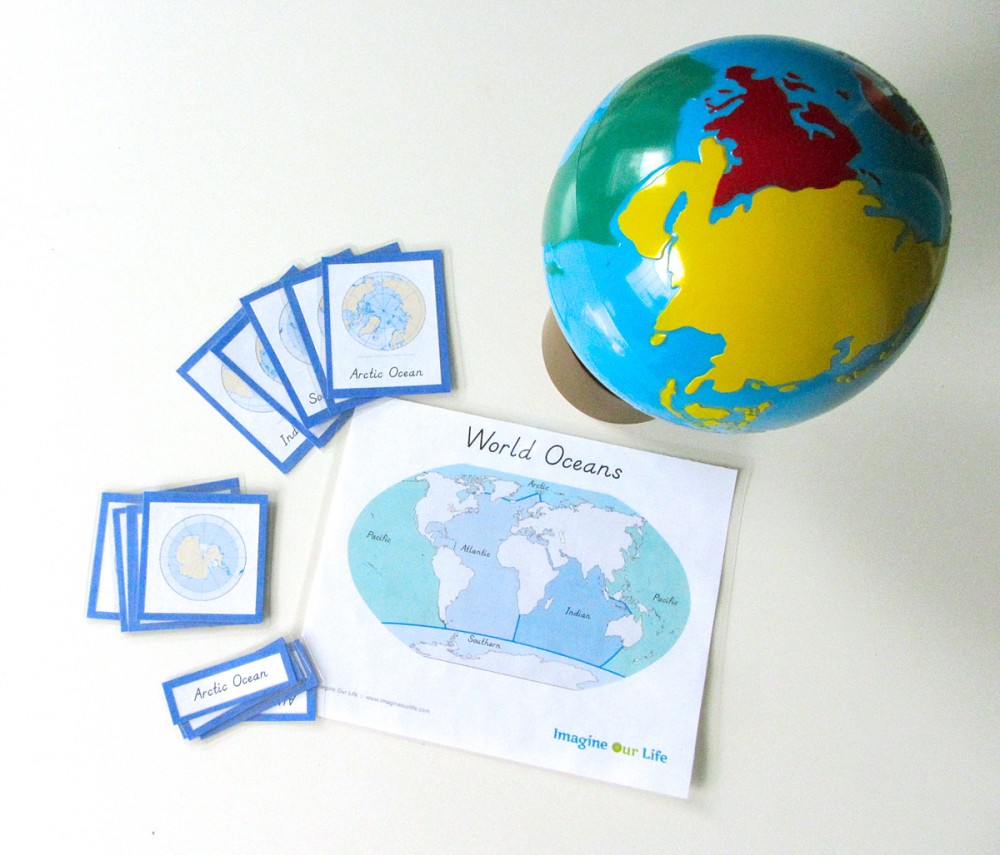
Montessori Ocean 3-Part Cards & Control Chart

Montessori Ocean 3-Part Cards & Control Chart

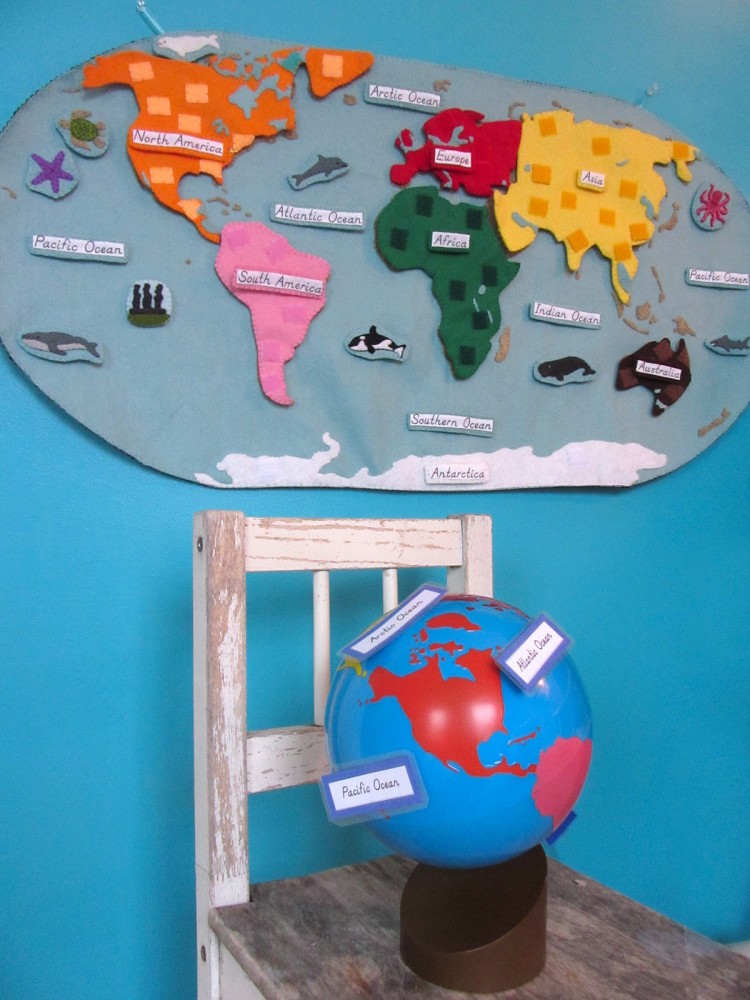
Jax just started his world continent unit with the world continent 3-part cards I made up for him. He loves his new Montessori globe,  and has his continent song memorized! This ocean set may be a bit advanced for him right now, but who knows – he is always surprising me! Montessori circles back through material, diving deeper into it each time, so it never hurts to introduce something when your child show interest.

Montessori Ocean 3-Part Cards & Control Chart

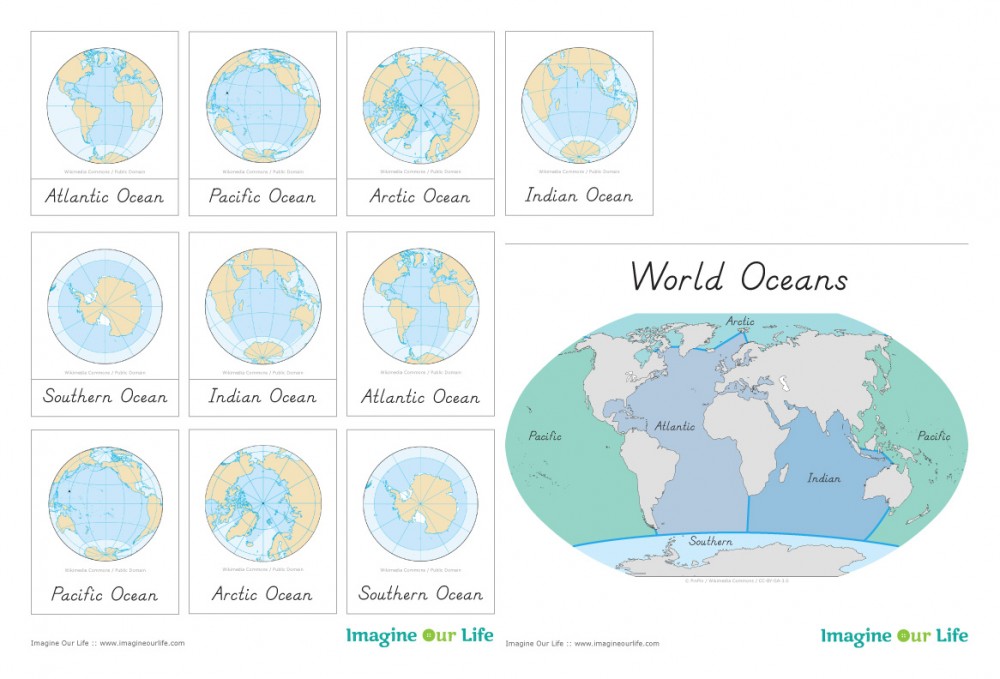
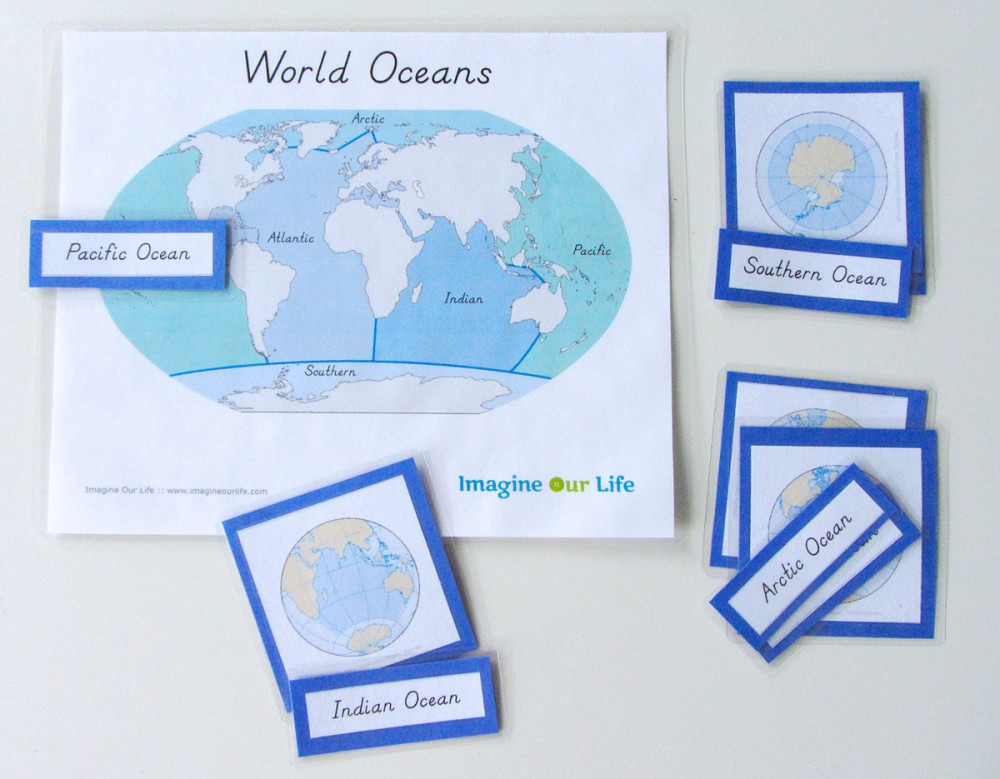
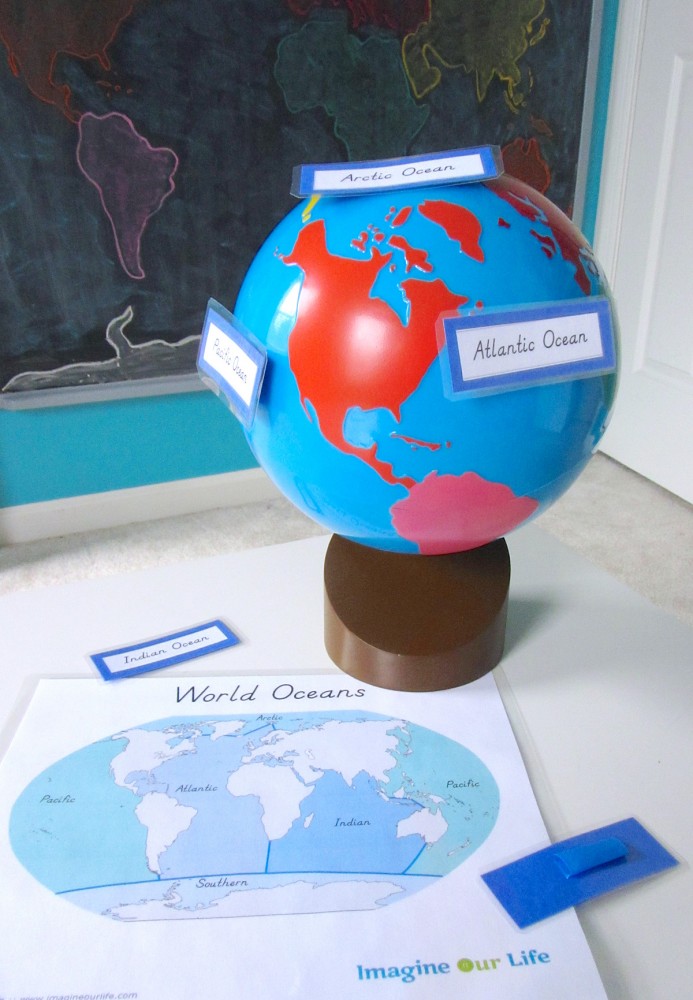
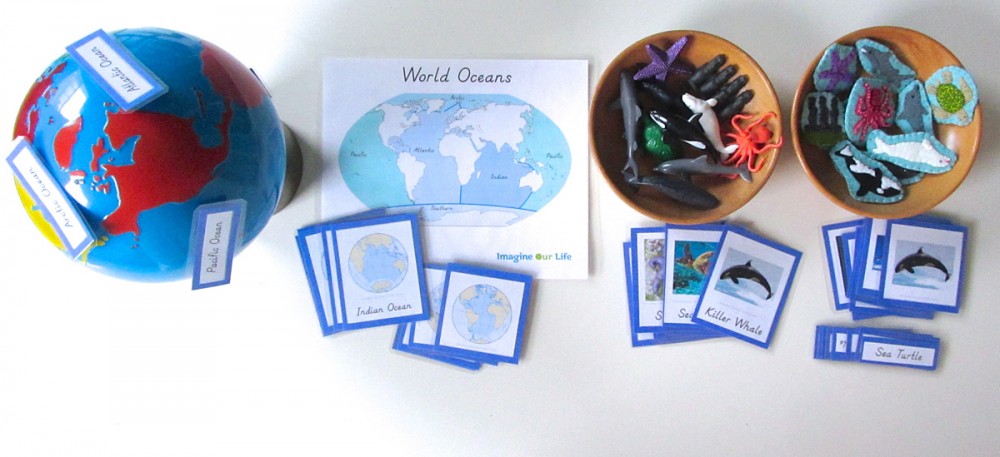
This set includes 3-part cards for the world’s oceans and a control chart showing the oceans outlined and labeled. You can start with a basic presentation of the oceans on our globe, comparing the globe to the cards. Click here to download my free pdf file to make your own

Montessori Ocean 3-Part Cards & Control Chart

For younger kids, you can have them match the labels to the labels on the control map to help early reading skills. Talk about how the continents look on the cards versus the globe and control chart map projection.

Montessori Ocean 3-Part Cards & Control Chart

For older kids, try a little painter’s tape on the backs of the labels and have them use the control chart to label your globe. Once your child is familiar with the labeled cards and chart, have them start matching the unlabeled cards as well. Eventually you can have them label the cards and the globe on their own.

Animals of the Ocean for the Montessori Wall Map & Quietbook with Printables

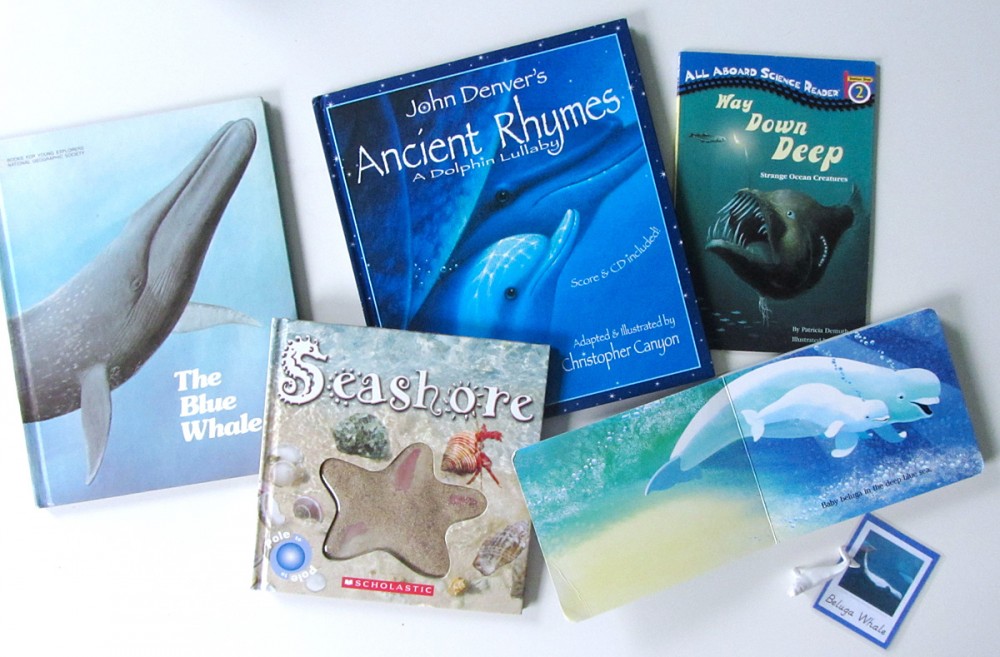
Ocean Books

I’ve started collecting some ocean books, so when Jax chooses one in the schoolroom, I can pull out our SafariLTD figurines and 3-part cards to match them. Most of my books are from the thrift store and out of print. These are The Blue Whale, Seashore, John Denver’s Ancient Rhymes: A Dolphin Lullaby (Audio CD Included) (John Denver & Kids Series), Way Down Deep (All Aboard Science Reader) and Baby Beluga (Raffi Songs to Read).

Animals of the Ocean for the Montessori Wall Map & Quietbook with Printables

I hope you are enjoying this project as much as I am! I’ve gotten see the maps a few of you have started! If you are sewing along, tag me on Instagram @iolstephanie and come comment on one of my pictures (I can’t see your photo if it you are private, but I can request to follow you temporarily if you comment on mine) or share photos on Facebook. You can also email me.

Animals of the Ocean for the Montessori Wall Map & Quietbook with Printables

It’s Montessori Monday on Tuesday for me this week, but I hope you’ll check out the other great links!
Montessori Monday