Tag Archives: Quiet Book

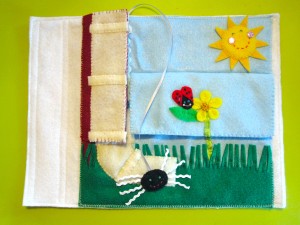
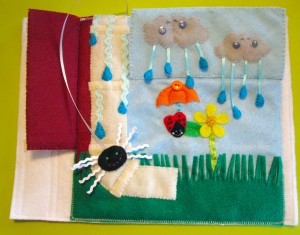
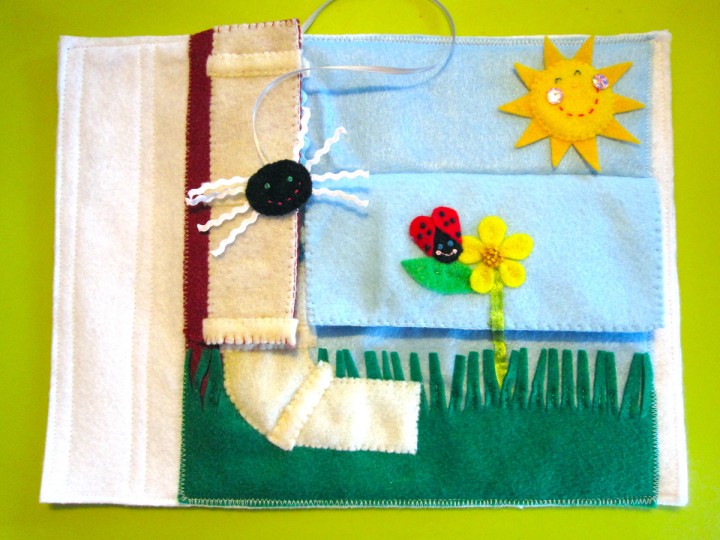
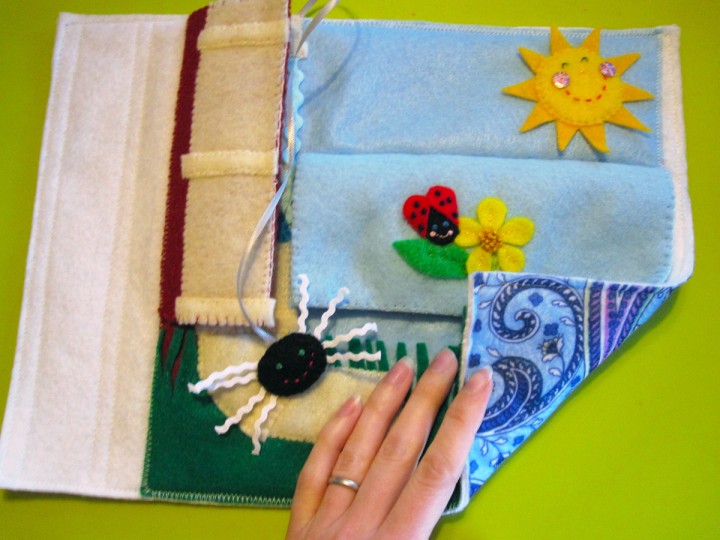
Itsy Bitsy Spider Quiet Book Page

The Itsy Bitsy Spider
Climbed up the water spout.
Down came the rain
And washed the spider out!
Out came the sun
And dried up all the rain.
So, the Itsy Bitsy Spider
climbed up the spout again!

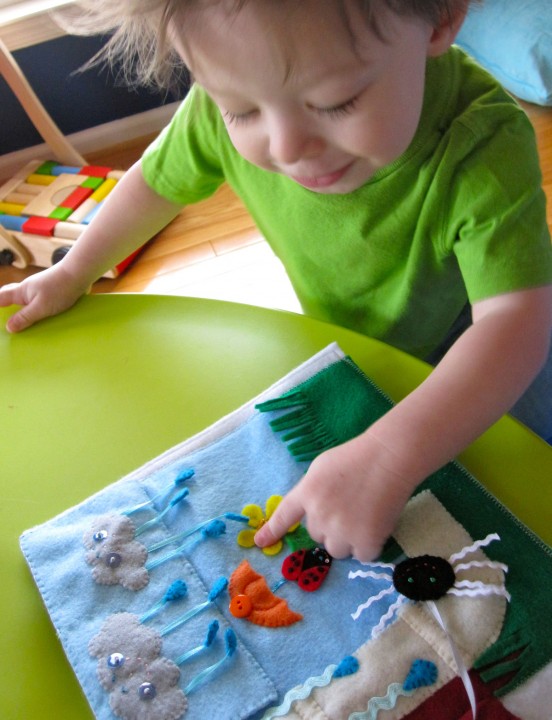
An animated gif would gave been too big for this page, so you’ll have to suffer through my singing! It was a bit tricky holding the camera in my right hand and opening the flaps/moving the spider with my left hand, but I managed!

This page was a request on the Facebook page (come join in the fun!), and one I though about a lot before creating. While it would have been more accurate to have the spider crawl up inside the spout, it would have obscured the view of him and made it hard to show the rain “washing him out”.

I decided what was important to me was being able to show the various stage of the rhyme, showing the weather (and the before/after that happens when the weather changes) and letting Jax control the spider.
For this page I used: The pattern, background felt in a 9″ x 9″ sky blue square, green felt cut into fringe for grass, felt (in dark red, red, orange, yellow, yellow-orange, gold, green, sky blue, aqua, black and cream), light blue ric rac, tiny white ric rac (I didn’t have black), thin blue ribbon, thin gray ribbon, green looped ribbon, a button, sequins and embroidery floss.

To start, I pinned down the side of the house and the grass, then pinned and sewed the gutter on top of it. I pinned a piece of green ribbon in place for the flower stem then sewed the grass in place with 4 stitches at the bottom of each stem.


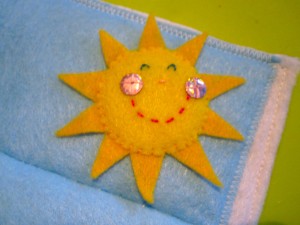
Sew the face onto the sun circle. I did a dashed line of stitches for a smile, three little stitches close together for a nose and sequin cheeks. For the eyes: I made a stitch, but before puling it tight, I made a tiny stitch across the center of it that held it in an arch shape. Pin the sun to the page on top of the rays and sew it down. I left the rays loose.

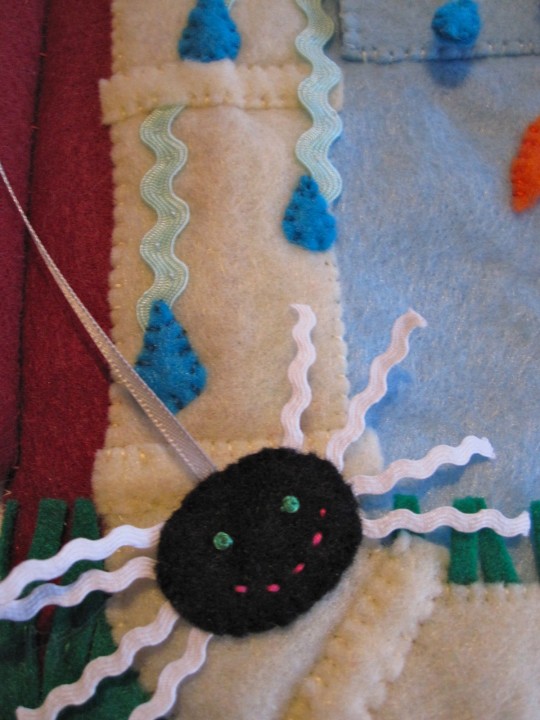
To decorate the “rainy” stage of the water spout, I sewed down some ric rac and felt raindrops. This goes on the water spout sewn to the page. To make the flap that covers it, sew the second (partial) water spout onto one of the house flap pieces, then sew them together, Sew it down to the page along the left side.

Next I made the rain scene. I sewed faces on the rain clouds the same as for the sun, but with French knots holding the sequins on. I sewed raindrops back-to-back onto the ends of ribbon scraps to make the rain. Pinning the clouds and rain to one side of the sky flap, I sewed everything down. Make sure the rain is not so long that it sticks out when the flap is folded down (the rain clouds will be upside-down when it is closed.)

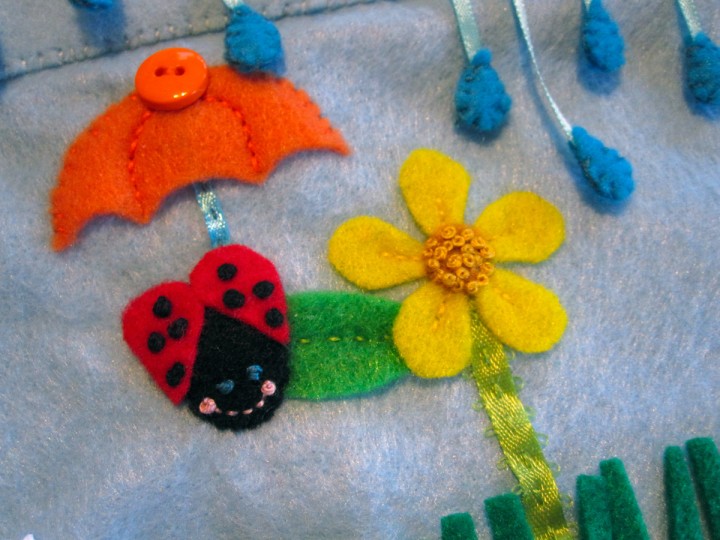
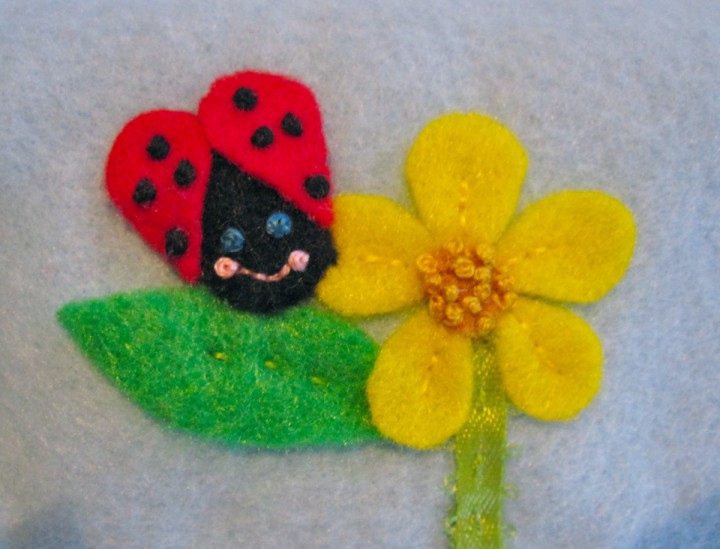
I sewed two identical ladybugs. They have dashed smiles, French knot cheeks and eyes and black French knots holding the wings on the body. Lay everything for the ladybug rain scene out and sew it down: a dashed line down the middle of the leaf, a few stitches for each petal, a bunch of French knots at the flower’s center, a scrap of ribbon for the umbrella stem and stitches around the top and on the spines of the umbrella (leave the bottom open and stretch the felt a bit for a curved look). I added a button at the top of the umbrella – just because buttons are cute!

Figure out where on the page your sky flap needs to be so it covers the sun completely, then sew down a bit of the flower stem ribbon onto the other piece of the sky flap so that it lines up with the one on the page. Sew the flower and leaf the same as before. I place my ladybug in a slightly different spot, just because.

Sew the two sides of the sky flap together (the rainy side upside-down) and sew it to the page along the top.

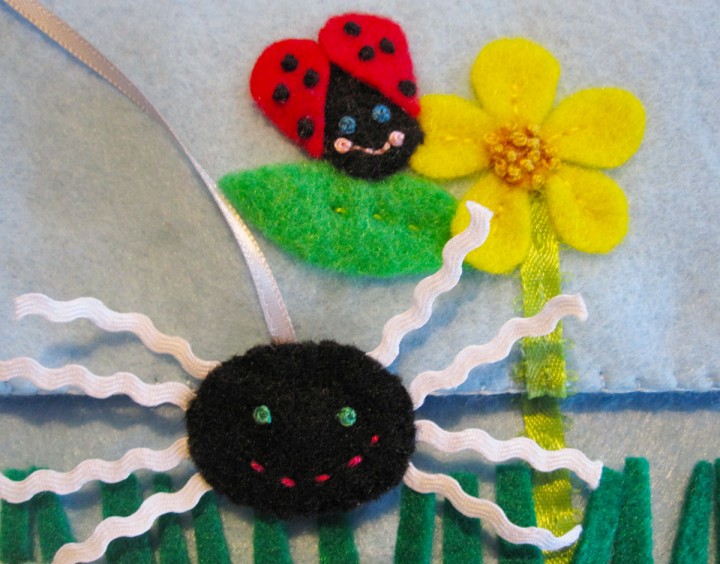
For the spider I sewed eyes and a mouth on the front piece then layered ric rac and the end of a ribbon between the two sides of the spider’s body. I cut 4 pieces of ric rac and had them cross in the middle so they stuck out both sides. Sew around the spider’s body.

When sewing your page down to the backing, make sure to catch the other end of the spider’s “web” ribbon at the top so he is attached to the page. Stop and start at all the flap folds so you don’t accidentally sew the flaps closed. I used some cute paisley patterned felt as the back side of my page.

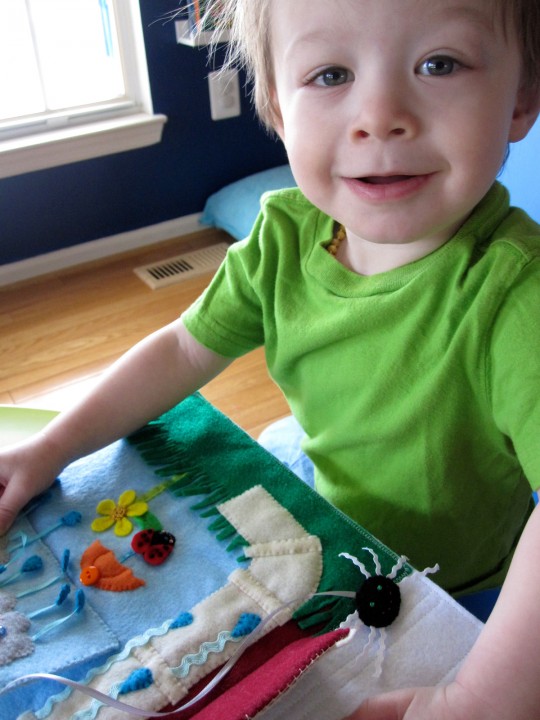
Jax can’t sing Itsy Bitsy Spider just yet (he does a great Twinkle Twinkle!) but he is starting to sing along to some of the words now that we have this page to play with. He especially loves the umbrella, which he calls a “boo-ya”!

What do you think?

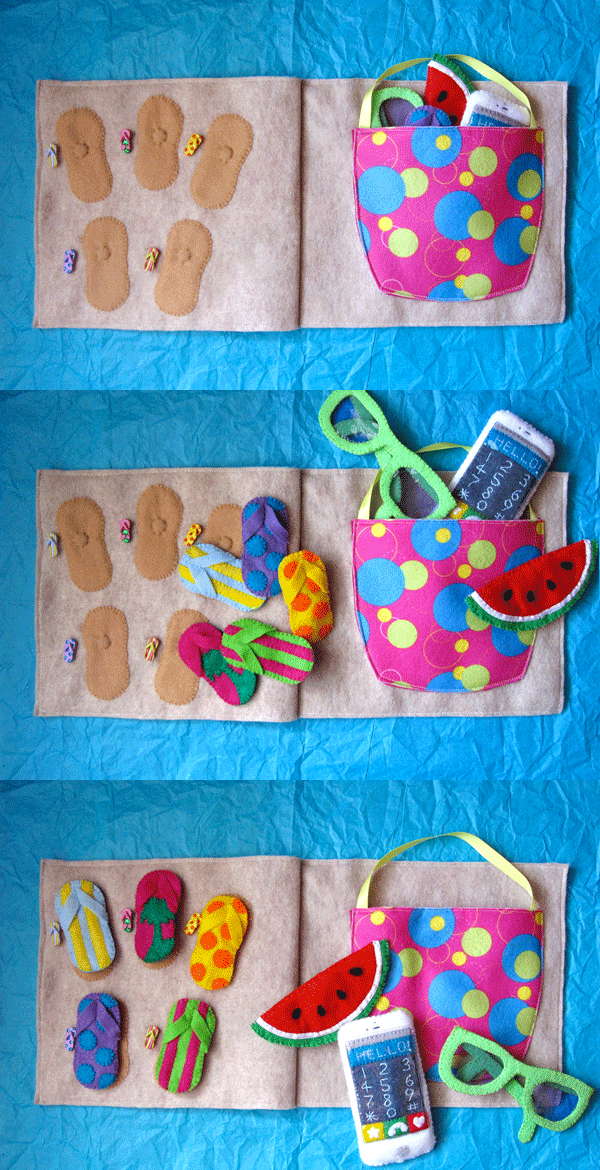
Beach Bag & Flip-Flop Matching Quiet Book Page

Beach Bag & Flip-Flop Matching Quiet Book Page

I will be making a number of beach and summer themed quiet book pages between now and May when we take a road trip to the beach. My next page will be Isty Bitsy Spider, but I’m trying to decide what to do after that: ice cream parlor or bonfire and s’mores. What do you think?
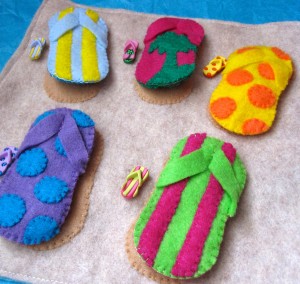
    

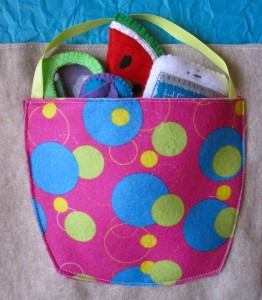
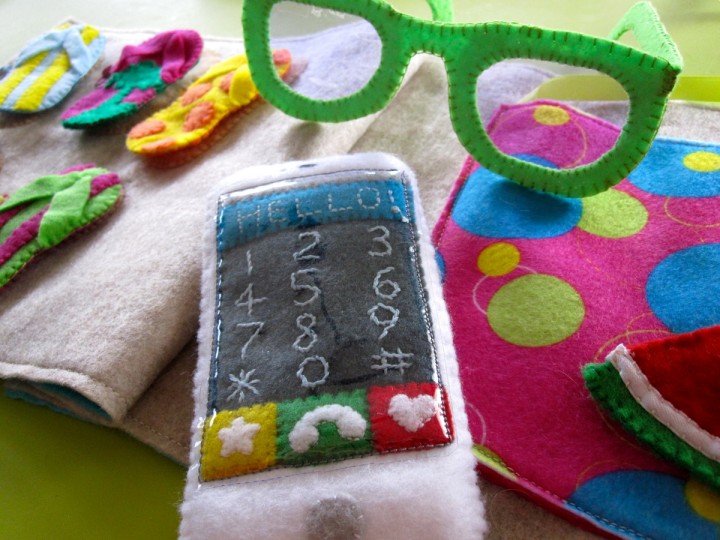
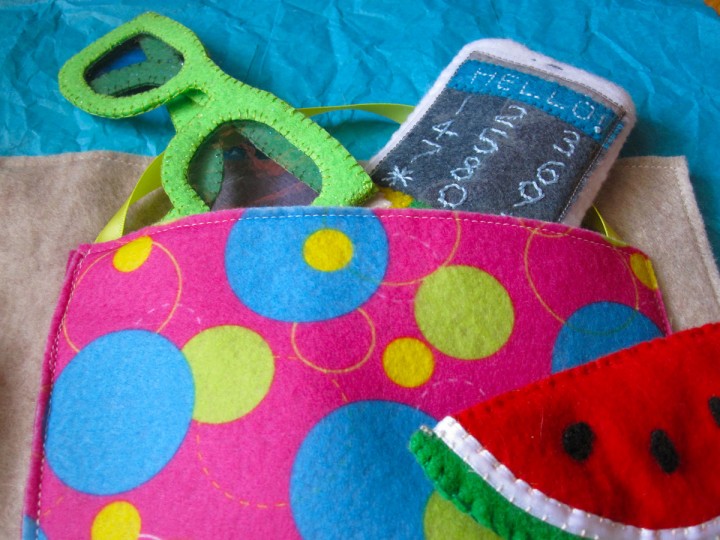
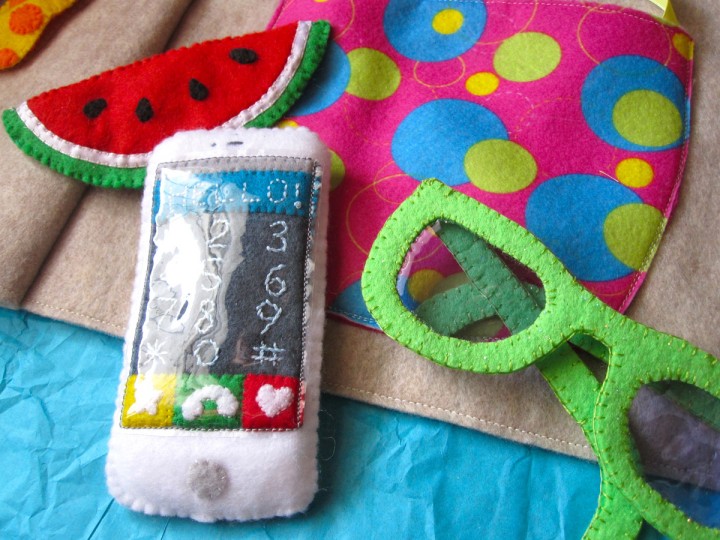
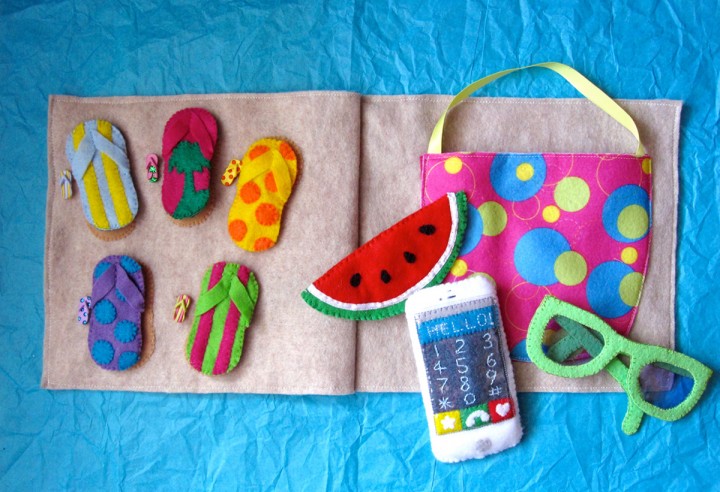
This is a two page spread that features both matching and my spin on the classic purse quiet book page. I wanted to make one, but I also wanted to make it gender neutral. When you open the bag, you’ll find sunglasses, an iPhone and a little snack of watermelon (Jax’s favorite!). The bag also holds all the flip flops from the matching page.


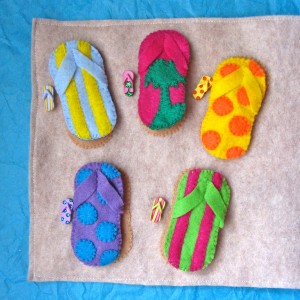
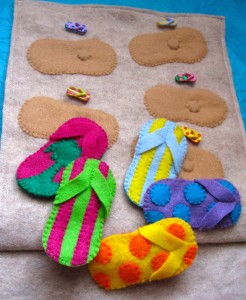
I had leftover flip flop buttons from the ocean i-spy page, so I decided to use them as the inspiration for the matching game. The flip flops are magnetic so they can stick easily to the footprints in the sand. If you don’t have the buttons, or wanted to do something different, you could make the footprints colored, or outline them with a color. You could even make two of each shoe and have them waiting in the sand for the other half of their pairs. I got my buttons from A.C Moore. They were $1.99 in the store.

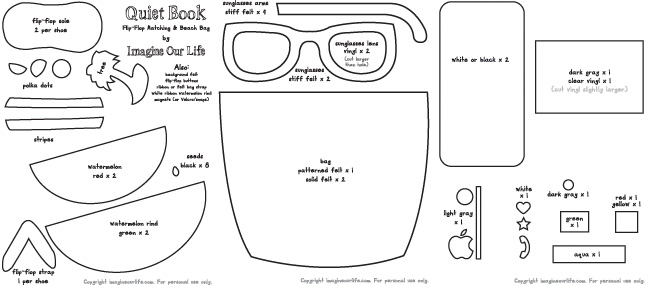
So for this page, I used: The pattern, natural felt for the background (I used 9″ x 12″, but you could use two 9″ x 9″ squares and mount them on white felt), felt (in pink multi-dot, hot pink, red, orange, yellow, light green, green, aqua, purple, light gray, dark gray, white and tan – lots of scraps!), stiff glitter felt in lime green, tinted vinyl (mine was blue, from my scrap stash), clear vinyl, batting or stuffing, flip flop buttons and ribbons.


Sand Footprints: Sew the footprints down to the page with a magnet under each one. Sew around the magnet to hold it in place. Sew each button beside a footprint.

Flip Flops: I included all the pattern pieces I used to make flip flops that match the buttons. Decorate the top of your flip flop first. Sew a vertical line of stitches to attach center of the strap. Sew a magnet to the inside of the sole of the shoe, using a scrap of felt to hold it in place. Sew the top and bottom together around the edges, catching both sides of the straps in your stitches.

Beach Bag: Sew Velcro or snaps to the top of the bag lining pieces, making sure they line up. Pin a length of ribbon of strip of felt like a handle between the outer piece of the bag and one of the lining pieces. Sew across the top. Pin the other bag lining piece to the page and sew across the top. Pin the handle side of the bag on top of the side on the page and sew around the sides and bottom.

Glasses: Very simple! Layer your tinted vinyl between the two front frame pieces and sew them together. Sew each pair of frame arms together, them sew them to the front at the temples.

Watermelon: Sew the seeds to each red piece, then pin the red to the green. Sew a length of white ribbon over the edge of the red where it meets the green to make the rind (you could also cut some white felt and layer it between the red and green). Sew the front and back together, adding batting or stuffing if you want some dimension.

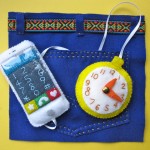
For the iPhone, please read the instructions from the iPhone and pocket watch page.


This page makes me even more ready to head to the beach! Hurry up, May!!

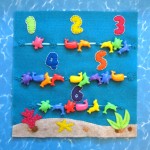
Ocean iSpy Quiet Book Page

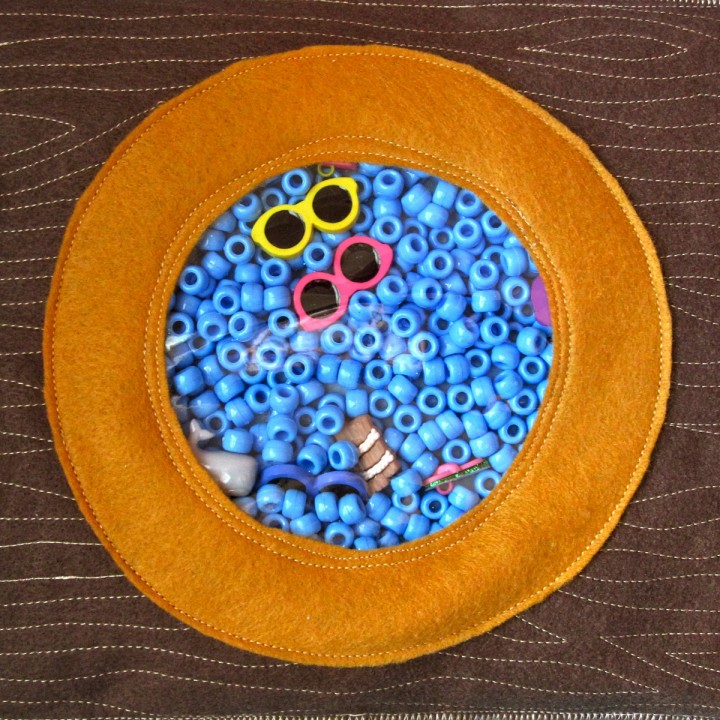
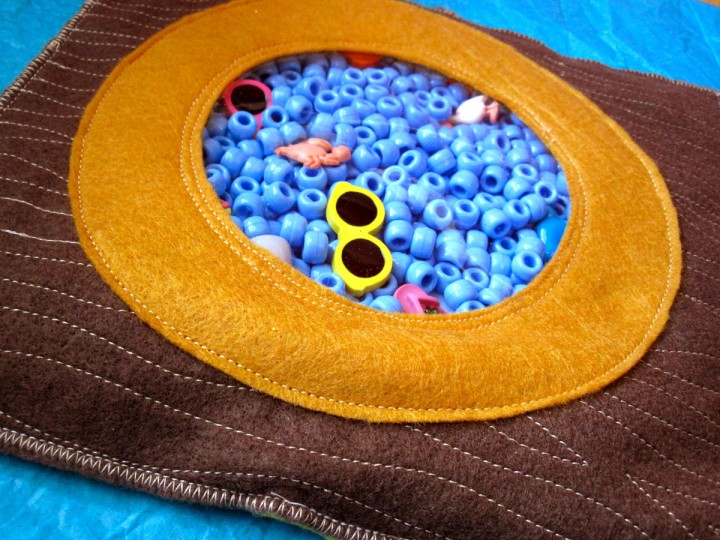
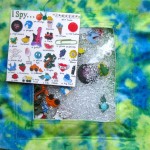
I’ll be doing a lot of beach and vacation themed pages over the next two months leading up to our trip to the Outer Banks. There will be other pages as well, including an Itsy Bitsy Spider page coming up soon. Here is the first beachy page I’ve completed – an ocean-themed iSpy page!

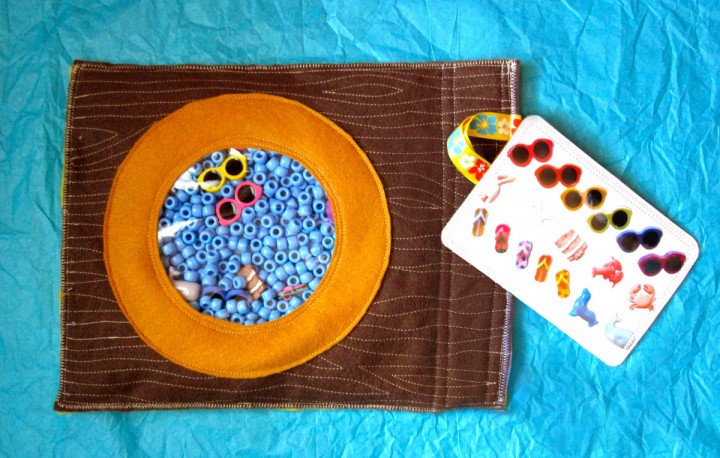
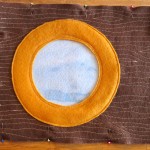
This page is made to look like you are inside a ship looking out into the ocean. I didn’t want to get too fussy with the details, since the point it to hunt for the iSpy goodies. I couldn’t resist doing at least *something* to make it special, so I added faux wood grain. This page was done entirely on a sewing machine. It’s Saturday, so I was about to get two hours away from Jax to whip this page out.

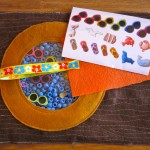
For this page I used: the circle template, full sheets of felt in brown, light blue and yellow (the back of my completed page – yours could be different), gold felt for the window, orange scrap felt for the back of my photo key, clear vinyl, a scrap of ribbon, a 4″x6″ print of my iSpy trinkets, light blue pony beads and iSpy trinkets.

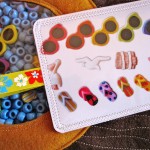
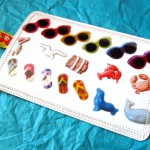
First thing you need to do is gather all the trinkets that are going into your iSpy game. I used ocean and beach themed buttons. Lay them all out on a sheet of white paper and take a picture. Print it out on photo paper or cardstock to use in your photo key.


I started the sewing by making the faux wood grain on the brown felt with tan thread. I made wavy lines, occasionally leaving an oval-shaped spot to add a “knot”. I didn’t bother to sew the wood grain behind where the window would be, since that would be cut away. I decided to do the whole page in brown instead of my usual 9″x9″ square sewn down to a white page. I aligned my page to be to the left hand page in my book as I plan to do a coordinating page for the right.


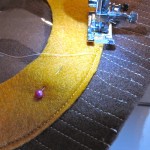
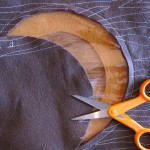
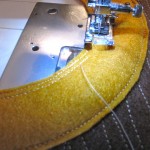
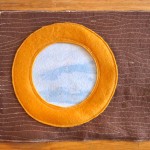
Lay your vinyl and window ring onto the page and pin it in place. Only pin vinyl where you know it won’t be seen – pin holes don’t go away! Sew around the outer edge of the gold ring. Flip the page over and carefully cut away the brown felt inside the circle so you can see through the window. Sew the inner edge of the window down. I went around twice.

Place your light blue felt behind the page and pin it on three sides. Leave the side that will be in the fold of your quiet book open. Sew around the three sides with a zigzag stitch. Pour your beads and trinkets into the page and pin the fouth side closed. Set the page aside to make your photo key.


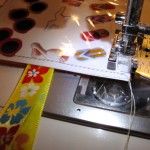
Take your photo print out and layer it between clear vinyl and a scrap of felt Insert a scrap of ribbon so you can attach it to the page. I folded my ribbon because it was only printing on one side. Sew all the way around with a straight stitch, trim it and round the corners and go around again with a zigzag stitch.

To close the page, pin the ribbon of your tag into the open seam then sew it shut with a zigzag stitch. Finish the page by sewing a piece of felt to the back and sew your grommet channels. I haven’t added my grommets yet. I tend to do a bunch of pages at once because I’m not a big fan of doing grommets!

I think it came out really cute! Now I need to think of a coordinating page for the right hand side…

Have a great weekend!

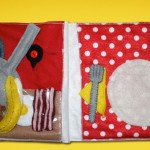
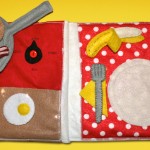
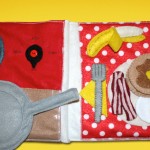
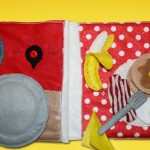
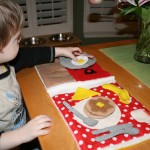
Let’s Cook Breakfast Quiet Book Page

Are you ready to cook breakfast?

Let's Cook Breakfast Quiet Book Page

 I’m so happy to be back to sewing after my little break! And I think this page came out adorable…

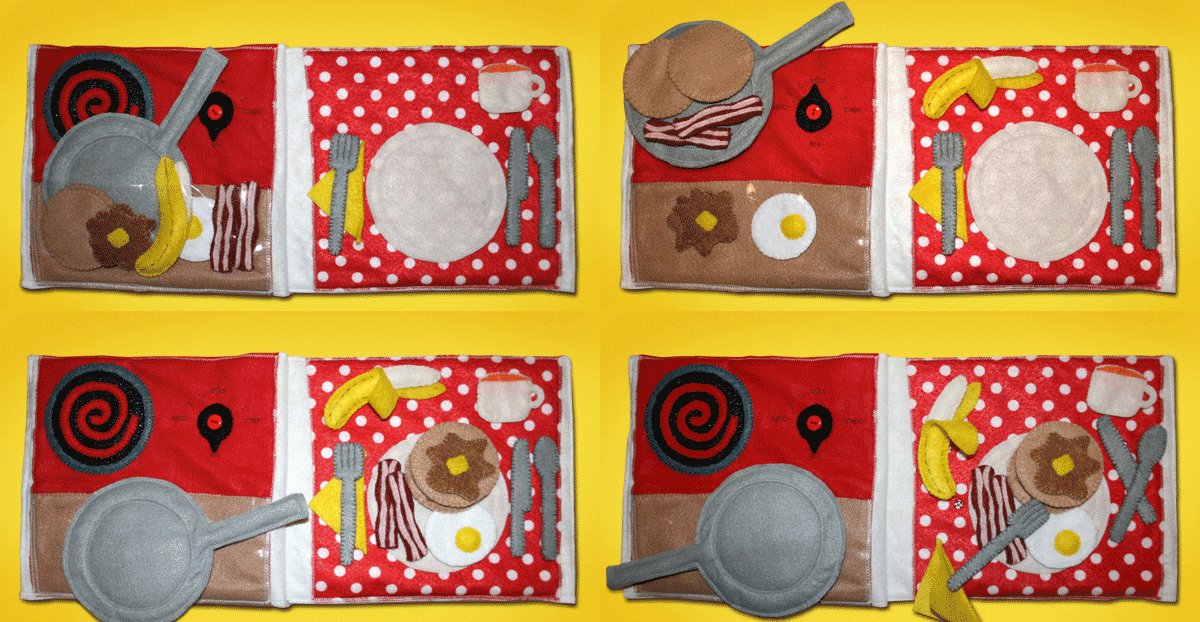
Jax loves pretend play cooking and playing with his kitchen, so it made sense to do a breakfast page after someone asked for a frying pan on the Facebook page. (Sorry it took so long!)

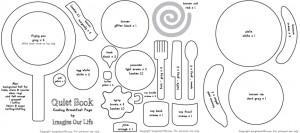
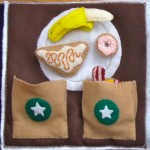
This pattern uses some duplicate items from the Starbucks Breakfast page. The patterns are included here, but please see that post for instructions on the banana, egg and bacon.

For this page, I used: background felt in red and red polka dot, felt (in pink, red, burgundy, orange, yellow, cream, white, tan, brown, gray, dark gray, black and glitter black), clear vinyl, batting/stuffing, 1 grommet/eyelet, 5 snaps and a button.

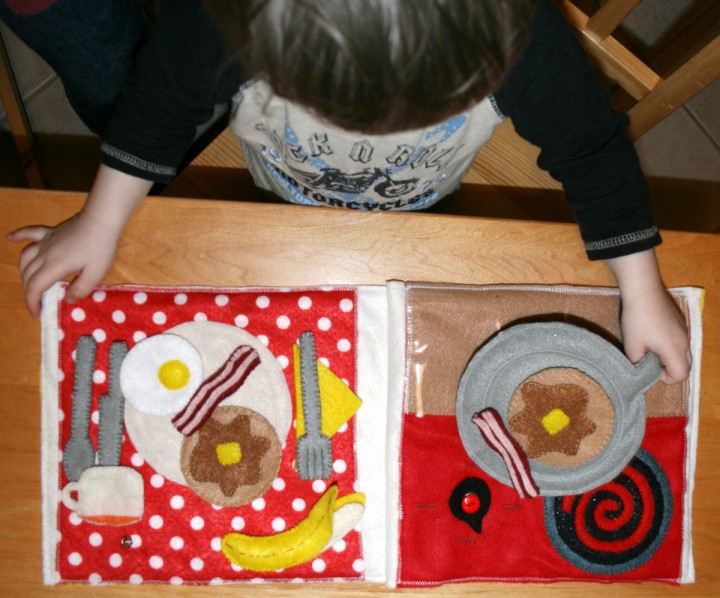
To create the stove page, I started with a 9″ x 9″ red felt square. I covered a little less than the bottom half with a tan felt to make the counter. Because I wanted a way to store the food without using lots of Velcro that damages the felt, I sewed a clear vinyl pocket over the counter.

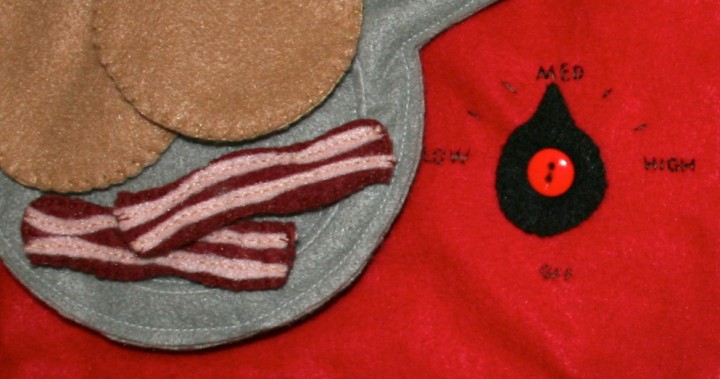
To make the knob, I sewed the two halves together, then installed a large eyelet in the center. I put it in place on the page and sewed a button to the page through the eyelet. This lets the knob spin around. I placed pins at all the points I wanted to add stitching, and I used them to keep my lettering straight. I free form stitched it all, but you could write it out first with a pattern pen. I did: LOW | | MED | | HIGH OFF.

The burner was simple – it just took a lot of stitching! The red spiral gets sewn to the black glitter circle (you could use plain black). Then the black circle gets sewn to the dark gray circle. The whole thing gets sewn down to the page.

To make the frying pan, I first stitched the inner circle from the pattern onto the top piece using the sewing machine (to save time.) I then layered some batting between the two sides and sewed them together around the outside. I’d considered adding a light cardboard or plastic canvas layer for stability, but I decided I wanted it to squish into my huge quiet book and not be bulky. When it was all sewn together, I sewed a second circle just inside the first to make the pan dip in a bit at the center.

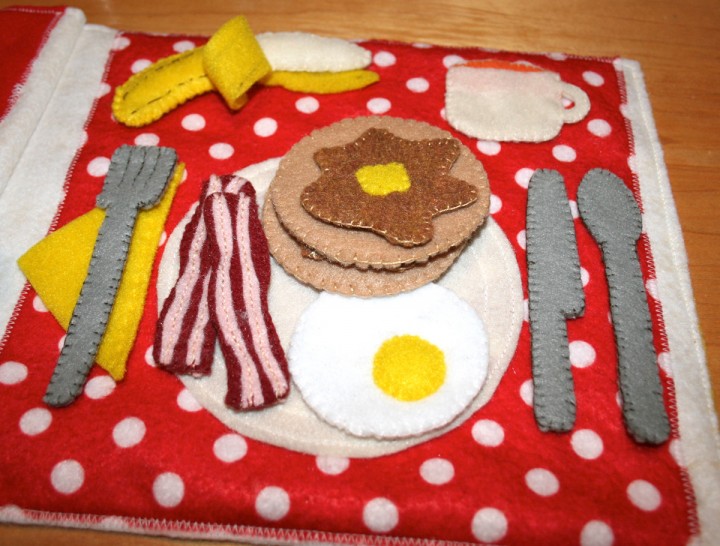
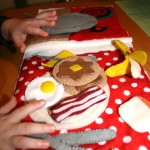
To make the table page, I started with a 9″ x 9″ square of polka dot felt. I sewed the plate down using my sewing machine (I used off-white for my plate and cup) then sewed a second circle inside the first.

To make the napkin, I used a square of yellow felt. Use whatever you have on hand that coordinates! I went with yellow thanks to a Facebook suggestion. I folded the square then hand stitched a running stitch just beside the fold to keep it folded. The fork, knife and spoon are all made by sewing the two sides together. The fork also has three rows of stitching to make the tines.

The cup was made by sewing the orange juice down to the top of the back of the cup, just below the top so you see a little lip. You could make your orange juice go the full length of the cup (or even come out!). I hadn’t originally intended to leave the cup open like a pocket, but that is what I did. I sewed the front to the back around the lower three sides, catching the handle in the stitching.

The napkin, fork, knife, spoon and cup all have snaps sewn to them and the table to hold them in place.

The pancakes are made by simply sewing the two sides together. I made two. For the syrup, I sewed butter squares to the top pieces and then sewed the tops to the bottoms. For instructions for sewing the banana, bacon and eggs, see the Starbucks Breakfast page.

What do you think? Jax loves this page! He hasn’t figured out how to turn the knob yet, but he likes stacking everything onto the frying pan then putting it all away in the counter pocket. He calls the juice “tea” – maybe I should have made it brown! He sees mama drinking tea a lot.
           

If you sew this page, feel free to share your photos here or on the Facebook page!

Valentine Mini Quiet Book

Win this book below!

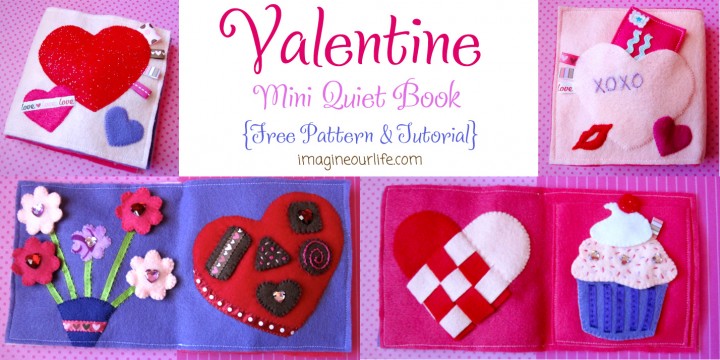
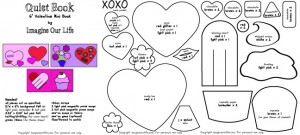
I created a pattern for a sweet and simple mini (6″ square) quiet book to share with you all. Do you have a little one you’d like to give a Valentine to?
Tutorials:
Front/Back Cover
Flowers & Chocolates
Weaving Heart & Cupcake
Book Assembly & Giveaway (this page)

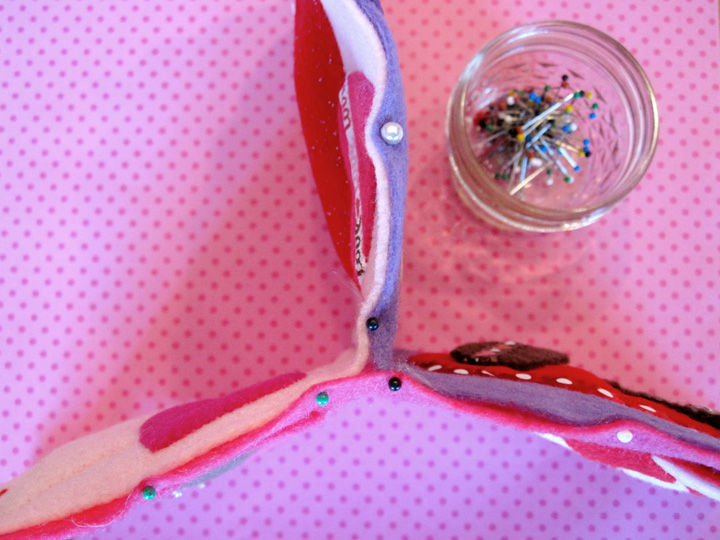
Book Assembly: Fold your three double pages in half – the cover should have the designs on the outside of the folds, the other two pages should have the designs on the inside of the folds. Pin your pages together as shown. They will form a little book.

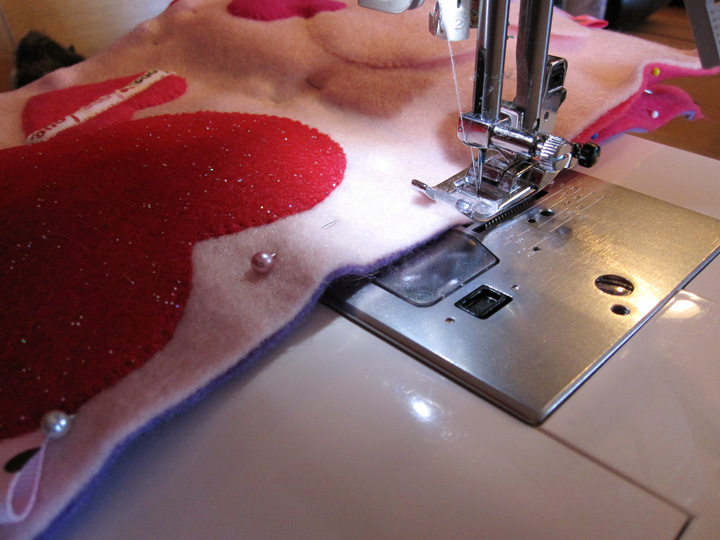
Make three passed on your sewing machine (you can also hand-sew!) – one for each double-sided page. You will be sewing three sides on each page: top, outer edge and bottom. Everything but the spine. Start at the spine at the top of the book, go down the outer edge, and across the bottom back to the spine. Repeat for all three pages. Trim up your felt edges as needed and you’re done!


If you make one of these little Valentine books, stop by the Facebook page and share some photos!

Don’t sew or don’t have time? You could win my sample book shown above!

Just leave a comment here on this blog post. I will be including one felt envelope and letter made from my mail pattern. This book is for children aged 3 and up do to small parts. We don’t want any little ones eating felt chocolates! I recommend adult supervision at all time with any younger child.

Your entry must include: a valid email address (so I can reach the winner) and who would be the recipient of the book if you won. Please use the blog’s comment form, not the Facebook form.

The nitty gritty: I have two hairy dogs, a golden and a chow, so if dog allergies are an issue, please be aware! I’ll take a lint roller to it, but they are shedding like whoa right now! And, you need to have a shipping address I can send the book to, obviously! Comments are held for approval for all first-time commenters, due to spam, but I’ll try to approve them as quickly as possible.

The contest is open to entries until around noon Eastern time on Thursday, January 19th. I will announce the winner that afternoon. I will send it off to the winner the next day if they reply promptly with their address.

Good luck!

Weaving Heart & Cupcake – Valentine Quiet Book

I created a pattern for a sweet and simple mini (6″ square) quiet book to share with you all. I will be posting instructions in sections as I complete my sewing. Do you have a little one you’d like to give a Valentine to?
Tutorials:
Front/Back Cover
Flowers & Chocolates
Weaving Heart & Cupcake (this page)
Book Assembly & Giveaway – coming soon!

Yes, I said giveaway! I’ll be sending off my finished book to one lucky reader in time for Valentine’s gift giving.

These pages use: 12″ w x 6″ h hot pink felt background, a hot pink square slightly smaller than the 6″ page, felt (in light pink, red, lavender, white, brown, and wine), purple ribbon, a ribbon scrap, sew-on gems, sew-on snaps and embroidery floss.


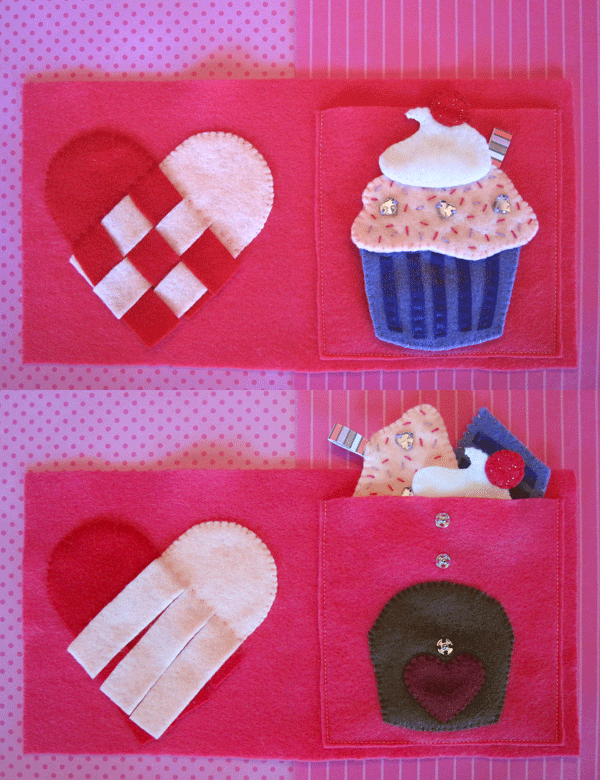
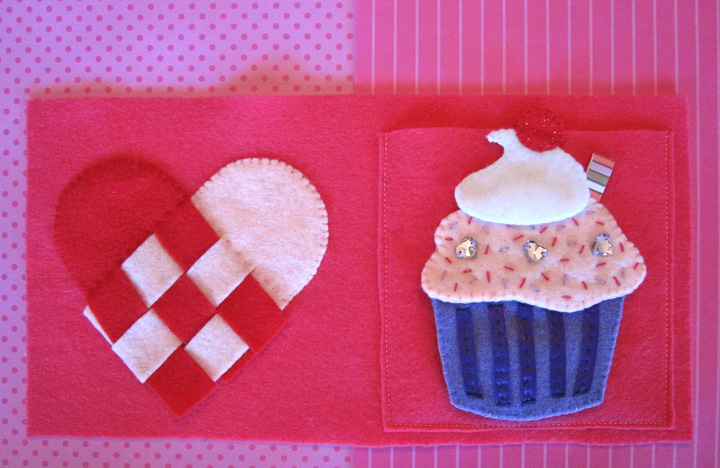
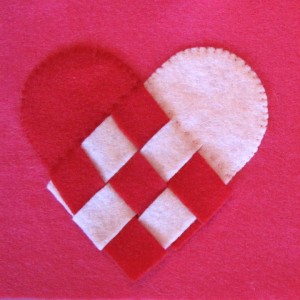
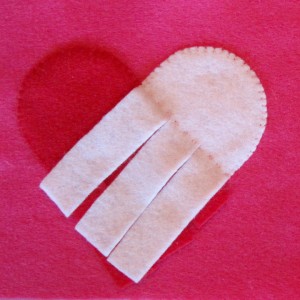
Weaving Heart: This is a very simple page to make! Lay the two halves of the heart on the page in a heart shape as shown. I made the pattern so there is about a 1/4″ extra at the ends of the strips. This leaves some wiggle room for weaving. Weave the two halves together before you pin them so you know you have it just right. Snip the slits between the strips a bit longer if needed. Once they are pinned down, sew the top of each one down in a half circle, leaving the strips loose.


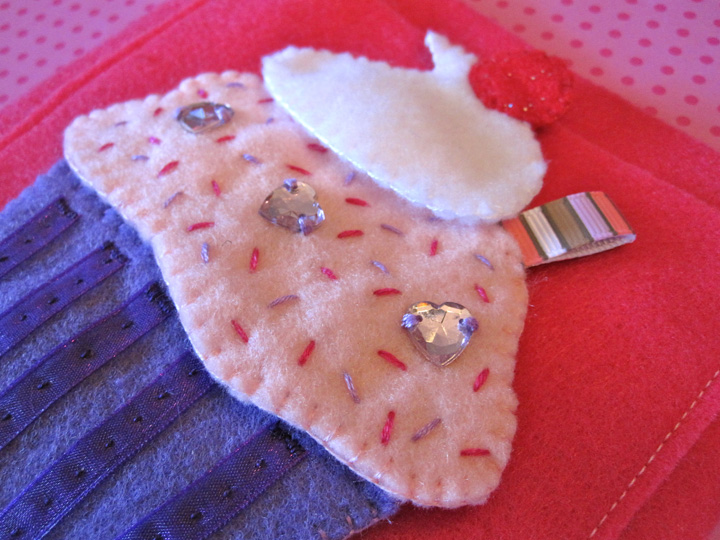
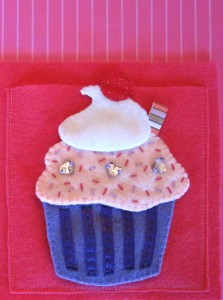
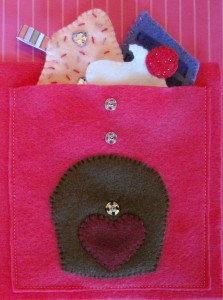
Cupcake: This page features a tasty cupcake you can decorate! I made mine chocolate with a raspberry center (“ras-ras” according to Jax) and you can decorate it with pink frosting, a cupcake paper, whipped cream and a cherry! You could definitely make multiple options from the same pattern in different colors. I designed the page to be a pocket to hold the parts.

First you need to cut a square of felt to be your pocket. Pin and sew down your cupcake and heart filling to the pocket piece.

To make the cupcake paper, first cut the top of your felt pieces with pinking shears to make a zigzag. Sew some ribbon strips to the front piece to look like the pleated paper. Sew half of a snap to the top of the back piece and sew the halves together. Lay the cupcake paper on the pocket to see where the other half of the snap should be placed, then sew it down.

For the frosting, you’ll need to first embellish the front piece. I chose to make stitched sprinkles in two colors and added 3 sew-on gems. Sew half of a snap to the top of the back piece then pin the two halves together. You can add a loop of ribbon like I did to be a little candle. Sew the two sides together and add the other half of the snap to the pocket as you did before.

The whipped topping is sewn together with the snap sewn on the back. I then wrapped the two sides of the cherry around the whipped cream and sewed it in place. Sew the other half of the snap to the pocket.

I sewed my pocket to the page with the sewing machine as I was planning to sew the book together right then anyway. You could hand-sew it if you prefer.

I love the cupcake! I might have to reuse that pattern to make a full cupcake page. Jax is into anything food or baking related, so I know he’d like it.

Our next post will be on sewing it together and our big giveaway of my sample book!

Flowers & Chocolates – Valentine Mini Quiet Book

I created a pattern for a sweet and simple mini (6″ square) quiet book to share with you all. I will be posting instructions in sections as I complete my sewing. Do you have a little one you’d like to give a Valentine to?
Tutorials:
Front/Back Cover
Flowers & Chocolates (this page)
Weaving Heart & Cupcake – coming soon!
Book Assembly & Giveaway – coming soon!

Yes, I said giveaway! I’ll be sending off my finished book to one lucky reader in time for Valentine’s gift giving.

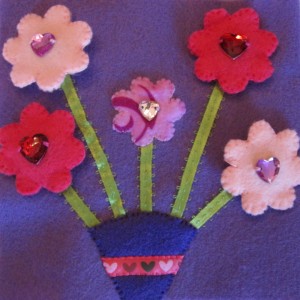
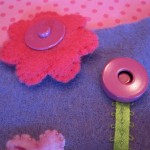
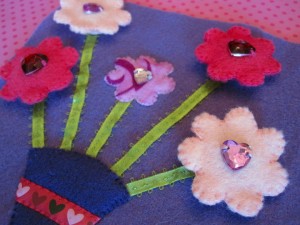
These pages use: 12″ w x 6″ h lavender felt background, felt (in light pink, red, hot pink, brown, a lilac floral and purple), green ribbon, ribbon scraps, sew-on gems, sew-on snaps, 2 hot pink & 2 light pink magnetic purse snaps (found at Joann’s in the purse-making aisle) and embroidery floss. You could use buttons or snaps on the flowers instead. I really loved the cute colored purse snaps and wanted to try them out. I used regular snaps on the chocolates. I find that Velcro snags the felt so I’ve been avoiding it lately.

Because of the smaller parts (flowers and chocolates) I’d recommend this book for the three and up crowd unless supervised closely. No eating felt chocolates, kids!


Flowers:
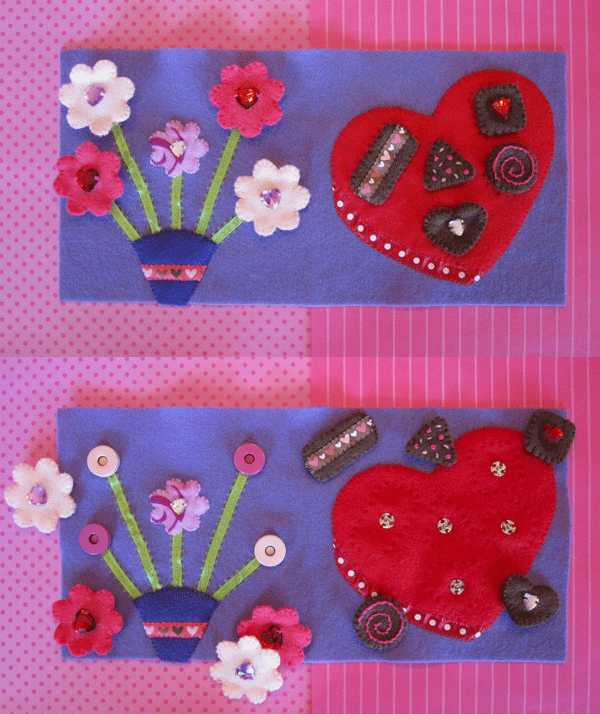
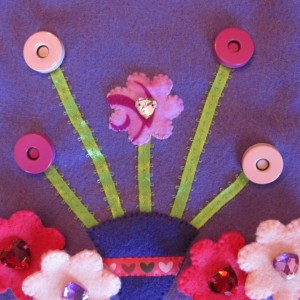
Embellish the front pieces of the 4 removable flowers (skip this or just use felt to decorate if you are sewing buttonholes later.) Attach one half of a magnetic snap to each flower back. I put the thinner side on my flowers and the thicker side on the page. I pressed each flower against the prongs on the snap half to make marks where I needed to make holes. I made two tiny snips where the marks were then pushed the snap prongs through and slide on the washer. Using the flat, closed metal blade of my scissors, I folded the prongs in to hold the snap in place. (Skip all that if you are doing buttons!) Sew the two sides of each flower together. (Here is where you would add buttonholes if that was your choice.)

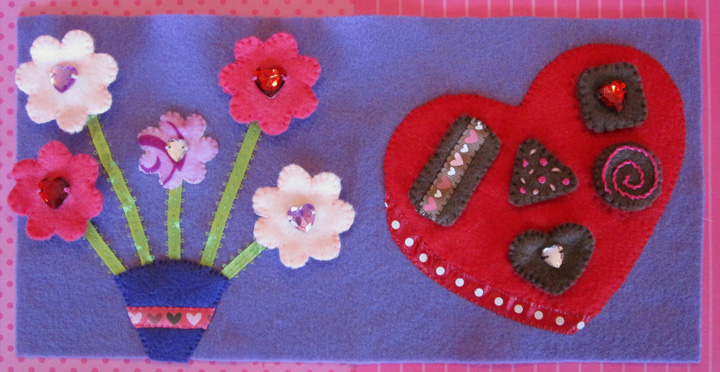
Flower Page: Start by laying out your ribbon stems in the arrangement you like. Make sure you lay out the flowers and vase as well to make sure everything fits. Trim the ribbons as needed to fit the page and sew them down. Sew down the vase. (Really its the paper that bouquets come wrapped in but I have no idea what that’s called!) I added a ribbon scrap before I attached mine to add a little detail. Sew the small flower to the center stem. I used a scrap of a floral patterned felt sheet because I liked the shade of lilac. You could use any color you like. Attach the other half of your magnetic snaps (or your buttons) over top of the ends of the ribbon stems.


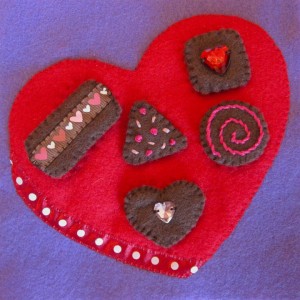
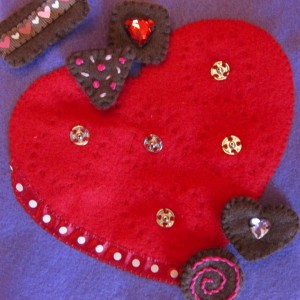
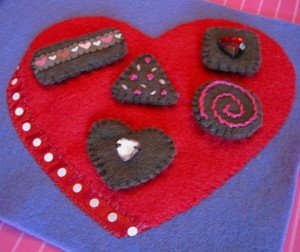
Chocolates: Embellish the front pieces of your chocolates. For the rectangle, I used a scrap of brown ribbon with hearts. On my square and heart, I used sew-on gems. I stitched a stem stitch spiral on the circle, and I did French knot and straight stitch sprinkles on the triangle. Sew one half of a snap to the back piece of each chocolate. Sew all the halves together.

Chocolates Page: Start by pinning your chocolates patterns down on the box heart how you’d like them to be arranged. There’s no right or wrong! Then stitch around the paper to make shape outlines. I used a darker red floss, but you could make it more obvious and use light pink or a dark brown. Sew the other half of each snap down in the center of each shape. Pin the heart down to the page and add a bit of ribbon along the lower left side as shown. I didn’t worry about trimming the ends of my ribbon when I pinned it. I sewed the ribbon along the side that is against the box, making sure to catch the box’s felt in each stitch. Then I took my scissor and snipped the ribbon ends off into angles that matched the box’s. Sew down the other side of the ribbon and all the way around the box.

Note: Turns out the ribbon I bought for this page was sticky-back scrapbook ribbon. Oops! It was a little slower to sew through, but worked great when I was laying it out on the page. I didn’t have to pin it and it stayed in the curve I placed it in. Martha Stewart makes some cute Valentines ribbons.

What do you think of these pages?

Almost done the mini book! Next installment will be the weaving heart page and cupcake page. Stay tuned, and stop by the Facebook page for sneak peeks.

Cover – Valentine Mini Quiet book

Would you like to sew along with me?

I created a pattern for a sweet and simple mini (6″ square) quiet book to share with you all. I will be posting instructions in sections as I complete my sewing. Do you have a little one you’d like to give a Valentine to?
The sections will be: the front/back cover, page 1 (flowers) & 2 (chocolates), page 3 (weaving) & 4 (cupcake) and book assembly & giveaway. Yes, I said giveaway! I’ll be sending off my finished book to one lucky reader in time for Valentine’s gift giving.

I am posting the entire pattern now so you know what you’ll need. I cut all my felt and ribbons and sorted my notions for all the pages at once. I’m keeping each page’s goodies in a ziplock bag till I’m ready for them. If you want to take a look at all the layouts, there is a photo on the Facebook page showing everything pinned (and unpinned) in place. Most of my ribbons were from the $1 bin at Joann’s Fabrics. I also got my purse snaps and gems there with a coupon.

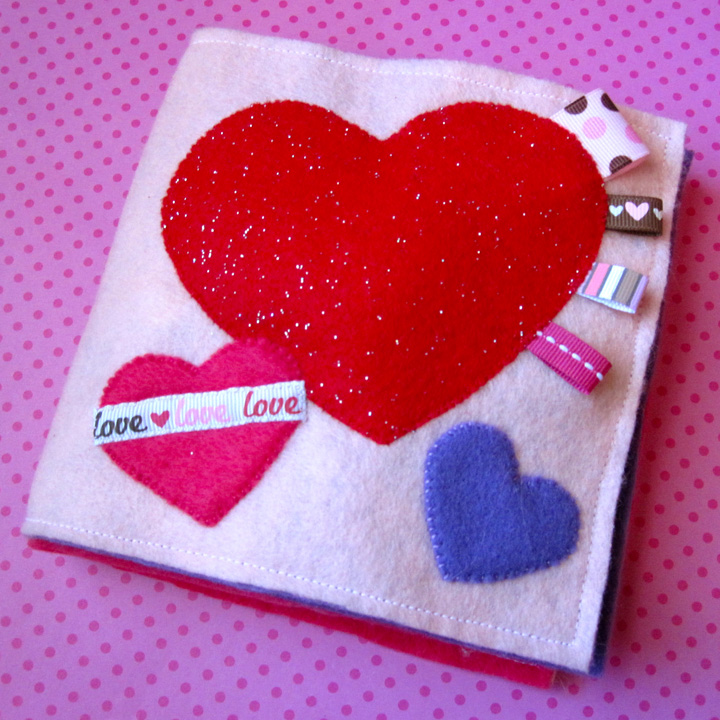
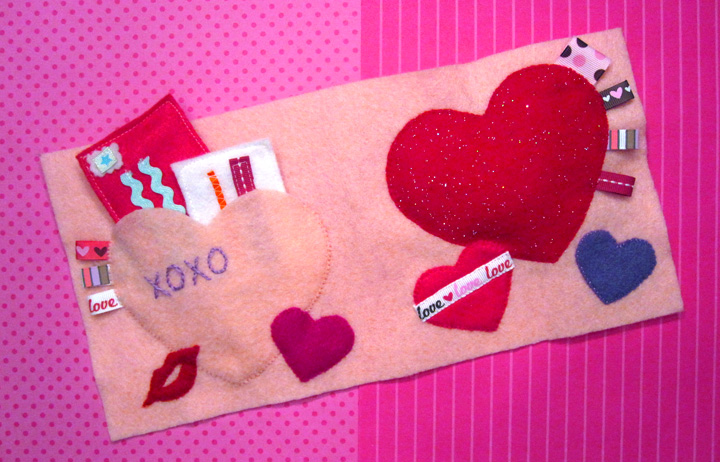
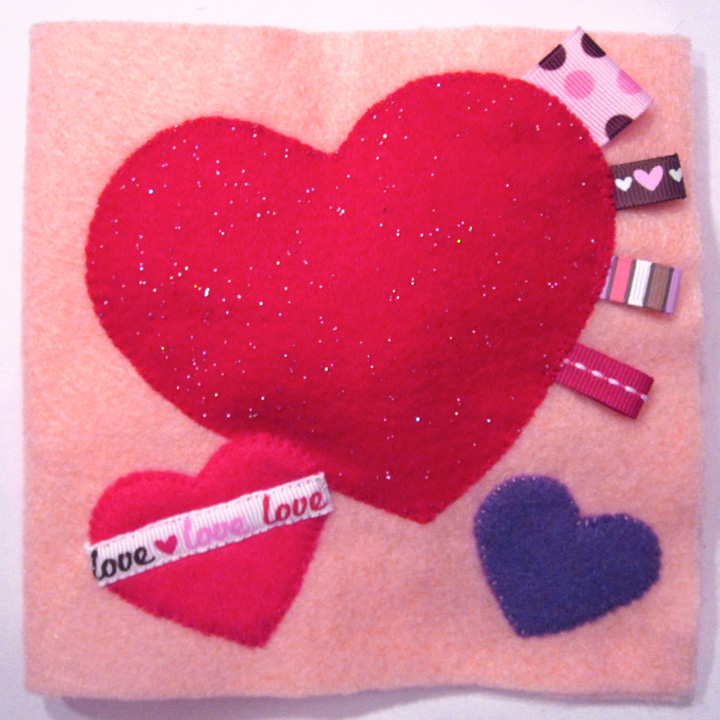
The cover uses: 12″ w x 6″ h light pink felt background, felt (in light pink, glitter red, red, hot pink (I had two shades) and purple), ribbon scraps, batting or stuffing and embroidery floss. You can add a paper valentine to the pocket on the back, or make a felt one like I did from my mailbox tutorial.

To make the front cover, pin everything in place on the right half of your background felt. You’ll want to put some batting or stuffing under the big heart to make it puffy. Fold the ribbon behind the hot pink heart before you pin it down. The rest is simple – sew it all down!

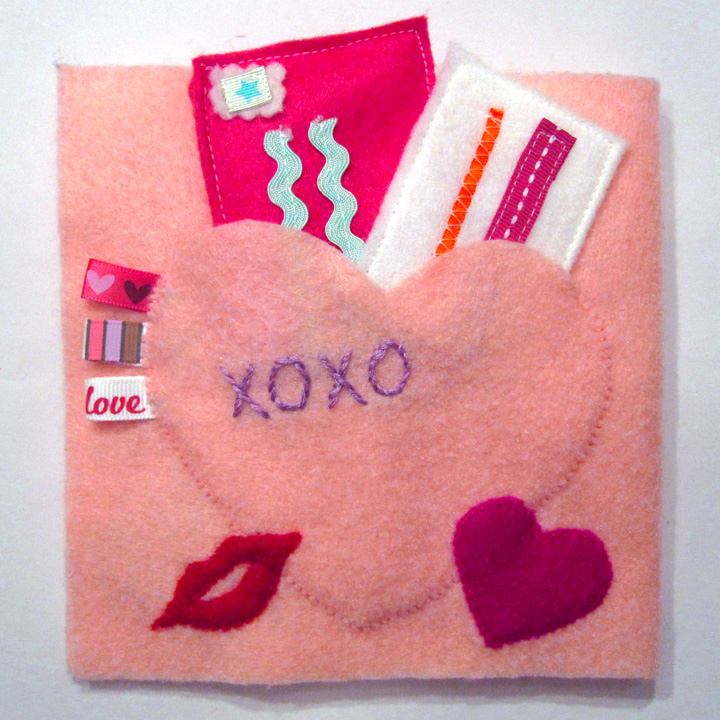
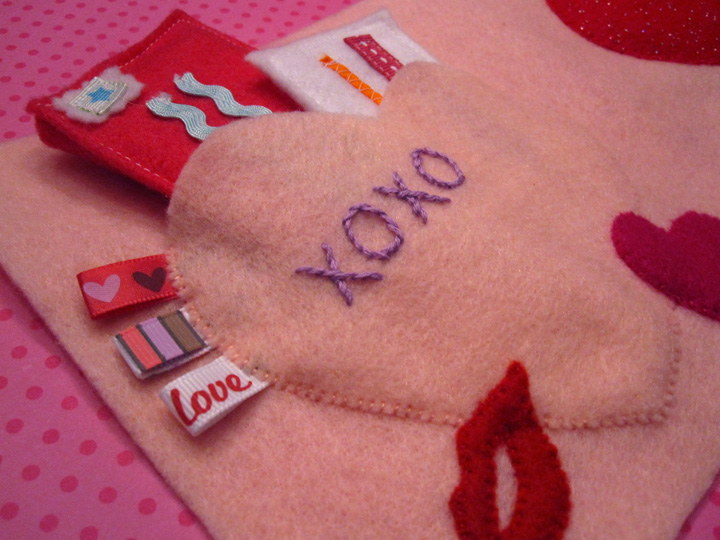
The back cover is on the left half of the background felt. It has a pocket to put valentines or a note from you to the book’s recipient. Start by pinning your “xoxo” pattern to the pocket piece. I sewed right through the paper using stem stitch. Once it is all stitched, you can gently rip the paper away.

Lay your pocket and other felt pieces on the page and pin the kiss and little heart to the pocket where they overlap it. Sew them to the pocket. You can leave your thread tails in place (just pull off the needle) so that when you pin it all down to the page, you can re-thread the needle and sew the rest down. Sew the pocket down with ribbon scrap loops on one side. Simple!

I think it looks adorable with a little play letter in the pocket!

Next installment will be the flower page and chocolate page. Those have a lot more little parts, but will be so cute!

Treasure Quiet Book Page

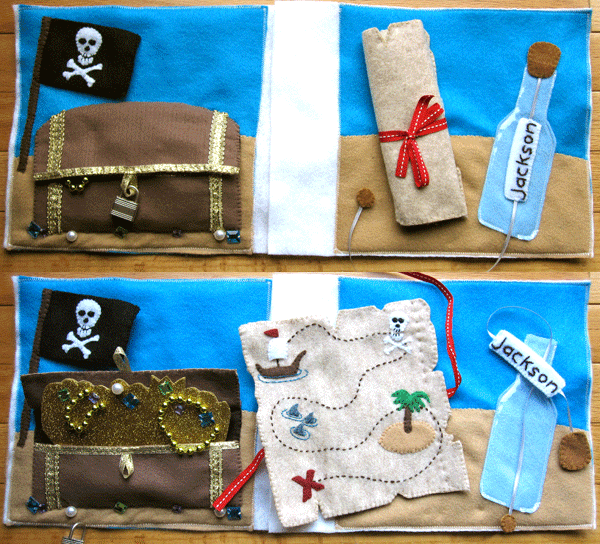
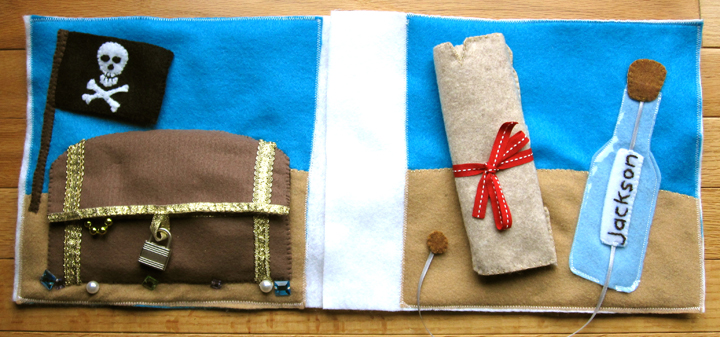
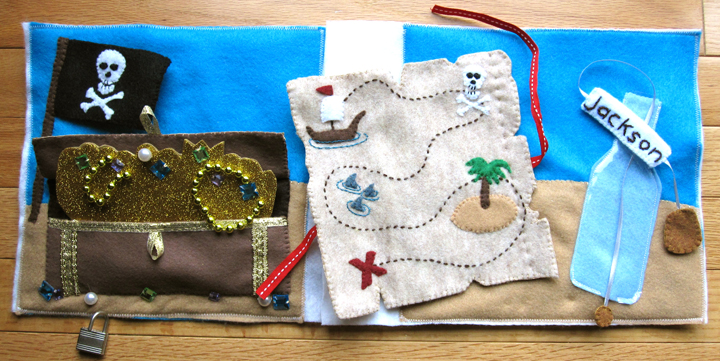
When a treasure chest was requested on the Facebook page, all kinds of ideas started popping into my mind. Maybe I went a bit overboard, but I’m not one to craft something halfway!

This page engages a lot of skills: tying a ribbon (on the map), unlocking a lock (on the chest) and pulling things in/out (the bottle and treasure.)

To make this page I used:
Aqua blue background felt (two 9″ squares), tan felt cut to look like sand, felt (in natural, light brown, brown, dark brown, light blue, burgundy, green, tan, gray, black and white), clear vinyl, gold trim, ribbons, sew-on gems/pearls, a luggage lock and embroidery floss.


Background:
Very simple – just cut out some tan felt in gentle slopes to make the sandy ground. Make sure the pages line up, though! I actually just pinned my “Sand” in place at the beginning and sewed the other elements down over top. At the end, I went back and stitched down the “sand” wherever it wasn’t caught under something else. That saved me a lot of time because I was hand-stitching on the couch.

Message in a Bottle:
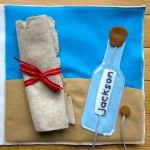
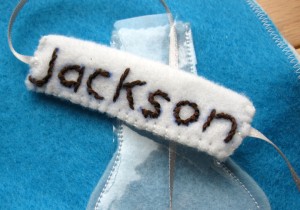
To make a “message”, cut two skinny rectangles out of white felt. Make sure they are narrower than the neck of your bottle. Write the word you want on one of them (preferably in a pattern pen), then embroider it. I wrote Jax’s name, but you could write “help!” I used stem stitch and dark brown floss. Cut a piece of ribbon about twice the length of your bottle and sew the two cork pieces onto one end (sandwich the ribbon.) Sew the matching circles onto the other end of the ribbon in the same way.

Pin the light blue bottle piece in place, then sew the top and bottom down. Sandwich the ribbon, cork side up, in between that and the clear vinyl bottle piece. Sew the sides and part of the bottom on a machine (it’s tough the hand-sew vinyl) according to the pattern, letting the ribbon go through the top and bottom holes.

With the cork down in place, make note of where you want your message to be. Pull the ribbon up and sandwich the message pieces around the ribbon. Pin and test that the message fits through the bottle neck (trim if needed.) Sew the message pieces in place, making sure to catch the ribbon on both sides so it doesn’t slide.

Map:
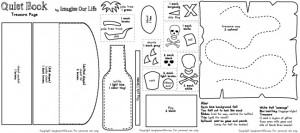
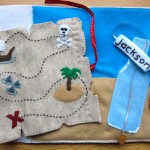
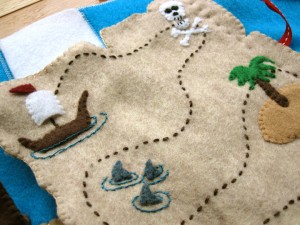
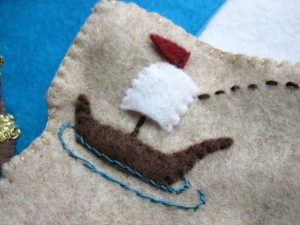
Transfer the map path to the top piece of the map, or pin the pattern down and stitch through the paper. (If you do this, as I did, you’ll need to cut away the paper afterwards and pull bits out of the stitching. Annoying, but my stitches came out very even.) Sew down each map element using the photos as a guide. The boat mast is sewn in dark brown stitching. The skull’s eyes/nose are stitched on in black since they were so tiny. I stitched some blue-green waves around the boat and sharks to show water. Once everything is on the map, sew the front to the back.

Roll up the map and figure out where you want it on the page. Take a length of ribbon and lay it under the rolled up map so that it will be centered behind where the map is. Stitch the ribbon to the page with a couple stitches to the center. Unroll the map and lay it so the center of the ribbon is 1″ from the right edge of the map. Sew the map to the page in a straight line 1″ from the edge. You should be able to roll it up from the left afterwards and tie it with the ribbon.

Flag:
Sew one skull & crossbones to each flag piece if you want a two-sided flag. I actually only put it on the front. The eyes on this one are little bits of felt I cut out and stitched down. Sew the two sides together along the top, right and bottom. Pin it on the page and sew down the flag pole over top.

Treasure Chest:
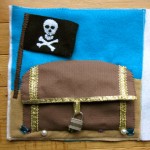
Sew the dark brown inner chest piece down to the page. To make the pocket, embellish the pocket piece with gold trim. I used a 1/4″ ribbon with an 1/8″ trim on either side to make two vertical bands. I sewed a loop of ribbon that the lock will hang on and pinned it hanging down from the center top of the pocket piece. I sewed gold ribbon along the top, holding the loop in place. Sew the pocket piece down to the page along the left, bottom and right.

Embellish the top piece of the chest lid in the same way as the pocket, but have the ribbon along the bottom instead of the top. The lid’s ribbon loop should also hang down. Sew the front and back of the chest lid together then sew it to the page along the top, starting where it starts to curve.

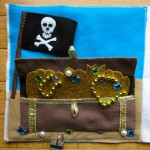
This part is optional/changeable. I used sew-on gems and a few plastic pearls to add some spilled treasure around the chest. If you are concerned about choking hazards, omit them or cut out little felt shapes instead. I triple-stitched mine on and Jax does not play with his quiet book alone.

Treasure:
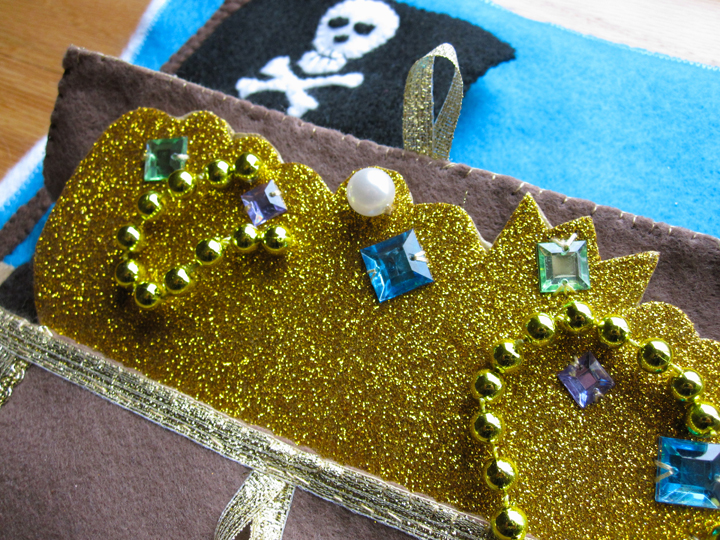
I didn’t include a pattern for this. If you have some play gold coins and necklaces, you could just put those in. You could also cut out circles of gold felt to make your own coins. I made my treasure all one piece for now. I used gold glitter foam and cut out a rough shape of a pile of gold and a crown. Leaving the sticky back paper on, I stitched some on jewels and bits of Mardi Gras beads I cut up from the dollar store. Then I peeled of the backing (ripping it around my stitching) and stuck it to the back of another piece of glitter foam (with the backing off.) I cut around the second piece of foam to match and was done! The glitter sticks a bit when you pull it out of the chest due to the roughness of the glitter, but it works fine.

The lock I have is not the one I want to use permanently. It’s just one I already had. I’d like to find a gold tone one. Once I have the one I will use for real, I’ll sew a ribbon to the edge of the page and attach the key. Jax is too young for the lock still, anyway.

Hope you enjoy this pattern! You could certainly use bits and pieces of it since there is a lot of elements. If you sew this page, I’d love to see it! Leave a comment here or post a photo on the Facebook page!

Dump Truck Quiet Book Page

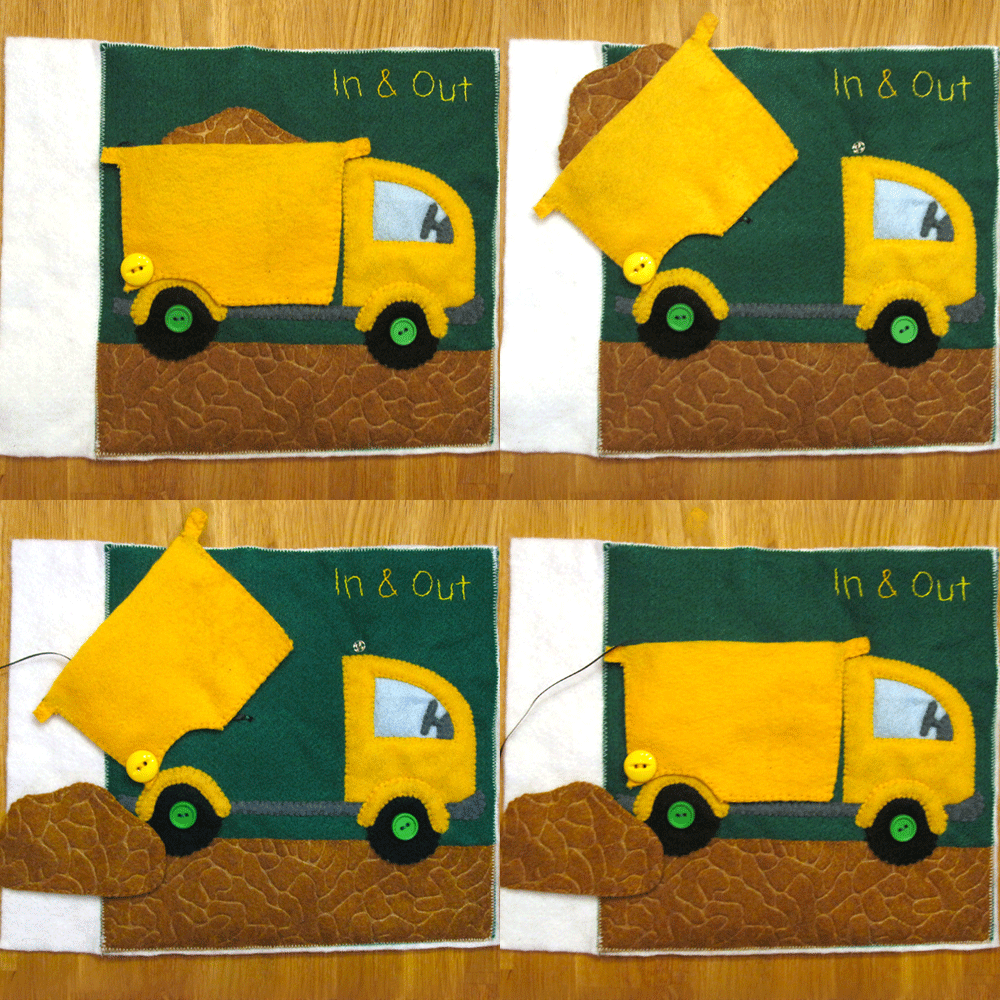
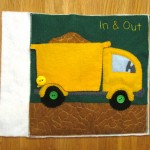
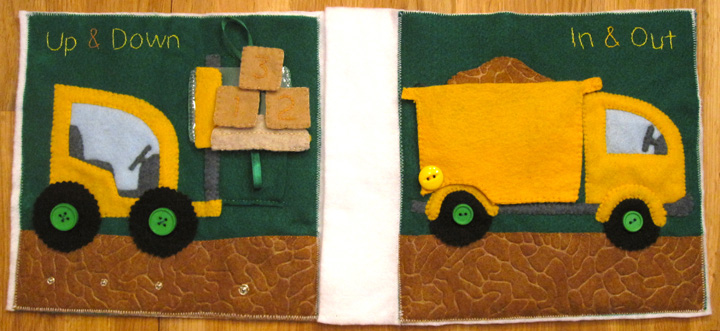
This dump truck was designed to go along with the forklift page I created by request. Since I wrote “Up & Down” on the forklift, I wanted to do another set of opposites on the matching page. A dump truck with “In & Out” sounded perfect!

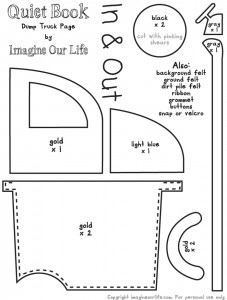
To make this page I used: green background felt, felt (in brown textured, light blue, gray, gold and black), 3 buttons, 1 grommet, 1 snap, ribbons and embroidery floss.

I started by free-hand cutting out the ground. I set the page beside the forklift while I cut so the ground matched up. I sewed it down when it was done. I then pinned down all the truck parts except the dumpster. That way I knew everything was centered correctly on the page before I began to sew.

I sewed the steering wheel down with it layered on top of the light blue window. Then I layered the gold truck cab over top and sewed it down. I never had to sew the light blue at all. Next I sewed the gray truck bed/bumper down.

The wheels on this page don’t turn because I wanted to have that curving part on them (sorry, I don’t know car parts!) I pinned the wheels down then attached then with a button in the center. I then sewed the gold curves down over the top. The bottom of the wheel is loose, but doesn’t turn.

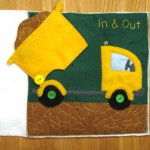
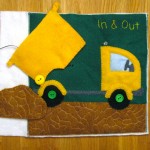
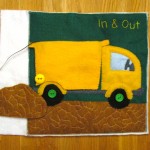
My next step was to cut out two sides of a dirt pile shape. I free-handed it and just made sure it was narrower than the dumpster. With one end of an ~8″ ribbon sticking out of one side, I sewed the halves together. I then sewed the dumpster into a pocket with the other end of the ribbon caught it the upper left corner. I marked on the pattern where I sewed the dumpster with a dashed line.

To attach the dumpster, I added a grommet in the lower left corner, a snap in the upper right (put the other half where it lines up on the page) and sewed a button through the grommet hole. To keep the dumpster from spinning all the way around, I sewed a scrap of ribbon to the back and attached it to the page. You can see it peaking out in the photos.


The final step was sewing the lettering. I actually just sewed right through the pattern paper then cut it away. Nice and quick! I used stem stitch.

This page goes with the forklift page I made by special request. Stop by the Facebook page if you’d like to make a suggestion. For more quiet book pages click here.

2011 Quiet Book Pages

Here is a look back at the quiet book pages I completed in 2011. I didn’t start working on them until September, so I’m proud I created 19 pages! A few were created to go together in 2-page spreads. (Number 20 is complete but not posted.)

Click a thumbnail below to visit a post:


Sock Matching

Top 5 Most Popular Patterns

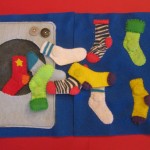
  1. Sock Matching – 4 comments – 3002 views
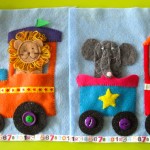
  2. Circus Train – 3 comments – 1842 views
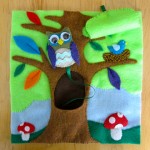
  3. Forest – 4 comments – 1773 views
  4. Starbucks – 0 comments – 1573 views
  5. Rocket Ship – 2 comments – 1428 views

Related Tutorials

Cover Tutorial

What People Are Making

Taking Requests!

This year I’m taking requests! Drop by my Facebook page with your suggestions. Page 19 was my first completed request, and I’ll be posting a page to match it very soon!

Happy New Year!


Forklift Quiet Book Page

This quiet book page is a special request. If you have a request, leave comment on my Facebook page and I’ll see what I can do.


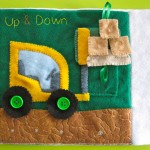
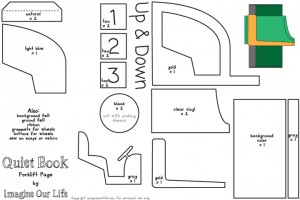
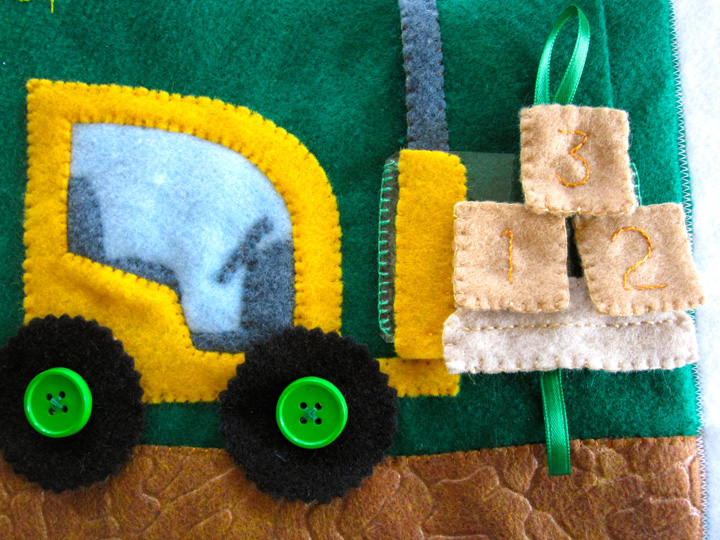
I knew nothing about forklifts when I started this page, so I had to look at a lot of pictures and figure out how to simplify it down. The basic mechanism on this page is a strip of felt matching the background that a sleeve of clear vinyl slides up and down on. The vinyl gave me a place to sew down the forklift platform and some snaps to attach the pallet and boxes. I added spinning wheels, numbers and the words “Up & Down” to add to the educational elements.

Here is what I used: a 9″ square dark green felt background, felt (in dark green, brown pebble texture, gold, light blue, tan, natural, gray and black, clear vinyl, green ribbon, sew-on snaps, two grommets, two buttons and embroidery thread. I sewed this page by hand, with the exception of sewing it down to the actual page.

I started by pinning everything down to get placement (don’t pin into vinyl – it leaves holes) then sewed down the light blue window the gray steering wheel and the brown ground (cut that out freehand.) Take your strip of felt that matches your background (dark green in my case) and sew the gray bar along the left side. Pin it in place on the page then sew down the gold cab of the forklift. It will overlap the bottom of the gray bar. You can then sew down the bottom of the background strip.

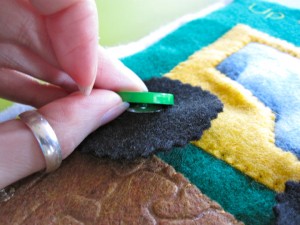
To make the wheels, cut them out just outside of the circle template using pinking shears. Insert a grommet into each wheel and sew a button to the page through the grommet hole. The wheels will be able to spin around but will be held in place by the buttons.

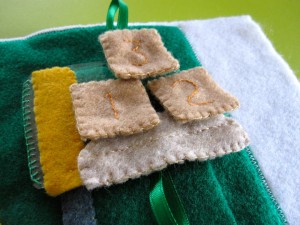
To make the sleeve for the forklift mechanism, start by sewing the gold forklift platform to one piece of clear vinyl. See the pattern and photos for placement. Sew down some snaps for the pallet and boxes to attach to. Sew a loop of ribbon to the top center and another to the bottom center. Place the second piece of vinyl behind the first and sew them together along the sides only. Slide the sleeve onto the background strip then sew down the top of the strip to keep it in place. You should be ale to slide it up and down to look like the forklift is lifting.

For each of the crates, I freehand stitched the numbers to the front and a snap to the back, then sewed the two sides together. For the pallet I sewed a line across the front to add dimension, sewed a snap to the back, then sewed the two sides together. I added more snaps to the ground to give the crates and pallet somewhere to go when they aren’t on the forklift. (I ended up using 1.5 small snap sets per crate and 1.5 medium snaps for the pallet.)

The final embellishment was the words embroidered at the top. To transfer the writing, I pinned my pattern down and basted over each latter with one strand of thread. I left 2″ tails at the end of each letter instead of knotting. I then cut the paper away from each letter and puled off the remaining bits. This left me with a basted pattern to stitch over using stem stitch. When I was done, I pulled out the basting threads, clipping them wherever they were caught in the embroidery.

I am currently working on a dump truck that will be the other side of the two page spread. I think they’ll be really cute together!

Let me know i you use this pattern. I’d love to see your version!